Articles in this section
Using the Partner Portal
Feature Availability
Vtiger Editions: One Pilot | One Growth | One Professional | One Enterprise | One AI
Introduction
The Partner Portal platform is designed to provide you with all the modules and information you need to grow your business with Vtiger. From managing contacts and tracking deals to handling Cases and performing various actions based on your access, everything you need is in one place. Your access to the Partner Portal is customized by your admin in Vtiger, who configures which modules you can view, edit, or act upon. This ensures you have the right modules for your work while maintaining security and control. With simple navigation and real-time updates, the Partner Portal helps you stay organized, save time, and focus on what matters—growing your business.
Benefits of using the Partner Portal
The benefits of using Partner Portal are:- Centralized Information: Access all critical business data, including leads, contacts, deals, and Cases, in one place.
- Enhanced Collaboration: Share real-time data with Vtiger for improved coordination and transparency.
- Improved Lead Management: Review and accept shared leads efficiently, ensuring no opportunities are missed.
- Streamlined Case Handling: Manage Cases effortlessly to provide timely resolutions and improve customer satisfaction.
In this article, you will learn about:
- Logging in to the Partner Portal
- Changing your Portal Password
- Editing your Profile Details
- Adding a Record
- Viewing Records
- Managing Leads in Partner Portal
- Cases Module in Partner Portal
- Accessing the Cases Module
- Documents Module in Partner Portal
- Logging out
Key Terminology
| Key Terms |
|
|
|
|
|
|
|
|
|
|
|
|
|
|
|
|
|
|
|
Logging In to the Partner Portal
Once Vtiger grants you access to the Partner Portal, you will receive your login credentials via email. The email will contain a login link and your credentials. The email will contain the following information:
- URL: A link to access the Partner Portal login page.
- Username: Your registered email address (e.g., [email protected]).
- Password Setup Link: A link to set your portal password.
Follow these steps to log in to the Partner Portal:
- Open the email sent from Vtiger with your login details.
- Click the provided Password Setup Link to set your portal password.
- After setting your password, click the URL link to navigate to the Partner Portal login page.
- Enter your Username (your email address) and the password you set.
- Click Sign In.
Changing the Portal Password
Changing your password is an essential step to ensure your account remains secure.
Follow these steps to change the portal password:
- Log in to the portal. The Partner Portal dashboard opens.
- Click the User icon on the top-right corner.
- Select Change Password. A change password window opens.

- Enter or select the following information to change the Password:
- Current Password - Enter the current password.
- New Password - Enter the new password you wish to set.
- Confirm Password - Re-enter the new password to confirm it.
- Click Save.
Editing Profile Details
Your profile details in the Partner Portal reflect the information stored in the CRM record. Any updates made to your profile in the Partner Portal will automatically update the corresponding contact record in the CRM.
Follow these steps to edit your profile details:
- Log in to the portal. The Partner Portal dashboard opens.
- Click the User icon on the top-right corner.
- Select Profile from the drop-down. The Profile page opens.
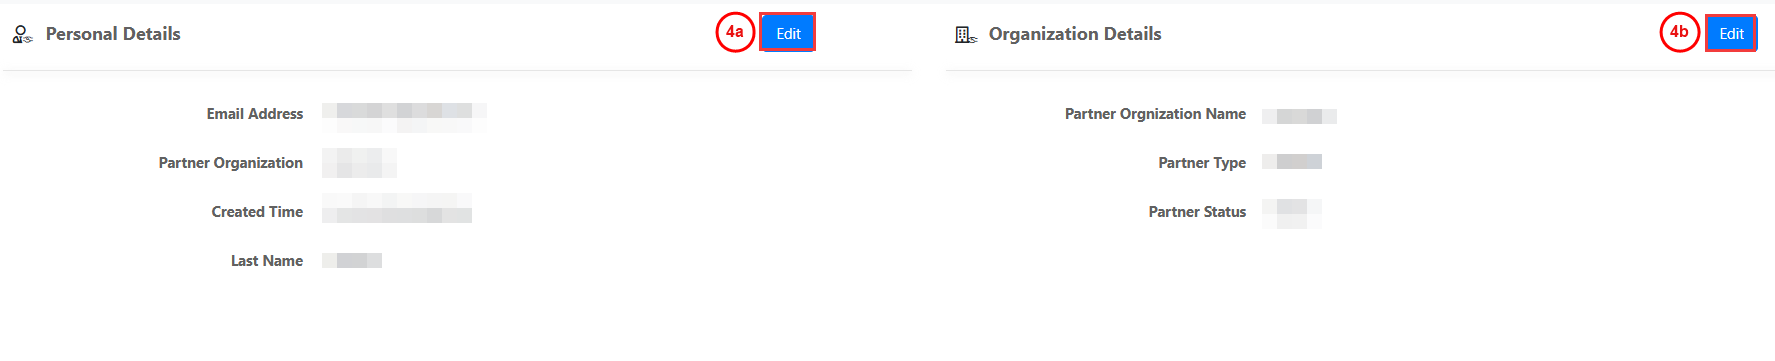
- Edit or view the following details on the Profile page:
- Personal Details - Click Edit to update your personal information.
- Organization Details - Click Edit to update your organization details.
- Click Save.
Note: The ability to edit or view profile details depends on the access permissions configured by the admin while setting up the Partner Portal.
Adding a Record
You can add a record in any of the modules available on the portal menu. The records you add are reflected in the CRM.
Follow these steps to add a record:
- Log in to the portal. The Partner Portal dashboard opens.
- Click a module on the menu at the top. For example, Deals.
- Click the Add Deals button. The button name varies depending on the module you select.
- Fill in the mandatory fields.
- Click Save.
Viewing Records
Follow these steps to view a record:
- Log in to the Partner Portal. The Partner Portal dashboard opens.
- Click the module(e.g., Cases, Deals, Contacts) in the top menu bar. The respective List View opens.
- Click on the record you want to view from the List View. The record opens in the default view(Summary or Details) set by your admin.
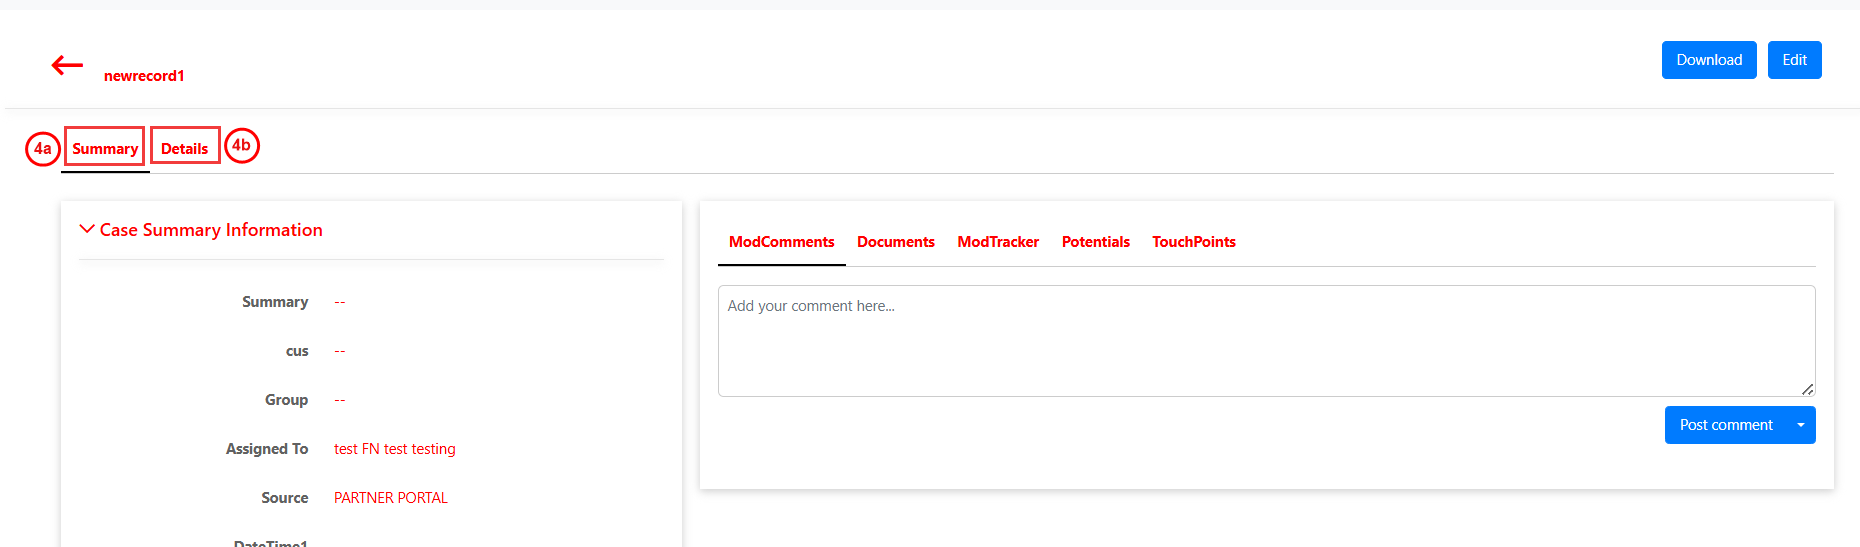
- Enter or select the following information in the record:
- Summary – Displays key details of the record, providing a quick overview of important information such as record name, status, and related data.
- Details – Displays complete information about the record. Fields are organized in blocks, and only the fields you have permission to view are visible. The field order follows the layout sequence configured by your admin.
Note: Your access to fields and views depends on the permissions configured by your admin while setting up the Partner Portal.
Managing Leads in Partner Portal
As a partner, you can easily review and manage the leads shared with you through the portal. Follow these steps to handle the shared leads:
- Log in to the portal. The Partner Portal dashboard opens.
- The Homepage displays the leads shared with you in your Leads Inbox.
- Review the shared leads.
- Click the Accept button to accept the lead.
Note: If a lead is shared with multiple partners, and you don’t accept it first, another partner may accept it. In that case, the lead will no longer be visible to you.
Cases Module
The Cases Module in the Portal is a vital tool for seamless collaboration between you and the Vtiger teams, and enables faster issue resolution
For example, with the Cases module, you can:
- Add new Cases or edit existing ones directly from the Partner Portal.
- Track and monitor the status of Cases anytime, anywhere.
- Generate a unique Case ID for each Case, simplifying tracking and management.
- Seamlessly integrate with Vtiger CRM, where all Cases created in the portal are accessible to the Vtiger Partnership and Support teams.
Accessing the Cases Module
Follow these steps to access the Cases module:
- Log in to the Partner Portal. The Partner portal dashboard opens.
- Click the Cases module on the top menu bar. The Cases List View opens.
- You can perform the following actions in the Cases module:
- Add a Case
- View Case details
- Sort records
- Edit a Case
Adding a Case
Follow these steps to add a Case:
- Log in to the Partner Portal. The Partner portal dashboard opens.
- Click the Cases module on the top menu bar. The Cases List View opens.
- Click +Add Case. The Adding New: Case page opens.
- Enter or select the following information to add a new Case:
- Summary - Enter a brief overview or description of the Case. This helps provide a quick understanding of the issue or request.
- Case Title - Enter a title for the Case.
- Status - Select the current status of the Case from the drop-down list.
- Priority - Choose the level of urgency for the Case based on its importance from the following options.
- Urgent - Select this for Cases requiring immediate attention and action.
- High - Select this for important Cases requiring prompt resolution.
- Medium - Select this for moderately important Cases requiring timely attention.
- Low - Select this for Cases requiring no immediate attention, which can be addressed later.
- Organization Name - Refers to the company or entity associated with your Case.
- Create - Click to add a new organization name if it’s not listed.
- Select - Click to choose an organization name from the existing organization list.
- Ticket Category - Select the category that describes the type of Case you are creating:
- Sales - Involves inquiries, purchases, or other sales-related activities and is assigned to the Partner Account Manager.
- Implementation - Involves the setup, installation, or configuration of a solution or service and is assigned to the Business Analyst.
- Support - Involves addressing issues, troubleshooting, or providing guidance and customer service, and is assigned to the Support Team.
- Customization Service - Involves customizing or modifying a solution to meet specific needs and is assigned to the Tech Team.
- Click Save.
Once you create the Case, it will automatically appear in the list view of the Cases Module, allowing you to track its status and details.
Note: Based on your selected category, the workflow will automatically assign the Case to the relevant group and user.
Viewing a Case
Follow these steps to view a Case:
- Log in to the Partner Portal. The Partner Portal dashboard opens.
- Click the Cases module in the top menu bar. The Cases List View opens.
- Click on the Case you want to view from the Cases List View. The Case Details View page opens.
- View the following details about a Case:
- Summary - A brief description of the Case, providing an overview of the issue or request.
- Case Title - The title that identifies the case helps you distinguish it from others.
- Status - The current progress of the Case, such as Open, In Progress, or Resolved.
- Priority - The urgency of the Case that you selected, such as Urgent, High, Medium, or Low, based on its importance.
- Partner Contact - The name of the person who created the Case.
- Contact Name - The name of the individual associated with the organization name.
- Partner Organization - The name of the organization to which the partner belongs.
- Organization Name - The name of the organization you added while creating the Case.
- Case ID - A unique identifier assigned to the Case for reference.
- Ticket Category - The type of Case, such as Sales, Implementation, Support, or Customization Service.
- Comments - Displays the conversation or notes exchanged within the Case, helping you track all discussions.
- Documents -Shows any documents or files that have been uploaded or shared in the Case.
- Updates - Tracks changes in the status or progress of the Case, keeping you informed about its evolution.
- Touch Points - Highlights key actions, interactions, or milestones related to the Case.
Sorting and Filtering Cases
Sorting and filtering help you quickly find Cases, saving time and improving efficiency. These actions let you focus on relevant Cases based on specific criteria.
Follow these steps to sort and filter the Cases:
- Log in to the Partner Portal. The Partner Portal dashboard opens.
- Click the Cases module on the top menu bar. The Cases List View opens.
- Use the Case ID to track the Case status.
- Use the Search bar to search for specific Cases quickly.
- Select options from the dropdown to filter Case records based on specific parameters.
- Click on the column title to sort the records in ascending or descending order.
The Case records will be rearranged based on the selected column title in either ascending or descending order.
Editing a Case Record
You can edit a case if you need to update or change any details to ensure the information is accurate and up-to-date.
Follow these steps to edit a Case:
- Log in to the Partner Portal. The Partner Portal dashboard opens.
- Click the Cases module in the top menu bar. The Cases List View opens.
- Click on the Case you want to edit from the Cases List View. The Case Details View page opens.
- Click Edit. The Edit Case page opens.
- Edit the following information on the Edit Case page:
- Summary - Update or revise the Case description to reflect the issue or request better.
- Case Title - Change the title to make it more relevant or descriptive of the Case.
- Status - Modify the current status of the Case, such as Open, In Progress, or Resolved, depending on its progress.
- Priority - Set the priority level to Urgent, High, Medium, or Low based on the current urgency of the Case.
- Partner Organization - Edit the organization associated with the Case by either creating a new organization or selecting from the existing list.
- Ticket Category - Update or change the Case category, such as Sales, Implementation, Support, or Customization Service.
- Click Save.
The updated details are saved and displayed on the Case Details page.
Adding Comments to a Case
Follow these steps to add your comments to a Case:
- Log in to the Partner Portal. The Partner Portal dashboard opens.
- Click the Cases module on the top menu bar. The Cases List View opens.
- Click on the Case you want to view from the Cases List View. The Case Details View page opens
- Enter your remarks, comments, or queries in the text box.
- The Comments text box supports rich formatting options, allowing you to:
- Format text using Bold, Italic, Underline, and Strikethrough
- Change text size.
- Add bullet points and indentation.
- Add or remove links.
- Clear formatting using the Remove Format option.
- Insert images and tables along with text.
- The Comments text box supports rich formatting options, allowing you to:
- Click Post Comment.
- Post Comment - The comment will be visible in the CRM and Partner Portal only.
- Post Comment to Portal - The comment is visible across all platforms: CRM, Customer Portal, and Partner Portal.
- The comment will be visible to the person assigned to the Case you created. You can also view comments made by the Vtiger Partnership team in the same section.
Note: You can attach files directly in the Comments section of a Case. This allows you to provide documents, screenshots, or other relevant files to help resolve the case faster.
Supported file types include:
- XLSX / Sheets
- Microsoft Word / DOCX
- JPEG / Images
- Other common document formats
Once attached, the files are linked to the Case and are visible to the support team handling the Case.
Documents Module
As a partner, you can manage, organize, and share documents easily through the Documents module. This module provides a centralized location for all files related to your Cases and business activities. You can upload documents relevant to Cases, deals, or other records in the Partner Portal. Any document you add to a Case will automatically appear in the Documents module for easy reference.
Viewing and Downloading Documents
Follow these steps to view and download a document:
- Log in to the Partner Portal. The Partner Portal dashboard opens.
- Click the Documents module in the top menu bar. The Documents List View opens.
- To view and download a document, choose one of the following options:
- List View - Hover over a document to perform the following actions.
- Click the Preview icon to view the document.
- Click the Download icon to download the document.
- Details View - Open a document to perform the following actions.
- Click the Preview icon to view the document.
- Click the Download icon to download the document.
- List View - Hover over a document to perform the following actions.
By using the Documents module efficiently, you can ensure seamless collaboration and easy access to important files related to your work in the Partner Portal.
Note:
- If the module has a default template, clicking the Download button downloads the PDF version of the default template.
- If there is no default template, the system downloads the latest modified template.
- If no active template is available, the following message appears: There is no Active template to download.
Logging Out of the Partner Portal
Follow these steps to log out of the portal:
- Click the User icon on the top-right corner.
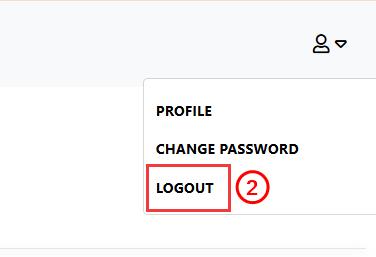
- Click Log out.