Articles in this section
Configuring & Managing the Partner Portal
Feature Availability
Vtiger Editions: One Pilot | One Growth | One Professional | One Enterprise | One AI
Introduction
In today’s business environment, collaborating with external partners, such as resellers, consultants, and other third-party businesses, can be a key factor for success. These partnerships help companies expand their reach and enhance their sales capabilities. The Vtiger CRM Partner Portal is designed to streamline and optimize communication and collaboration with these partners, providing them with access to essential information and modules.
Benefits of the Partner Portal
- Streamlined Communication: Partners can independently access key CRM data, such as deals, contacts, and documents, which minimizes back-and-forth communication and enhances efficiency.
- Improved Collaboration: Partners can manage leads, quotes, and cases directly through the portal, facilitating better teamwork and streamlined workflows.
- Enhanced Transparency: The portal offers partners visibility into their tasks.
In this article, you will learn about:
- Installing the partner portal
- Configuring the partner portal
- Configuring the Portal Layout and Profile Layout
- Displaying the logo on the Partner Portal
- Adding and managing the partners
- Enabling portal access for partners
- Sharing contacts with a partner
- Viewing records created by partners
Installing the Partner Portal
You must first install the Partner Portal from Vtiger’s Extension Store.
Follow these steps to install the Partner Portal:
- Log in to the CRM.
- Click the User Menu in the top right corner of the screen.
- Click Settings. The Settings page opens.
- Go to Extensions.
- Click Add-ons. The Add-ons page opens.
- Select Partner Portal and click the Install button.
Once installed, you will find the Partner Contact and Partner Organization modules under Sales > Partner Management.
Configuring the Partner Portal
Once the Partner Portal is installed, you need to configure the following:
- Step 1: Partner Portal Details
- Step 2: Portal Layout
- Step 3: Profile Layout
Step 1: Partner Portal Details
Follow these steps to configure the Partner Portal:
- Log in to the CRM.
- Click the User Menu.
- Click Settings. The Settings page opens.
- Go to Marketing & Sales > Partner Portal. The Partner Portal page opens.
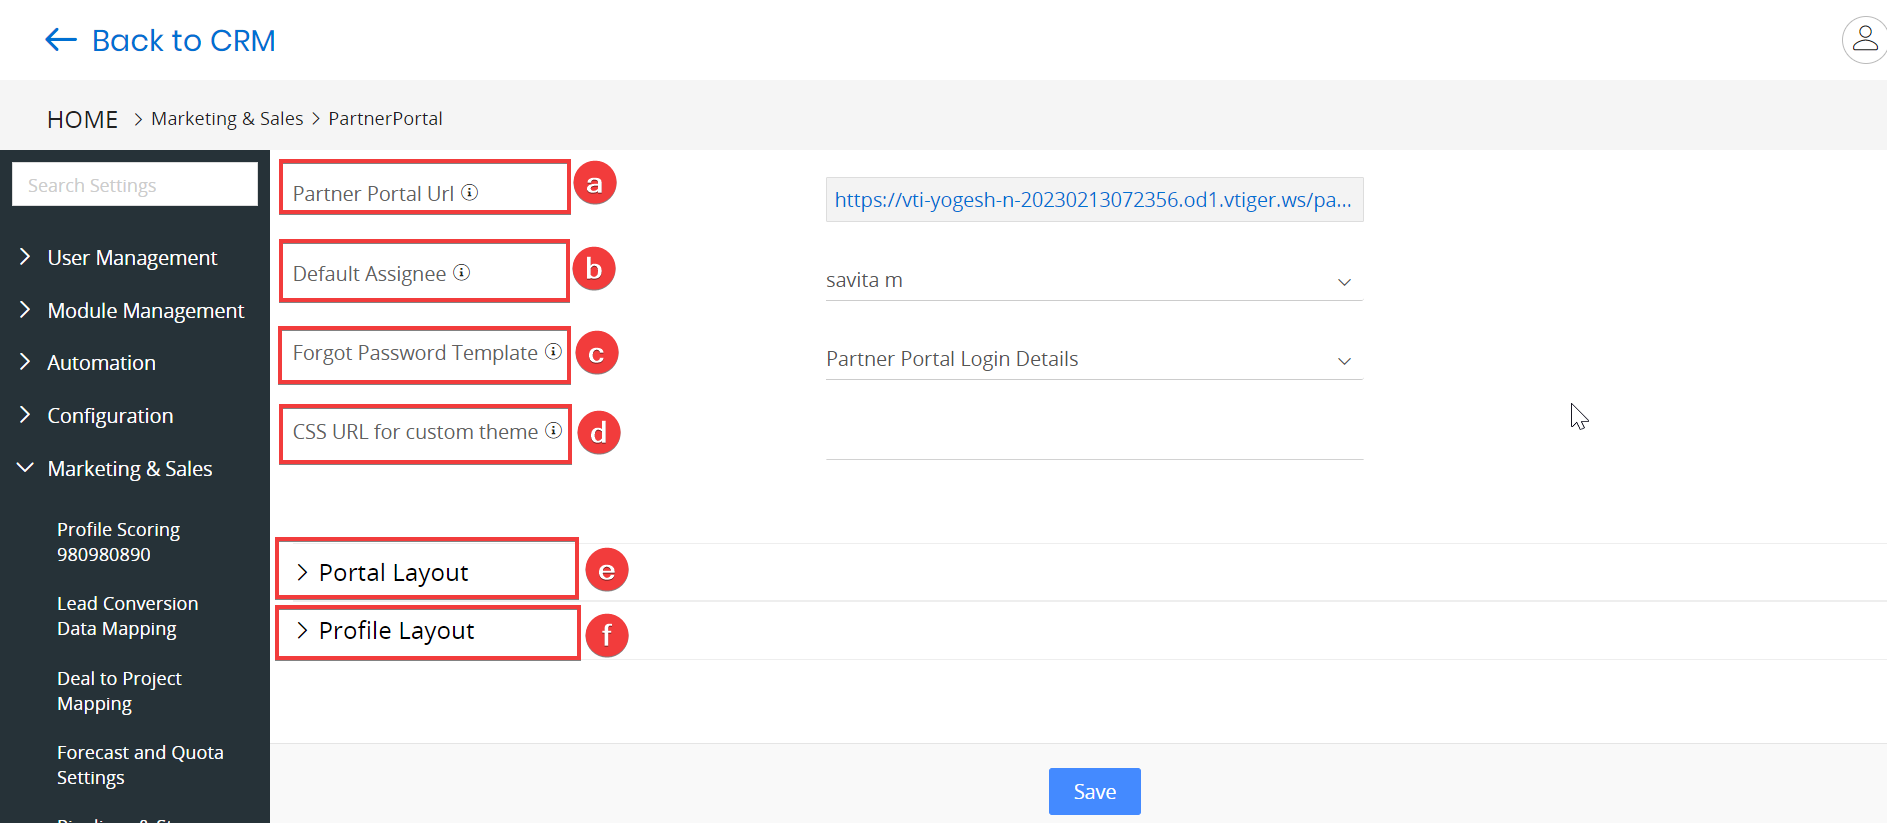
- Enter or select the following information:
- Partner Portal URL - The unique link partners use to access the portal.
- Default Assignee - The default case owner for any case created from the Partner Portal.
- Forgot Password Template - Select the email template from the dropdown, which will be used for the Forgot Password email sent when a partner clicks the Forgot Password link on the portal's login page.
- CSS URL for Custom Theme - A link to an external CSS file for customizing the portal's appearance with brand colors, fonts, and layout.
- Portal Layout - Configure the Partner Portal by selecting which modules to display and defining the functions that partners can perform in the modules.
- Profile Layout - Defines the partner profile page layout, showing specific fields like contact info and company details, and setting permissions for which fields can be edited.
- Click Save.
Now, configure the Portal Layout.
Step 2: Portal Layout
The Portal Layout section controls how the modules and fields in a portal are arranged and what actions are available for partners in the Partner Portal.
Follow these steps to configure the Portal Layout:
- Log in to the CRM.
- Click the Main Menu.
- Click Settings. The Settings page opens.
- Go to Marketing & Sales > Partner Portal. The Partner Portal page opens.
- Go to the Portal Layout tab.
- Click Portal Layout. The CRM displays the following sections.
- Enter or select the following information to configure the portal.
- Portal Menu - Displays a list of available modules. Enable the Checkbox if you want to display the module in the Partner Portal.
- Portal Home Layout
- Document Widget - Enable this widget if you want to manage or display documents on the portal home page.
- Lead Inbox - Enable this widget to display the leads shared with the partner.
- Partner Manager – Enable this widget to display partner information on the portal home page. You can enable or disable to show or hide the following read-only fields:
- First Name
- Last Name
- Mobile Phone
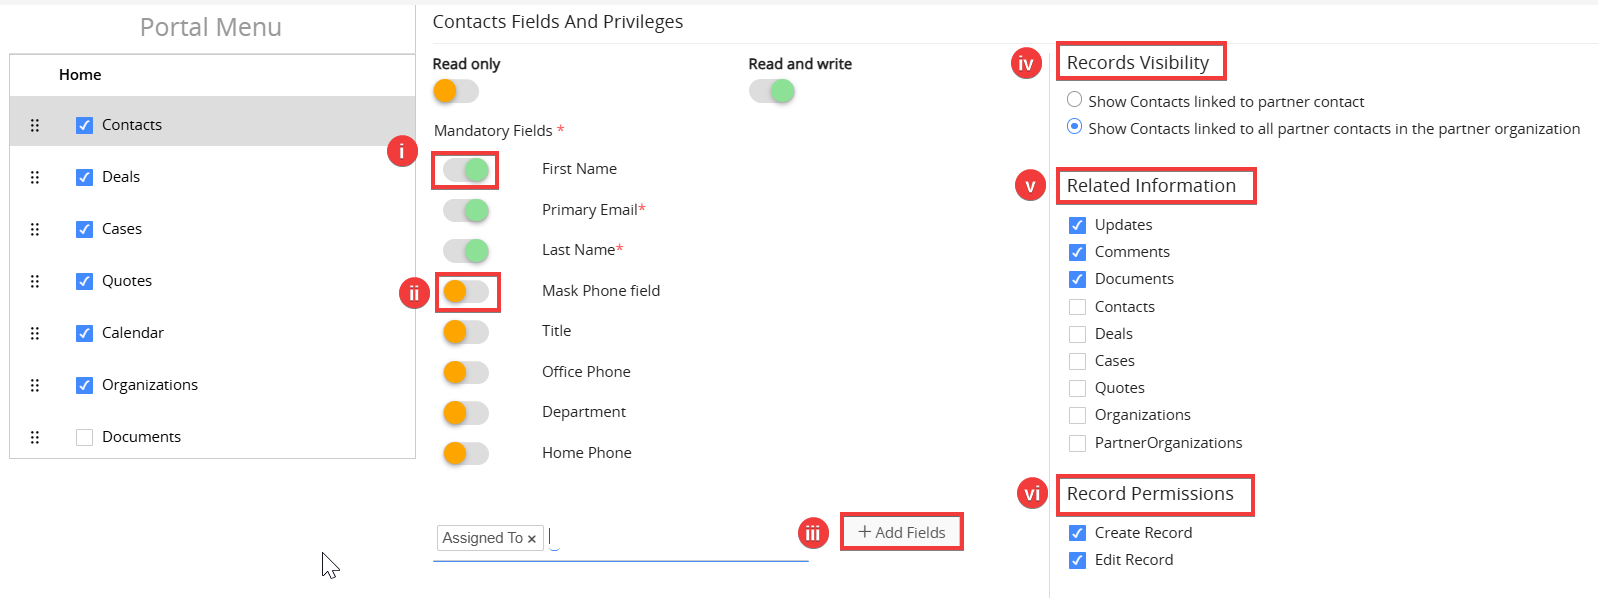
- Actions on Individual Modules - Click on a module available in the Portal Menu to customize the following permissions.
- Read Only - Toggle to Read Only for the required fields in the module so partners can only view those fields without the ability to edit them.
- Read and Write - Toggle this option to allow partners to view and edit fields within the module.
- Add Fields - Click to add more fields into the module and enable the toggle between Read Only and Read and Write access for those fields.
- Records Visibility - Displays records from the selected module that are associated with partner contacts or partner organizations.
- Related Information - Displays information from related modules. The modules that are enabled here will be shown in the record summary view in the portal record.
- Record Permissions - Enable Create Record to allow partners to create records and Edit Record to let them modify existing ones.
- Rearranging Modules - Drag and drop the modules to set the order in which they will appear in the partner portal.
Now, configure the Profile Layout.
Step 3: Profile Layout
The Profile Layout defines the structure of a partner’s profile page, showing specific fields like contact info and company details, and setting permissions for which fields can be edited.
Follow these steps to configure the Profile Layout:
- Log in to the CRM.
- Click the Main Menu.
- Click Settings. The Settings page opens.
- Go to Marketing & Sales > Partner Portal. The Partner Portal page opens.
- Go to the Profile Layout tab.
- Click Profile Layout.
- Enter or select the following information to configure the portal:
- Partner Contact
- Read Only - Toggle to Read Only for the required fields in the module so partners can only view those fields without the ability to edit them.
- Read and Write - Toggle this option to allow partners to view and edit fields within the module.
- Add Fields - Click to add more fields into the module and enable the toggle between Read Only and Read and Write access for those fields.
- Partner Organization
- Read Only - Toggle to Read Only for the required fields in the module so partners can only view those fields without the ability to edit them.
- Read and Write - Toggle this option to allow partners to view and edit fields within the module.
- Add Fields - Click to add more fields into the module and enable the toggle between Read Only and Read and Write access for those fields.
- Partner Contact
Customizing the Partner Portal
You can customize the Partner Portal by displaying the logo of the partner's company. It will provide your partners with a personalized branding experience.Follow these steps to upload and display the company logo of the Partner:
- Log in to the CRM.
- Click the User Menu in the top right corner.
- Click Settings. The Settings page opens.
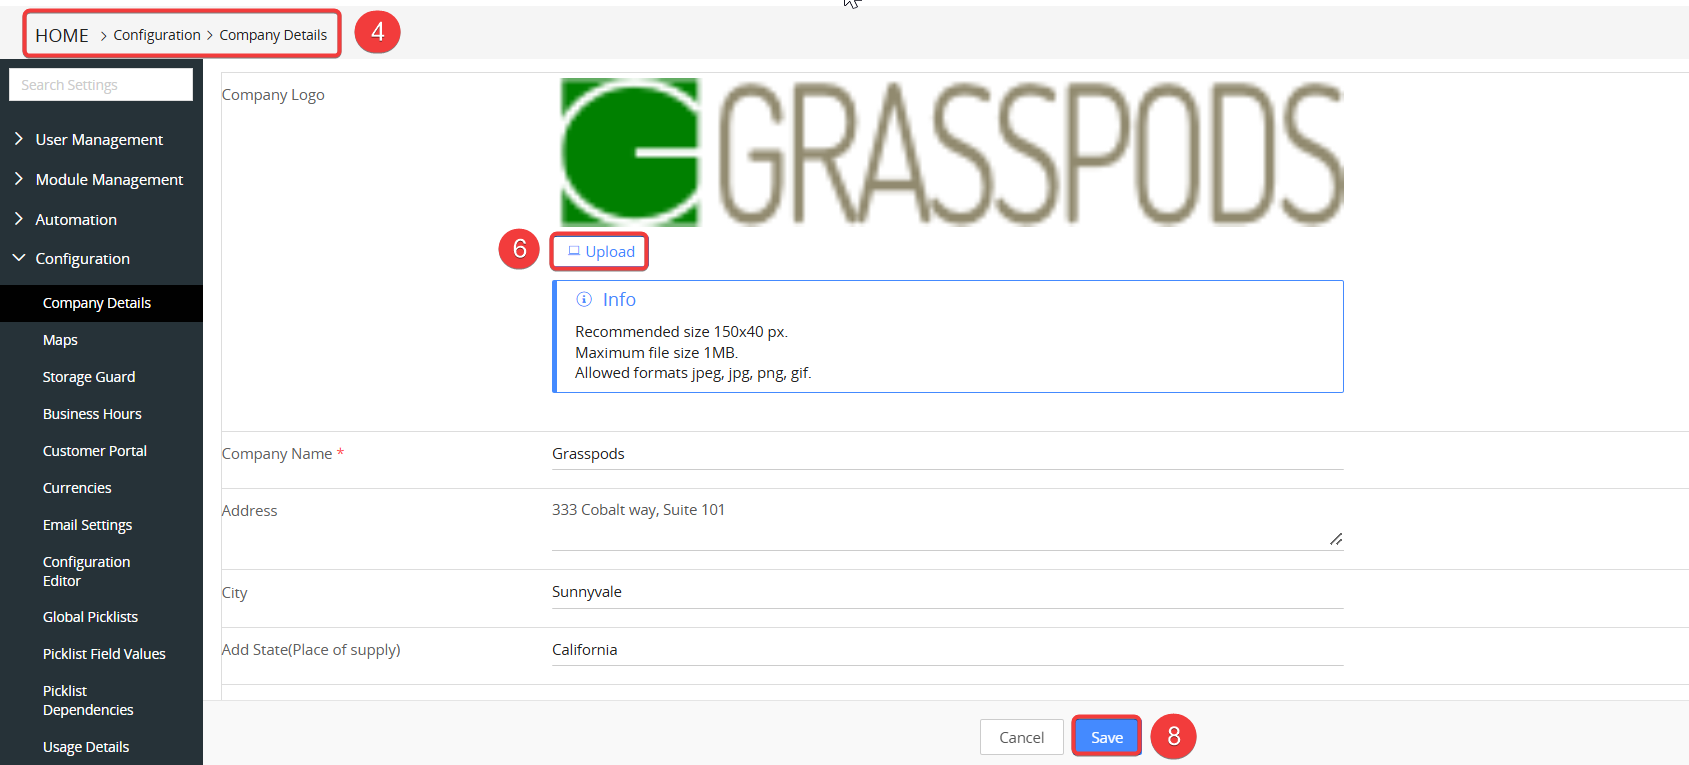
- Go to Settings > Configuration > Company Details. The Company Details page opens.
- Click Edit. The Edit page opens.
- Click the Upload option.
- Select and upload the company logo.
- Click Save.
The uploaded logo will appear on the Partner Portal's login screen.
Adding and Managing Partners
After successfully installing the Partner Portal, you will see the Partner Contacts and Partner Organizations modules in the CRM.
Adding a Partner Contact
Follow these steps to add a partner contact:
- Log in to the CRM.
- Click the Main Menu.
- Go to Sales > Partner Management > Partner Contacts. The Partner Contacts page opens.
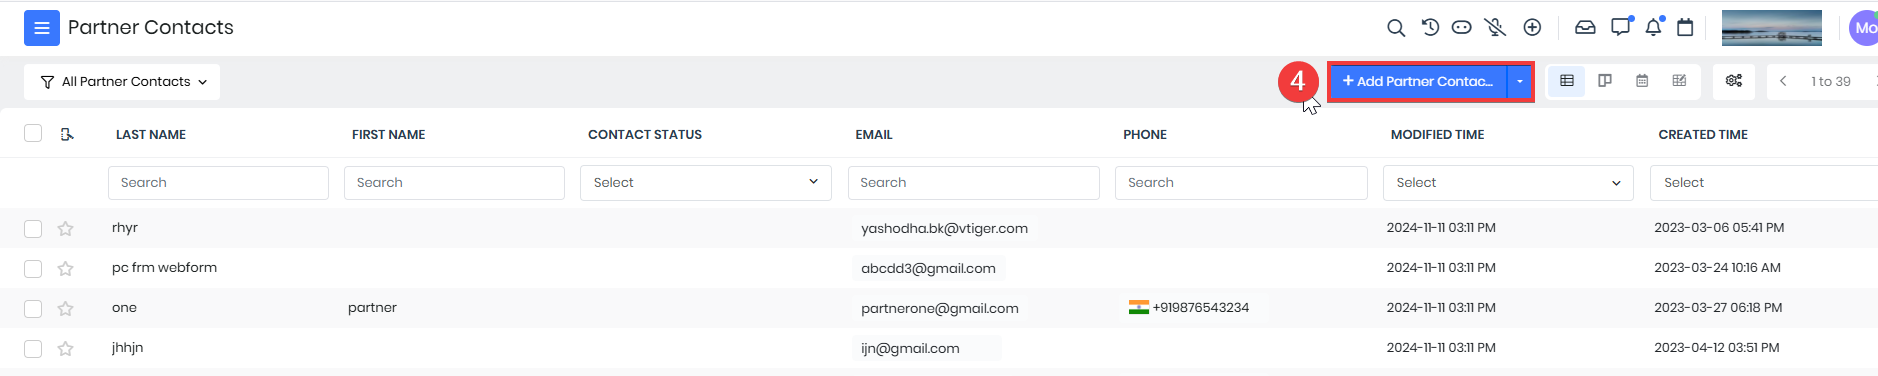
- Click +Add Partner Contacts. An Add Partner Contacts page opens.
- Enter all the mandatory fields.
- Click Save.
Adding a Partner Organization
Follow these steps to add a partner Organization:
- Log in to the CRM.
- Click the Main Menu.
- Go to Sales > Partner Management > Partner Organization. The Partner Organization page opens.
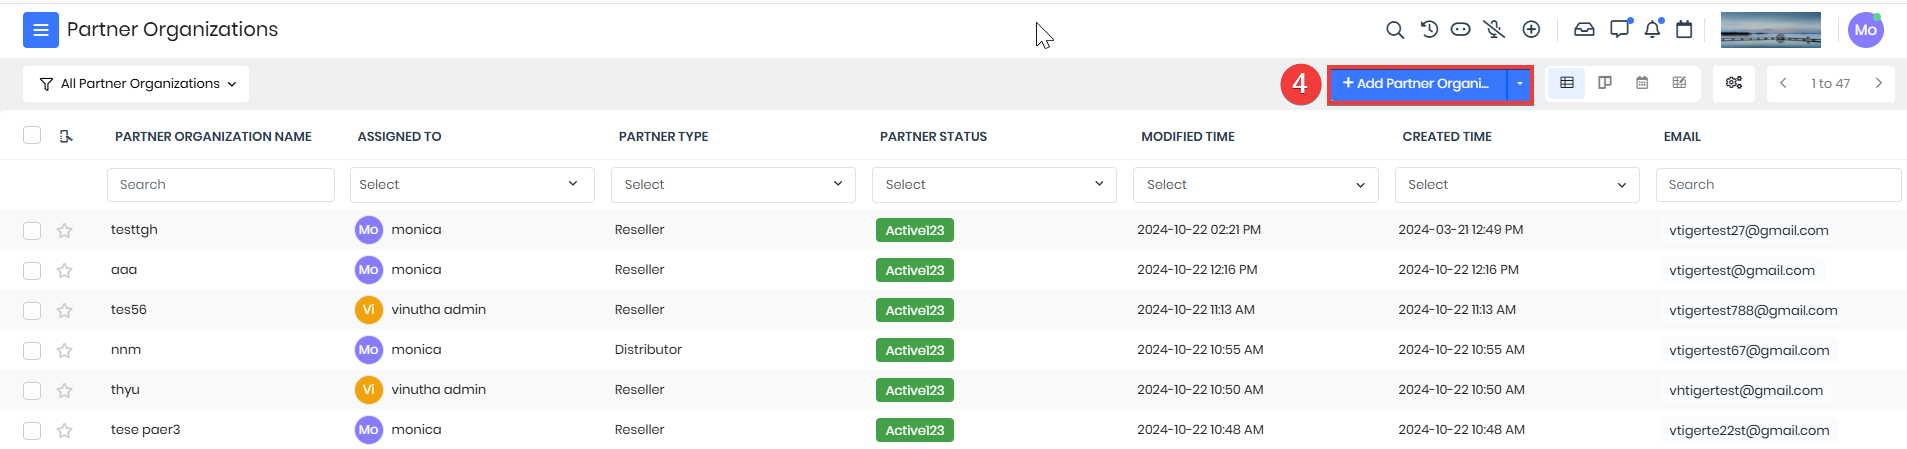
- Click +Add Partner Organization. An Add Partner Organization page opens.
- Enter all the mandatory fields and set the Partner Status to Active.
- Link the contact you created in the previous section to the organization using the Primary Contact field. You can also create new contacts by clicking the + icon.
- Click Save.
Note: The Partner Status must be set to Active for portal access to be granted to the partner.
Enabling Portal Access for Partners
Follow these steps to enable portal access for partners:
- Log in to the CRM.
- Click the Main Menu.
- Go to Sales > Partner Management > Partner Contacts. The List View opens.
- Click on a record. The Summary view opens.
- Click the Details tab.
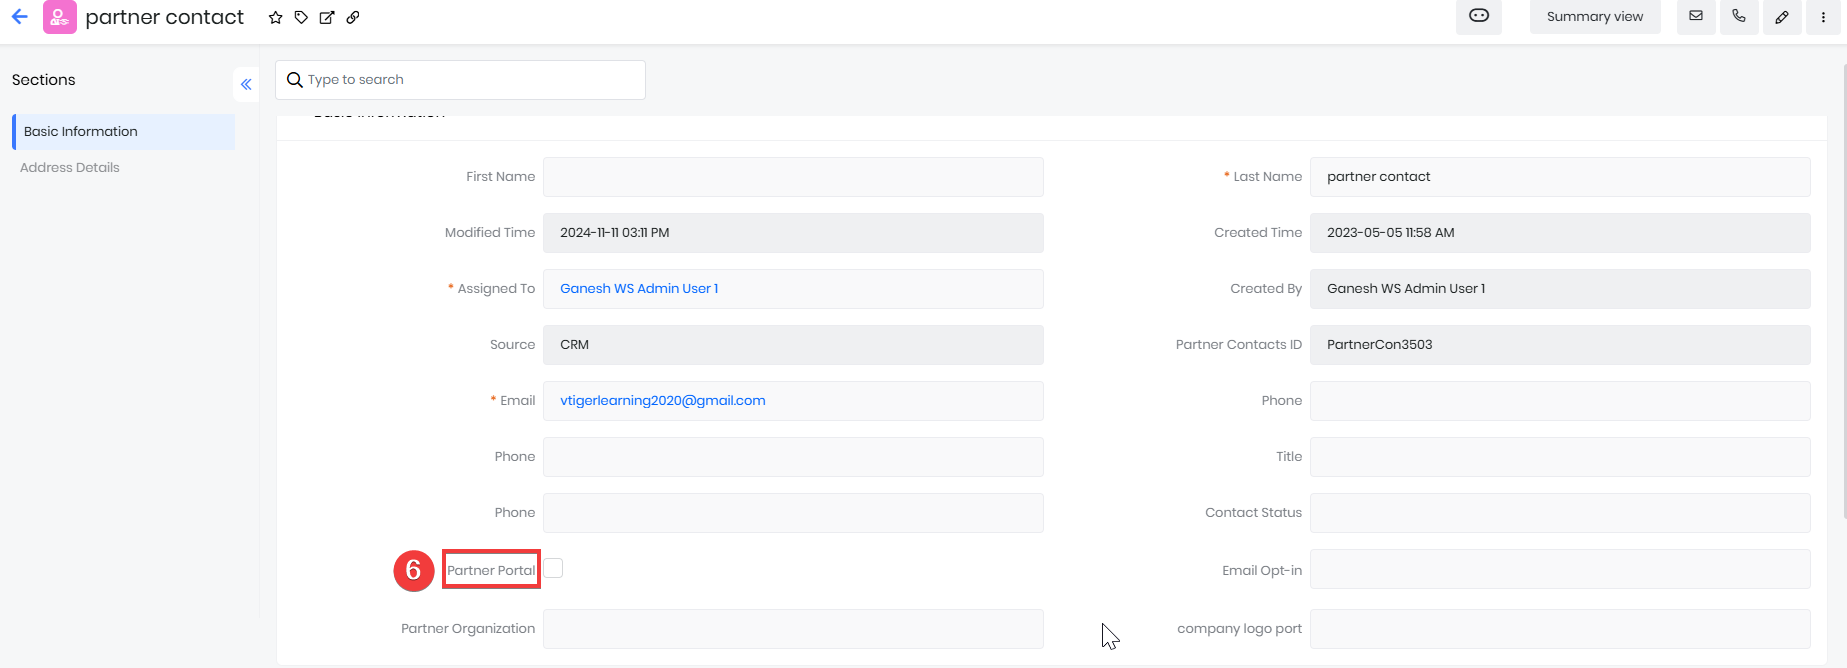
- Go to the Partner Portal field. Enable the checkbox.
- Click Save.
Note: You can enable portal access while creating a partner contact.
Ensuring Email Delivery
To ensure that the email with portal credentials is delivered to the partners, you must enable a setting in the CRM.
Follow these steps to ensure email delivery:
- Log in to the CRM.
- Click the User Menu in the top right corner of the CRM screen.
- Click Settings. The Settings page opens.
- Go to Configuration > Email Settings. The Email Settings page opens.
- Click the Edit icon.
- Go to the Required Opt-in for Email Delivery section.
- Enable the checkbox for Allow sending workflow emails to contacts that have opted-out.
- Click Save.
Sharing contacts with Partners
Contacts can be shared with partners in the following ways:
- Sharing contacts with a partner
- Sharing contacts with an organization
Sharing contacts with a partner
Follow these steps to share contacts with a partner:
- Log in to the CRM.
- Click the Main Menu.
- Go to Essentials > Contact. The Contact page opens.
- Open a Record. The Summary view of the record is displayed.
- Click the Details view.
- Go to the Partner Contact tab.
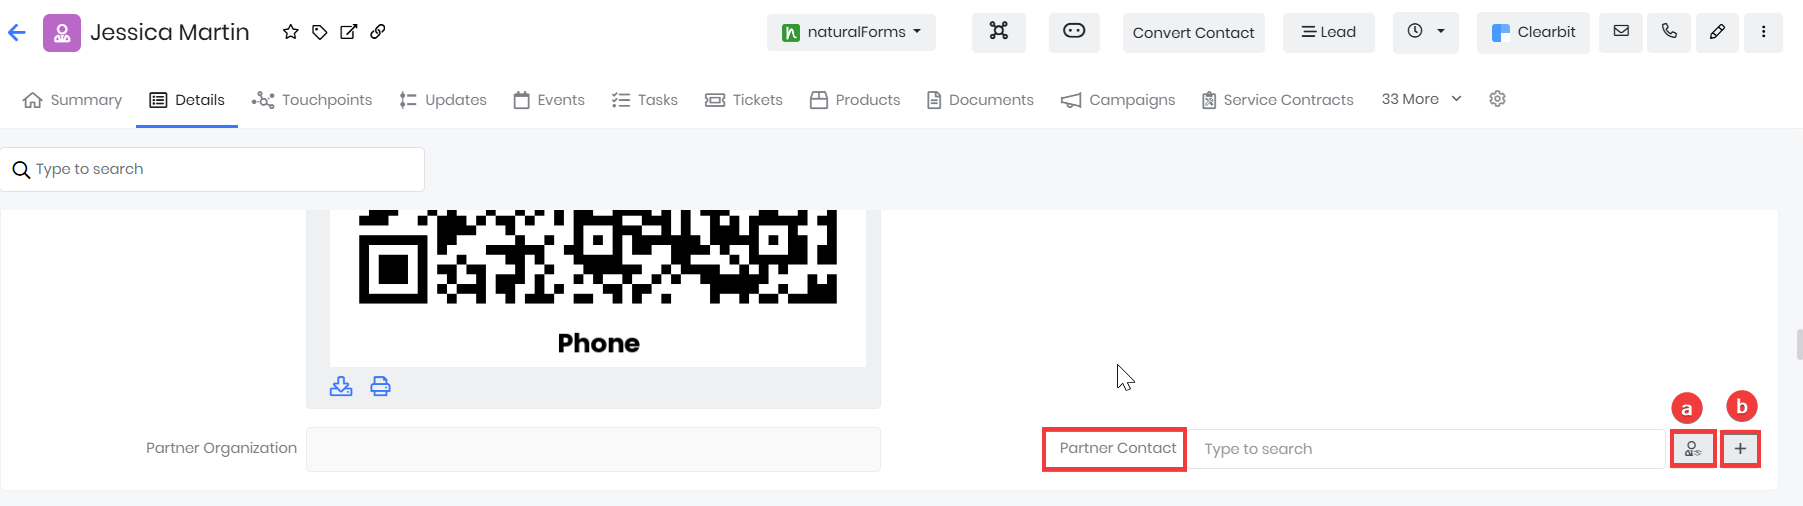
- You can select or add the following information to add a partner contact:
- Select - Click the Select icon to select a partner contact.
- Create - Click the + icon to add a new partner contact.
- Click Save.
Sharing contacts with an organization
Follow these steps to share contacts with an organization:
- Log in to the CRM.
- Click the Main Menu.
- Go to Sales > Partner Management > Partner Organization. The Partner Organization List View opens.
- Click on a record. The Summary View of the record is displayed.
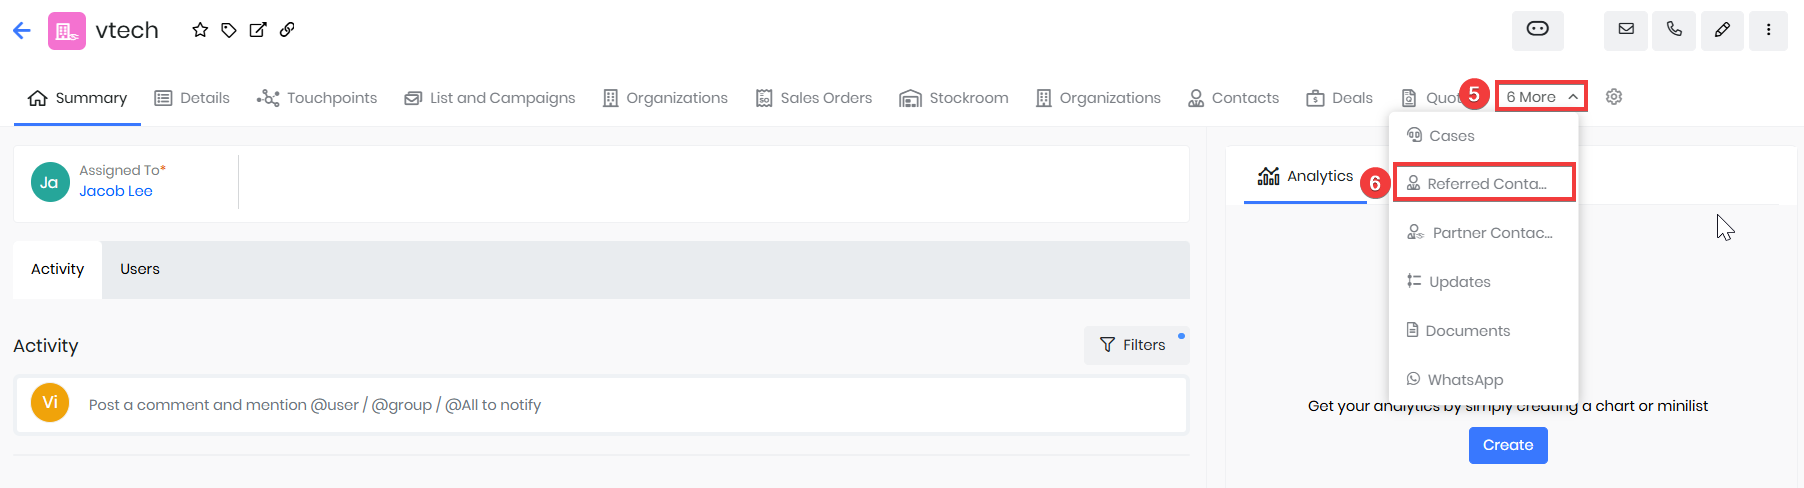
- Click the More icon.
- Select Referred Contacts. A What do you want to do pop-up box opens.

- Enter or select the following information to share contacts:
- Link Contacts
- Click Link Contacts. A box with the list of contacts opens.
- Select the required contacts that should be shared with partners.
- Click Add.
- Add Contacts
- Click Add Contacts. A Quick Create > Contacts box opens.
- Fill in all the mandatory fields.
- Click Save. The Contact will automatically be linked to the Partner as well as saved in the CRM as a Contact.
- Link Contacts
Note: The shared contacts will only be visible to the partners to whom you have enabled the Partner Portal checkbox in the record. Any contacts added by partners in the Partner Portal will be reflected in the Contacts module, with the source labeled as Partner Portal.
Managing Records Created by Partners
When partners add records, such as contacts, deals, or cases, through the Partner Portal, these records will automatically appear in the respective modules in the CRM. Additionally, if a partner adds comments to a record (e.g., a case), those comments will be visible within the record's Summary View. Any reply or comment added by you will also be visible to the partner in the Partner Portal.
Examples:
- When a partner creates a Case record titled Login Issue, their name shows in the CreatedByExt field. If they update the description to Occurred during password reset, their name appears in the ModifiedByExt field.
- For comments, like an Issue reported by multiple customers, the comment and their name are shown in the Comments Section. Replies from you will also be visible to the partner in the Partner Portal.
Viewing records created by partners
Follow these steps to view records:
- Log in to the CRM.
- Click the Main Menu.
- Go to the respective module (e.g., Cases). The List View of the module opens.
- Open the record created by the partner. The Summary View of the record opens.

- View the following details in the record added by the partner:
- Summary Tab - Provides an overview of the case with the following sections:
- Header Section - Displays assigned CRM user, case origin (organization/contact), Case ID, and priority.
- Activities Section - Contains partner's issue/query descriptions, internal comments, and email replies. Each comment will display the partner’s name and timestamp. Replies from you will also be visible to the partner in the Partner Portal.
- OneView Section - Shows SLA information, links to contact and organization records, and associated deals.
- Recommendation Section - Provides case-related suggestions and Vtiger CRM recommendations.
- Analysis Section - Displays contact-related metrics in charts and mini-lists, allowing for custom reports.
- Details Tab - Displays full case details, including assigned CRM users and progress status. It also includes:
- CreatedByExt Field - Identifies the partner who created the record.
- ModifiedByExt Field - Shows the last partner who modified it.
- Updates Tab - Logs all modifications made by partners and the CRM team.
- Displays details of actions performed, such as who executed them, along with date, time, and specifics.
- Includes activities like document uploads, emails sent, case status changes, or updates to case information.
- Events Tab - Used for scheduling calls, meetings, or follow-ups related to the case.
- Tasks Tab - Enables task creation for CRM users to address partner-submitted requests.
- Documents Tab - Displays all attached files shared between partners and the CRM team.
- Link a document by clicking on the Link Document button.
- Upload a document by clicking on the Upload Document button.
- View a document by clicking on the View icon in each document row.
- Download a document by clicking on the Download icon in each document row.
- Summary Tab - Provides an overview of the case with the following sections:
Replying to records created by the Partner
Follow these steps to reply to the records:
- Log in to the CRM.
- Click the Main Menu.
- Go to the respective module (e.g., Cases). The List View of the module opens.
- Open the record created by the partner. The Summary View of the record opens.
- Click the Reply icon to the comments added by the partner in the Activity Section.
- Post and Publish to Portal - This option makes the comment visible across the Customer Portal, Partner Portal, and CRM.
- Post and Publish to Partner Portal - This option makes the comment visible in the CRM and the Partner Portal.
Note: When replying to a Case, the system automatically selects the recipient(s) based on the type of linked records:
- If only a Contact is linked to the Case, the reply will be sent to the Contact's email.
- If only a Partner Contact is linked, the reply will be sent to the Partner Contact's email.
- If both a Contact and a Partner Contact are linked, the reply will be sent to the Contact, with the Partner Contact added in CC.
- If neither Contact nor Partner Contact is linked, but an Organization is associated, the reply will be sent to the Organization's email.
- If no Contact, Partner Contact, or Organization is linked to the case, the system will block the reply and display a warning message.