Articles in this section
Scheduling a Conference in Vtiger CRM
Feature Availability
Vtiger Editions: One Pilot | One Growth | One Professional | One Enterprise | One AI
Introduction
Conferences are essential for maintaining effective communication with your customers, leads, and internal teams. Vtiger CRM offers a built-in Conference feature that allows you to schedule and manage meetings directly from various modules in the CRM, enhancing collaboration and productivity.
Scheduling a Conference in Vtiger CRM
You can use the Schedule Conference option to:
- Create meetings using service providers such as Microsoft Teams, Google Meet, Webex, JioMeet, and Zoom.
- Create calendar events and share meeting details with participants via email, event alerts, live chats, etc.
You need to install the Conference Add-on to use this feature.
The Schedule Conference option is available in the following Vtiger CRM modules:
- Events – via the Activity Type dropdown
- Contacts – via the Schedule Conference option
- Deals – via the Schedule Conference option
- Emails – via Insert Links > Schedule Conference
- Live Chats – via More > Schedule Conference
You can schedule conferences directly from the CRM by creating calendar events and sharing meeting details with participants via email, event alerts, live chats, and more.
You can also use the Schedule Conference option to create meetings using providers such as Microsoft Teams, Google Meet, Webex, JioMeet, and Zoom.
Benefits of Scheduling Conferences in Vtiger
The benefits of scheduling a conference in Vtiger CRM are:
- Unified Experience: Plan and manage all your meetings without leaving the CRM.
- Multi-module Support: Schedule conferences from Events, Contacts, Deals, Emails, and Live Chats.
- Automatic Event Creation: Each scheduled conference generates a corresponding Event record in CRM.
- Streamlined Collaboration: Share conference links with ease via email or chat with participants, contacts, etc
- Meeting History: Track past and upcoming conferences linked to relevant CRM records.
In this article, you will learn about:
- Installing the Conference Add-on
- Setting up a Conference Provider
- Scheduling a Conference from the Events Module
- Scheduling a Conference from the Contacts Module
- Scheduling a Conference from the Deals Module
- Scheduling a Conference from the Email feature
- Scheduling a Conference from Live Chats
- Revoke Access to a Conference Provider
- Uninstalling the Conference Add-on
Installing the Conference Add-on
To use the Schedule Conference feature, you must install the Conference Add-on.
Follow these steps to install the Conference Add-on:
- Log in to the CRM.
- Click the User Menu in the top right corner.
- Click the Settings. The Settings page opens.
- Go to the Extensions section.
- Click Add-ons. The Add-ons page opens.
- Search for Conference. The Conference Add-on appears.
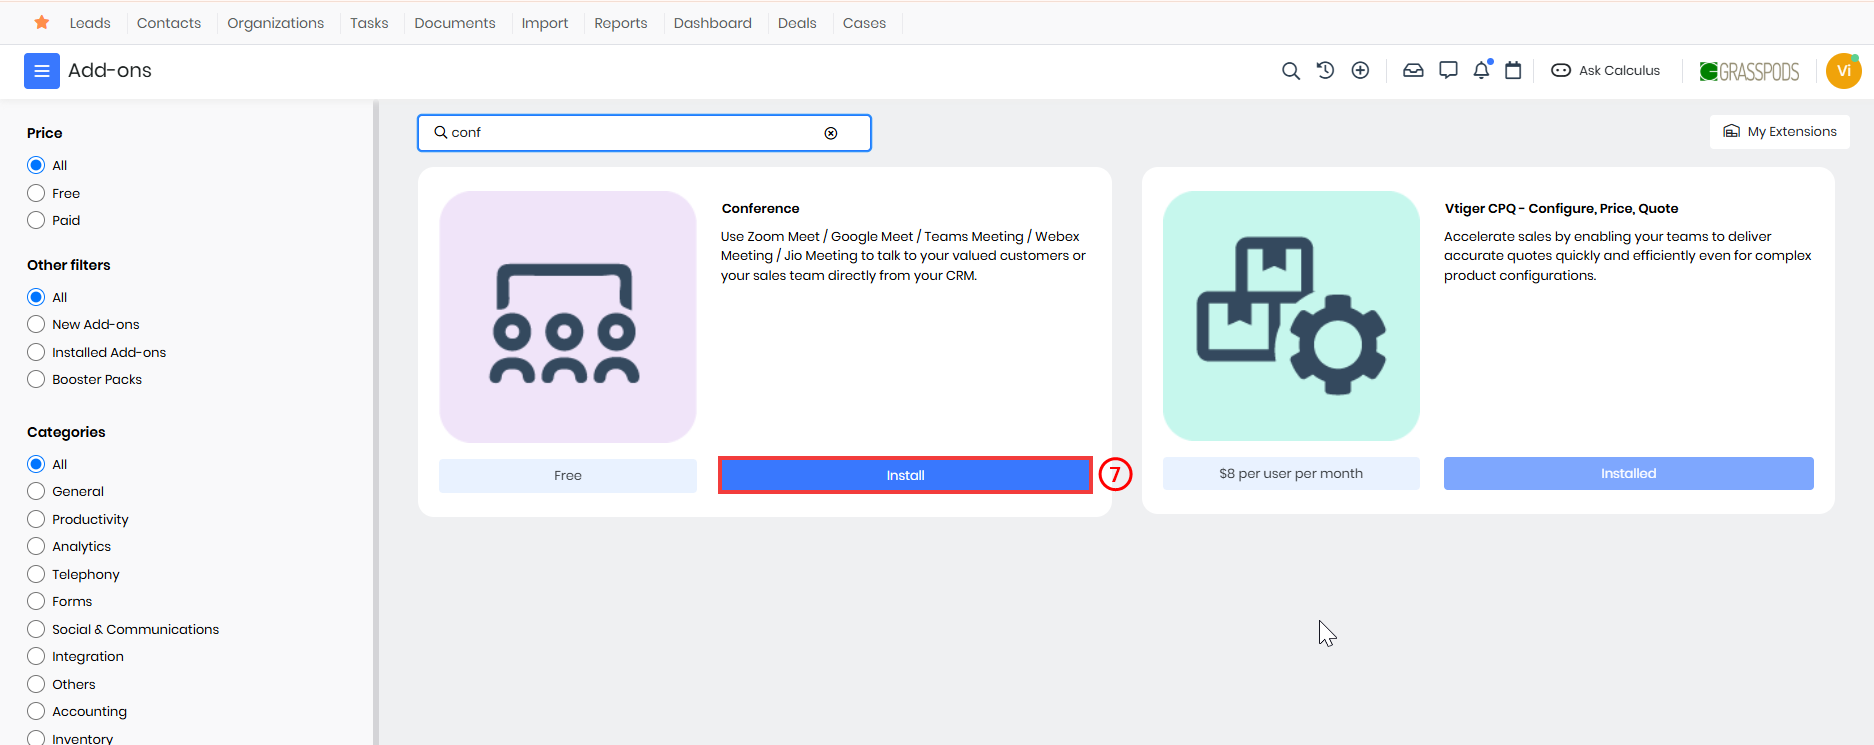
- Click Install.
Once installed, service providers such as Microsoft Teams, Google Meet, Webex, JioMeet, and Zoom will appear as options in the Activity Type dropdown in the Events module. You can begin scheduling conferences from various modules, including Events, Contacts, Deals, Emails, and Live Chats.
Setting Up a Conference Provider
After installing the Conference Add-on, you must connect your preferred service provider, such as Microsoft Teams, Zoom, or Google Meet, to start scheduling meetings from within Vtiger CRM.
Follow these steps to sign in to a service provider:
- Log in to the CRM.
- Go to the main Menu.
- Select Essentials > Events. The Events List View opens.
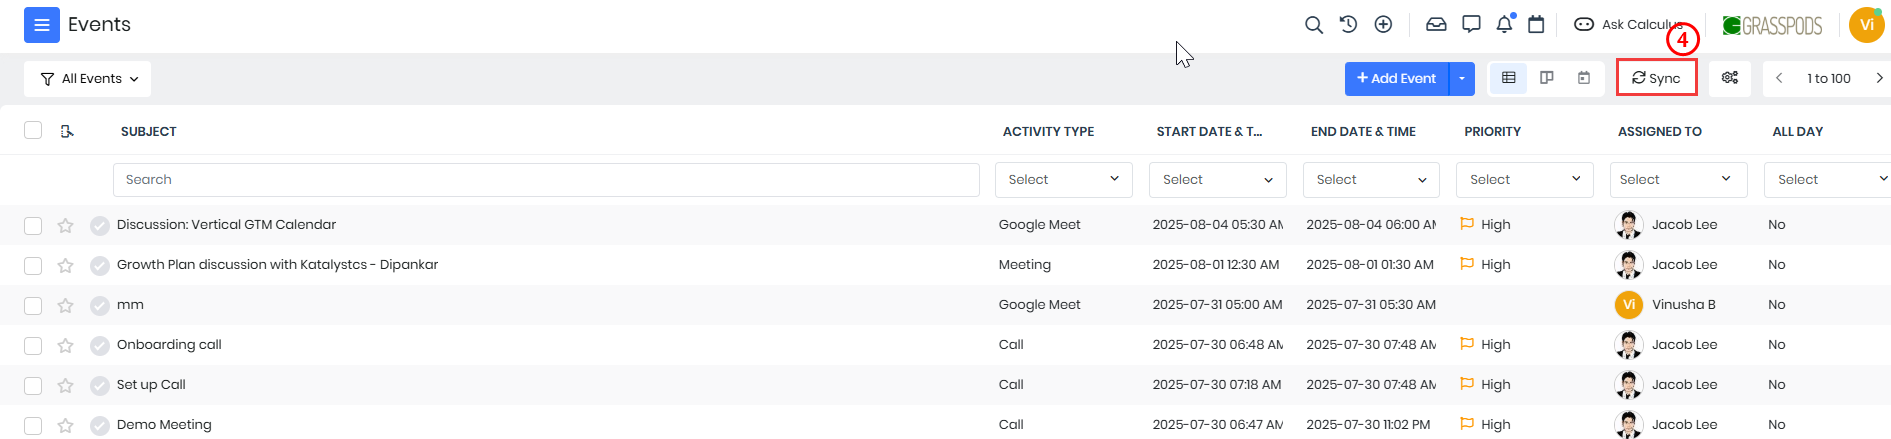
- Click the Sync button on the top-right. The Sync window opens.
- Click Sign In next to the provider you want to use (e.g., Microsoft Teams).
- A login screen for the selected provider (e.g., Microsoft) appears.
- Enter your credentials.
- Grant the necessary permissions when prompted.
- Click Sign In.
The provider you signed in to is now connected and ready to use in Vtiger CRM.
Scheduling a Conference from the Events Module
Once the Conference Add-on is installed, new Activity Type options—Microsoft Teams, Google Meet, Webex, JioMeet, and Zoom—will be available in the Events module.
Follow these steps to schedule a Conference from the Events module:
- Log in to the CRM.
- Go to the Main Menu.
- Click the Essentials > Events. The Events page opens.
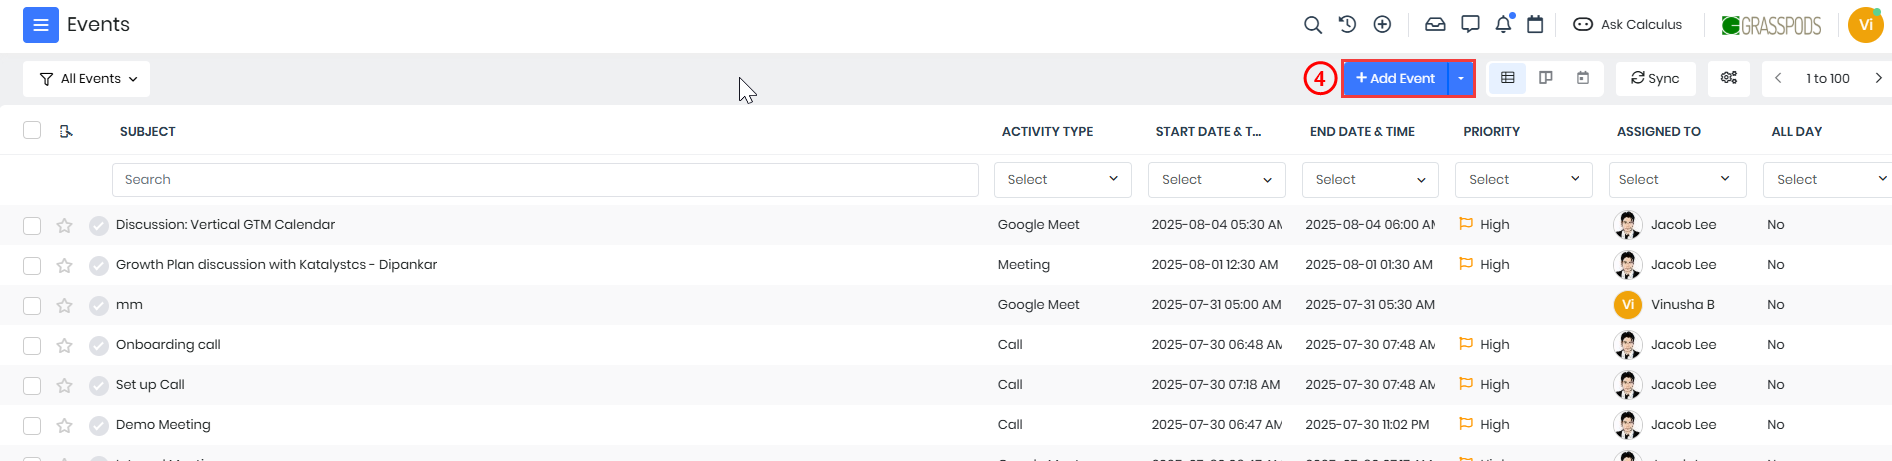
- Click the + Add Event button. The Add Event window opens.
- Enter or select the following details to create a new Event -
- Subject: Enter the subject of the Event.
- Activity Type: Select the appropriate type from the drop-down (e.g., Microsoft Teams, Google Meet, Webex, JioMeet, and Zoom).
- Start Date & Time: Specify when the event should start by selecting the appropriate date and time.
- End Date & Time: Define when the event will conclude by setting the end date and time.
- Description: Provide a detailed explanation of the event, outlining its purpose.
- Participants: Add participants who will be attending the event. You can select participants by clicking the User icon. If necessary, quickly create new contacts by clicking the Plus icon.
- Assigned To: Choose the individual or team to whom the event should be assigned from the drop-down.
- Status: Indicate the current status of the Event by selecting options such as Held, Incomplete, Planned, etc.
- Priority: Specify the priority of the Event, whether it is High, Medium, or Low Priority, so you can prioritize tasks accordingly.
- Location: Add the Location.
- Event Image: Add an image for the event by clicking Browse and selecting one from your device.
- All Day: Select this checkbox if the event will last all day.
- Mutual: Enable this checkbox if the event is mutual
- Related To: If the Event is associated with any module, such as Deals or Internal Tickets, you can select it from the dropdown menu and select the particular record in the search bar.
- Organization Name: Add the name of the organization.
- View full form: Click to enter or select details for the following sections:
- Event Details
- Reminder Details
- Recurrence Details
- Description Details
- Related To
- Invitees
- Click Save.
An Event record with a meeting link is created and stored in the Events folder in the CRM.
Scheduling a Conference from the Contacts Module
You can schedule a conference from an individual Contact record, and the recipient will receive the invite via email. They can accept your request and click on the link you sent to join the meeting
Follow these steps to create a conference schedule from the Contacts module:
- Log in to the CRM.
- Click the Main Menu.
- Go to Essentials.
- Select Lead & Contact Management > Contacts. The Contacts List View opens.
- Select and click to open the Contact record for whom you want to set up a meeting. The Summary View opens.
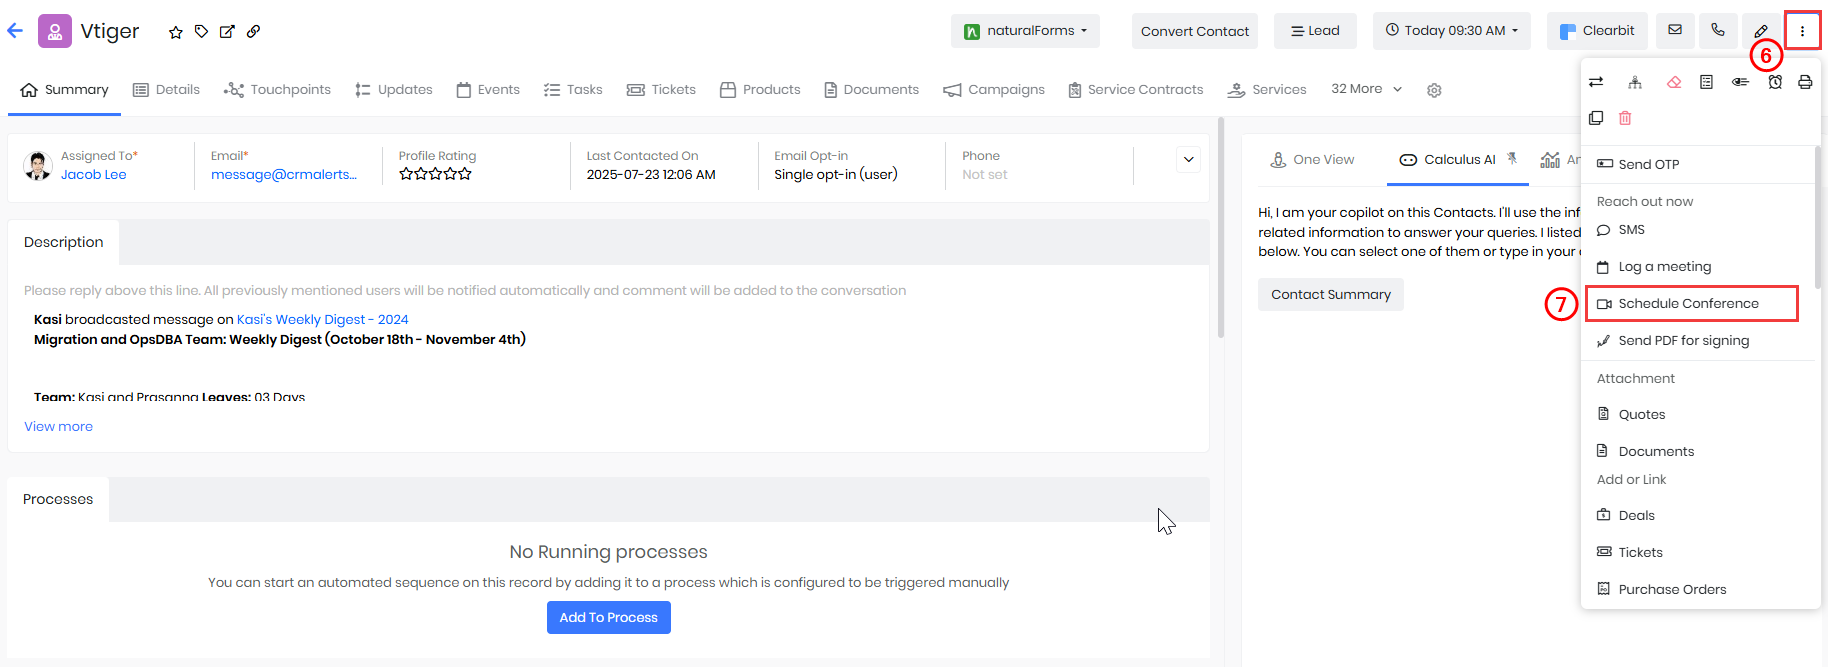
- Click More.
- Select the Schedule Conference option in the dropdown. The Schedule Conference window opens.
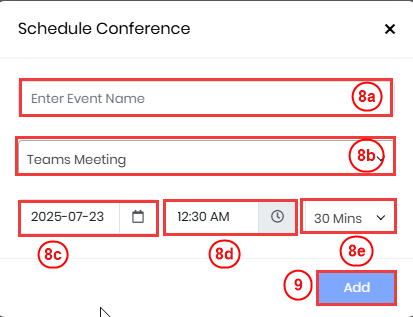
- Enter or select the following information -
- Event Name: Enter a name for your meeting.
- Activity Type: Select Teams Meeting as the activity type from the dropdown.
- Start Date: Choose the date on which the meeting should be scheduled.
- Start Time: Select the time at which the meeting should begin.
- Duration: Enter the expected duration of the meeting (e.g., 30 minutes, 1 hour).
- Click Add. A Do you want to send invite email to all invitees? Pop-up window opens.
- Click Yes to send the meeting invite to all participants, or No if you prefer not to send the invite.
- Click Send to send the invite to the Contact.
An Event record is created in the CRM with the Microsoft Teams meeting details and is automatically linked to the corresponding Contact record.
Scheduling a Conference from the Deals Module
You can schedule a conference from an individual Deal record, and the recipient will receive the invite via email. They can accept your request and click on the link you sent to join the meeting
Follow these steps to create a Teams meeting from the Deals module:
- Log in to the CRM.
- Click the Main Menu.
- Go to Sales.
- Select Pipeline Management > Deals. The Deals List View opens.
- Select and click to open the Deal record for whom you want to set up a meeting. The Summary View opens.
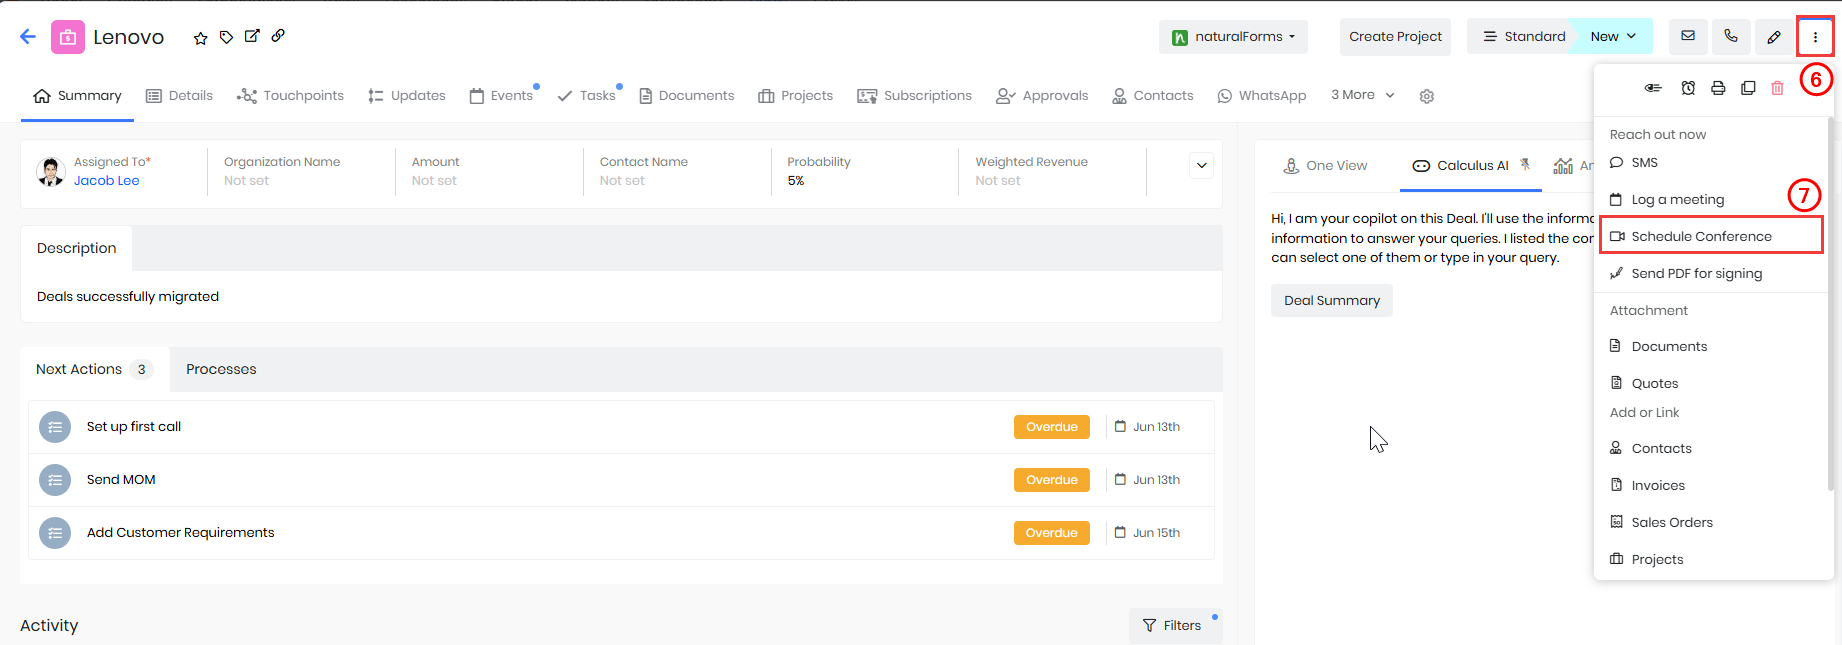
- Click More.
- Select the Schedule Conference option in the dropdown. The Schedule Conference window opens.
- Enter or select the following information -
- Event Name: Enter a name for your meeting.
- Activity Type: Select the required meeting type from the dropdown.
- Start Date: Choose the date on which the meeting should be scheduled.
- Start Time: Select the time at which the meeting should begin.
- Duration: Enter the expected duration of the meeting (e.g., 30 minutes, 1 hour).
- Click Add. A Do you want to send invite email to all invitees? Pop-up window opens.
- Click Yes to send the meeting invite to all participants, or No if you prefer not to send the invite.
- Click Send.
An Event record is created in the CRM with the meeting details and linked to the Deal record.
Scheduling a Conference from Email
You can schedule a conference and send a meeting link to your contacts or co-workers from the Compose Email window (everywhere in the CRM). You can send the link from:
- The List View of a record
- The Summary View of a record
Let us consider this example from the Deals module.
Follow these steps to schedule a meeting from the Deals module:
- Log in to the CRM.
- Click the Main Menu.
- Go to Sales.
- Select Pipeline Management > Deals. The Deals List View opens.

- From List View -
- Hover over the Deal record for whom you want to set up a meeting.
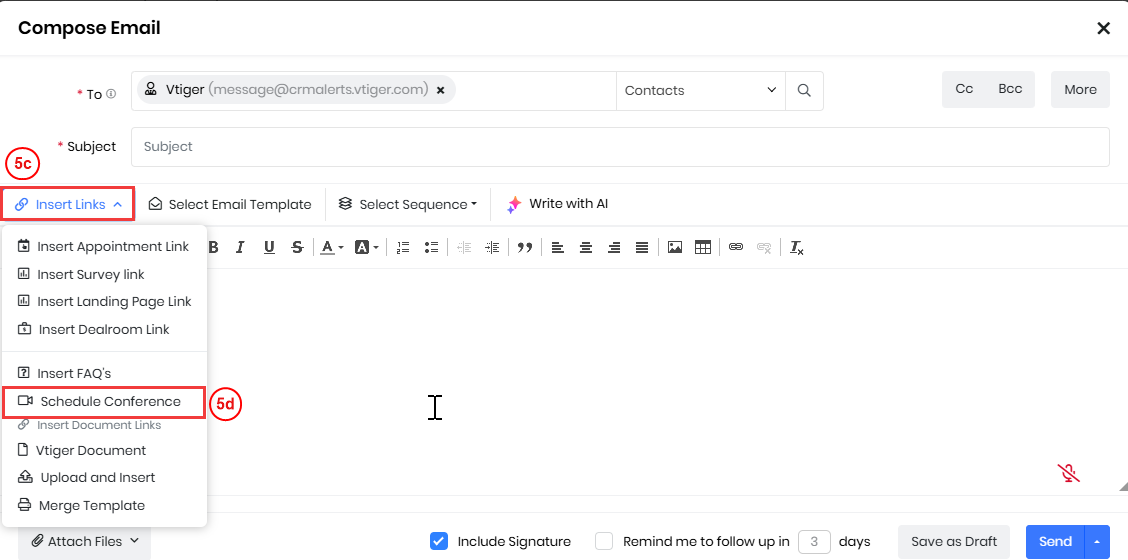
- Click Email. The Compose Email window appears.
- Click the Insert Links dropdown from the Compose Email window.
- Select the Schedule Conference option. The Schedule Conference window opens.
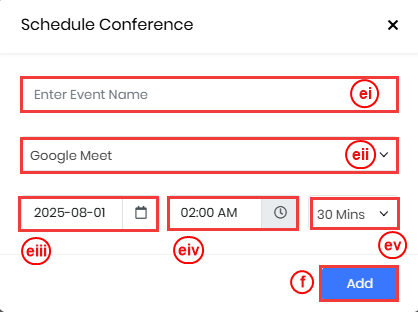
- Enter or select the following information -
- Event Name: Enter a name for your meeting.
- Activity Type: Select the meeting type from the drop-down.
- Start Date: Choose the date on which the meeting should be scheduled.
- Start Time: Select the time at which the meeting should begin.
- Duration: Enter the expected duration of the meeting (e.g., 30 minutes, 1 hour).
- Click Add. A Do you want to send invite email to all invitees? Pop-up window opens.
- Click Yes to send the meeting invite to all participants, or No if you prefer not to send the invite
- The meeting information is added to your email.
- Add email content in the text box.
- Click Send.
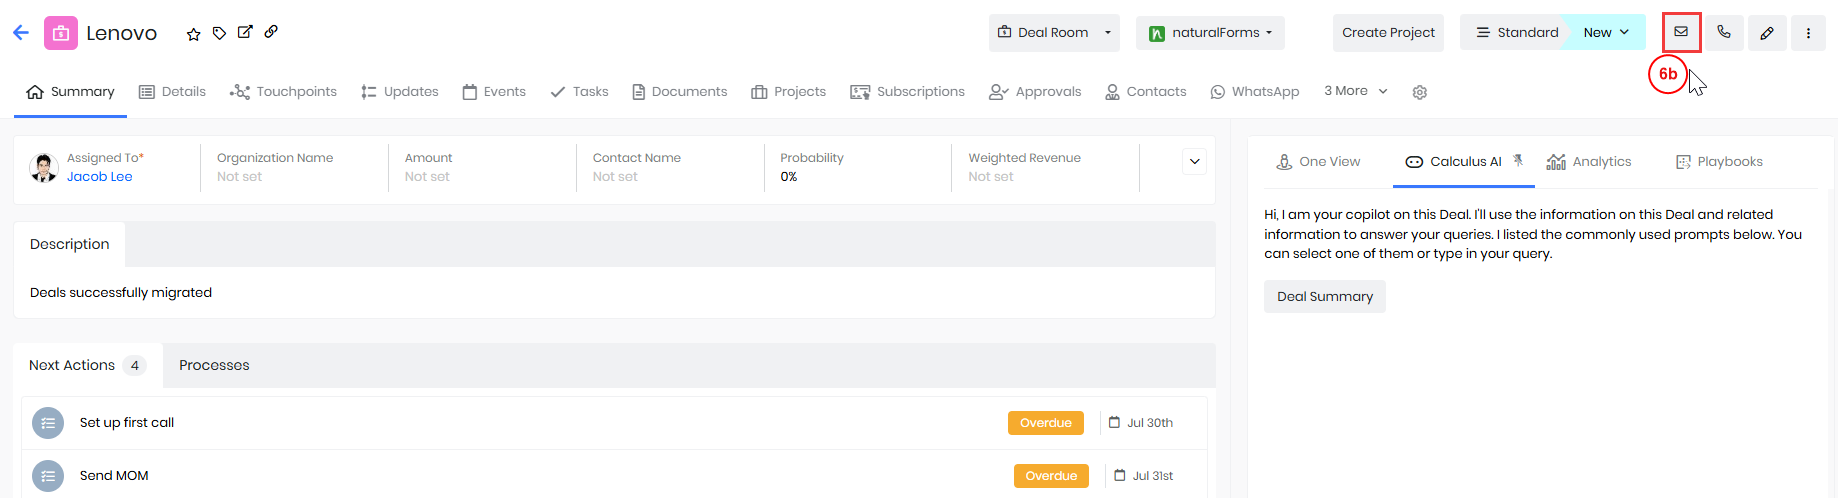
- From Summary View -
- Click on a Deal record for whom you want to set up a meeting. The Summary View opens.
- Click Email located at the top right corner of the record. The Email Compose window opens.
- Click the Insert Links dropdown from the Compose Email window.
- Select the Schedule Conference option. The Schedule Conference window opens.
- Enter or select the following information -
- Event Name: Enter a name for your meeting.
- Activity Type: Select the meeting type from the drop-down.
- Start Date: Choose the date on which the meeting should be scheduled.
- Start Time: Select the time at which the meeting should begin.
- Duration: Enter the expected duration of the meeting (e.g., 30 minutes, 1 hour).
- Click Add. A Do you want to send invite email to all invitees? Pop-up window opens.
- Click Yes to send the meeting invite to all participants, or No if you prefer not to send the invite.
- The meeting information is added to your email.
- Add email content in the text window.
- Click Send.
An Event record is created in the CRM with the meeting details. You can view the sent email in the Activity section of the respective record.
Note: You can also select an existing email template by clicking the Select Email Template button instead of typing it from scratch. To know more about Email Templates, click here.
Scheduling a Conference from the Live Chats
Follow these steps to create a meeting from the Live Chats:
- Log in to the CRM.
- Click the Main Menu.
- Go to Help desk.
- Select Customer Issues > Live Chats. The Live Chat page opens.
- In the Live Chat console, click on any conversation.
- Click More on the top right of the conversation.
- Click Accept.
- Click More on the top right of the conversation.
- Select the Schedule Conference option. The Schedule Conference window opens.
- Enter or select the following details in the Schedule Conference window -
- Event Name: Enter a name for your meeting.
- Activity Type: Select the required meeting type from the dropdown.
- Start Date: Choose the date on which the meeting should be scheduled.
- Start Time: Select the time at which the meeting should begin.
- Duration: Enter the expected duration of the meeting (e.g., 30 minutes, 1 hour).
- Select the following options to send the Teams Meeting link -
- Send via Email: The link will be emailed to the primary email.
- Send in Chat: The link will be shared within an active Live chat conversation.
The conference details are shared with the customer, and an Event record is created in the CRM with the meeting details.
Revoking Access to a Conference Provider
If you no longer want to use a specific meeting provider (e.g., Microsoft Teams or Zoom), you can revoke its access without having to uninstall the entire Conference Add-on.
Follow these steps to revoke access:
- Log in to the CRM.
- Go to the Main Menu.
- Navigate to Essentials > Events. The Events List View opens.
- Click the Sync button on the top right. The Sync window opens.
- Locate the provider you want to disconnect (e.g., Microsoft Teams, Zoom).
- Click Revoke Access next to the provider's name. A confirmation window appears.
- Click Revoke Access again to confirm.
You will no longer be able to schedule new meetings using the disconnected provider. Event records already created will still be available in the CRM and will retain the meeting details.
Uninstalling the Conference Add-on
If you no longer wish to use meeting providers in Vtiger CRM, you can uninstall the Conference Add-on.
Follow these steps to uninstall the Conference add-on from your CRM:
- Log in to the CRM.
- Click the User Menu on the top right corner.
- Click the Settings. The Settings page opens.
- Go to the Extensions section.
- Click Add-ons. The Add-ons page opens.
- Search Conference.
- Click Conference Add-on.
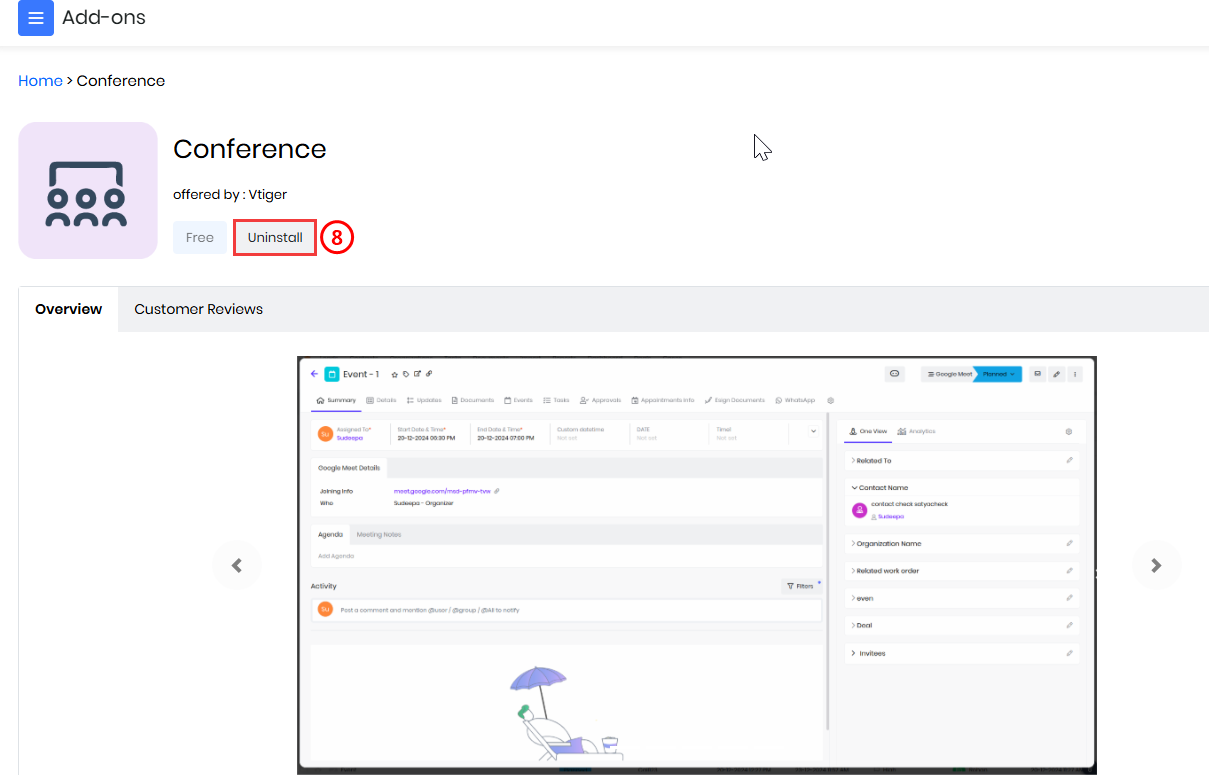
- Click the Uninstall button.
Note:
- Once you uninstall the Conference extension, all service providers, along with Zoom, Teams Meetings, Webex Meetings, and Google Meet, will be disabled. They will not be available when creating new meetings.
- All existing Event records will remain in the CRM, including meeting recordings and links.