Articles in this section
Configure My Preferences Feature
Feature Availability
Vtiger Editions: One Pilot | One Growth | One Professional | One Enterprise | One AI
Introduction
Personalizing your settings in Vtiger CRM is a powerful way to boost productivity and simplify your workflow. The My Preferences is the central hub for configuring your personal information, including email addresses, phone numbers, currency preferences, business hours, default page views and more.
This page is accessible to both Admin and Non-Admin users, making it a central location to configure user-specific options. If you’re an Admin user, you also have the ability to manage and customize the preferences of other users in the CRM.
Benefits of My Preferences
Here are the benefits of the My Preferences page in Vtiger CRM:
- Personalized Experience: Adjust your CRM settings to match your work style and needs.
- Smooth Workflow: Choose default pages, add email signatures, and set business hours for easier daily tasks.
- Better Data Management: Keep currency, numbers, and phone settings clear and consistent.
- Improved Communication: Use email signatures and phone settings for professional and efficient communication.
In this article, you will learn about:
- Configuring My Preferences
- Changing the Username
- Changing the Primary Email address
- Changing the Password
- Changing the Access key
Configuring My Preferences
Follow these steps to set up My Preferences:
- Log in to your CRM account.
- Click the User Menu on the top right corner of the CRM screen.
- Click My Preferences. The My Preferences page opens.
- Click the Edit icon on the top right or hover over the respective section to quick edit.
- Fill in or update the following sections to customize your preferences:
- Display Picture
- User Information
- Employee Information
- My Groups
- User Address
- Currently and Number Preferences
- Phone Preferences
- User Business Hours
- Vtiger Usage Preferences
- Signature
- Click Save.
Note: You can also go to My Preferences from Settings > My Preferences
Let’s now explore each section in detail.
Display Picture

-
Upload - Upload a profile picture (maximum size: 2MB) to personalize your account. The image will appear in the User Menu.
User Information
This block provides key details about your CRM account.

- Username - Displays the unique username you used to log in to your Vtiger CRM account.
- User Type - Indicates whether you are an Admin User, a Standard User, a Light Agent, or an Admin based on your access level.
- Role - Defines your position in the company hierarchy (e.g., CEO, Marketing Manager).
- Reports To - indicates who you report to, such as your manager or team lead.
- Primary Group - Displays the team or group you are a part of (e.g., Marketing Team, Sales Team).
- Language - Indicates the language you have selected for using the CRM interface.
- Access Key - Shows your unique, system-generated security token for API authentication.
Note:
- As an Admin user, you can edit all the fields mentioned above for yourself and other users.
- Updating the username requires password confirmation and is limited to two failed attempts per day. After two failed attempts, changes are restricted, and an alert is sent to the IT and Security teams to prevent potential attacks.
Employee Information
Includes personal and contact details such as name, title, department, email addresses, and phone numbers.
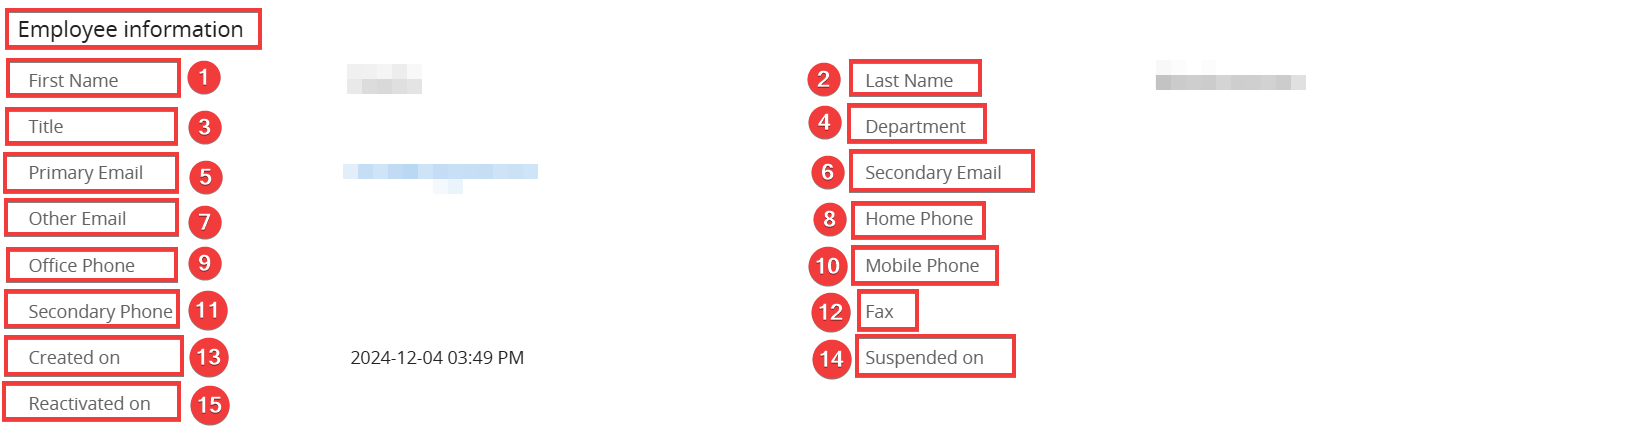
- First Name - Displays your first name.
- Last Name - Displays your last name.
- Title - Shows your designation in the company (e.g., Manager, Executive).
- Department - Indicates the department you belong to (e.g., Marketing, Sales).
- Primary Email - Displays your primary email address for communication.
- Secondary Email - Displays an alternate email address for backup or secondary use.
- Other Email - Displays an additional email address for contact, if applicable.
- Home Phone - Shows your home phone number for contact purposes.
- Office Phone - Displays your office phone number for professional communication.
- Mobile Phone - Displays your mobile phone number for quick communication.
- Secondary Phone - Displays an additional phone number for backup purposes.
- Fax - Shows your fax number, if applicable.
- Documents - Displays any documents associated with your profile.
- Created On - Indicates the date your profile was created.
- Suspended On - Displays the date your account was suspended, if applicable.
- Reactivated On - Displays the date your account was reactivated, if applicable.
My Groups
This is a read-only section that displays the groups you belong to, such as the Marketing Group or Sales Group.

- Group Name - Shows the name of the group you are part of.
- Description - Provides a brief overview of the group.
Admin users can add other users to groups by navigating to Settings > User Management > Groups.
To learn more about User Groups, Click here.
User Address
You can input address details, including the street, city, state, country, and postal code.

- Street - Displays your street address.
- City - Displays the city you reside in.
- State - Shows the state or province of your address.
- Country - Indicates the country of your residence.
- Postal Code - Displays the postal or ZIP code for your address.
- FS Beat - Represents additional information or a specific designation related to your location (if applicable).
Currency and Number Preferences
Set up your currency and number formatting preferences for Inventory and financial modules.
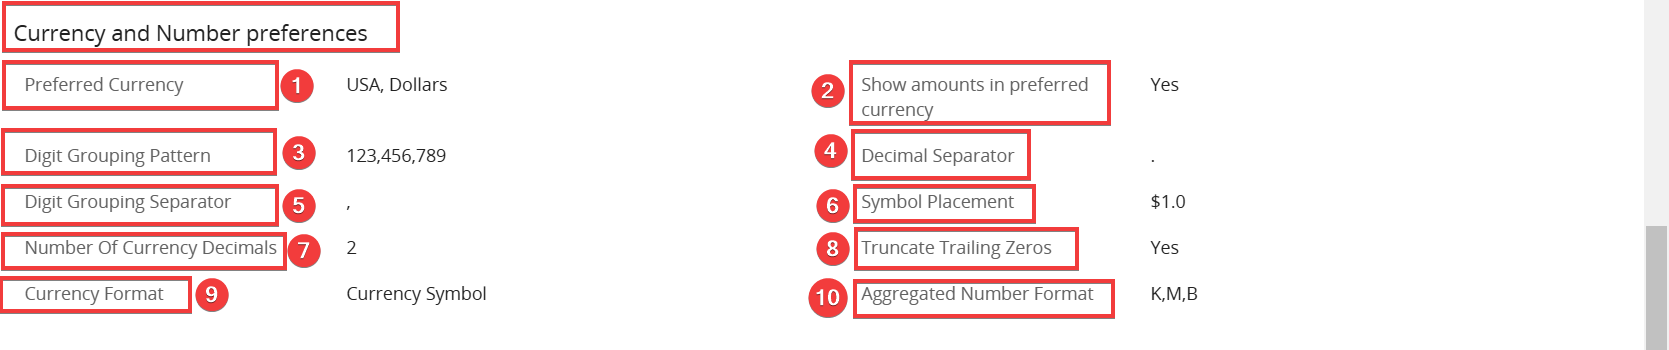
- Preferred Currency -Choose the default currency for transactions and reports.
- Show Amounts in Preferred Currency -Enable this option to convert displayed amounts into your preferred currency automatically.
- Digit Grouping Pattern - Set how numbers are grouped for better readability (e.g., 1,000 or 1.000).
- Decimal Separator - Select the symbol to separate the integer and fractional parts of a number (e.g., "." or ",").
- Digit Grouping Separator - Choose the symbol to separate groups of digits in large numbers (e.g., 1,000 or 1.000).
- Symbol Placement - Decide whether the currency symbol appears before (e.g., $100) or after the number (e.g., 100€).
- Number of Currency Decimals - Define how many decimal places are displayed for currency values (e.g., 2 for 100.00).
- Truncate Trailing Zeros - Enable this option to remove unnecessary zeros after the decimal point (e.g., 100.00 becomes 100).
- Currency Format - Select the currency's appearance as a code (e.g., USD, EUR) or symbol (e.g., $, €).
- Aggregated Number Format - Choose how large numbers are displayed:
- Full: 1,000,000
- K/M/B: 1K, 1M, 1B
- L/CR: 10L, 1CR
Note: Changes to these settings reflect across all CRM modules containing Currency, Decimal, or Percent fields.
Phone Preferences
Set up phone numbers for incoming and outgoing calls via supported gateways, such as Asterisk, Plivo, or Twilo. When you set up a phone number for a gateway, you ensure that the gateway is active to receive and make calls.
Phone gateways can be managed and configured by navigating to Settings > Extensions > Phone Configuration.
To learn more about Phone Calls in Vtiger CRM, click here.
User Business Hours
User Business Hours represent your working hours. You can choose your appropriate business hours from a drop-down list.
To set up your business hours, navigate to Settings > Configuration > Business Hours.
To learn more about User Business Hours, click here.
Vtiger Usage Preferences
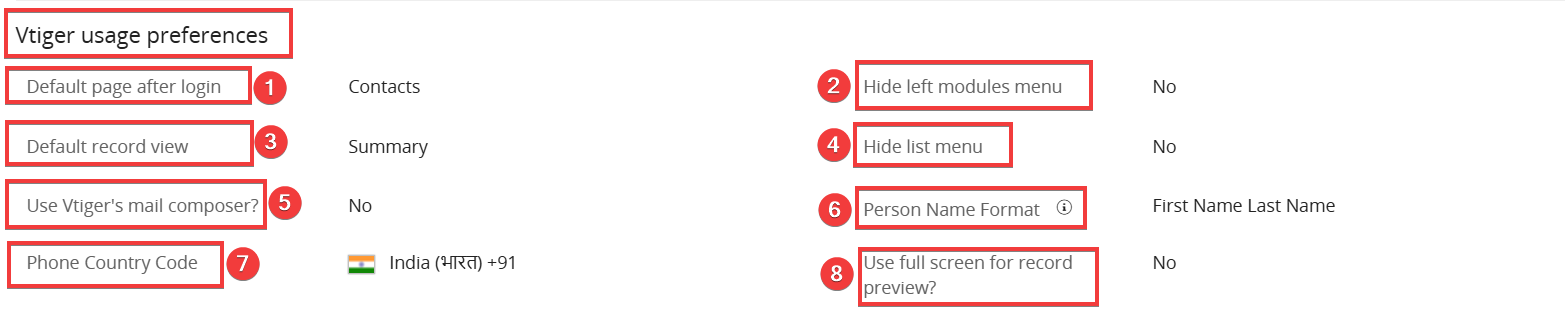
- Default Page After Login - Choose the page or module to display immediately after logging in.
- Hide Left Modules Menu - Enable the option to hide the left-hand navigation menu.
- Hide List Menu - Enable the option to hide the list menu for a streamlined view.
- Default Record View - Select the default format for viewing records (e.g., Summary or Details).
- Use Vtiger’s Mail Composer - Enable the built-in mail composer for sending emails directly from the CRM.
- Person Name Format - Choose how names are displayed (e.g., First Last or Last, First).
- Phone Country Code - Set a default country code to prefix phone numbers automatically.
- Use Full Screen for Record Preview - Enable full-screen mode for viewing record previews.
Signature
Create a personalized email signature, including text and your company’s logo.
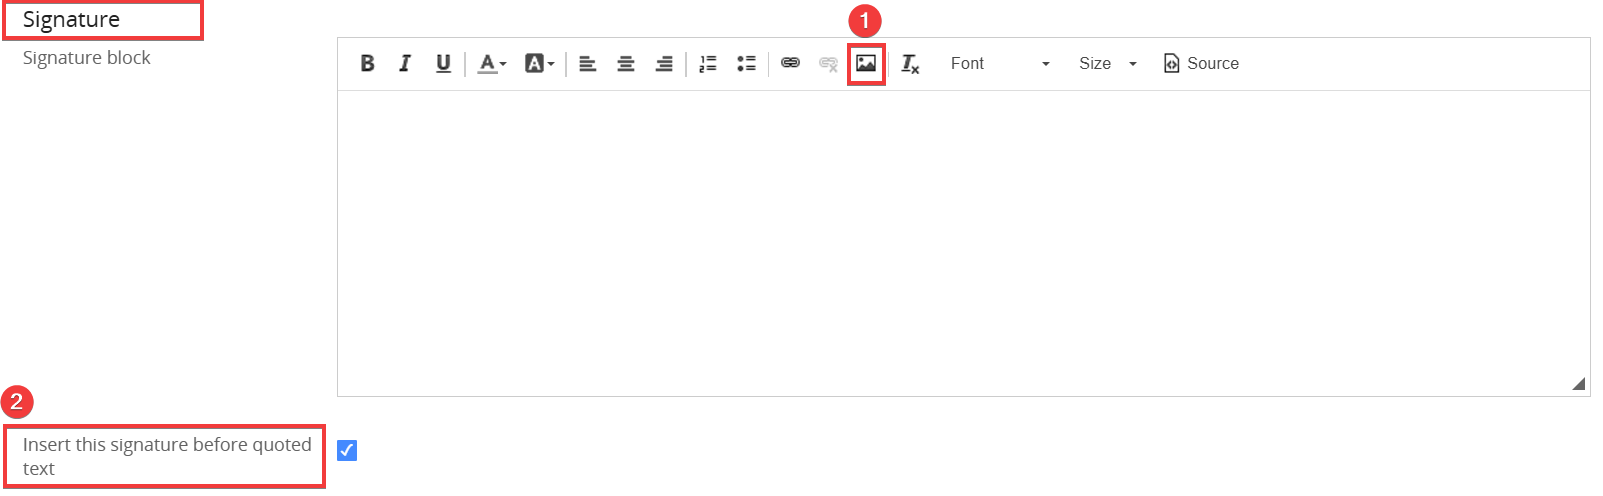
- Use the Image toolbar option to add a logo.
- Enable the Insert this signature before quoted text checkbox to ensure your signature appears before quoted text in emails.
Changing the Username
As an Admin user, you can change the username.
Follow these steps to change the username:
- Log in to your CRM account.
- Click the User Menu on the top right corner of the CRM screen.
- Click My Preferences. The My Preferences page opens.
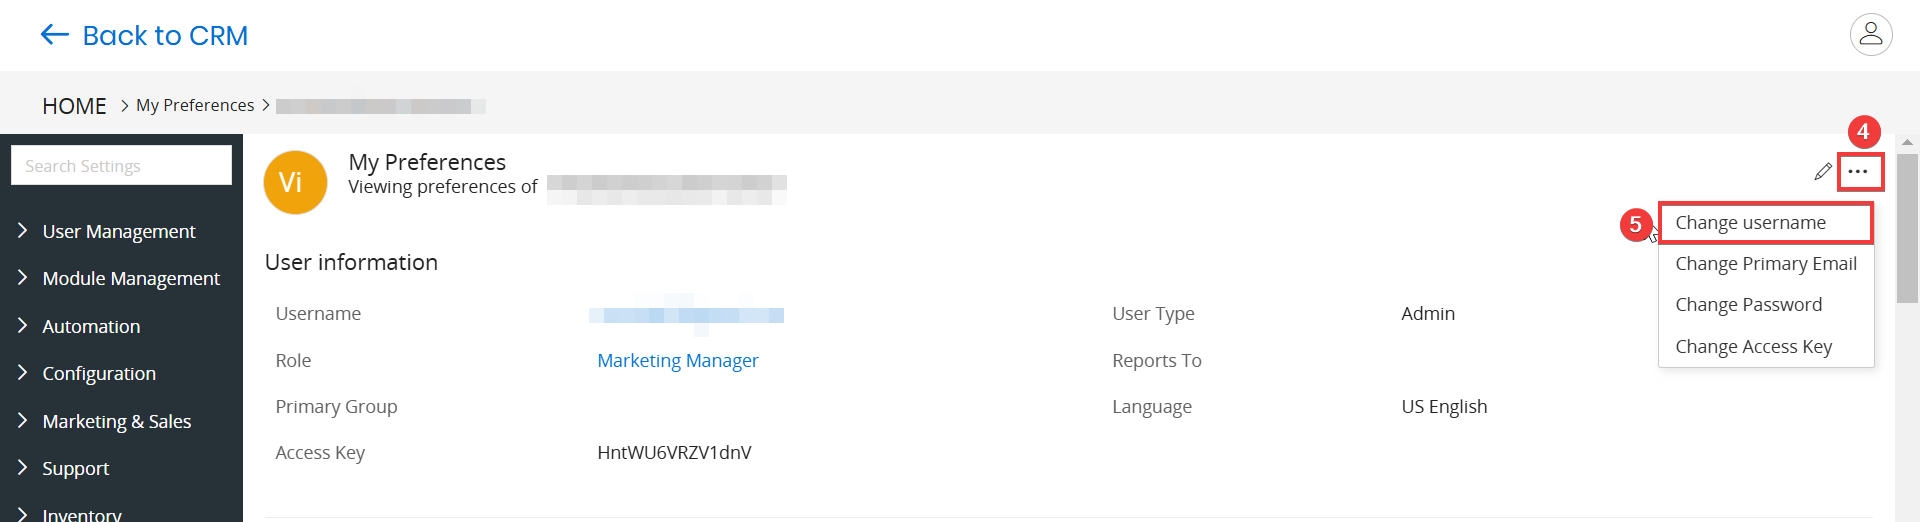
- Click the More icon on the top right corner of the user record.
- Select the Change Username option. A Change Username window opens.
- Enter or select the following information to change the username:
- User Name - Enter the new username.
- Password - Enter your current password to authorize the change.
- Confirm Password - Re-enter your current password to confirm.
- Click Save.
Changing the Primary Email
Follow these steps to change the Primary email:

- Log in to your CRM account.
- Click the User Menu on the top right corner of the CRM screen.
- Click My Preferences. The My Preferences page opens.
- Click the More icon on the top right corner of the user record.
- Select Change Primary Email. A change Primary Email window opens.
- Enter or select the following information to change the primary email address:
- New Primary Email - Enter the new primary email address.
- Confirm Password - Enter your current password to authorize the change.
- Click Save.
Changing the Password
Follow these steps to change the Password:
- Log in to your CRM account.
- Click the User Menu on the top right corner of the CRM screen.
- Click My Preferences. The My Preferences page opens.
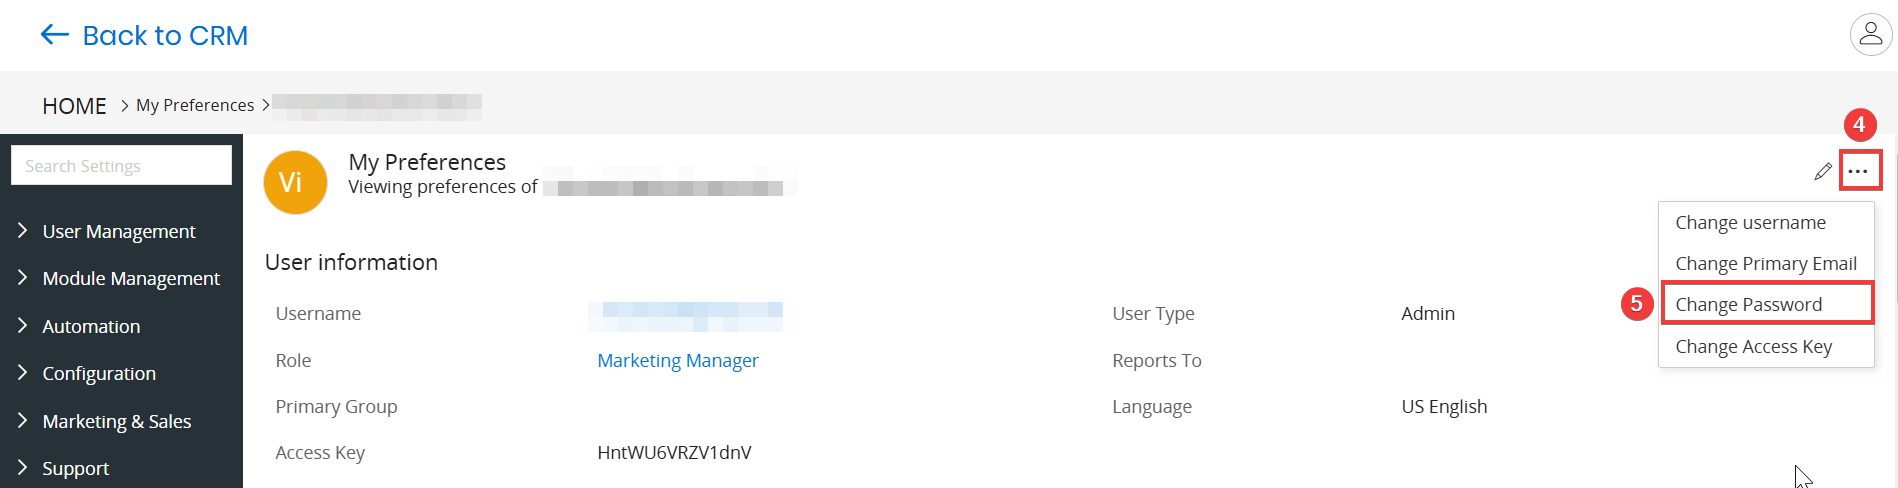
- Click the More icon on the top right corner of the user record.
- Select Change Password. A Change Password window opens.
- Enter or select the following information to change the Password:
- New Password - Enter the new password you wish to set.
- Confirm Password - Re-enter the new password to confirm it.
- Click Save.
Changing the Access Key
Access Key is a unique security token generated automatically when a user is created. It is used for authentication in REST APIs/Web Services.
Follow these steps to generate a new Access key:
- Log in to your CRM account.
- Click the User Menu on the top right corner of the CRM screen.
- Click My Preferences. The My Preferences page opens.
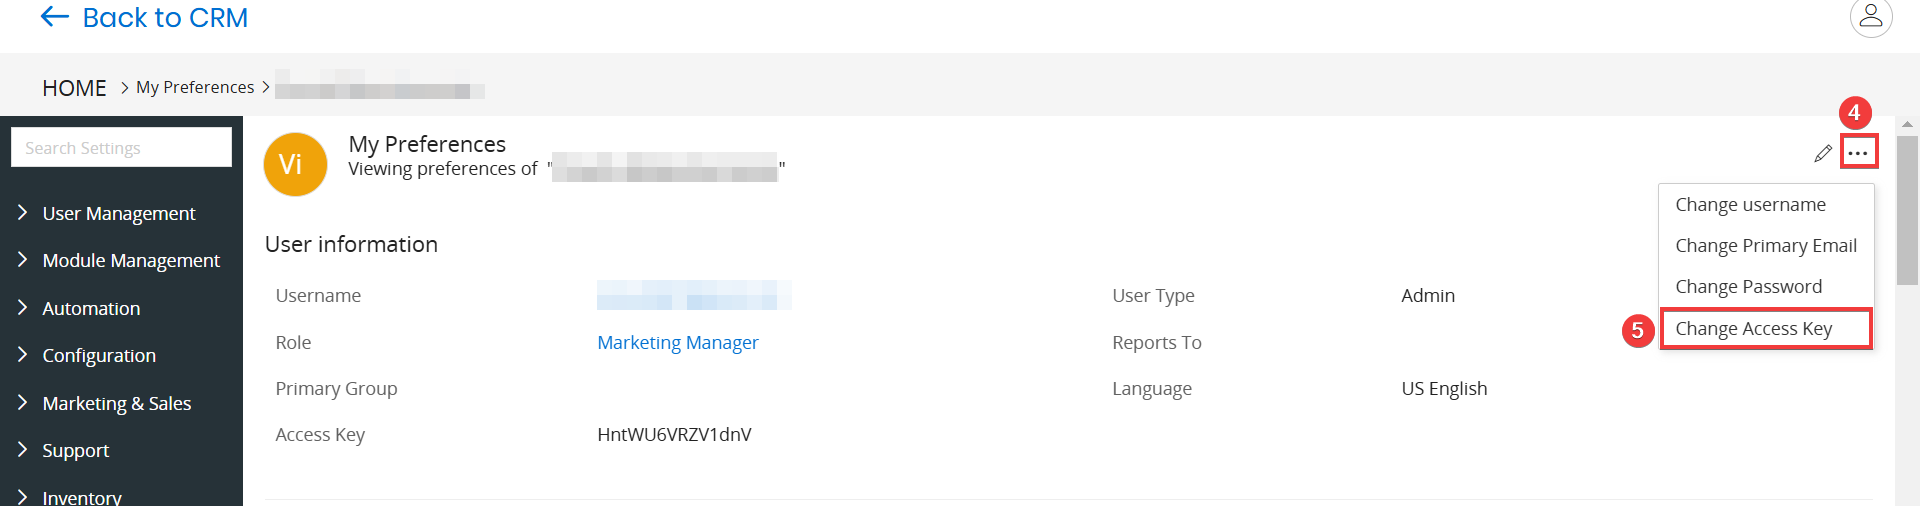
- Click the More icon on the top right corner of the user record.
- Select Change Access Key. A New access key requested pop-up window opens.
- Click Yes.
Troubleshooting Tips
- Issue: Unable to Change Username or Primary Email
- Ensure the username or email address is unique and not already in use.
- Confirm your current password during the update process.
- After two failed attempts, updates are locked for a day, and alerts are sent to the IT and Security teams.
- Issue: Password Not Accepted
- Verify that the password meets the requirements: 8-64 characters, at least one uppercase letter, one number, and one special character.
- Issue: Disabled Modules Appear in My Preferences
- Check if the module is correctly disabled in Settings > Modules.
- Ensure that the disabled module is not set as the default page after login in user preferences.