Articles in this section
QuickBooks Desktop Version Integration
Feature Availability
Vtiger Editions: One Pilot | One Growth | One Professional | One Enterprise
Introduction
QuickBooks is accounting software for small and medium-sized businesses. It comes in both on-premise and cloud-based versions. QuickBooks covers a wide range of accounting functions, such as:
- Track expenses
- Manage payroll
- Generate reports
Are you a QuickBooks and Vtiger CRM user?
Then integrate your QuickBooks data with Vtiger CRM. Sync your contacts, products, and services today, and see how easy it is to manage your inventory, payments, etc.
Benefits
The benefits of integrating your QuickBooks account with Vtiger CRM are:- Eliminate double data entry or errors that might occur during an exchange of information between the sales and accounting teams.
- Access your customers’ billing status, payment details, and shared documents, directly within Vtiger CRM.
- Create invoices, with just a few clicks, right from a Quote or Sales order in Vtiger, and then sync with QuickBooks, ensuring data accuracy.
You need to have the following downloaded and installed before you can start syncing Vtiger CRM with QuickBooks (Desktop Version).
- Install the QuickBooks Desktop Software.
- Install the QuickBooks Web Connector app and download the .QWC file from Vtiger.
- Install Vtiger CRM On-Demand.
QuickBooks Desktop Software
Follow these steps to download the QuickBooks installation file to your desktop:
- Sign in to your Intuit account with the email address you used to purchase QuickBooks Desktop.
- Select QuickBooks Desktop under Manage your QuickBooks.
- Find the version you need.
- Select Details to see your license number, product number, and the download link.
- Select Download to get the installation file.
QuickBooks Web Connector
QuickBooks Web Connector helps in syncing data from QuickBooks to Vtiger and vice versa.
You need to first install the QWC app and match the file location. Only then you will be able to add the organization (your company name) in QuickBooks.
Download and Install the QuickBooks Web Connector App (Installer)
The QuickBooks Web Connector app exchanges data between QuickBooks and Vtiger CRM.
Follow these steps to install the Web Connector:
- Download the Connector from here.
- The .exe file will be in your Downloads folder.
- Double-click and run the .exe file to install the Web Connector.
- Locate the QuickBooks Web Connector on your local computer.
- Click Start
- Click All Programs
- Click QuickBooks
- Click Web Connector
Download QuickBooks Web Connector File (.QWC)
The .QWC file helps you to establish a connection between your QuickBooks account and your Vtiger CRM account.
Follow these steps to download the .QWC file from Vtiger CRM:
- Log in to your CRM.
- Go to the main Menu.
- Click Settings.
- Go to the Extensions section.
- Click QuickBooks.
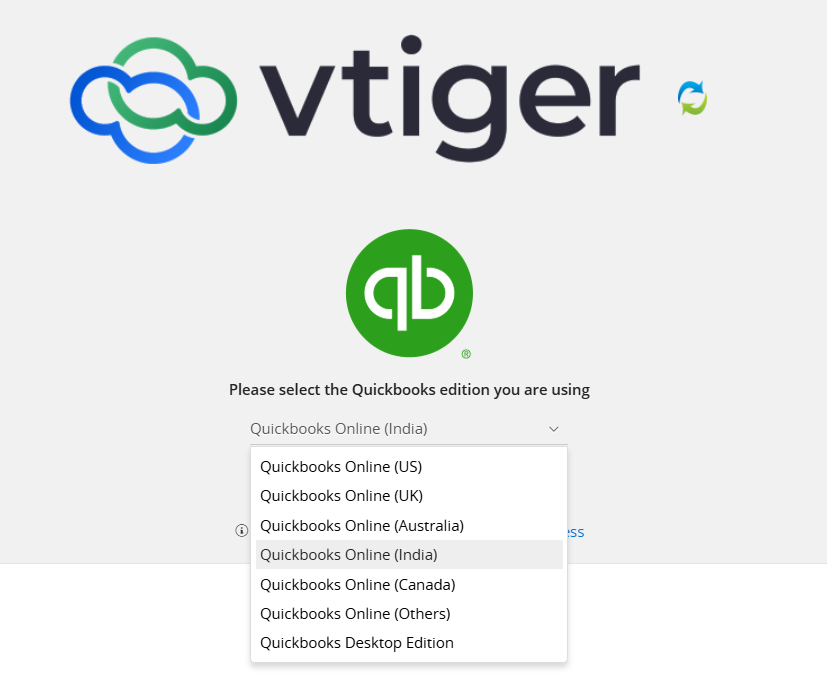
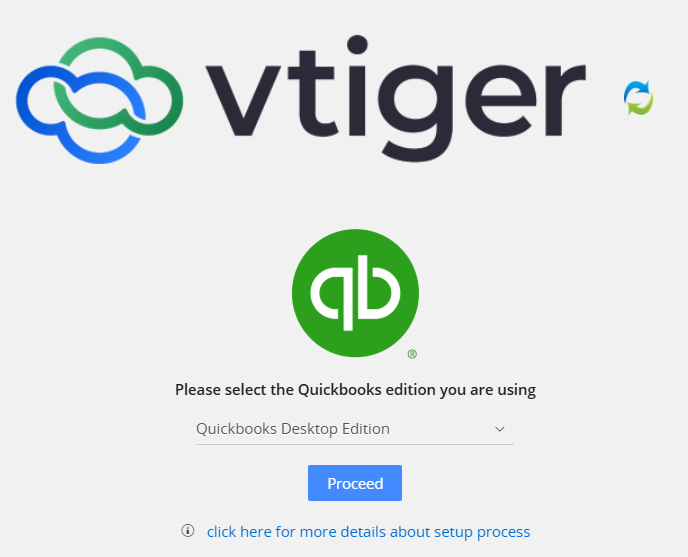
- Choose the QuickBooks edition you are using from the dropdown - QuickBooks Desktop Edition.
- Click Proceed.
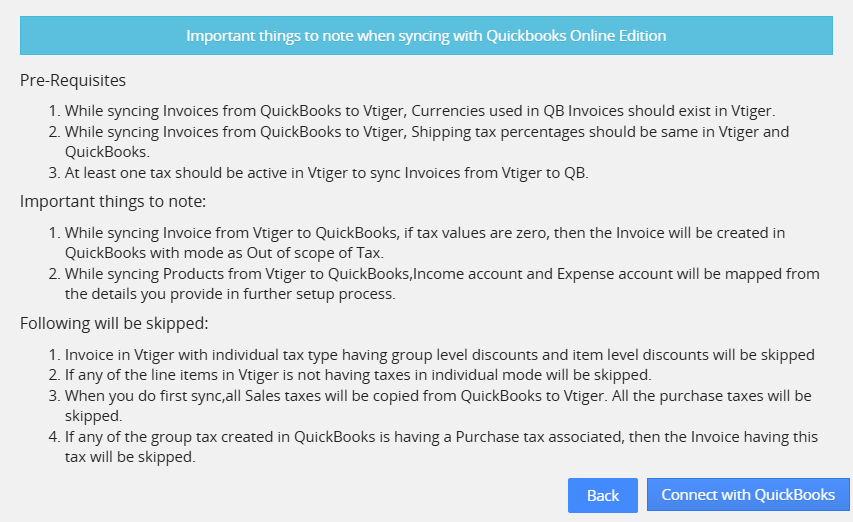
- Read the pre-requisites and click Next.
- To download the .QWC file, add the following information in the Download .QWC File window:
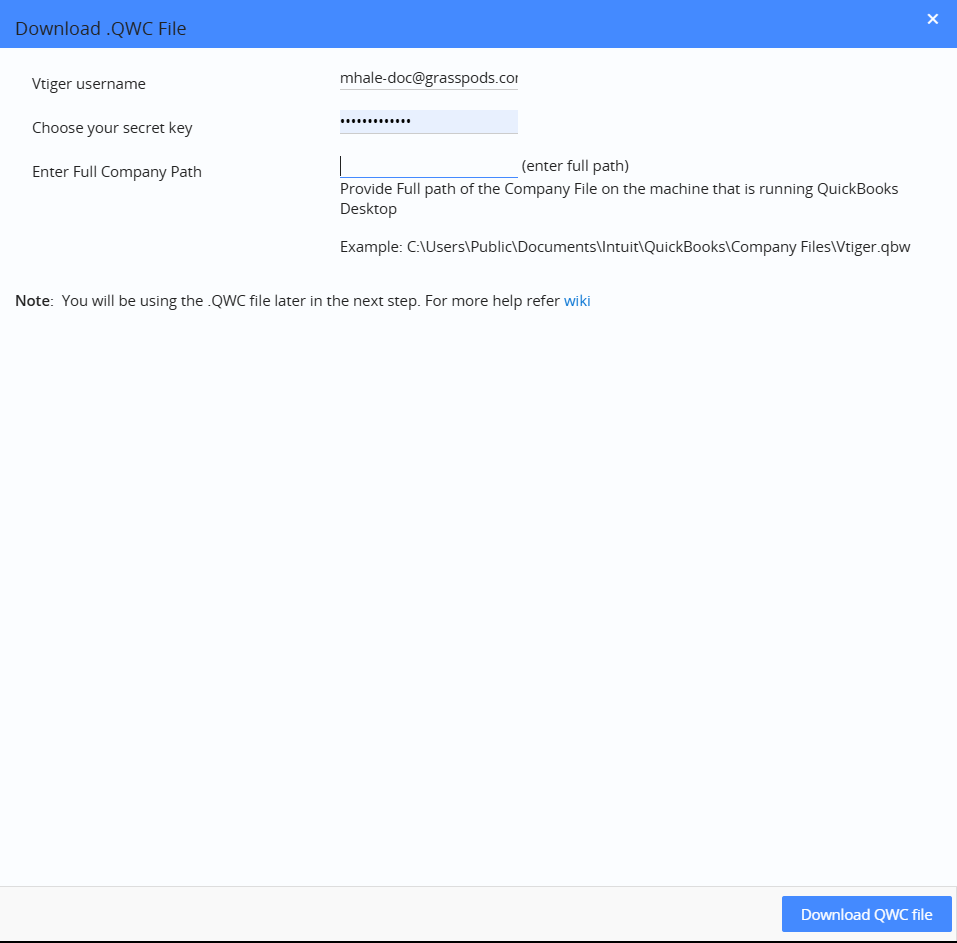
- Vtiger User Name - Enter your Vtiger user name,
- Secret Key - Add the desired secret key in the Choose your secret key window
- Full Company Path - Provide the full path of your QuickBooks Company File. Here's where QuickBooks normally saves company files
- For normal QuickBooks installations, the default path is mentioned in the above link. For example:
- Default path in XP: C:\Documents and Settings\All Users(Shared) Documents\Intuit\QuickBooks\Company Files\Vtiger Inc.qbw
- Default path in Windows Vista and Windows 7: C:\Users\Public\Public Documents\Intuit\QuickBooks\Company Files\Vtiger Inc.qbw
- The company path should end with a .qbw extension.
- For normal QuickBooks installations, the default path is mentioned in the above link. For example:
- If your QuickBooks Desktop software is installed on the server, then you can get the company path by hitting the F2 once the software is open on your machine. This displays a pop-up window with the company information on the company path.
- Click Download the QWC file. You’ll be prompted to save the QWC file in the desired location on your machine. After the save, you’ll be redirected to the actual QuickBooks sync view in Vtiger CRM.
Note: If you have configured the company path incorrectly, you can download the file again by clicking Download .qwc file.
Adding the QWC file to QuickBooks Web Connector
After successfully downloading the QWC file from Vtiger, you’ll need to add it to QuickBooks Web Connector. Follow these steps to add the .QWC file to QuickBooks Web Connector.
- Click Start.
- Select All Programs.
- Select QuickBooks.
- Select Web Connector.
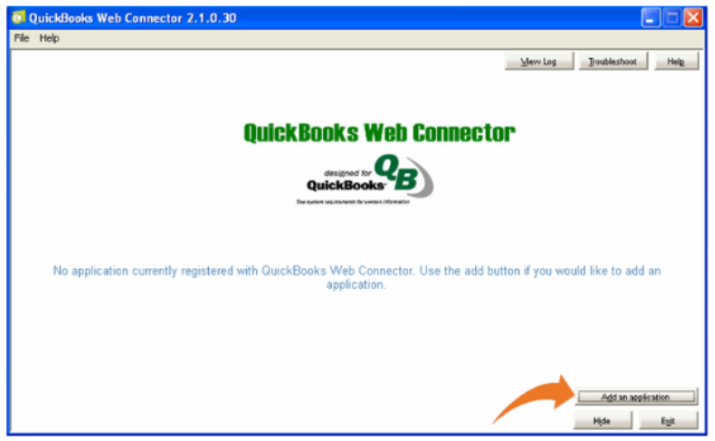
- Click Add an application in the QuickBooks Web Connector window.
- Browse and select the QWC file that was downloaded from Vtiger CRM in the Select a .QWC file window.
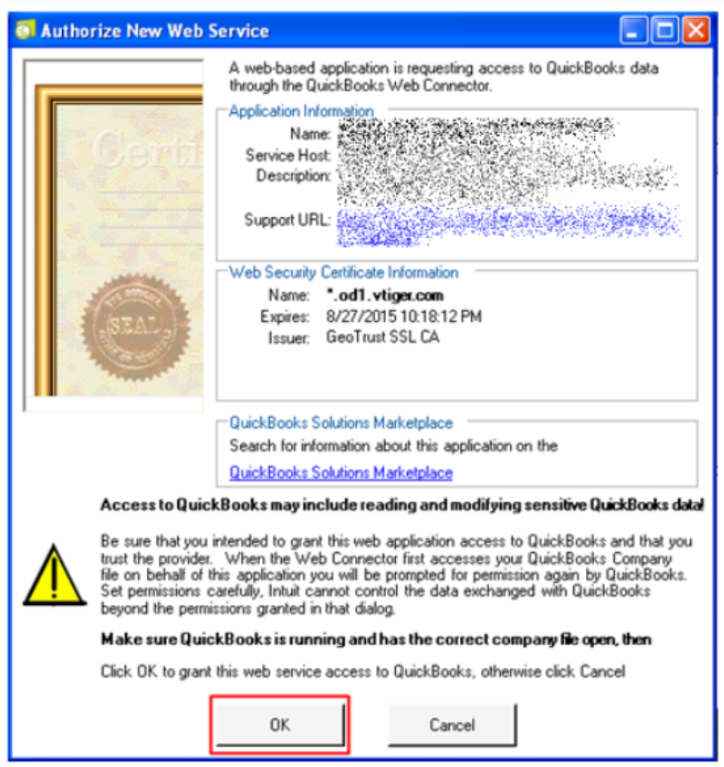
- Click OK in the Authorize New Web Service popup window.
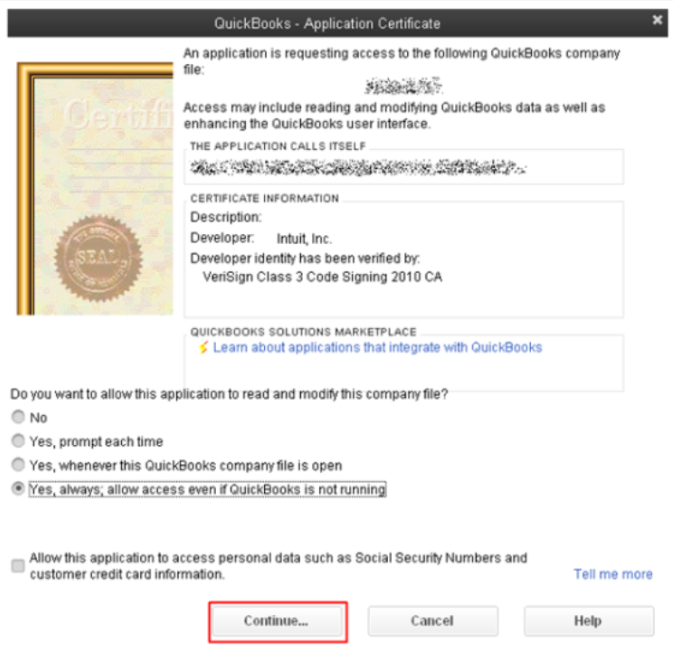
- Select the last option: ‘Yes, always; allow access even if QuickBooks is not running’ in the QuickBooks – Application Certificate window.
- Click Continue.
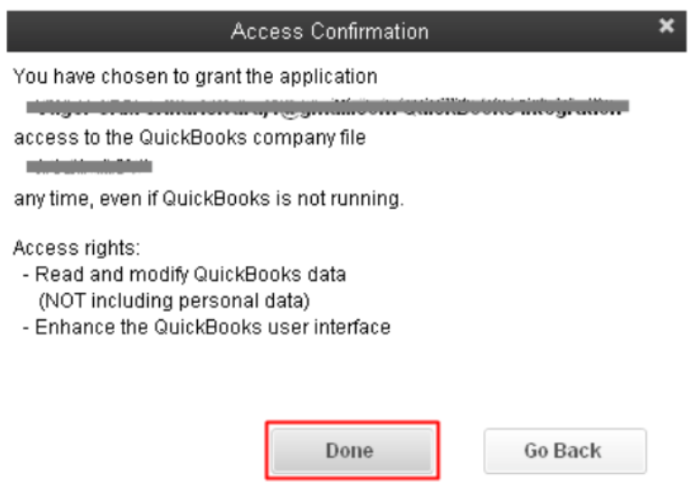
- Click Done in the Access Confirmation window.
- Review the Vtiger CRM application that was added to the Web Connector, and provide the password you have chosen earlier.
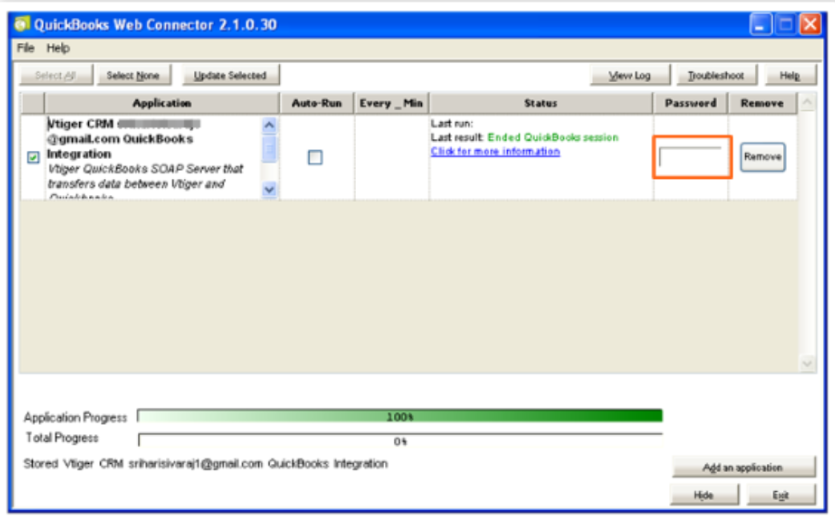
- The application is added to QuickBooks Web Connector, and you are all set to sync data between Vtiger and QuickBooks Desktop.
Note: Before you perform every sync, remember to clear the current log.
But how do you know if the sync process was successful? You can check if the sync process was a success by viewing the sync log in the Web Connector.
- Viewing the sync log
- Click View Log at the top right corner of the screen. This will help you find if the sync worked and the data was transferred successfully. If a sync process fails, the log displays the errors using which you can correct the configuration and run the sync again.
- For example, if a sync process failed since authentication was not carried out properly, view the log to see if the configuration was correct.
- Downloading the sync log
- The log is displayed in Notepad. You can download and save the log on your system for reference purposes.
- Clearing the current log, click Clear Log.
- Always remember to clear the current log whenever you run a fresh sync.
Synchronization Between Vtiger CRM and QuickBooks
Vtiger CRM integration with QuickBooks Desktop helps you sync data between Contacts, Products, Services, and the Invoices modules.
So what does this involve? Syncing is a simple process. Field mapping occurs when you select the modules you want to sync and choose the sync direction. You click sync to update the data, and you are ready to go.
Note:
Vtiger does not delete records from your QuickBooks account after synchronization and vice-versa. For example, consider ‘Contact A’ which exists in both Vtiger CRM and QuickBooks. If you delete this Contact A from Vtiger and then perform a sync operation, Contact A still remains in QuickBooks. This operation holds good for vice-versa also.
When contacts, vendors, products, and services are synced from Vtiger to QuickBooks, duplicate records will also be linked.
Data Sync
During the sync process, data from the following modules are updated:
|
|
|
|
|
|
|
|
|
|
|
|
|
|
|
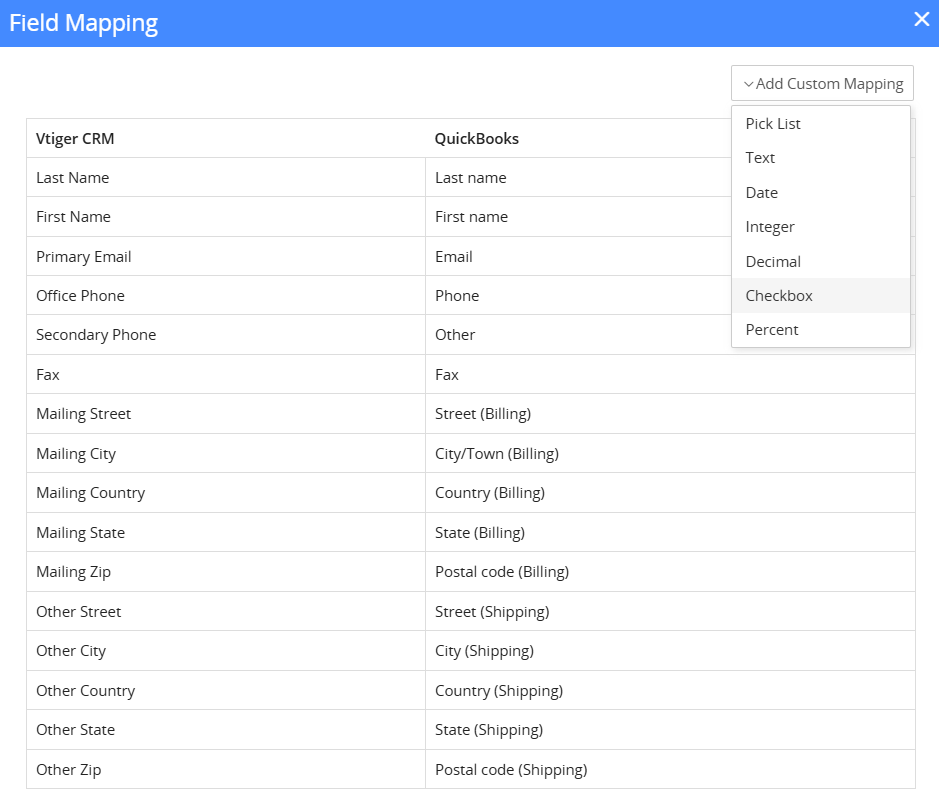
Field Mapping
Field Mapping ensures that important information is transferred mutually between Vtiger CRM and QuickBooks during the data synchronization process. Peruse these tables below. They list the data that is synced between Vtiger and QuickBooks for each module.
You can configure and map custom fields for your QuickBooks Desktop application. You can use the Configure option to view and modify Vtiger and QuickBooks field mapping.
Synchronization of Contacts
|
|
|
|
|
|
|
|
|
|
|
|
|
|
|
|
|
|
|
|
|
|
|
|
|
|
|
|
|
|
|
|
|
|
|
|
Synchronization of Products and Services
|
|
|
|
|
|
|
|
|
|
|
|
|
|
|
Synchronization of Invoices
|
|
|
|
|
|
|
|
|
|
|
|
|
|
|
|
|
|
|
|
|
|
|
|
|
|
|
|
|
|
|
|
|
|
|
|
|
|
|
|
|
|
|
|
|
|
|
|
|
|
|
|
|
|
|
|
|
Selecting Modules and Sync Direction
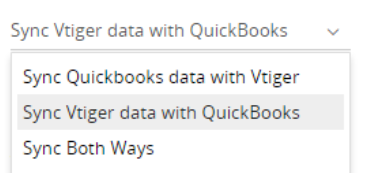
Sync direction
Vtiger CRM provides you with the option of syncing your CRM data with QuickBooks in three ways:
- From Vtiger to QuickBooks
- From QuickBooks to Vtiger
- Sync both ways
Selecting modules to sync
Vtiger CRM gives you the ability to sync only desired modules and configure the direction of the sync.
Follow these steps to initiate the sync process:
- Log in to your CRM account.
- Click QuickBooks from the Inventory app.
- Click Sync Settings.
- Click the corresponding check-boxes to select desired modules to enable sync.
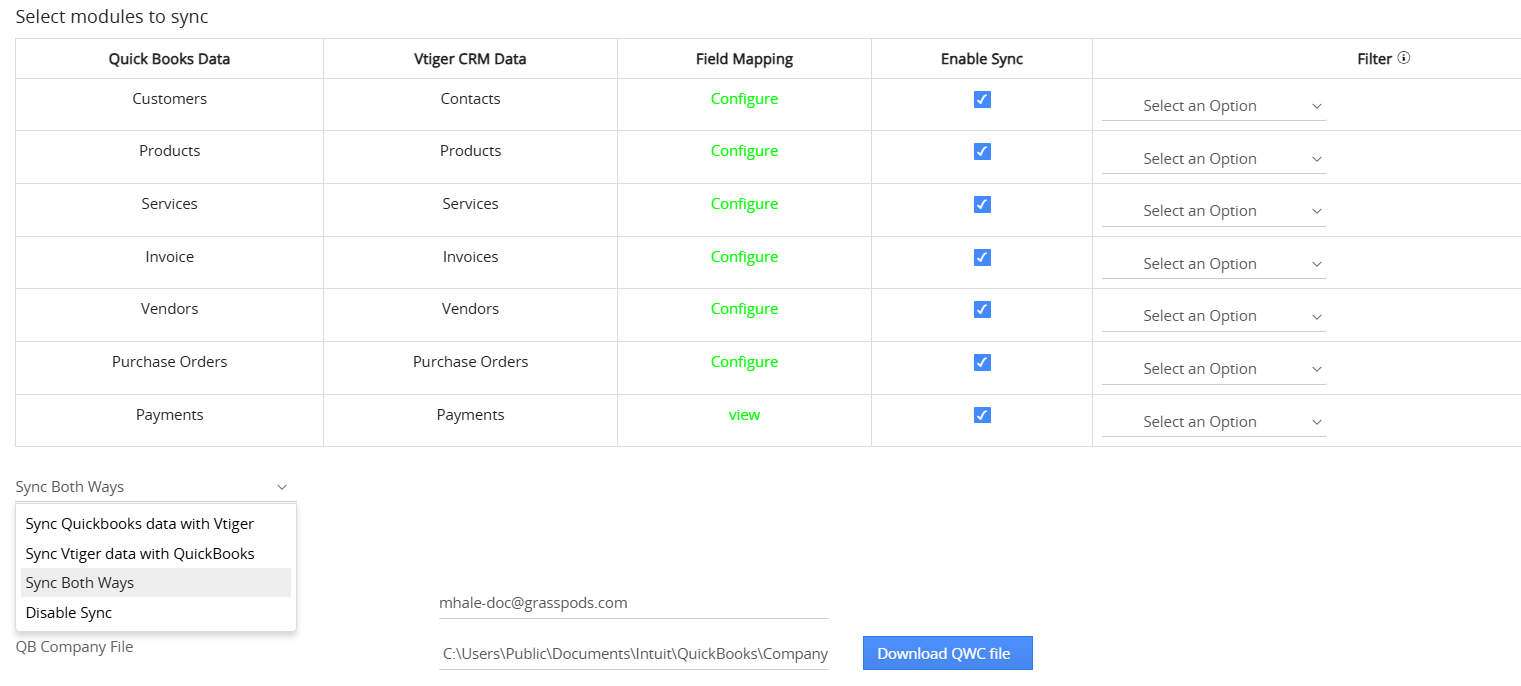
- Configure: Click to view the default Field Mapping and add custom mapping.
- Filter: Records sent from Vtiger to QuickBooks will be filtered based on this criteria.
- Select the direction of sync:
- Sync QuickBooks data with Vtiger
- Sync Vtiger data With QuickBooks
- Sync both ways
- Click Save.
- Open your QuickBooks Web Connector, click the check-box on the left side of the Vtiger Application that was added earlier.
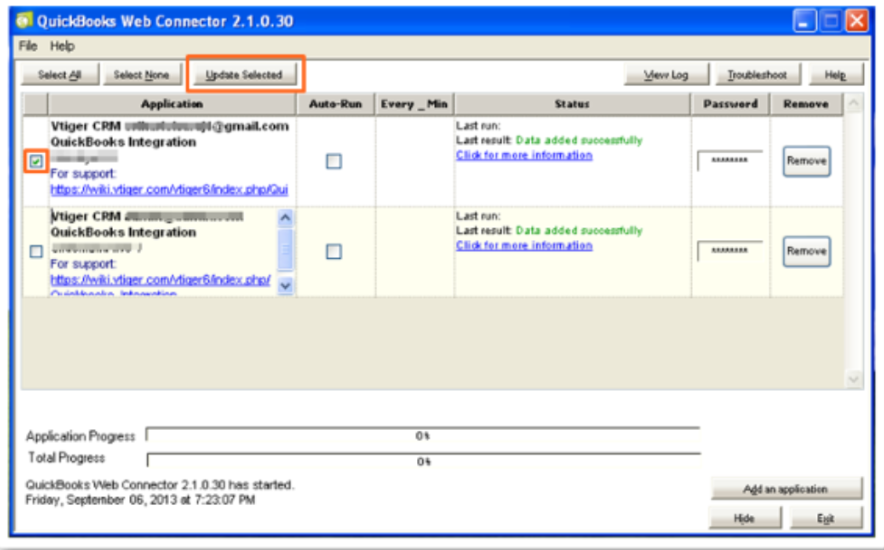
- Click Update Selected.
The selected modules will be updated.
Troubleshooting Tips
Prerequisites
Here are a few prerequisites for the sync to work:
- Enable Sales Tax in Vtiger. Click the Configuration icon > CRM Settings > Other Settings > Tax Calculations and enable Sales tax under Product & Service Taxes
- Enable inventory in QuickBooks. Click Edit > Preferences > Items & Inventory > Company Preferences > Click the checkbox Inventory and Purchase orders are active > Click OK.
- Create an account of type Income in QuickBooks with the name Vtiger Account. Click Lists > Chart of Accounts > Right Click your Mouse > New > Select type Income > Continue > Provide Vtiger Account > Save and Close. Products and Services created in QuickBooks from Vtiger will be linked to this account.
- Enable Sales Tax in QuickBooks. Click Edit > Preferences > Sales Tax > Company Preferences > Click Yes > Click Add sales tax item > Select Sales Tax Item > Provide desired Sales Tax Name and Tax Rate > Click OK.
After the sync happens, some things may appear different on your screen. Read the following and you will know what they are!
Vtiger to QuickBooks
- QuickBooks accepts only a certain number of characters for some fields. If you exceed the limit, the field values are truncated. This persists when you sync UTF-8 characters.
- Products from Vtiger will be synced as items of type Inventory Part in QuickBooks.
- Services from Vtiger will be synced as items of type Service in QuickBooks.
- While syncing invoices from Vtiger to QuickBooks, you will be adding line items to your QuickBooks account.
- Vtiger Invoice Tax: Taxes from Vtiger will be linked to this line item.
- Vtiger Discount Amount: Discounts from Invoices in Vtiger are calculated as a single discount amount and mapped to this line item.
- Vtiger Adjustment Add: Adjustments, like add from Invoices in Vtiger, will be linked to this line item.
- Vtiger Adjustment Deduct: Adjustments like deductions from invoices in Vtiger will be linked to this line item.
- Vtiger Shipping Charges: Shipping charges provided in Vtiger will be mapped to this line item.
- Vtiger Shipping Taxes: Shipping taxes from Vtiger will be mapped to this line item.
- Note: Modifications made to the above line items will affect the actual value in Vtiger after records are synced. For example, changes made to the Vtiger Shipping Charges line item in QuickBooks will affect the shipping charges in Vtiger Invoices.
- Make sure you do not sync QuickBooks’ invoices that have both Vtiger Adjustment Add and Vtiger Adjustment Deduct line items.
- On sync, the Vtiger Contact Number will be appended to the Vtiger Contact Name in Quickbooks. For example, Jessie Stokes CON123.
- Deleting a record: If you delete a record in the CRM after sync, you won’t be able to update the record from QuickBooks to Vtiger. So do not delete a record unless you really want to.
- If you delete a record from the CRM after sync, then the record won’t be available for:
- The next update
- The next sync
- If you try to update a deleted record from QuickBooks to Vtiger, then the sync process skips the deleted record
QuickBooks to Vtiger
- Items of the type Inventory Part and Non-inventory Part will be synced as Products in Vtiger.
- Items of the type Service and Other Charge types in QuickBooks will be added as services in Vtiger.
- Other types of items in QuickBooks are not synced with Vtiger. For example, Group, Sub Total, Payment, etc.
Common Errors
Below are a few common errors users often face during the sync process:
- Error: Vtiger Invoice contains products that are not available in QuickBooks – Vtiger Error.
- The specified products, such as Product A or Service B, are not in QuickBooks. First, you must sync these products.
- Error: Vtiger Invoice contains currency that is not available in QuickBooks - Vtiger Error.
- The base currency of Vtiger CRM and QuickBooks should be the same.
- If the base currency is the same in both applications and the issue persists, follow these steps:
- Go to Invoices.
- Click on Skipped Invoice.
- Go to Item Details.
- Update the record currency to match the base currency.
- Save the Invoice.
- Try syncing the invoice once more.
- Error: The specified string length does not match the supported length. Min:0 Max:4,000 supported. Supplied length:4,312 - QuickBooks Error.
- Product descriptions must be fewer than 4,000 characters, as QuickBooks has a character limit of 4,000 for item descriptions.
- Error: Invalid account type: You can't associate a product or service with accounts of certain types(such as Debtors and Creditors). If the product or service is something you sell, use an income account. If the product or service is something you buy, use an expense account.-QuickBooks Error.
- Please follow these steps to resolve the issue:
- Go to the QuickBooks Sync Settings page.
- Click on Account settings.
- Give a proper expense account and save
- Go to the sync log of QuickBooks.
- Click on Sync Now.
- Please follow these steps to resolve the issue:
- Error: Related To does not have a value
- Please follow these steps to resolve the issue:
- Go to Module Layouts & Fields of Payments.
- Make Related To non-mandatory.
- Go to the sync log of QuickBooks.
- Click on Sync Now.
- Please follow these steps to resolve the issue:
- Error: Vendor related to the QuickBooks Invoice is not created in Vtiger - Vtiger Error
- The specified vendors are not found in Vtiger. Please sync the vendors first before syncing the purchase orders.
- Error: Product/Service linked to the QuickBooks Invoice is not synced to Vtiger - Vtiger Error
- The specified Products/Services are not synced to Vtiger. Please sync the Products/Services first before syncing the Invoices.
- Error: Business Validation Error: You must set a transaction amount. The status of this payment is not "Received," "Paid," or "Refunded," and hence, the transaction amount doesn't exist. - QuickBooks Error
- Please follow these steps to resolve the issue:
- Go to Payments.
- Open the skipped payments.
- Change the status Received, Paid, or Refunded and Save.
- Go to the sync log of QuickBooks.
- Click on Sync Now.
- Please follow these steps to resolve the issue:
- Error: A matching product bundle with the same name is not available in QuickBooks. Please manually create a product bundle in QuickBooks with the same name as Vtiger and resync. QuickBooks does not provide API to create or update product bundles - Vtiger Error.
- Please follow these steps to resolve the issue:
- Login to QuickBooks.
- Create a product bundle manually in QuickBooks using the same name as in Vtiger.
- Go to the sync log of QuickBooks in Vtiger.
- Click on Sync Now.
- Please follow these steps to resolve the issue:
- Error: Vtiger Purchase order contains currency that is not available in QuickBooks - QuickBooks Error. Currency of the purchase order must match QuickBooks' base currency.
- Please follow these steps to resolve the issue:
- Go to Purchase Orders.
- Open the skipped Purchase order.
- Go to the Item details block.
- Change the currency to match QuickBooks' base currency and Save
- Go to the sync log of QuickBooks in Vtiger.
- Click on Sync Now.
- Please follow these steps to resolve the issue:
- Error: Vtiger Invoice contains tax values that are not available in QuickBooks - QuickBooks Error. Vtiger-created taxes are not supported. Only QuickBooks created taxes must be used in Invoices.
- Please follow these steps to resolve the issue:
- Go to Invoice Module
- Click on the skipped invoice.
- Go to edit view
- Scroll to the item details section.
- Remove the taxes that Vtiger created.
- Save the invoice
- Go to the QuickBooks sync log.
- Click Sync Now.
- Please follow these steps to resolve the issue:
- Error: Invalid reference record id specified for currency_id. The QuickBooks currency must be present in Vtiger.
- Please follow these steps to resolve the issue:
- Go to Currencies in Settings.
- Create the currency that is in QuickBooks.
- Go to the QuickBooks sync log.
- Click Sync Now.
- Please follow these steps to resolve the issue:
- Error: Required parameter CustomerRef is missing in the request - QuickBooks Error.
- Please follow these steps to resolve the issue:
- Go to Payments.
- Open the Skipped Payments.
- Add Related Contact and Save.
- Go to the QuickBooks sync log.
- Click Sync Now.