Articles in this section
Website Tracking
Feature Availability
Vtiger Editions: One Growth | One Professional | One Enterprise
Click here to learn about various Vtiger CRM editions and feature availability.
Introduction
This module lets you track the activities performed by visitors on your website. Tracking is done using web cookies, and every time a visitor lands on the website, Vtiger checks if there is a tracking cookie. If it does not exist, it will create a new one, assign it to the Visitor, and track all their page visits on the website.
Web Activity Module
The Web Activity module helps to track a user's online movement and identify if they could be converted into a potential Lead or Contact.
If a person visits the website multiple times or spends time understanding the product, their activities can be tracked. They may also show interest in the product by signing up on the website and sharing their personal details. By accessing these details, one can reach the person to understand their interest in the product, which in turn helps to convert into a potential Lead or Contact. The Web Activity module displays the address of the page the visitor visits.
WebActivity Timeline
The WebActivity module displays an Activity Timeline that shows the page visits and the date and time the page was visited. It also shows the time spent on each page.
Page Scoring
Page Scoring gives a score for every page in a website. This is added under Web Activity Settings under the Marketing and Sales section. This is to identify the interest of the visitor. For example, if a visitor visits the Main page, a lower score is given for the main page, which will be displayed in the Web Activity Timeline. Similarly, if a visitor visits a sub-page, a higher score is given for that. Based on the score, one can gauge if the visitor can become a potential lead or contact.
Web Activity Engagements
Web Activity Engagements gives you information about the Activity Score, which is the sum of all the scores of all pages visited. It also gives the Total page visits, Total page events, and Last seen date.
Benefits
The benefits of using Website Tracking are:
- Understanding User Behavior - Website tracking helps you gain insights into how users navigate and interact with your website.
- Improved User Experience - By analyzing user behavior, you can identify areas of your website that may need improvement.
- Identify Visitor Location - Website tracking tools often provide data on the demographics and geographic locations of your visitors.
- Identify traffic sources - You can determine where your website traffic is coming from, whether it's from search engines, social media, referrals, or direct visits.
In this article, you will learn about:
- Enabling Tracking
- Converting visitors to Contacts
- Enabling Website Scoring
- Accessing the Website score for a Contact
Key Terminology
| Key Term | Definition |
| Website Tracking | This module lets you track the activities performed by visitors on your website. |
| WebActivity Timeline | The WebActivity module displays an Activity Timeline that shows the page visits and the date and time the page was visited. |
| Page Scoring | Page Scoring gives a score for every page in a website. |
| WebActivity Engagements | The Web Activity Engagements gives you information about the Activity Score, which is the sum of all the scores of all pages visited. |
Enabling Tracking
Follow these steps to enable Tracking:
- Log in to the CRM.
- Click on User Profile on the right side.
- Go to Settings.
- Look for Websense.
- Select Trackers.
This will enable and register your CRM to track all website-related activities like Website chats, Facebook chat integration, and other website-related tracking activities. Once the tracker is activated, you will see an entry on the page; here, you need to copy the script code and add it to your website.
- Example 1:
- In the Live Chat, messages from multiple sites can be received. The tracker will be added to the website for you to know from which website you are receiving messages.
- If a customer is using different WhatsApp providers(like Twilio, Gupshup) in an instance, then it will show the provider name as Twilio, Gupshup in the Chat Conversation page.
- Example 2:
- Consider a company that has two websites.
- Let us say that Site 1 is injected with Tracker 1 and Site 2 is injected with Tracker 2; they will receive chat messages from Site 1 and Site 2. If they want to know from which site a particular chat was initiated by a customer, the chat will show the Tracker name (Tracker 1, Tracker 2).

Converting Visitors to Contacts
After you copy the code and add it to your website, we provide JavaScript APIs that will help you track visitors and convert them into Contacts. Also, API gives you the ability to track specific events a visitor performs on the website, for example, clicking on the Pricing button, downloading an ebook, submitting a particular web form, etc.
For example: API Request to Create a Contact
| POST/webservice.php Content-Type: application/x-www-form-urlencoded operation=create sessionName=yourSessionName elementType=Contacts element= { "firstname": "John", "lastname": "Doe", "email": "[email protected]", "phone": "123-456-7890", // Additional fields as needed } |
In this example:
- Replace your session name with the actual session name you obtained after authentication.
- The elementType=Contacts specifies that you are creating a new contact.
- The element section contains the details of the contact you want to create, such as first name, last name, email, phone, and any additional fields required.
| { "success": true; "result": { "id": "27*1234", "firstname": "John", "lastname": "Doe", "email": "[email protected]", // Additional details } } |
- If the creation is successful, the success: true field indicates success.
- The result section contains the details of the newly created contact, including the contact ID (id: 27x1234).
Below are the API details:
- websense.convert: This API lets you convert a visitor to a contact. You can do this when the visitor submits their email address either in a web form or when signing up with you and logging in to your portal. You need to send your email address along with this API.
- You can also send the pass name attribute along with the email. This will be added to the last name of the Contact.
| if (websense) { websense.convert( { email : EMAIL_ADDRESS } ); } |
- websense. event: This API helps you track visitor actions on your website. For example, you want to track if a visitor has clicked on a particular button, a link, etc. You need to pass your custom event name to the function call.
| if (websense) { websense.event( "CUSTOM_EVENT_NAME"); } |
Enabling Website Scoring
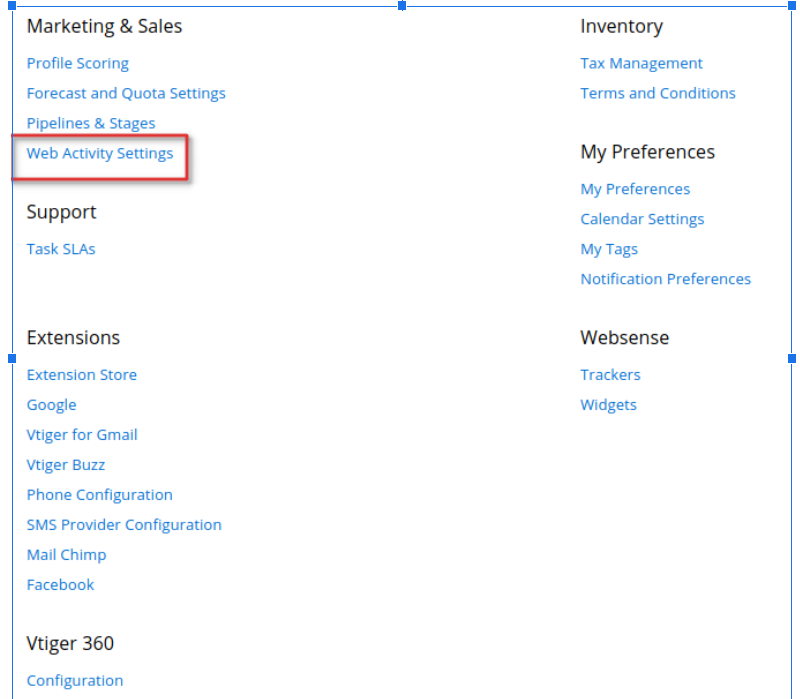
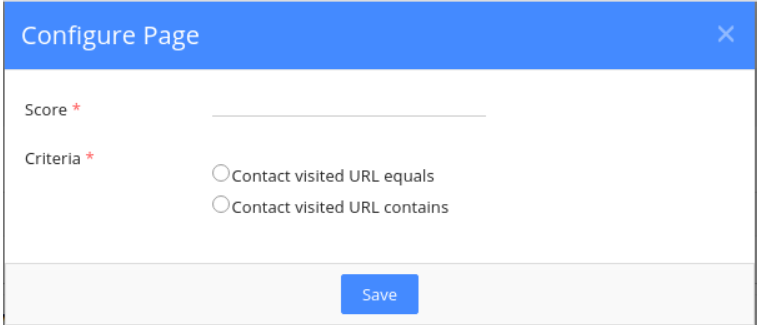
If you have installed the WebActivity module, then you get the ability to score specific page visits with some points. For this, you need to configure pages on your website and add appropriate scores. This is available on the Settings page, under the Marketing & Sales section.

You can configure the score for a specific web page using the exact URL or on a URL containing a specific string. For example, any visitor visiting the pricing page will get 10 points, and the feature page will get 20 points. You can also give a negative score, like anyone visiting the career page will get -10, or the free product page will get -25 points.
Accessing Website Score for a Contact
Once all the configuration and settings are done, you can sit back and start monitoring the score in the Contacts module.There is a widget enabled in One View of Contacts that shows the following things:
- What is their website activity score?
- When were they last seen on the website?
- How many pages did they visit?
- How many events did they perform?

To get more details and a timeline view of their activities, click on More (three dots) details. Here you will see the top 10 pages visitors visited and the top 10 events performed on your website. Also, you will see the amount of time spent on each of the pages.

Here are a few points to remember when you are tracking website visitors:
- If a visitor deletes their cookies, then they will be considered a new visitor the next time they log in and will be assigned a new cookie. In case they submit their email address, and you track it using WebSense. Convert API, then all of their actions will be linked to the matching contact.
- Tracking works for all Contacts, even imported ones. So when a matching contact submits their email address on the website, all their previous page visits and events will be tracked against them.
- To install this extension, send an email to [email protected]
Installing WebActivity Module
Since Web Activity is a paid Add-on, it is unavailable on the Add-ons page. Anyone who is interested in installing this module can send a request to [email protected]. The dev team will help you get it installed on your instance.
Once installed, you will find the Web Activity module on the Marketing and Sales Settings page.
Enabling Websense Tracker
Once the WebActivity module is installed, you must enable the Websense tracker to track the online visitor's movement. By enabling the tracker, a tracker code is generated, which must be copied and pasted into the Web Activity page. (online HTML website). This code helps you track the visitor's Web Activity.
Follow these steps to enable Websense Tracker:
- Log in to the CRM.
- Click the User Profile on the top right side of the screen.
- Click Settings.
- Look for Websense.
- Go to Trackers. The Trackers page opens.

- Enable the toggle to activate the tracker.
- Copy the Tracker Code. A message successfully copied will be displayed.
- Go to the Webform or HTML Script page where you want to paste the tracker code.
- Paste the Tracker code.
You will now be able to track the visitor’s online activity.
Adding Webform details
A Webform is an HTML form on your website that captures user information and stores it in the CRM. Once you have enabled the tracker, you can add fields by which you want to identify a customer or a visitor. For example, when a customer visits Vtiger’s website, you can add a Webform with details like Name and email ID. If they are interested in the product, they will sign up by giving their information, like name and email ID. These details are automatically added to CRM. You can use these details to reach out to your customers to understand their interest in the product.
To learn more about Webform, click here.