Articles in this section
3CX Phone Integration with Vtiger
Feature Availability
Vtiger Editions: One Pilot | One Growth | One Professional | One Enterprise
Introduction
The Phone Calls module in Vtiger lets you:
- Integrate with different service providers.
- Make and receive calls from the CRM.
- Track, manage, and log every phone call with your leads, customers, and team members—ensuring no critical conversation slips through the cracks.
- Create records for every phone call made or received.
- Integrate services such as Live Chat, email, call logging, purchase history, feedback surveying, support tickets, and more.
The Phone Calls module lets you connect to other hosted telephony services such as ViciDial and Knowlarity.
3CX Integration with Vtiger
3CX is a software-based private branch exchange (PBX) based on the SIP (Session Initiation Protocol) standard. It enables extensions to make calls via the public switched telephone network (PSTN) or via Voice over Internet Protocol (VoIP) services.
3CX integration with Vtiger CRM occurs on the server side. This integration allows users of 3CX and Vtiger CRM to:
- Synchronize Contacts: Inbound and outbound calls for external numbers trigger a CRM contact lookup to add to 3CX Contacts, so the contact name is automatically shown on your phone’s display over a call.
- Receive Call Pop-ups: When using the 3CX Web Client or Desktop App, the customer record auto-populates when you receive an inbound call.
- Call Journals: Calls are logged as events in the CRM.
- Chat Journals: Chats are logged as events in the CRM.
- Create a new contact: Auto creates contact records for calls from unknown numbers.
- Click to Call: The Click2Call Browser extensions to place calls directly from Vtiger CRM or mobile app for Google Chrome and Microsoft Edge.
Requirements
To integrate 3CX with Vtiger you need to:
- Have an active 3CX account. If you do not have an account, you must sign up with 3CX and create one.
- Provide your 3CX credentials during the configuration process in Vtiger.
- Install Vtiger’s Phone Calls module.
- Integrate your 3CX phone number with the Phone Calls module in Vtiger.
Before configuring Vtiger you have to explain the IVR flow of your phone system to the Telephony service provider (3CX) to ensure proper setup.
Benefits of 3CX Phone Integration
- Allows agents to access customer information directly within the phone system.
- Automatically logs call details and updates customer records.
- Combines voice, video, messaging, and chat in one interface.
- Easily add or remove extensions and integrate new services as the business grows.
- Provides redundancy to keep services operational during unexpected issues.
- Gain insights into customer behavior and operational efficiency for data-driven decisions.
Note: This integration is enabled only for Vtiger Cloud CRM. It is not available for the Community edition.
In this article, you will learn about:
- General configurations in Vtiger CRM
- Calls and Chat journaling
- Enabling the Leads module
Key Terminology
|
|
|
|
|
|
|
|
|
|
|
|
|
|
|
|
|
|
|
|
|
Vtiger CRM Configurations
3CX Integration with Vtiger CRM is executed in two phases:
- Vtiger CRM configurations
- 3CX Phone server-side configurations
Vtiger CRM configurations are configured on the CRM settings page and involve three stages:
- General configuration
- Calls and Chats journaling
- Enabling the Leads module
Let’s understand the Vtiger CRM configurations
General Configuration
Follow these steps for the general configuration::
- Log in to your Vtiger CRM account.
- Click the User Menu..
- Select My Preferences.
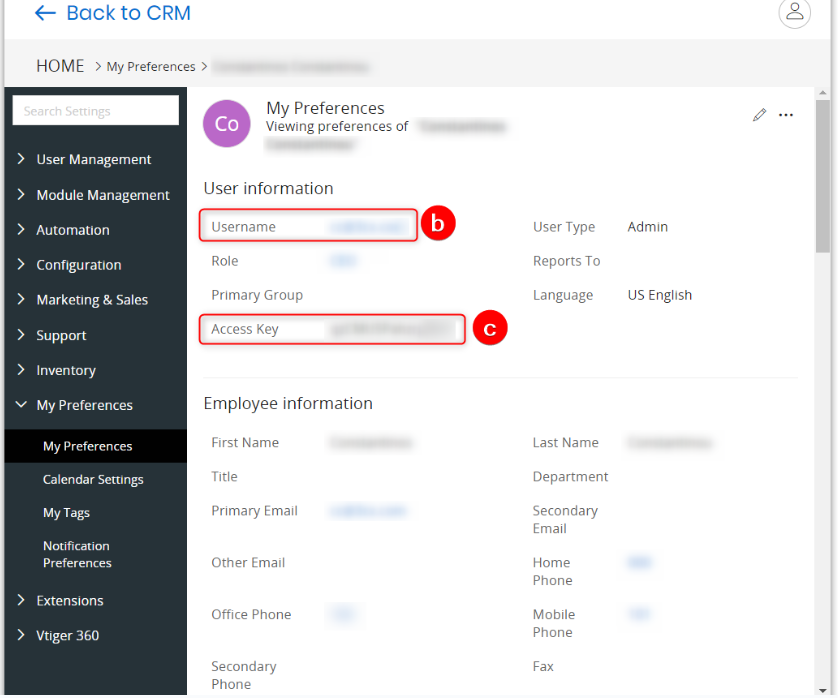
- Copy the following information to a Notepad or a document:.
- URL (as shown above)
- Username
- Access Key
Note: The above details are used in the 3CX General Settings configuration.
Calls and Chats Journaling
To report external calls and chats to Vtiger, the email address configured for the 3CX extension must match the email address of a Vtiger user. This way, 3CX can map the 3CX extension receiving the call or chat with the Vtiger user.
Enabling the Leads module
To be able to run the contact lookup on Leads, you need to ensure that the Leads module is enabled in Vtiger CRM.
Follow these steps to enable the Leads module:
- Log in to your Vtiger CRM account.
- Click the User Menu.
- Select Settings.
- Click Module Management.
- Select Modules.
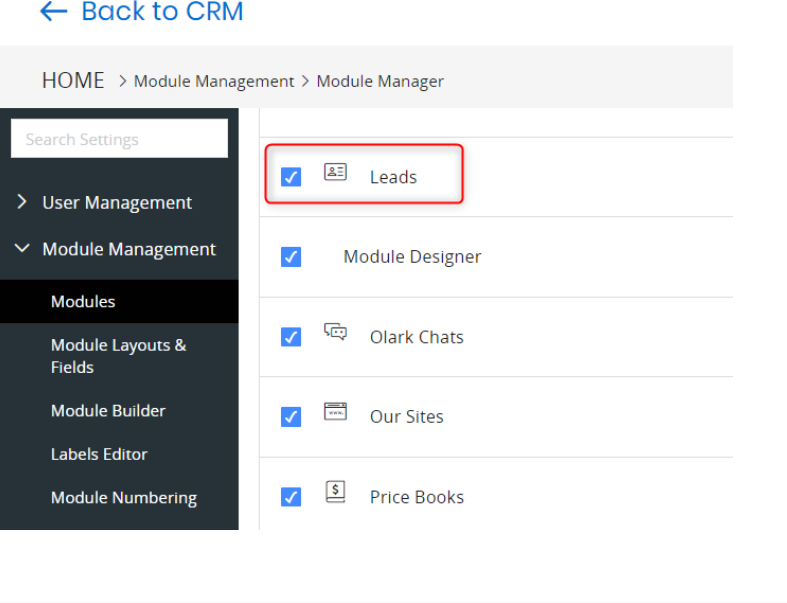
- Click the Checkbox beside the Leads module.
You have now successfully enabled the Leads module in Vtiger CRM.
3CX Phone Server Side Configurations
3CX Phone server-side configurations are done in the 3CX management console. This involves the following stages::
- Contact Matching
- General Settings
- Calls Journaling
- Chat Journaling
- Contact Creation
Contact Matching
To get a contact match with Vtiger, the incoming Caller ID must be identical to the CRM entry, including any prefix. Vtiger can store the numbers in E164 format, so ensure that your SIP Trunk provides the caller’s number in E164 format and that they match. Or you can use Caller ID Reformatting to adjust the caller’s number before being passed on to Vtiger CRM.
Follow these steps to set up the condition for contact matching:
- Log in to your 3CX Management Console.
- Click Advanced.
- Select Contacts.
- Click Options.
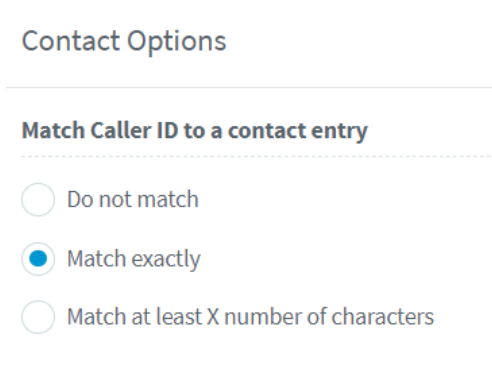
- Set the matching condition to Match exactly.
- Click OK to save.
General Settings
Follow these steps to configure the general settings:
- Log in to the 3CX management console.
- Click Settings.
- Select CRM Integration.
- Click the Server Side tab.
- Under Select a CRM Solution, select Vtiger.
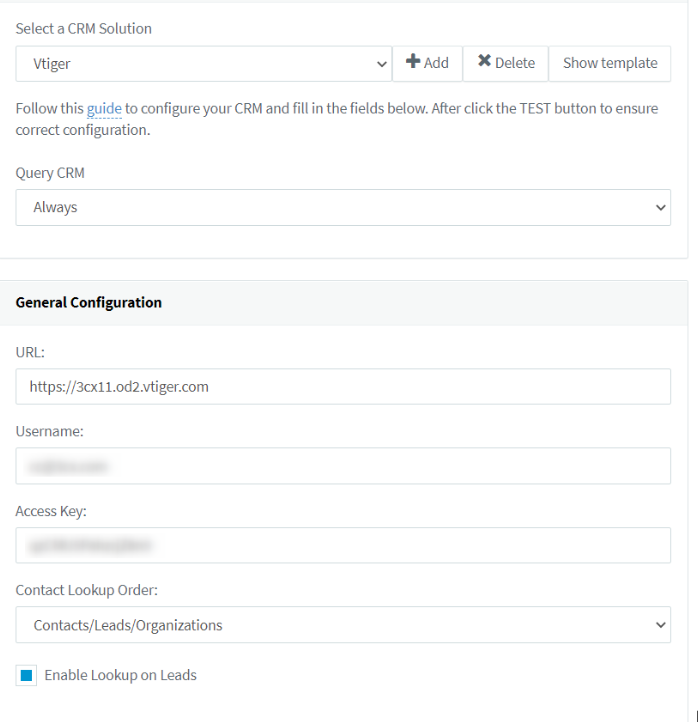
- Under General Configuration:
- Paste the following information copied in the Vtiger General Configuration section:
- URL: Ensure you enter https:// before the URL.
- Username: Enter the unique identifier assigned to a user.
- Access Key: Enter the secure key used for authentication.
- Contact Lookup Order: Select the preferred contact lookup order
- Enable Lookup on Leads: Enable the Checkbox to enable lookup on leads.
- Paste the following information copied in the Vtiger General Configuration section:
Calls Journaling
If you want to report external calls to Vtiger CRM, enable the Enable Call Journaling checkbox and configure the following parameters.
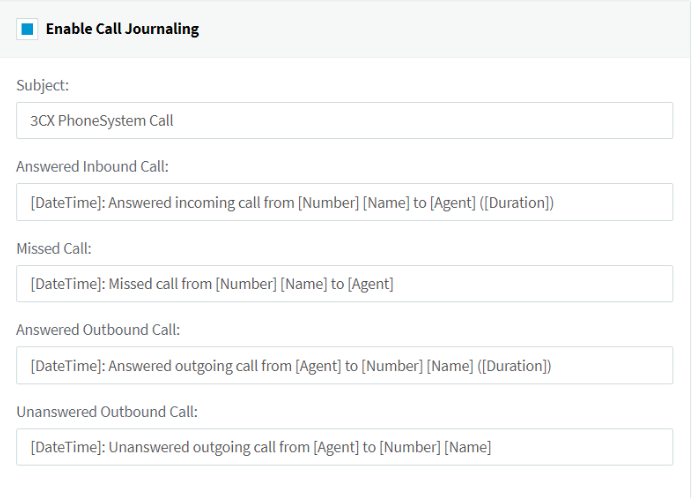
The Call Journaling parameters are
- Subject: The subject of the call.
- Answered Inbound Call: Description for answered inbound calls (agent-customer conversation).
- Missed Call: Description of missed calls.
- Answered Outbound Call: Description for answered outbound calls (agent-customer conversation).
- Unanswered Outbound Call: Description of unanswered outbound calls.
|
|
Chat Journaling
If you want to report chats to Vtiger CRM, check the Enable Chat Journaling checkbox and configure the parameters below.
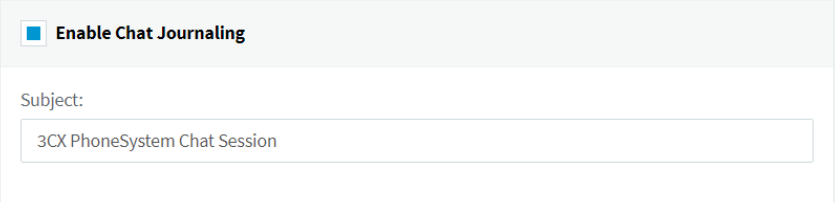
Chat Journaling parameters are:
- Subject: The subject of the chat session.
|
|
Contact Creation
If you want to create new contacts in Vtiger CRM when a call is received from an unknown number (not found in both 3CX and CRM), check the Enable Contact Creation checkbox and configure the parameters below.

Contact Creation parameters are:
- Create Contacts on Call Direction: Select if you want 3CX to create contacts on Inbound calls only or also on Outbound calls.
- Create Lead or Contact: The entity to be created (Lead or Contact). Please ensure that the Leads module is enabled in Vtiger if you select “Lead” here.
- New Contact First Name: The first name of the newly created Contact.
- New Contact Last Name: The last name of the newly created Contact.
|
|
References
Check out the following links for related information: