Articles in this section
Expenses Module
Introduction
|
|
The Expenses Module in Vtiger CRM helps you track the expenses incurred during the sales or post-sales process. The Expense module is a free add-on available in the Vtiger Extension store. Once installed, it will be available under the Service Desk app> Internal Requests.
How it works
You can record and track expenses such as food, travel, and services spent during your official visits to customers. For example, you might be negotiating a deal, you might be on a service and maintenance visit, you might be visiting your clients for training sessions, etc.
You can upload details and supporting expense-related documents while creating an Expense record. On submission, managers can review the documents and approve expense reimbursement.
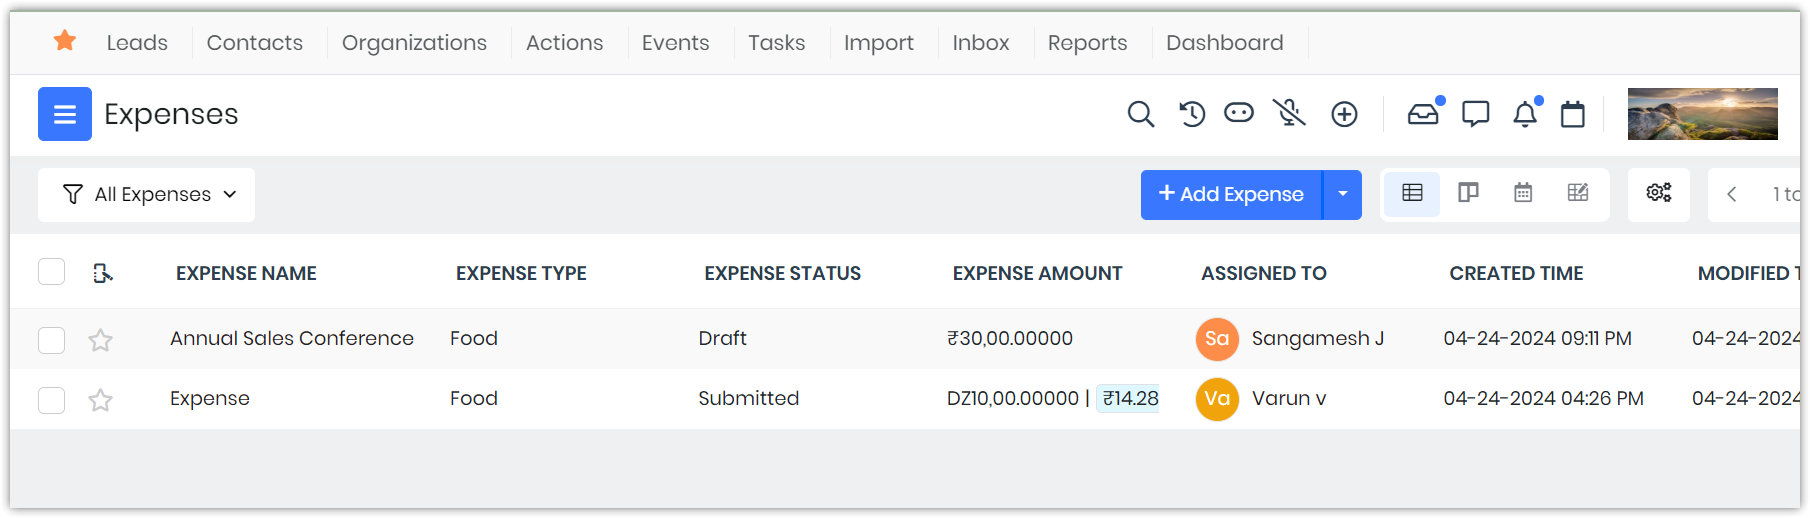
Once the Expense module is installed, you can add your expenses by clicking the +Add Expense button on the Expenses module screen. While creating an expense, you can add the following details to an expense record:
- Basic Information
- Expense Name: You can add the name of the expense, such as travel expenses, meals and entertainment, software subscriptions, client gifts, etc.
- Related to: This includes fields like Deals, Tasks, Events, Projects, etc.
- Expense Type: This includes expenses such as food, travel, software, computer hardware, electronics, furniture, equipment, and services.
- If you select travel, then you must select fields like From, To, and Distance.
- Expense Purpose: This includes fields like Sales, Marketing, HR, Customer Service, Customer Success, and Facilities.
- Expense Status: This includes statuses such as submitted, needs clarification, approved, rejected, reimbursed, and draft.
- Expense Receipt: This includes the receipts that serve as proof of a financial transaction or expenditure.
- Expense Amount: This includes the total cost of the transaction, including any taxes or fees.
- Event Name: This includes names like the Annual Sales Conference, Marketing Campaign Launch, Employee Training Workshop, Client Appreciation Dinner, and Product Launch Event.
- Description
- The Description textbox allows you to describe the expenses incurred.
When you save the expense record, it will prompt you to submit it for approval from your approver.
Custom Picklist Fields for an Expense Record
You can also add custom picklist fields to an Expense record by configuring them in the Module Layout and Fields settings page. These can include expense type, expense purpose, expense status, and so on.
Expense Module for the Field Sales App (FSA)
The Expense module is used by sales agents to record expenses spent during their official visits to customers. They can upload related documents for the expenses spent when creating an Expense record. The agents have to create expense records and submit them to their managers for approval.
Feature Availability
|
|
|
|
| |
|
| ||||
|
|
|
|
|
|
Click here to learn more about Feature Limits.
Benefits of Expense Module in Vtiger CRM
The following are the benefits of the Expense Module in Vtiger CRM:
- Centralized Expense Management: The Expense module provides a centralized platform for businesses to track and manage all their expenses in one place.
- Improved Visibility and Control: The Expense module offers real-time visibility into expenses incurred across the organization.
- Customizable Fields: The Picklist field in Expense type can be customizable in the Module Layouts and Fields Settings page. This will help you add a new field or delete any existing fields.
- Expense Approval Workflows: The Approval workflows help streamline the approval process, reducing bottlenecks and ensuring timely reimbursement for employees.
- Receipt Attachment and Documentation: This ensures accurate documentation and verification of expenses, facilitating compliance with auditing requirements and tax regulations.
In this article, you will learn about:
- Installing the Expenses module
- Adding Picklist Fields in Module Layouts and Fields page
- Creating an Expense record
Key Terminology
|
|
|
|
|
|
|
|
|
|
|
|
|
|
|
|
|
|
Installing Expenses Module
The Expense module is a free add-on. You can install it from the Extension store.
Follow these steps to install the Expense Module:
- Log in to the CRM.
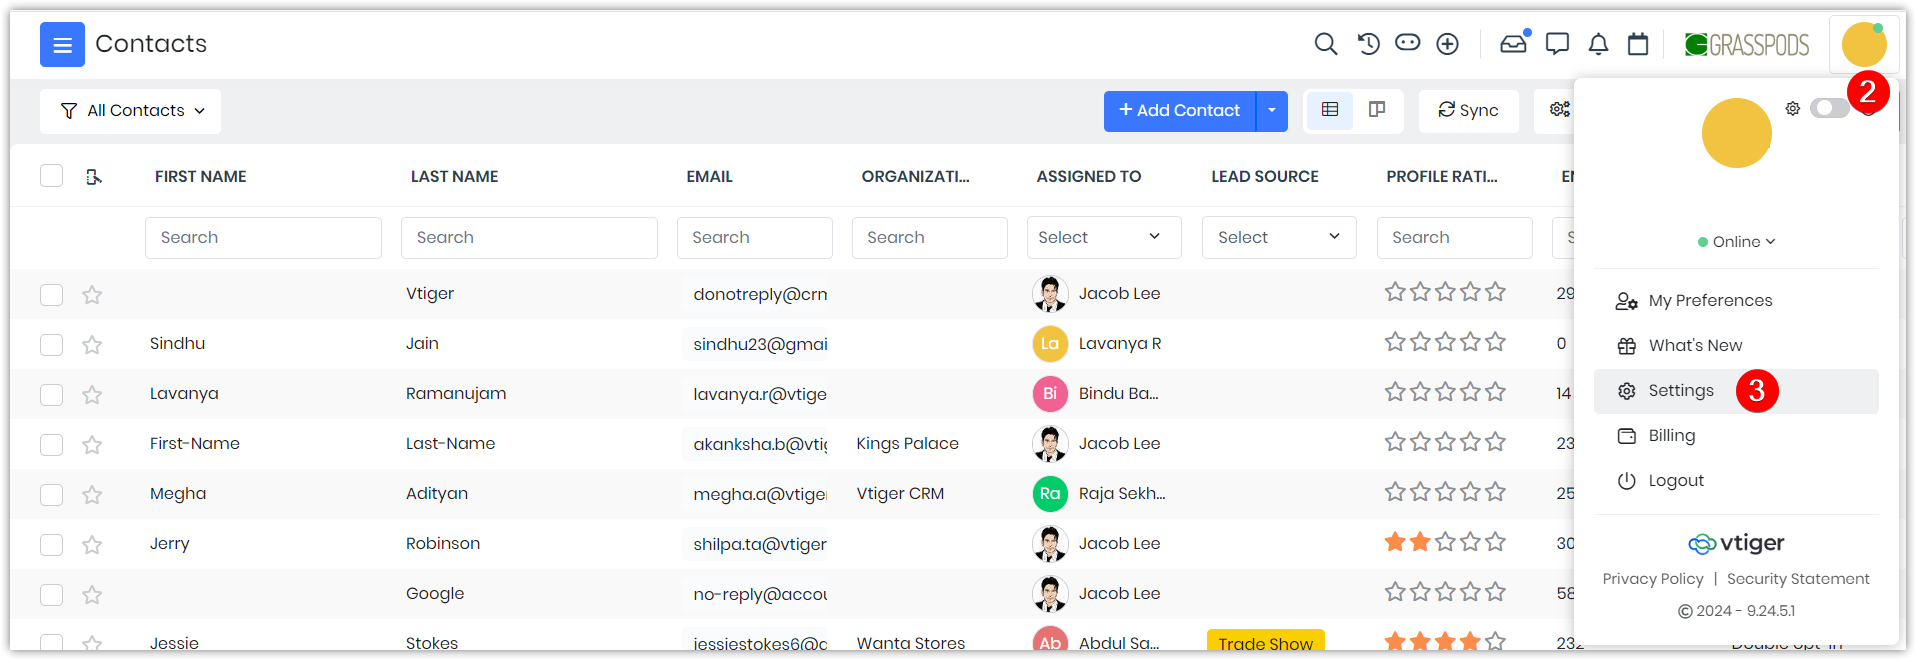
- Click the User Profile on the right side of the screen.
- Click Settings.
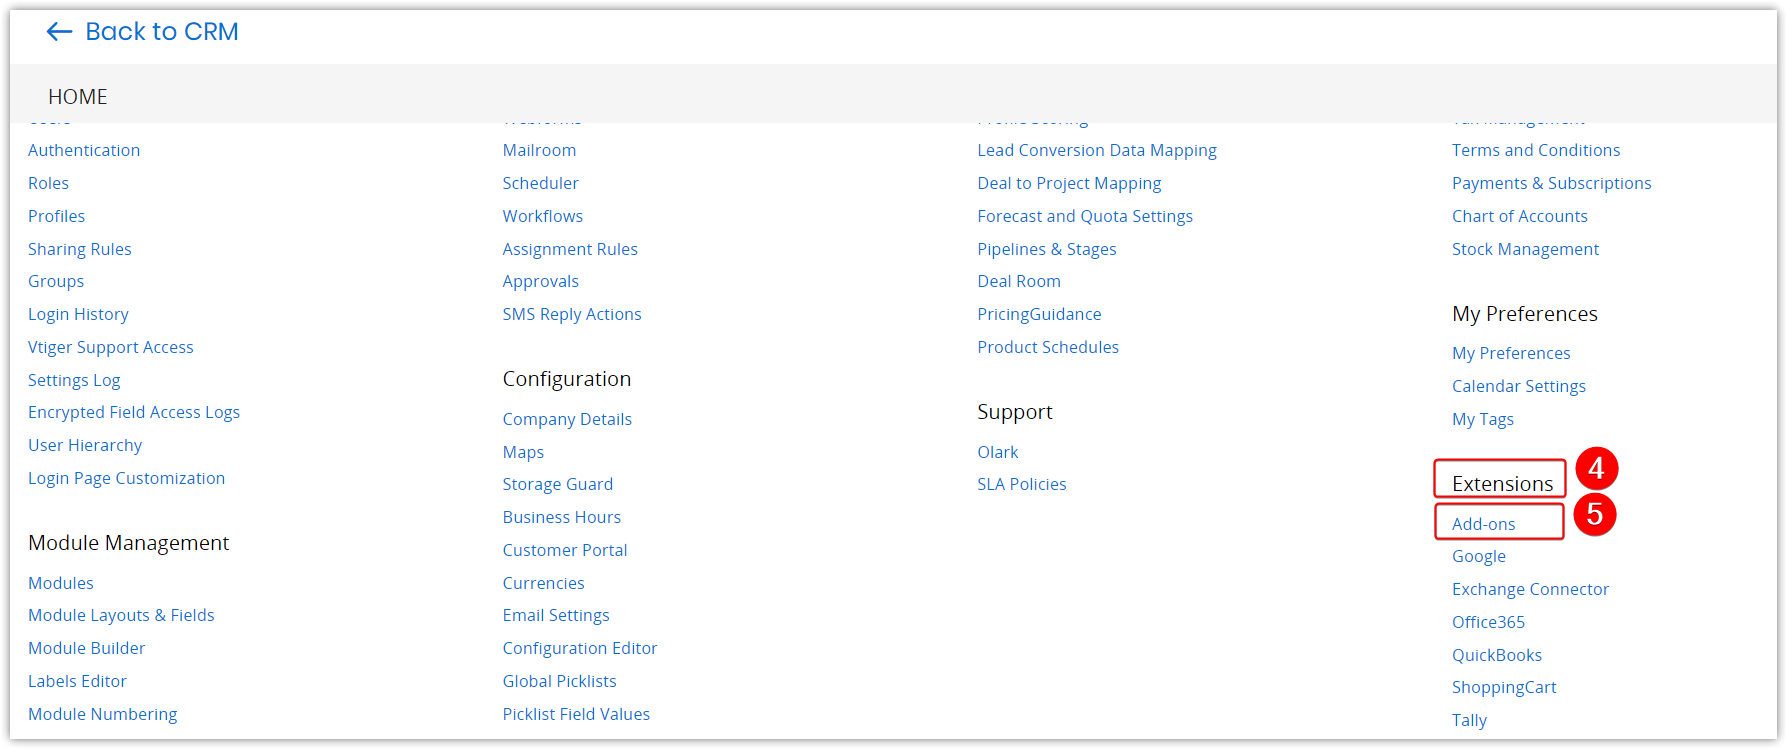
- Go to Extensions.
- Click Add-ons.
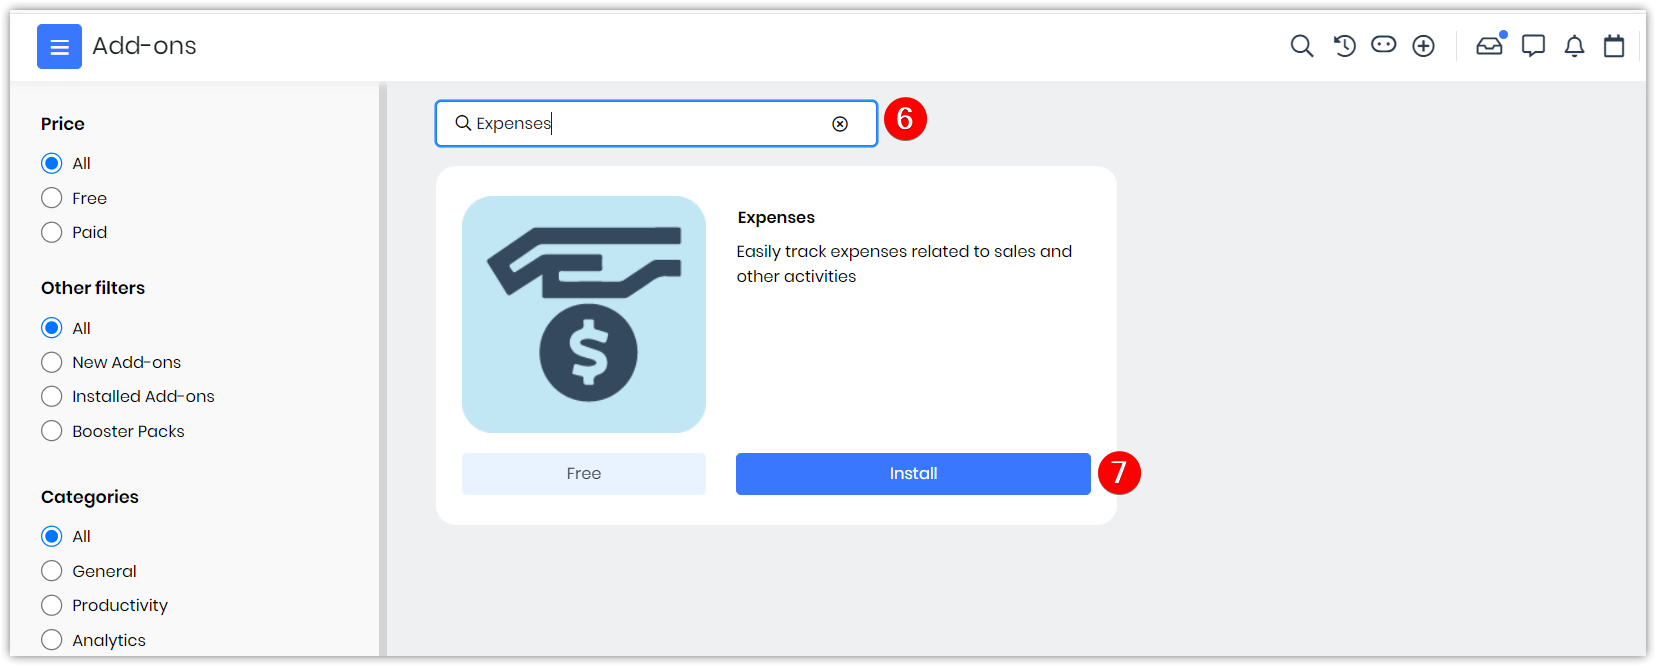
- Type Expense Module in the search bar.
- Click Install. Are you sure you want to install this Add-on? message appears.
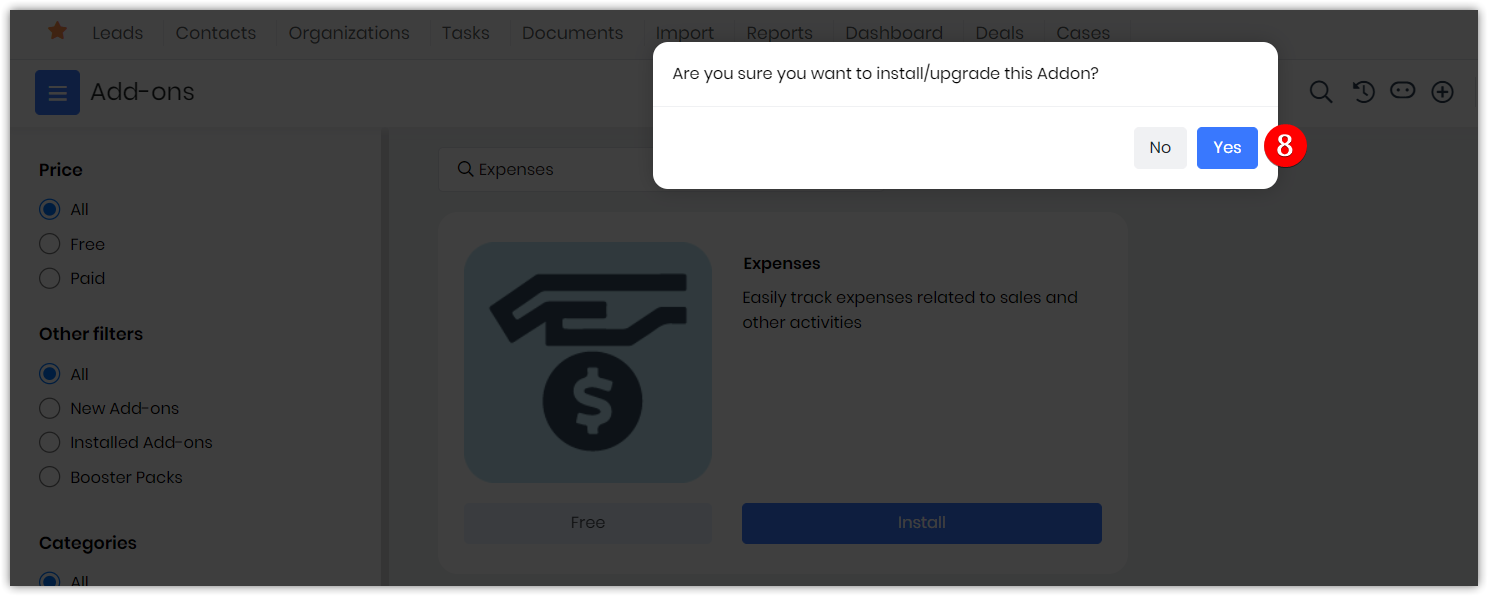
- Click Yes.
A success message will be displayed. Once installed, the Expenses module will appear under the Service Desk app> Internal Requests.
Adding Picklist Fields in Module Layouts and Fields
Follow these steps to add Picklist Fields in the Module Layouts and Fields:
- Log in to the CRM.
- Click the User Profile on the right corner of the screen.
- Click Settings.
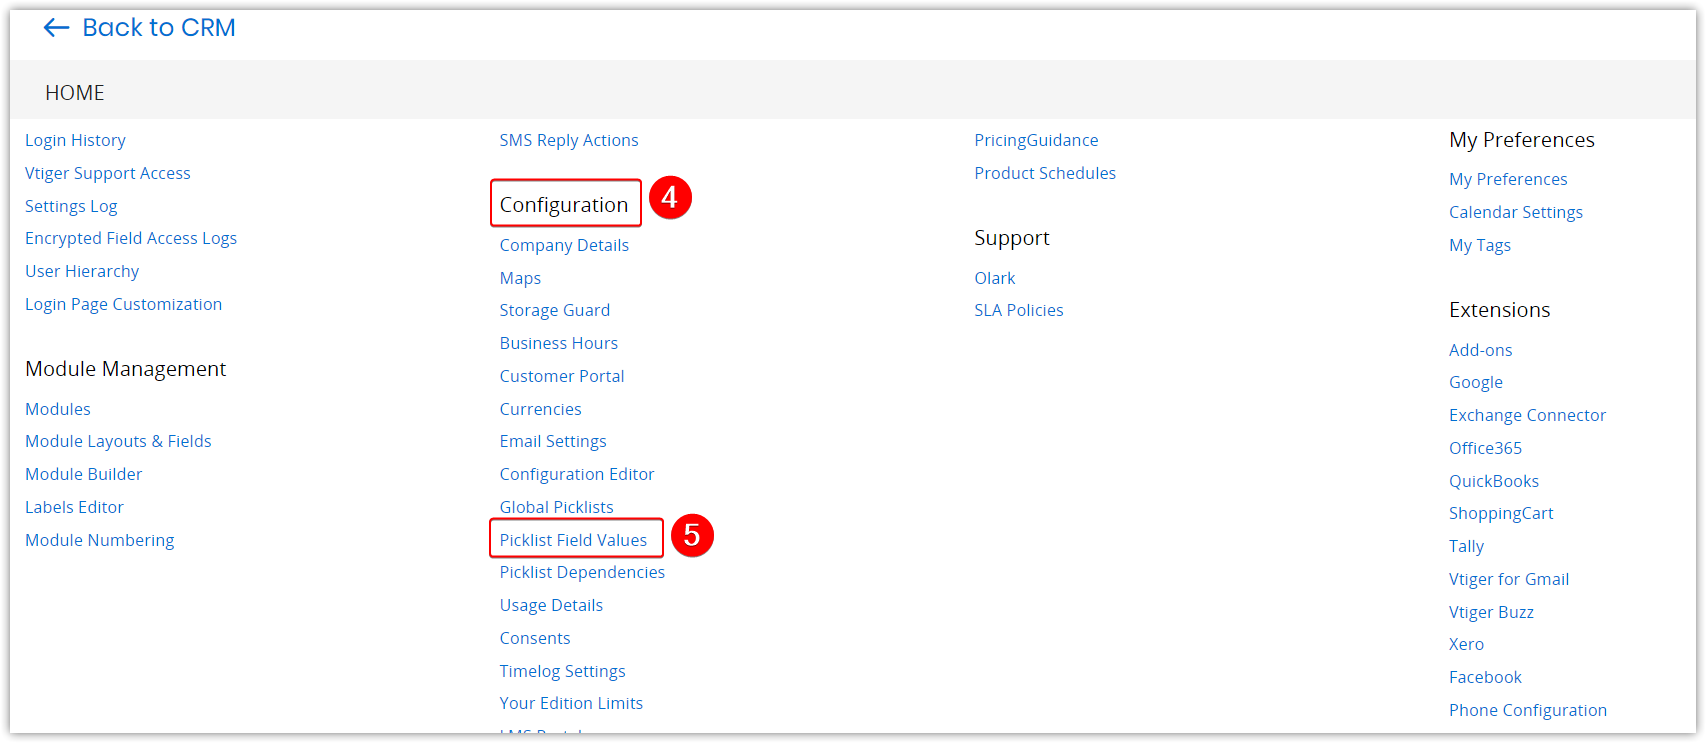
- Go to the Configuration section.
- Select Picklist Field Values. The Picklist Settings page opens.
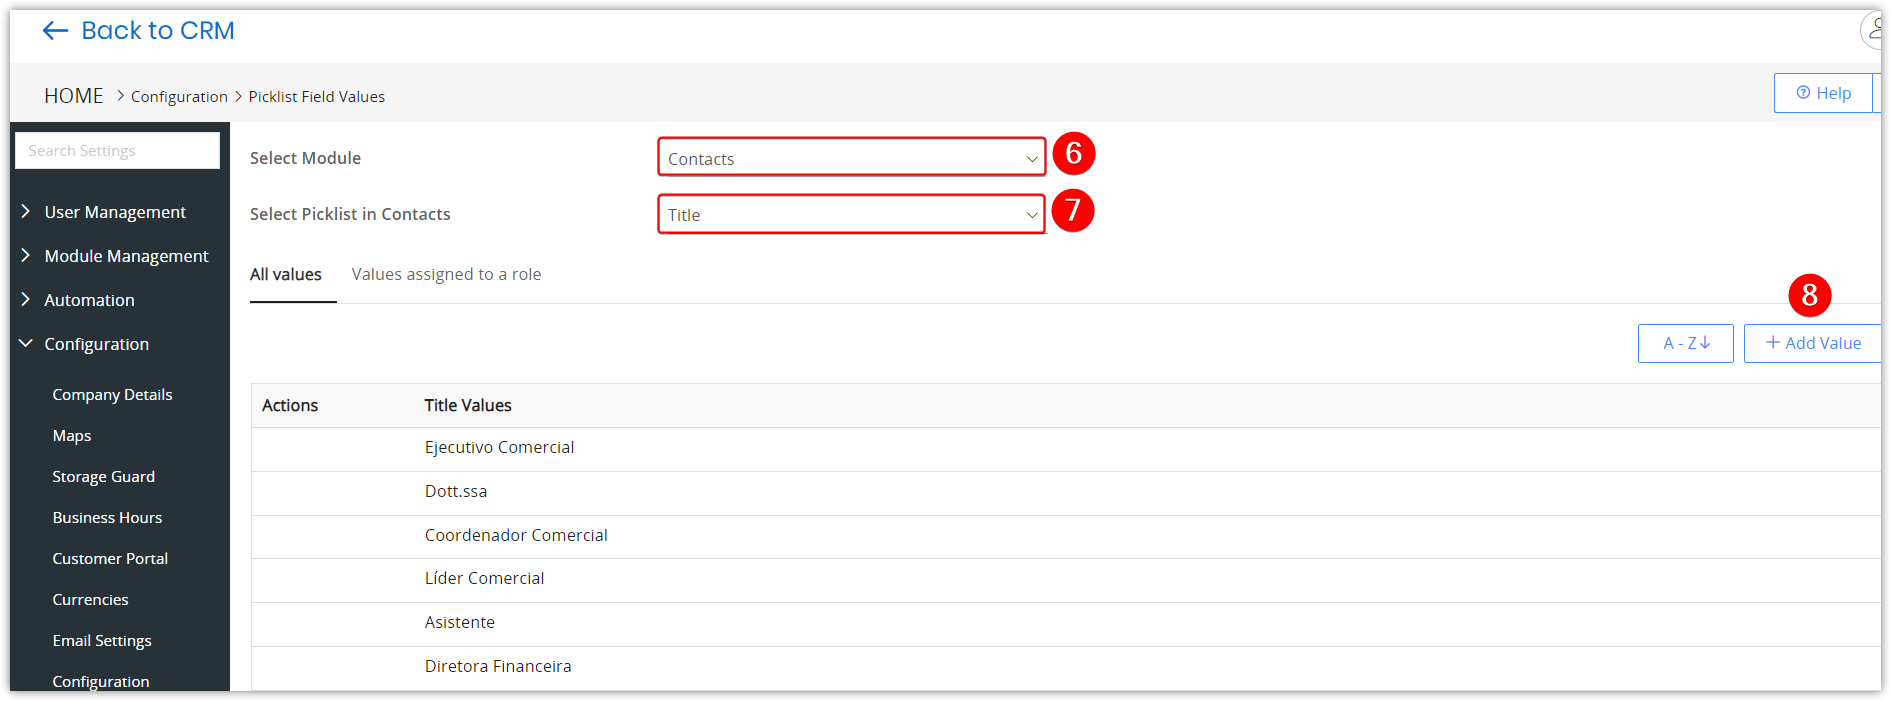
- Select Module from the drop-down.
- Select Picklist in Expenses from the drop-down.
- Click +Add Value.
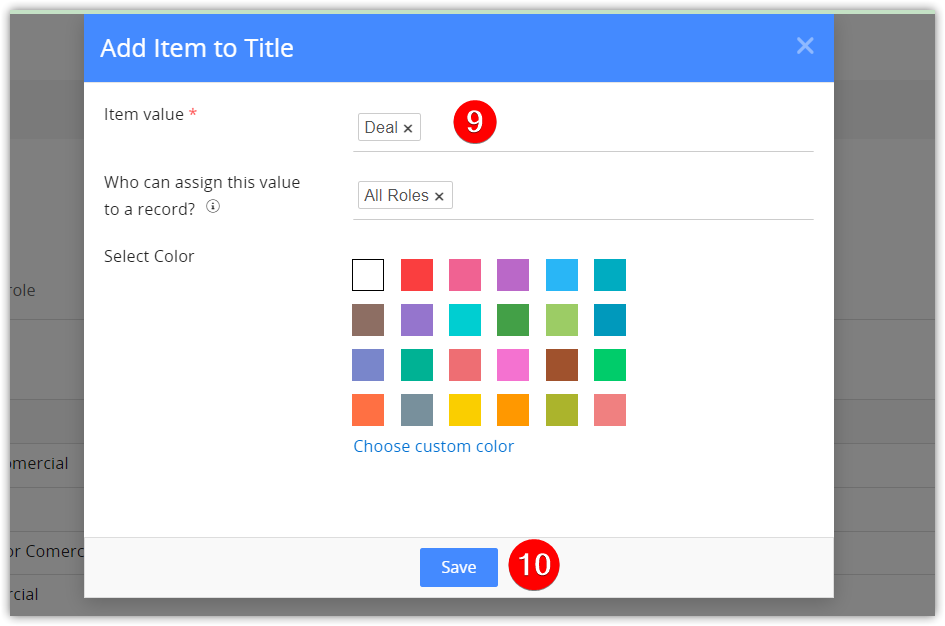
- Add the Item Value.
- Click Save.
Item added successfully message will be displayed. Once added, you can go to the Expense module and see if it is available.
Creating an Expense record
Follow these steps to create an Expense record:
- Log in to the CRM.
- Click the Main Menu.
- Go to the Service Desk app.
- Go to the Internal Requests section.
- Select Expenses.
- Click +Add Expense. An Add Expense window opens.
- Enter or select the following information:
- Expense Name: Type the Expense Name.
- Related To: Select the Related To from the drop-down.
- Expense Type: Select the Expense Type from the drop-down.
- Assigned To: Select the Assigned To from the drop-down.
- Expense Purpose: Select the Purpose from the drop-down.
- Expense Status: Select the Status from the drop-down.
- Expense Amount: Type the amount and select the currency from the drop-down.
- Employee: Please enter 3 or more characters or select the icon to fetch the Employee details.
- Expense Details: Type the Expense Details.
- Click View Full Form to add additional details.
- Enter or select the following information:
- Expense Receipt: Click Browse to attach receipts, files, etc.
- Event Name: Type the Event name.
- Add Description Details.
- Click Save. An Approval window opens.
- Click Submit for Approvals.
A created message will be displayed. Once created, you will find it in the Expense module List View.
Viewing an Expense Record
Follow these steps to view a new Expense record:
- Log in to the CRM.
- Click the Main Menu.
- Go to the Service Desk app.
- Select the Expense module. The Expense module List View opens.
You will find the created Expense here.
Approving an Expense Record (For Managers)
Once an agent creates an expense record, approvers (Supervisors, Managers, etc.) will receive a notification. The admins can set the Approval automation on the Vtiger Settings page for the Expense module.
For example, on the Settings page, you can add conditions to add receipts only if the amount of expense is greater than a certain amount.
You can also choose the owner profile for which the rule can be executed. The Expense record will be sent for approval to the Approver chosen on the Settings page.