Articles in this section
Managing Quarantine Emails in Google Workspace and Microsoft Outlook
Introduction

Quarantined emails are messages that are flagged as suspicious or potentially harmful—such as spam, phishing attempts, or policy violations by your organization's email security system.
Instead of being delivered directly to the recipient’s inbox, these messages are held in a quarantine area for further review.
Both Microsoft 365 and Google Workspace provide centralized quarantine tools for administrators to view, release, or block these emails before they reach users. This helps protect your organization’s data and ensures that legitimate communication isn’t lost due to aggressive filtering.
In this article, you will learn about:
- Accessing the quarantine dashboards in Google Admin Console and Microsoft Defender
- Reviewing message details and reasons for quarantine
- Allowing or denying email delivery
- Searching and filtering quarantined messages
- Retention policies and message handling behaviors
Accessing and Managing Quarantine Emails in Google Workspace
Google Workspace allows administrators to quarantine certain incoming or outgoing emails for review before they are delivered to recipients. This is useful for handling spam, phishing, or policy-violating messages.
Note:
- Only users with appropriate admin privileges can access and manage quarantined emails.
- If you're not a super admin, your access may be limited based on roles and group memberships.
Using this feature, admins can:
- View whether a message was delivered, quarantined, or rejected.
- Check details such as sender and recipient information, message subject, and timestamps.
- Identify the source of the message with the sender’s IP address.
- Troubleshoot email delivery issues and confirm if a message was blocked due to security rules or spam filters.
This makes Email Log Search a powerful tool for verifying message flow and ensuring that important emails are not lost while maintaining strong security controls.
Follow the steps below to identify the email status:
- Sign in to admin.google.com using a super administrator account.
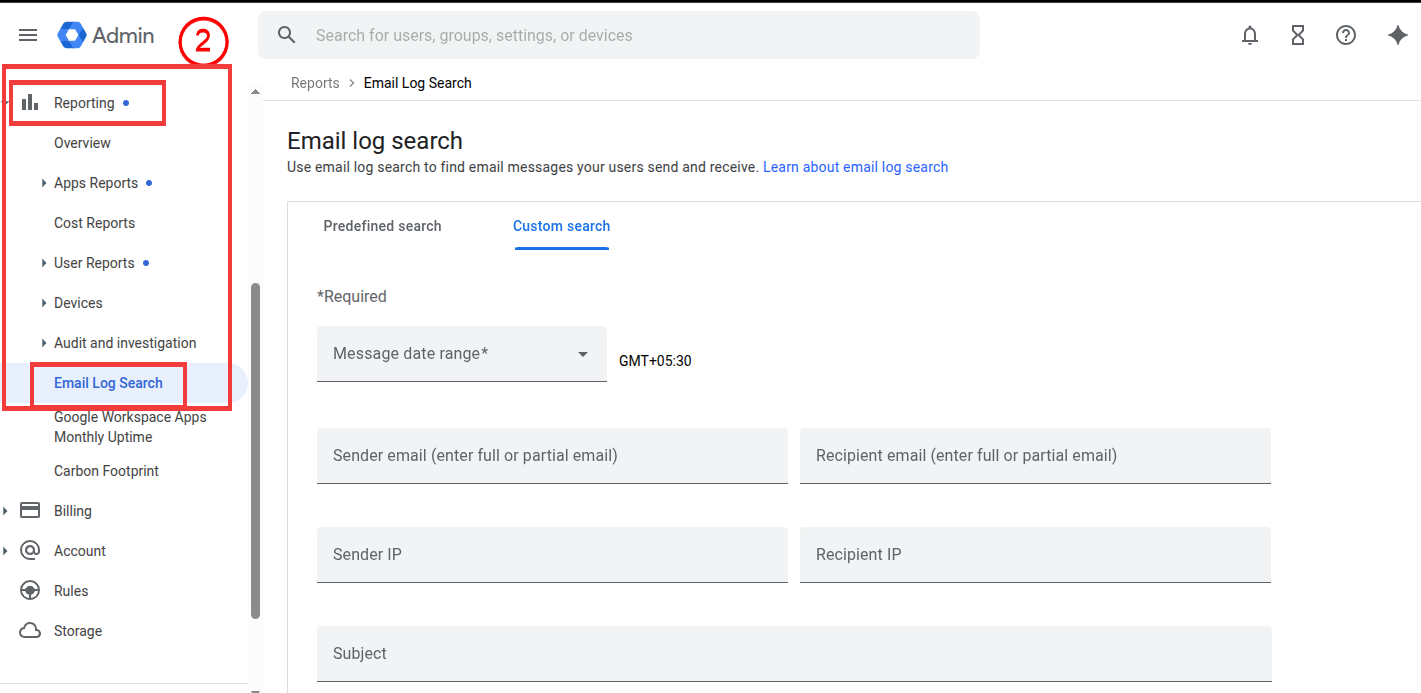
- Go to Reporting > Email Log Search. The Email Log Search window opens.
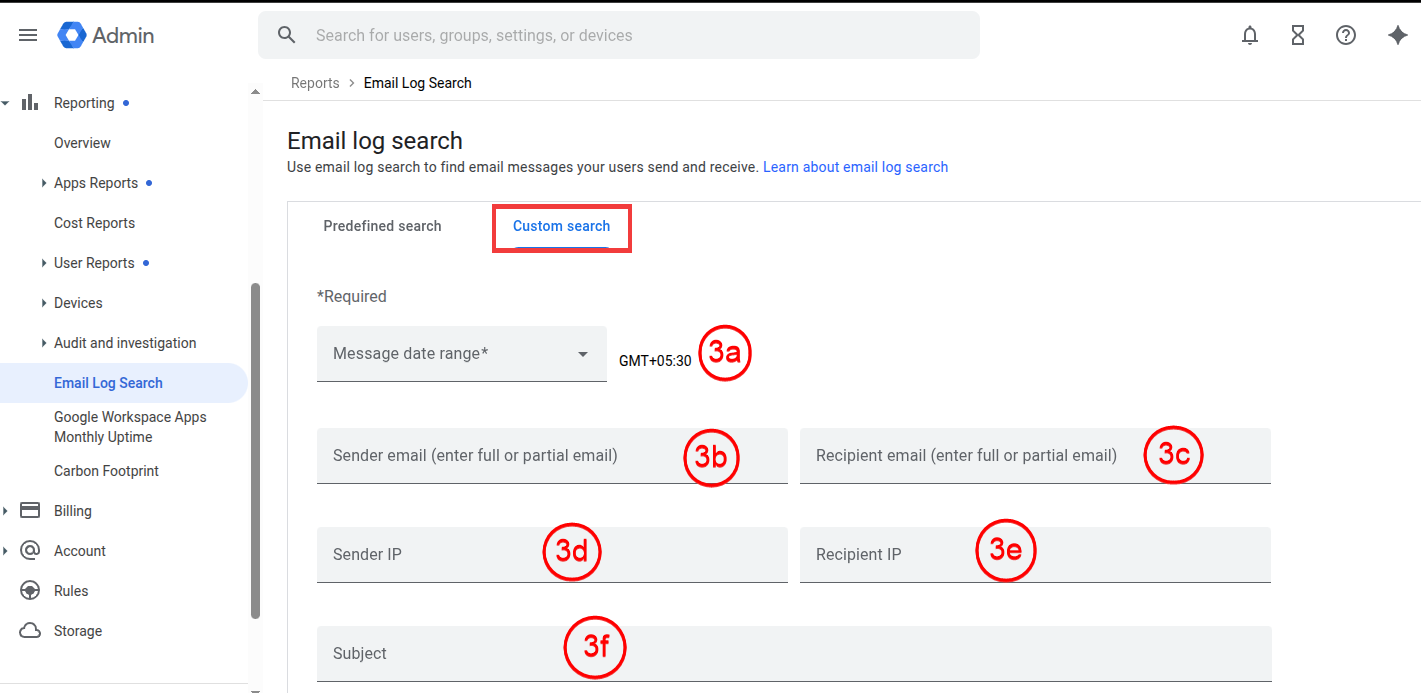
- Enter or select the following details in the Custom search:
- Message date range: Select the time period during which the email was sent or received.
- Sender email: The email address of the person or system that sent the message.
- Recipient email: The email address of the person or system that received the message.
- Sender IP: The IP address of the server or device that originated the email.
- Recipient IP: The IP address of the server that accepted the email for delivery.
- Subject: The title or topic line of the email message.
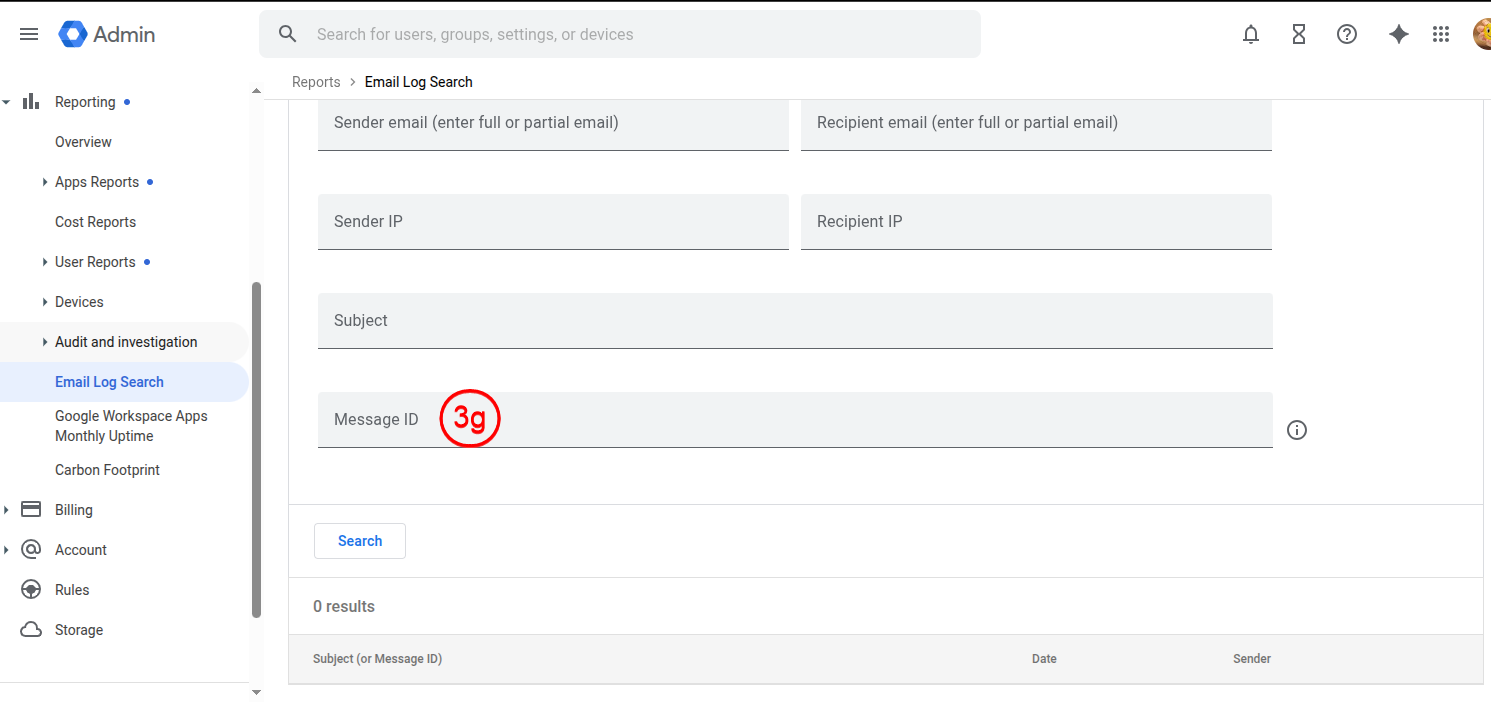
- Message: The main content or body of the email.
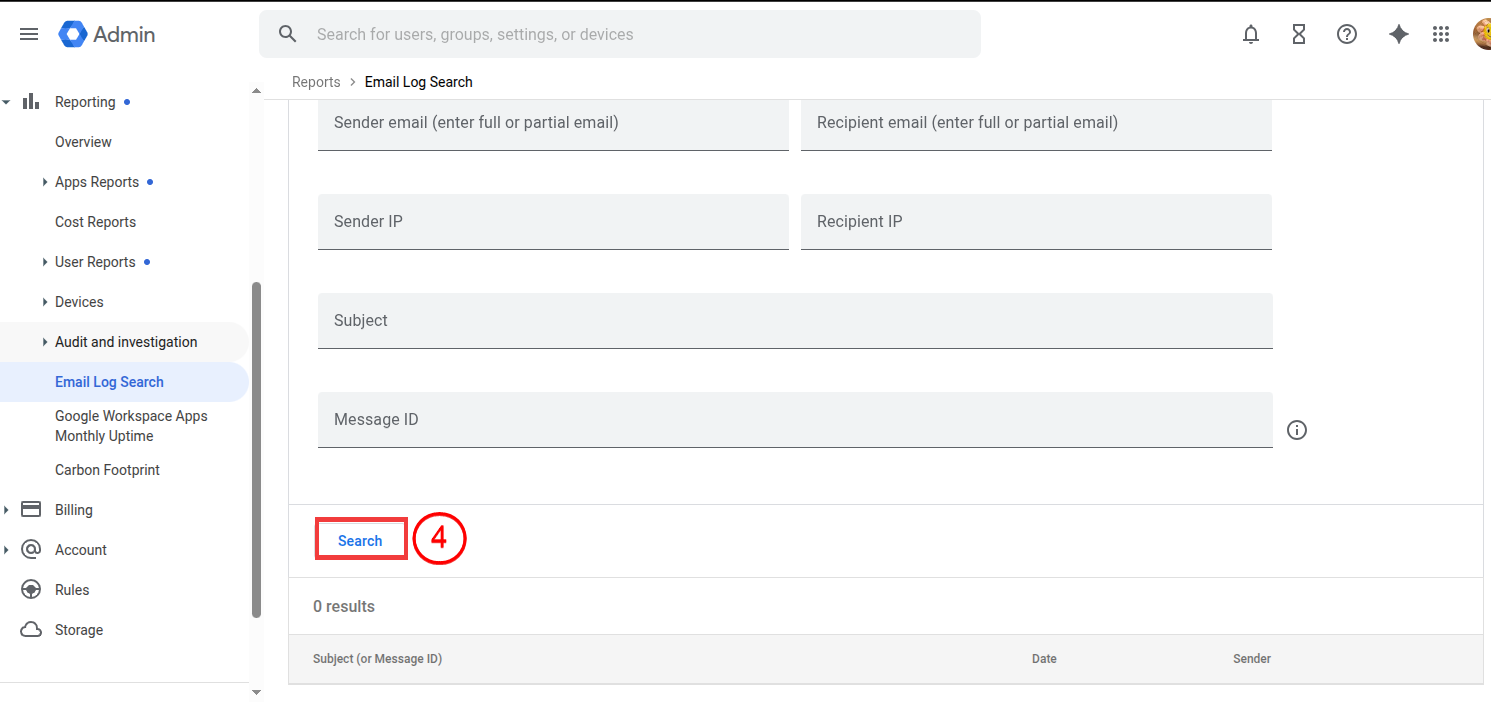
- Click Search. All emails sent or received within the specified time range will be displayed.
By using Email Log Search, you can quickly track the status of emails and understand why a message was delivered, quarantined, or blocked.
Here is how you can access the quarantine dashboard. Follow the steps below to access the quarantine dashboard:
- Sign in to admin.google.com using a super administrator account.
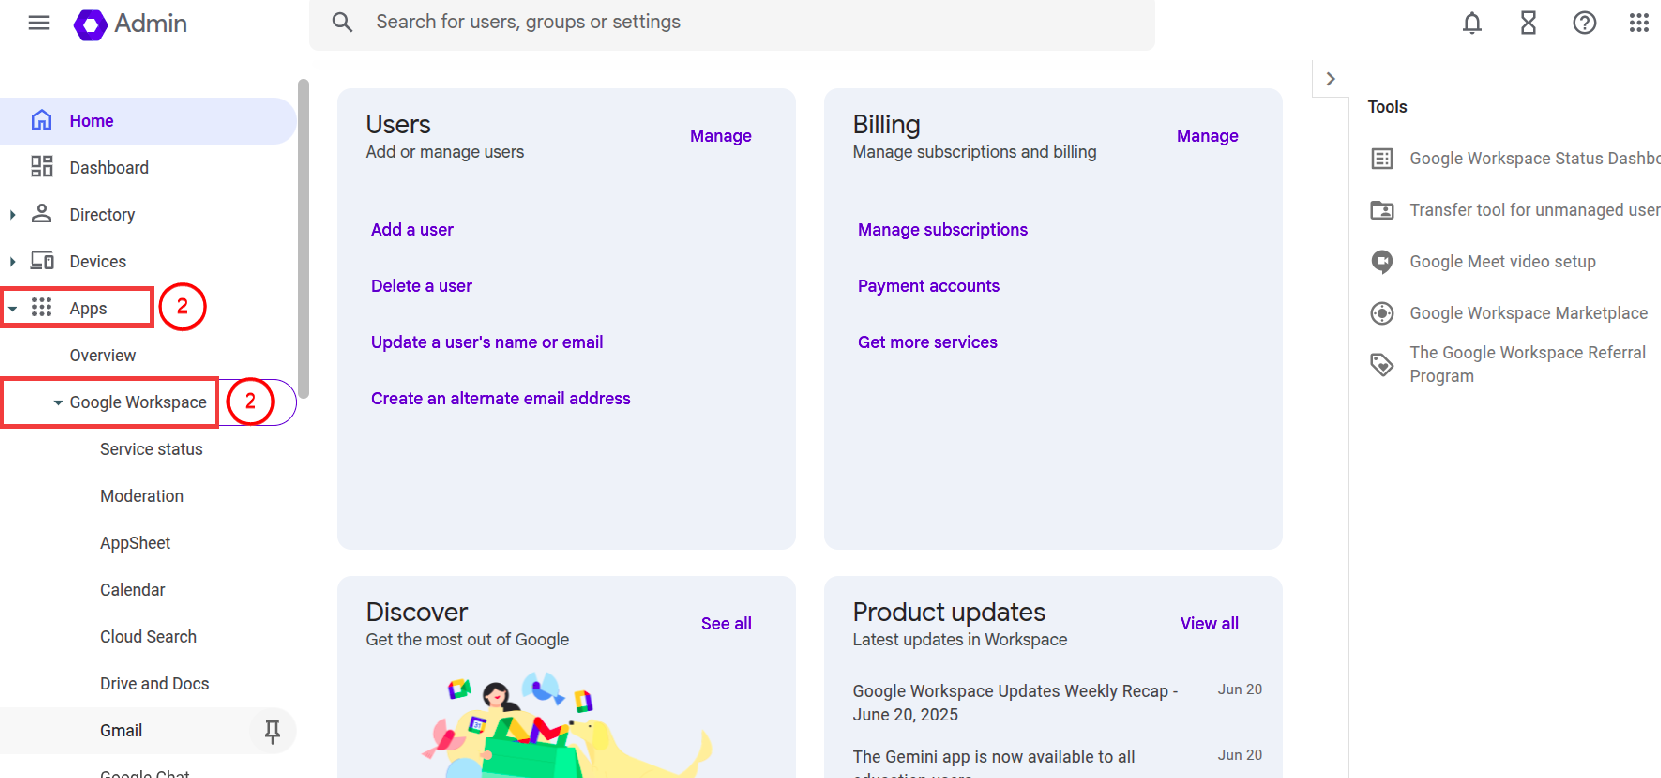
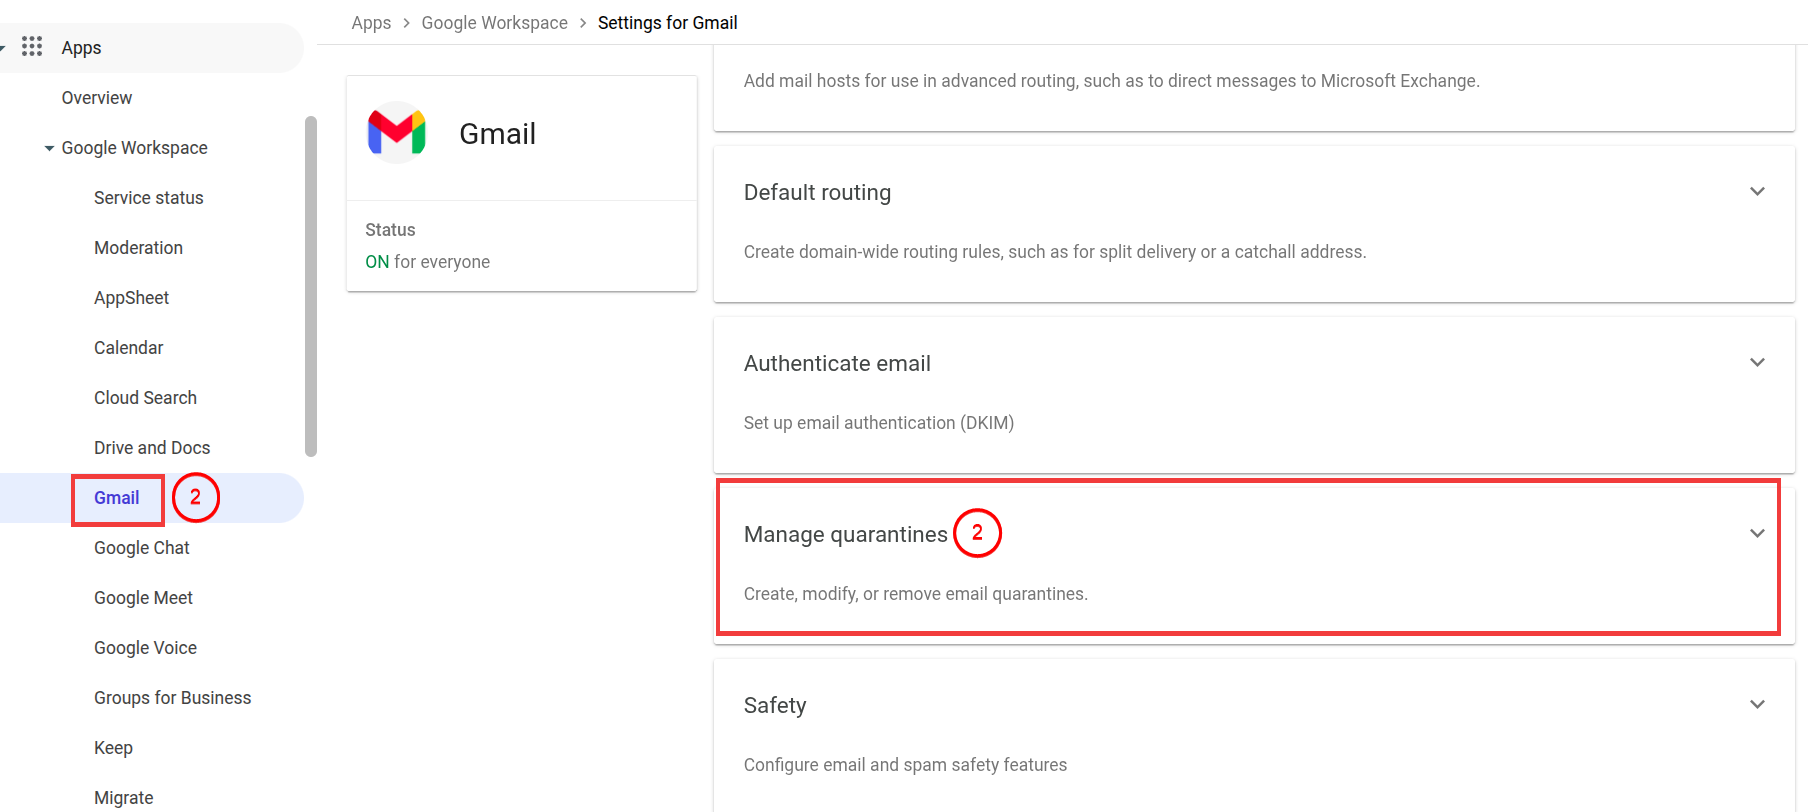
- Go to Apps > Google Workspace > Gmail > Manage quarantines.
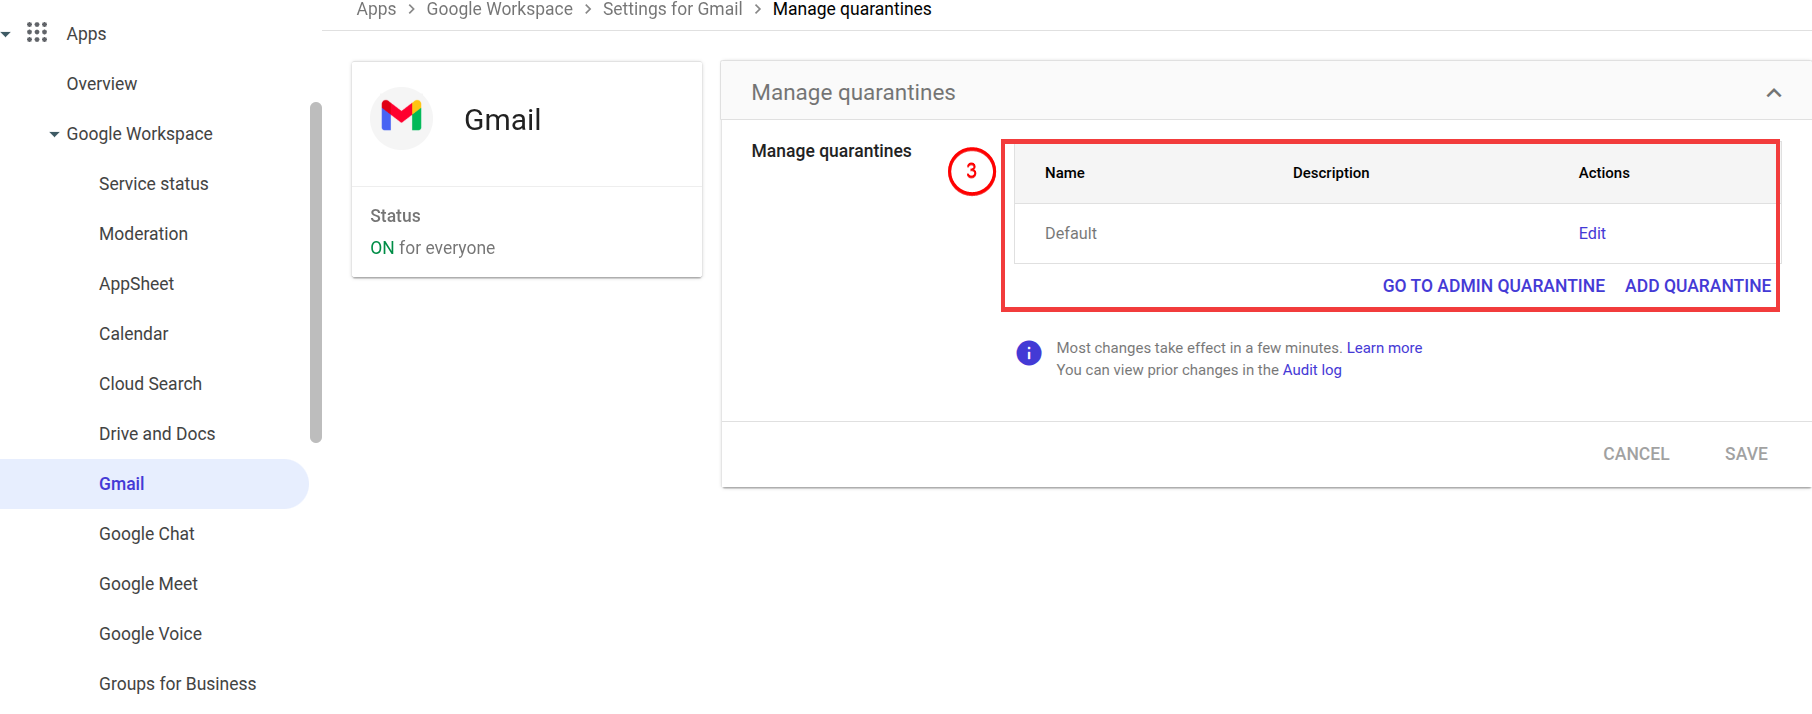
- Click Go to Quarantine.
Review Quarantined Emails
When you log into email quarantine, the default view is all messages in all quarantines with a status of Pending triage.
To get details about which quarantine a message belongs to, point at the message in the dashboard. The Quarantine details box opens, and it shows the quarantine name and the settings that you created for the quarantine.
Filter quarantined messages
Using the controls at the top of the dashboard, you can filter messages by quarantine or by message status.
- To show messages from one quarantine, click Quarantine, select a quarantine from the list, and click Apply.
- To show all messages from all quarantines, click Quarantine, select All, and click Apply.
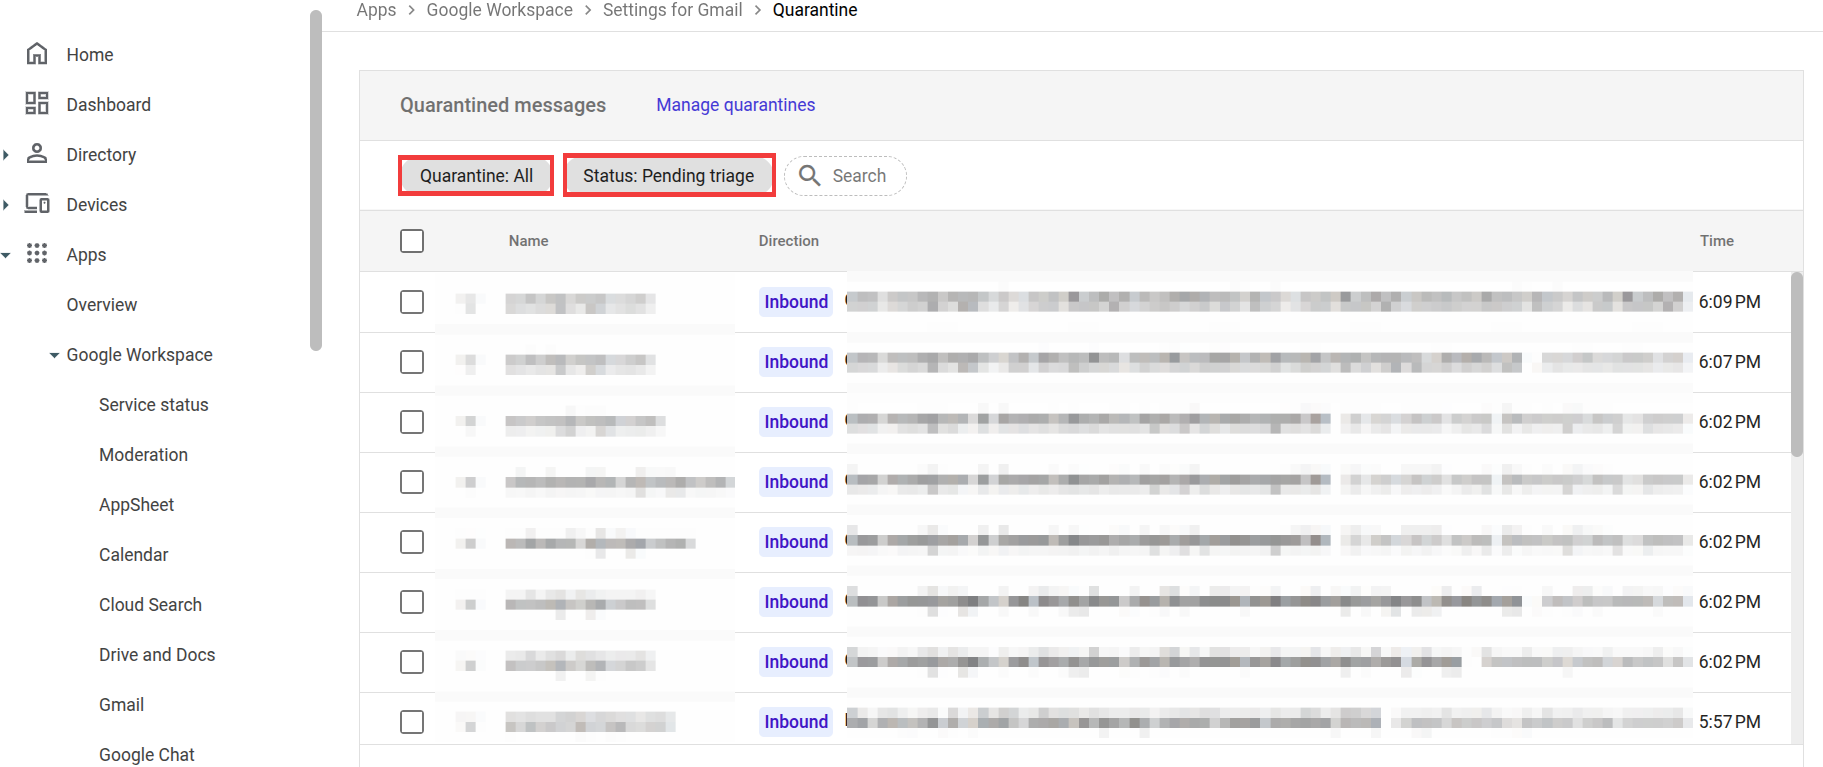
- To filter messages by quarantine status, click Status, select a status, and click Apply.
Search for quarantined messages
To find messages by searching on message content, at the top of the dashboard, enter search terms in the Search field.

Only messages that match the current dashboard filters (Quarantine name and message status) are searched.
All message content is searched, including header information such as sender address, recipient email address, message subject, and message body.
To create more targeted searches, use the same search operators used in Gmail.
View email message headers
Headers are short code snippets that are sent along with an email message and contain information about the message.
Some headers, such as From: and Subject:, are typically visible in a message.
Other headers are only visible when you view full headers for the message. To view the complete content of a quarantined email message, including all email headers:
- In the quarantine dashboard, click the menu to the left of the Name column. The dashboard entry expands to show the message.
- Click Show Original at the bottom right of the expanded entry,
Taking Action on Quarantined Messages in Google Workspace
Once a message is quarantined, admins can choose to either allow or deny its delivery. Please note that once an action is taken, it cannot be undone.
Allowing Delivery of Quarantined Messages
To release a message from quarantine and deliver it to the recipient:
- Go to the Quarantine Dashboard.
- Select one or more messages by checking the box next to them.
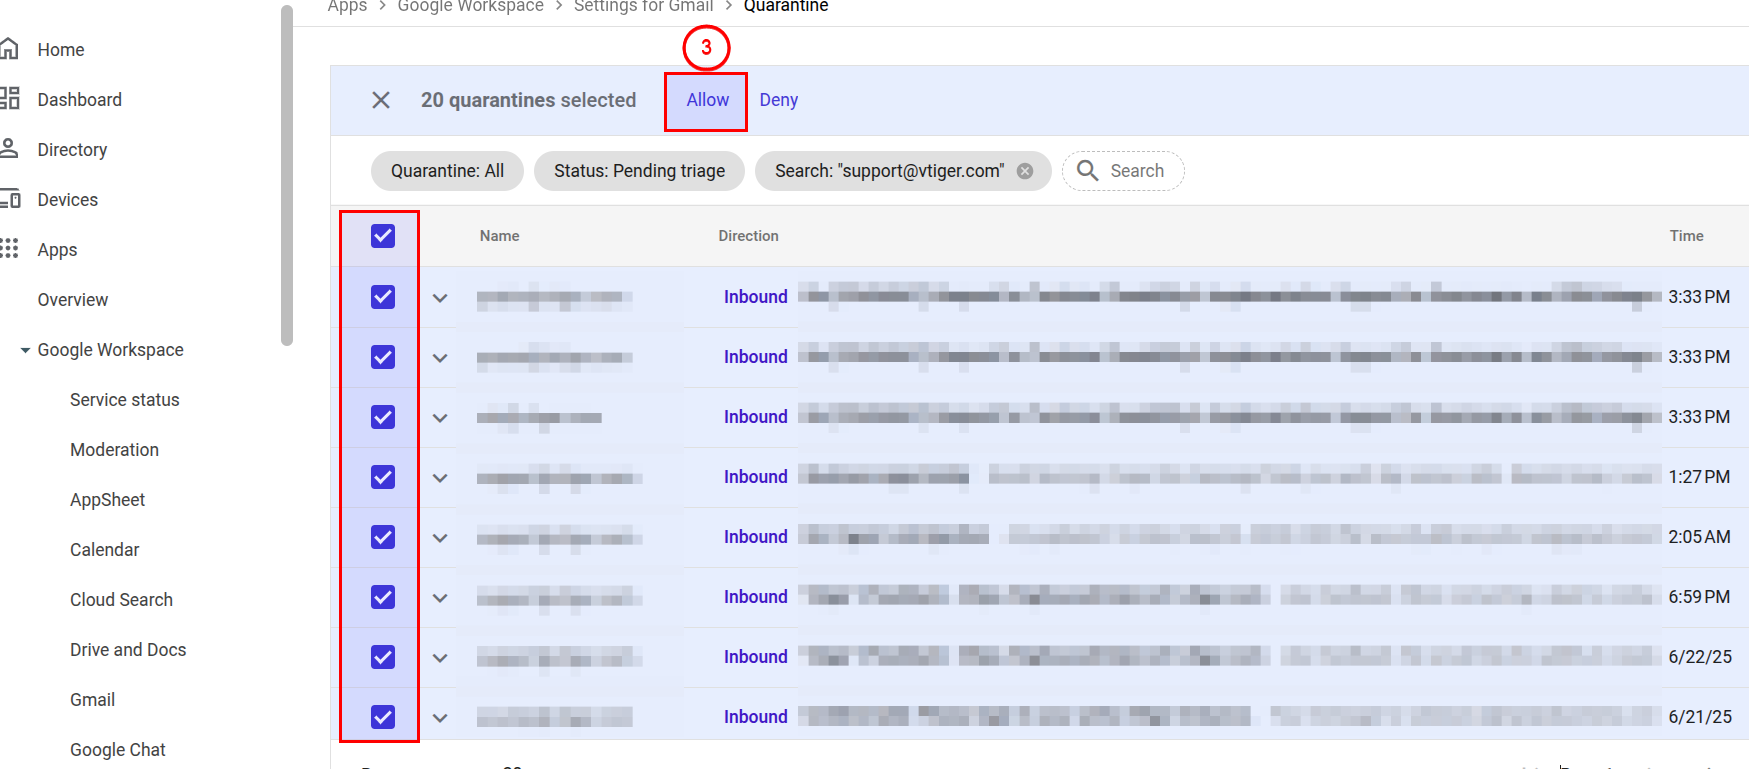
- Click Allow at the top of the dashboard.
The message will be delivered to the user. If it doesn't appear in their inbox, advise them to check their Spam folder.
Denying Delivery of Quarantined Messages
To block a message from being delivered:
- In the Quarantine Dashboard, select the message(s) by checking the boxes.
- Click Deny.
Depending on the Denial consequence setting configured for the quarantine, the system may automatically send a rejection notice to the original sender.
Denied messages remain in quarantine for 30 days, after which they are permanently deleted and cannot be recovered, even by admins.
Note: If your organization uses additional storage solutions such as Google Vault, quarantined messages may still be retained there based on your configured retention policies.
Denying Messages in Multiple Quarantines
Sometimes a message may appear in multiple quarantines. When you deny delivery, the action is governed by the settings of the specific quarantine where the action is taken.
Example:
A message appears in two quarantines:
- Suspicious: Denial consequence: Drop message
- Large Attachment: Denial consequence: Send rejection notice
If you deny the message from the Suspicious quarantine, the message will be dropped without sending a rejection notice. To learn more about managing quarantine emails in Google Workspace, click here.
Accessing and Managing Quarantine Emails in Microsoft
Follow these steps to access and manage Quarantine emails:- Go to https://office.com.
- Log in with your Microsoft 365 account.
- Click the App Launcher in the top-left corner.

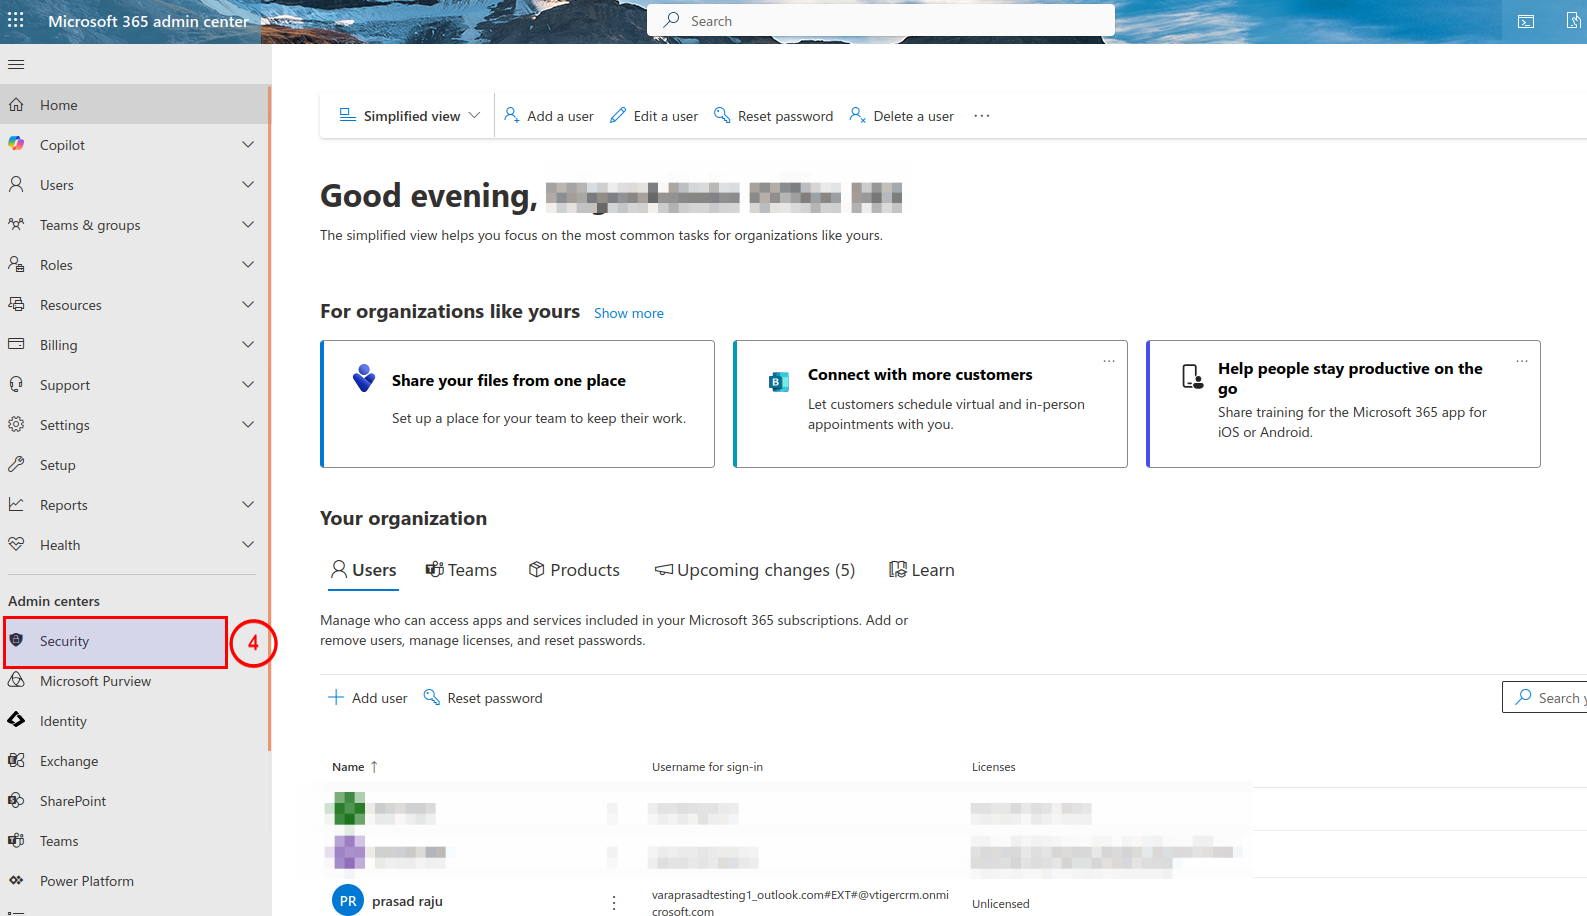
- Select Security.
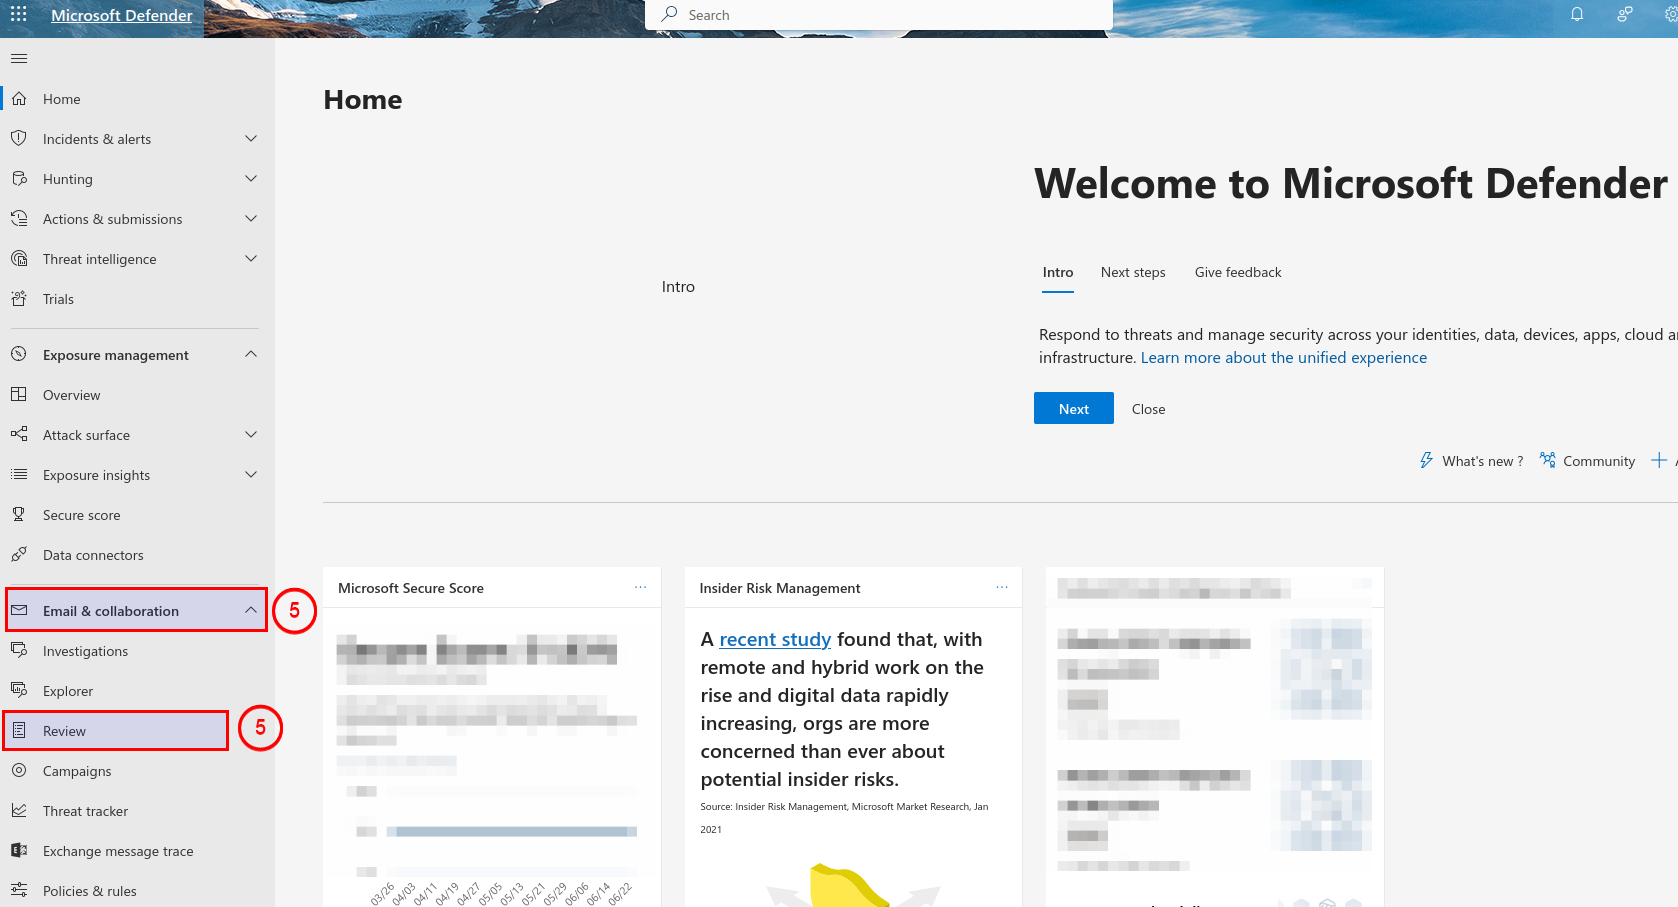
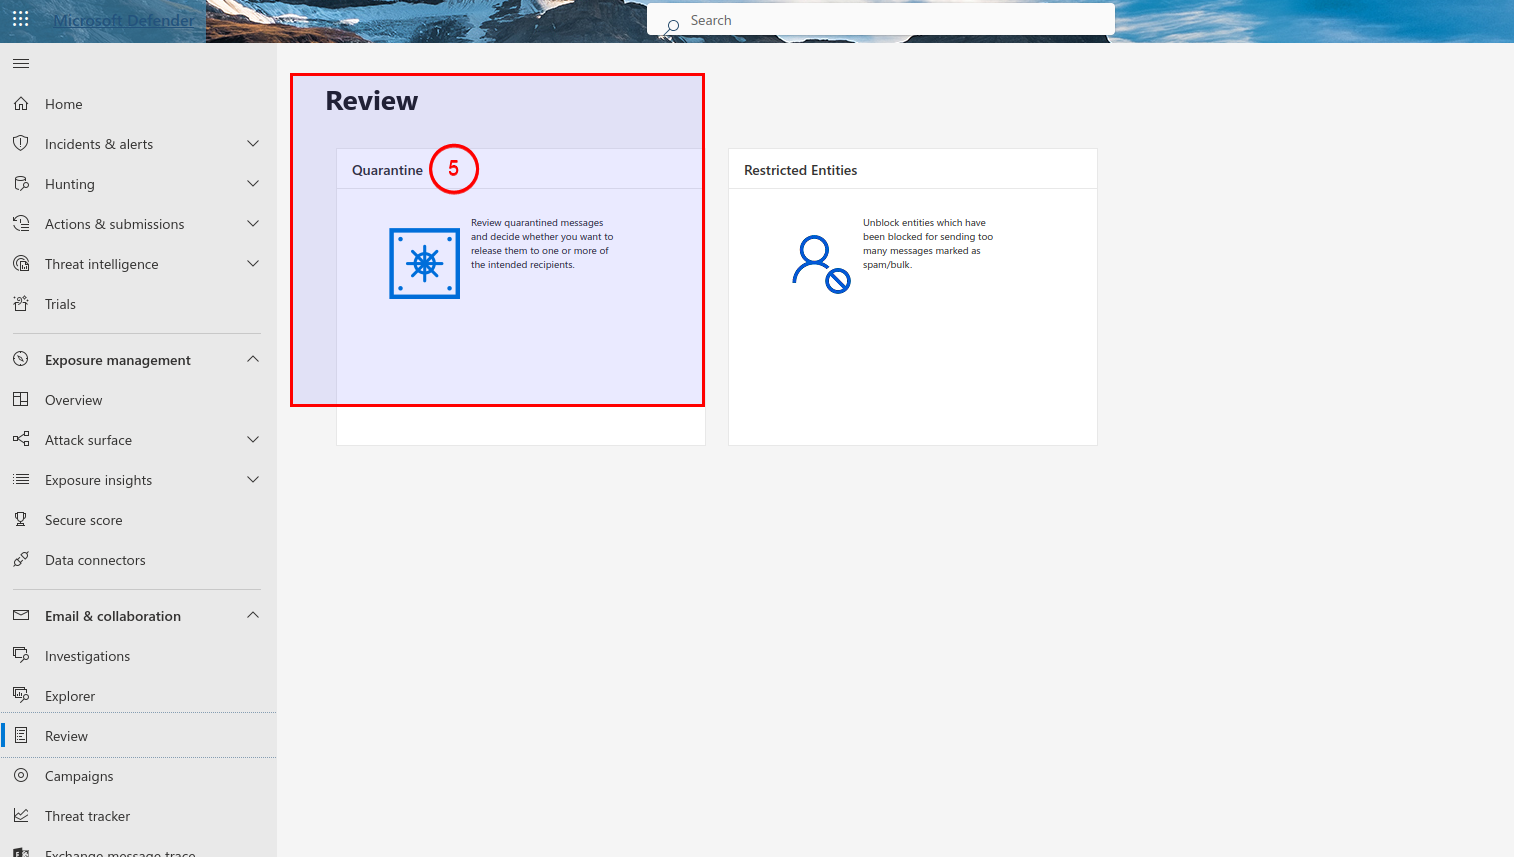
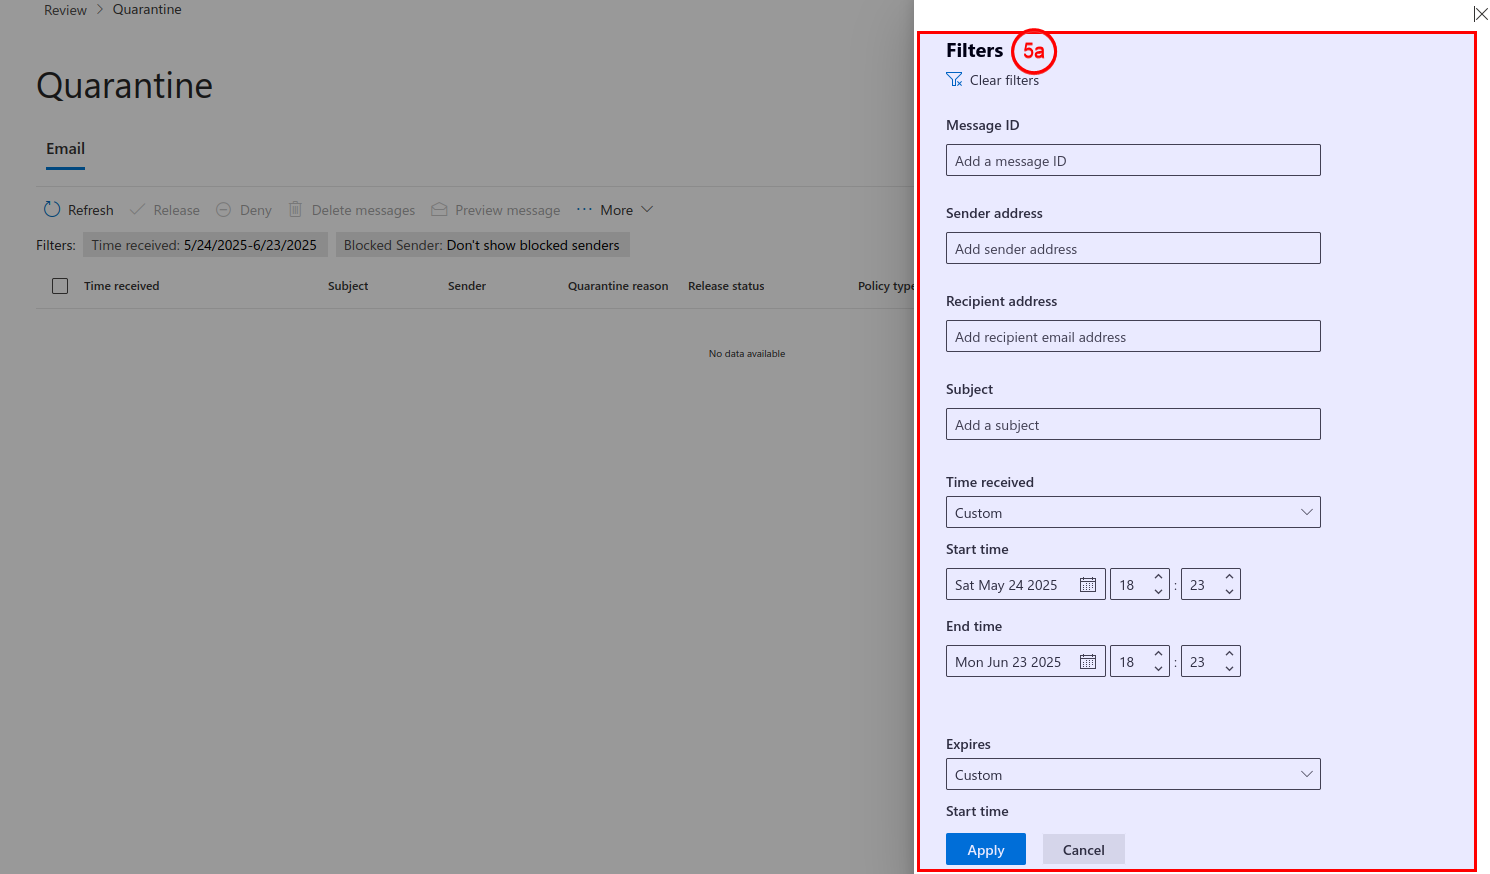
- In Microsoft 365 Defender, navigate to Email & Collaboration> Review > Quarantine. You'll see a list of quarantined messages.
- Use filters to narrow down the messages (e.g., spam, phishing).
- Select a message to open the preview panel on the right.
- Click the More actions to see available actions:
- Allow Sender – Adds the sender to your allowed list (optional, for future messages).
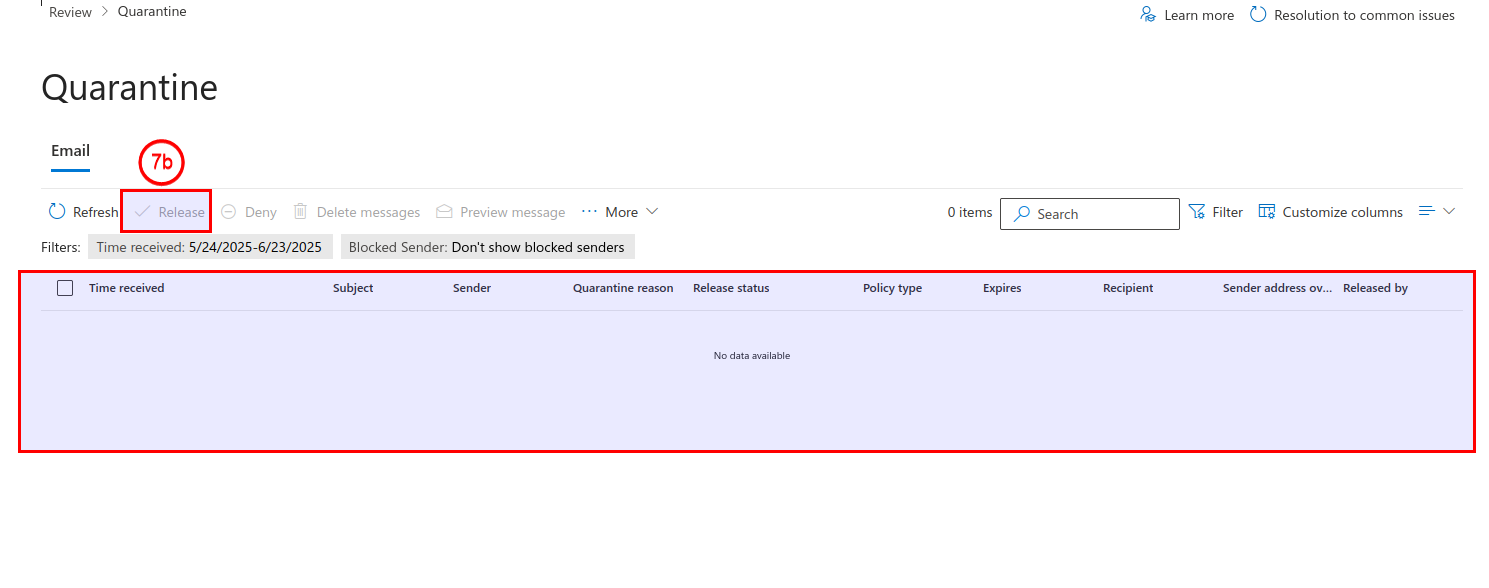
- Release – Sends the email to your inbox.
- Report – Submits the message to Microsoft for analysis.
- Click Send to release the message.
- Click Done, then close the panel.
You can automate the above process or receive quarantine emails to your inbox, review them, and then allow or reject them based on the necessity of the email type. If you need additional support:
- The Allow Sender and Submit to Microsoft options may not appear if the administrator has restricted those permissions.
- This process is applicable for end users; admins can manage quarantined emails differently via the Exchange Admin Center.
- Contact the Microsoft technical support team for assistance with automating this process. To learn more about the setup, click here.