Articles in this section
Tally Integration - OnPremise
Feature Availability
Vtiger Editions: One Pilot | One Growth | One Professional | One Enterprise
Introduction
Integrating Tally Prime with Vtiger CRM enables syncing financial data seamlessly. Learn more.
Benefits of Tally Integration
- Synchronizing ledgers and financial records in real time
- Eliminating manual data entry between systems
- Avoiding inconsistencies in billing and accounting data
- Streamlining financial reporting and compliance
- Install Tally Add-on in Vtiger
- Integrating Tally Prime (Rel 5.1) with Vtiger CRM using the VtigerTallyConnector on an on-premise setup.
Key Terminology
|
|
|
|
|
|
|
|
|
|
|
|
|
|
|
|
|
|
Prerequisites
- Admin access to Vtiger CRM and Tally Prime.
- Java installed on your desktop.
- You must download the following files:
- Tally Prime (Rel 5.1)
- VtigerTallyConnector ZIP file
Installing Tally Add-on in Vtiger CRM
Tally is a third-party app that you must install from Vtiger’s Extension Store. You can install extensions only if you are an Admin user in the CRM.
Follow these steps to install Tally:
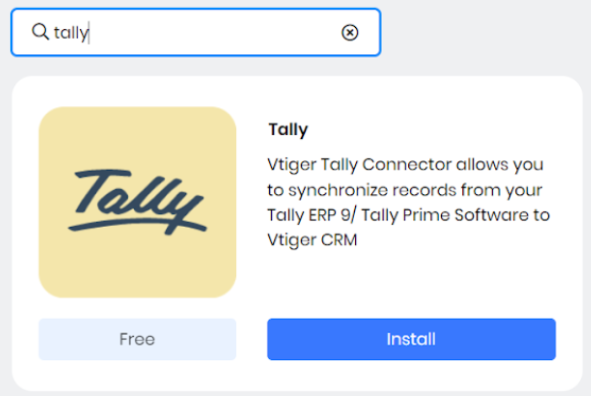
- Log in to your CRM account.
- Go to the Main Menu.
- Click Add-ons.
- Look for Tally and click Install.
- Click Yes to confirm the installation.
Note: Before you start syncing data, you must ensure the following:
- The base currencies in Tally and Vtiger must be the same.
- You must have the latest Java version installed.
- To set up the gateway, log in to your Tally account and keep both Vtiger and Tally tabs open.
- Configuration requires you to move back and forth between Vtiger CRM and the Tally website.
- You can configure Tally and other gateways only if you are an Admin user.
Installing Java
Follow these steps to check if Java is already installed:
- Open the command prompt.
- Type java -version, and press Enter.
- If Java is not installed, download it from the official Java website and install it.
Please note that you have both Vtiger CRM and Java platforms open on your system.
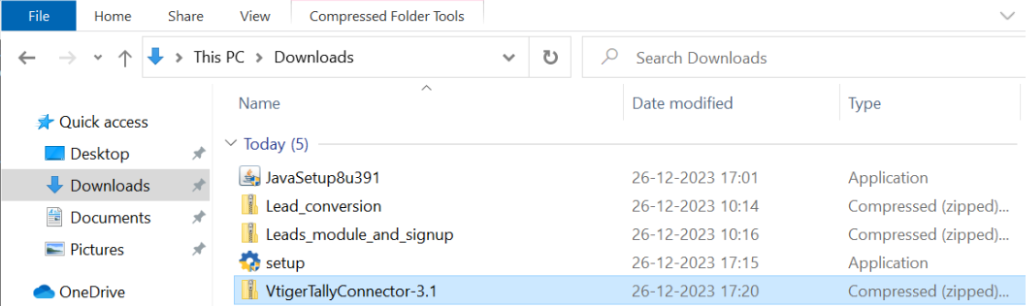
Downloading Required Files
You must download the following files to connect Tally with Vtiger.
- Download Tally Prime (Rel 5.1) from the official website.
- Download the VtigerTallyConnector ZIP file from the Tally Integration article.
- Extract the ZIP file to a temporary folder.
Place the Connector Folder in the Tally Directory
- Cut the VtigerTallyConnector folder from the extracted location.
- Paste it into the Tally Prime installation folder:
- Example: C:\Program Files\TallyPrime
Example: Open VtigerTallyConnector > Cut the folder(VtigerTallyConnector) and copy it into the tally application folder.
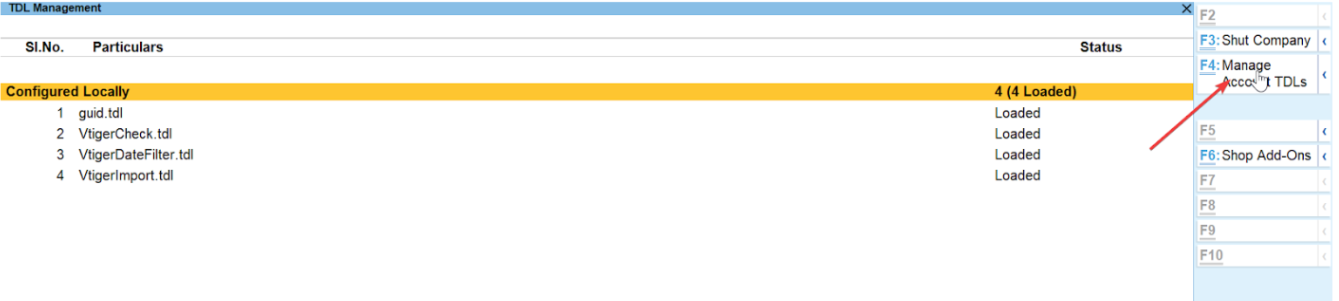
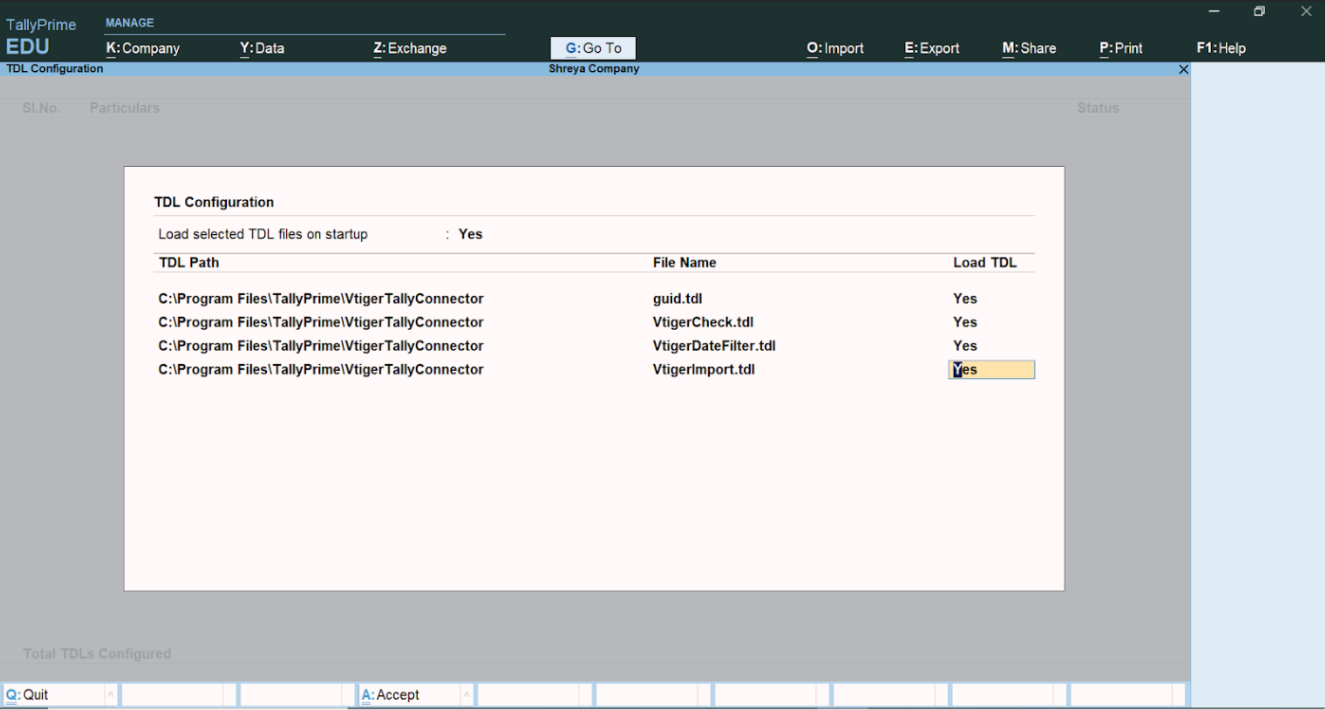
Load TDL Files in Tally
- Open Tally.
- Press Fn + F1 to open the Help menu.
- Go to TDLs and Add-ons.
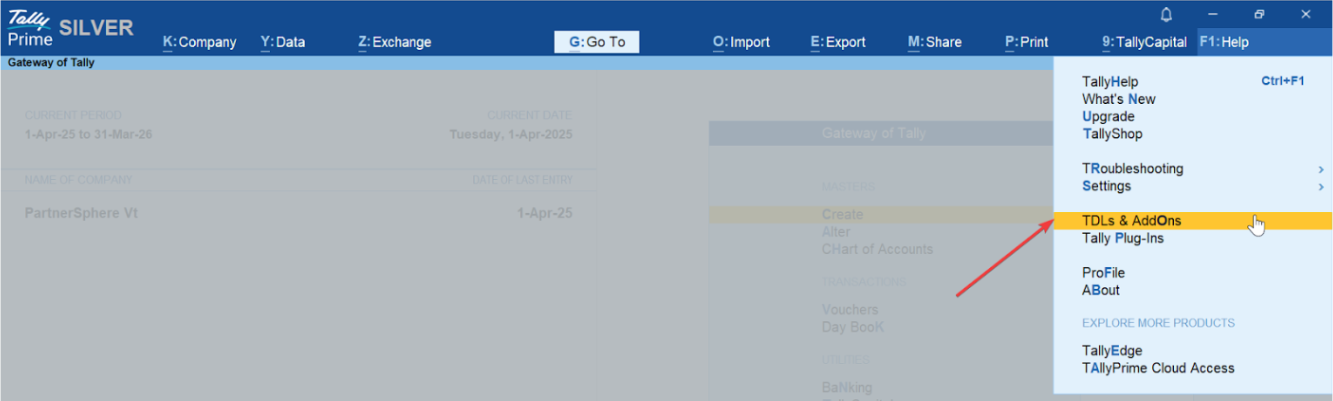
- Load TDL files from the VtigerTallyConnector folder.
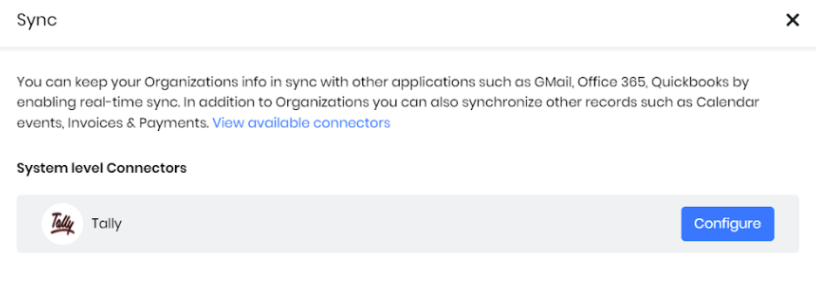
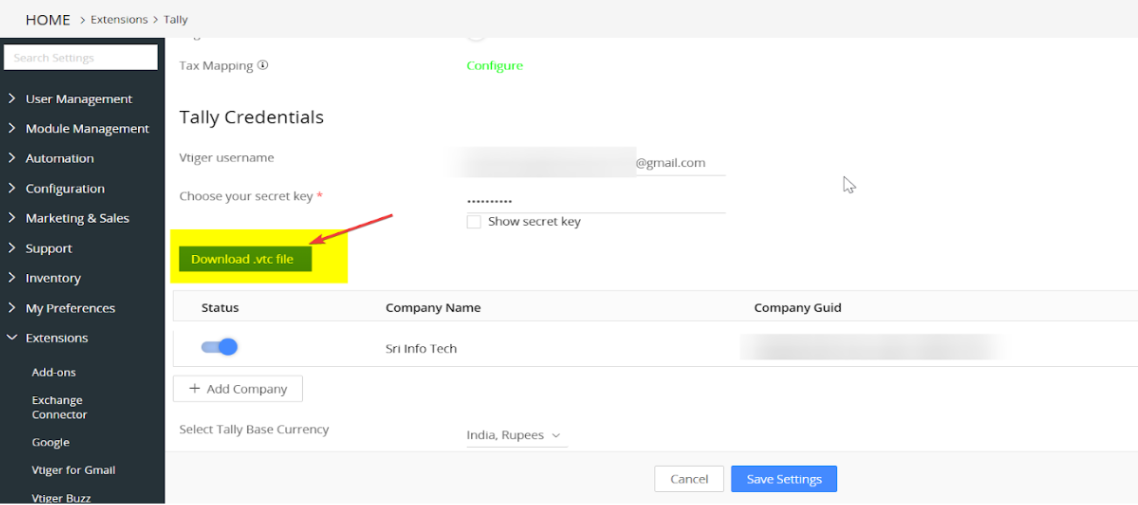
Configure Tally in Vtiger
In Vtiger CRM, please follow the steps below to configure Tally
- Log in to the CRM.
- Go to the Main Menu.
- Go to Organizations > List View > Settings > Configure Tally.
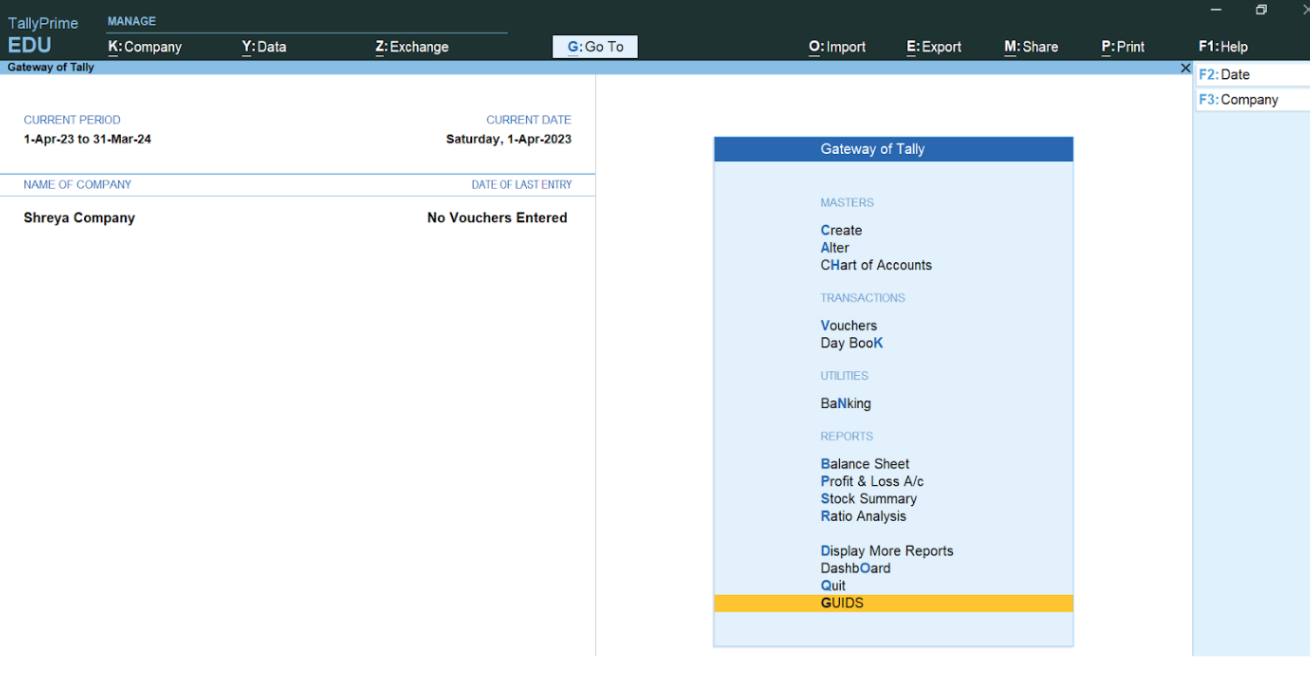
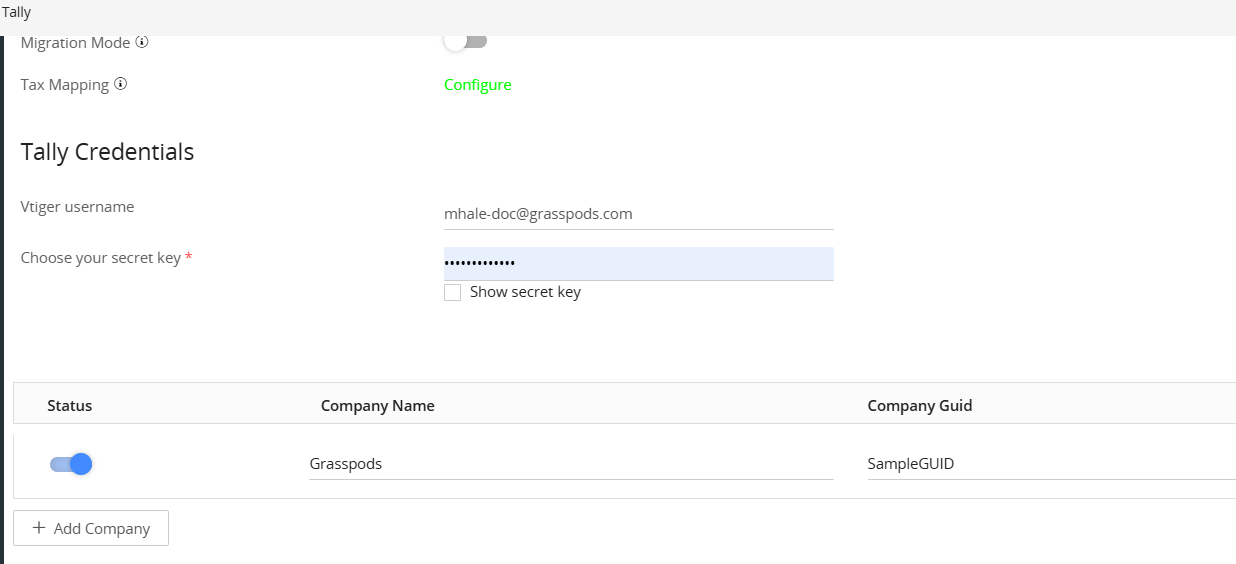
- Copy the Company Name and GUID from Tally.
- Paste the values into the respective fields in Vtiger.
Set Up the VTC File
-
Download the .vtc file from Vtiger.
-
Place it in the same folder as above (conf).
-
Ensure the correct path is referenced in VtigerTallyConnector.properties.
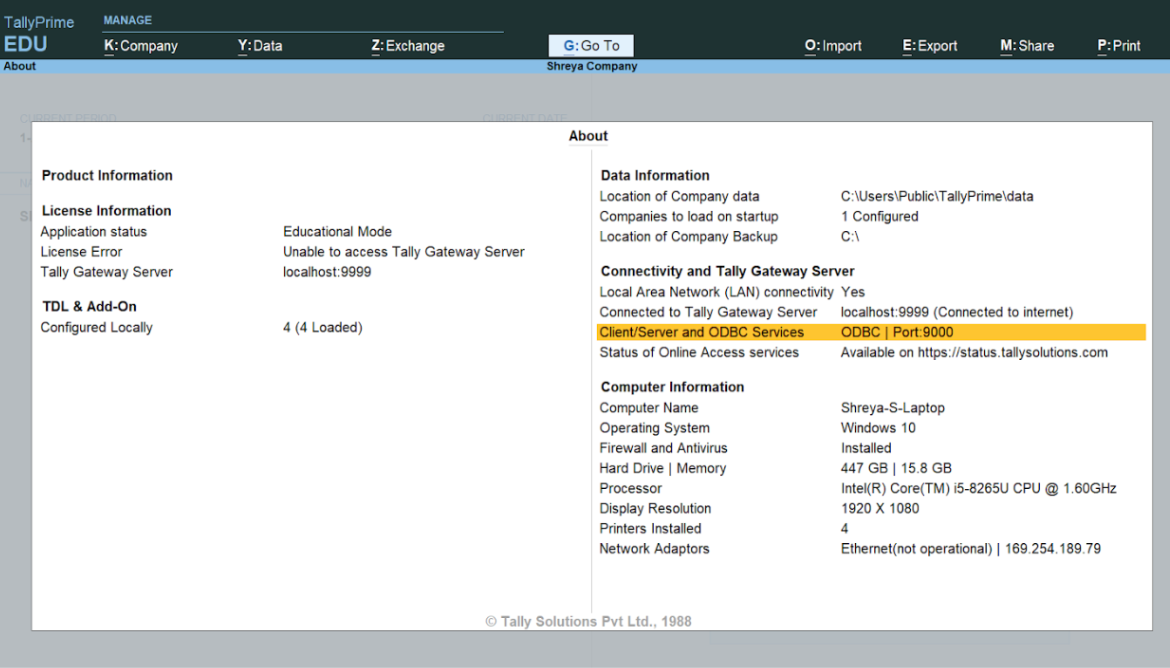
Check Port Number in Tally
- Open Tally.
- Press Fn + F1 > Help > About.
- Note the port number (default: 9000 or similar) for API connection.
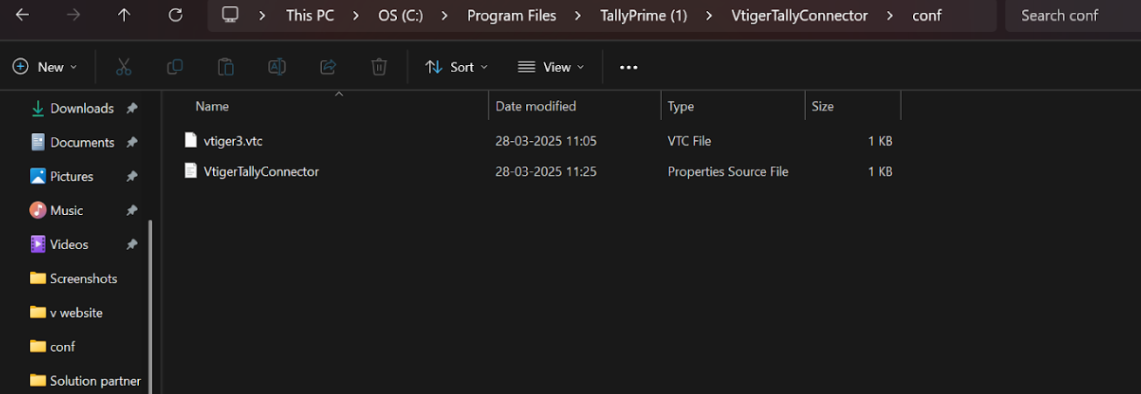
Edit Configuration Files
- Go to: C:\Program Files\TallyPrime\VtigerTallyConnector\conf
- Open VtigerTallyConnector.properties in Notepad.
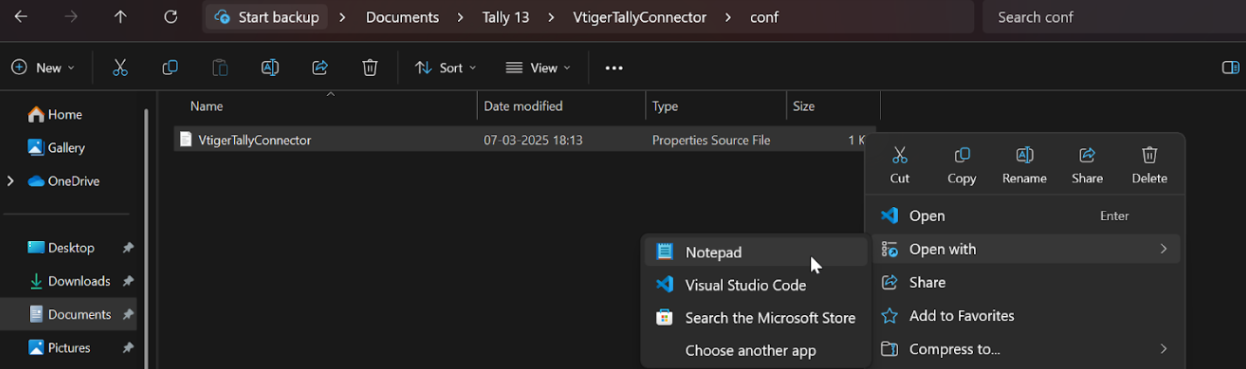
- Update the following:
- VTC_File_Path: Provide the full path to your downloaded .vtc file.
- Tally_Company: Enter your company name from Tally.
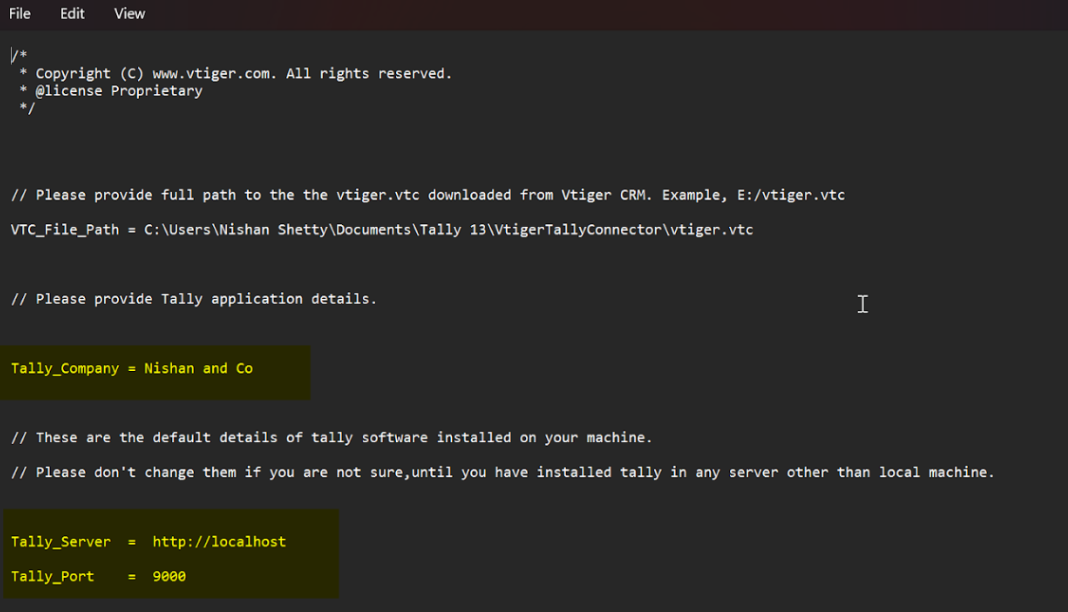
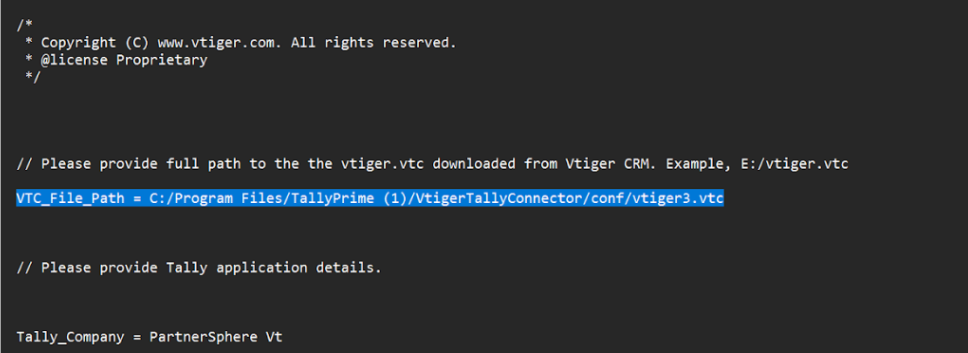
Note:
-
Use forward slashes (/) instead of backslashes (\) in the path.
Example:
VTC_File_Path = C:/Program Files/TallyPrime/VtigerTallyConnector/conf/vtiger3.vtc
Tally_Company = Your Company Name
Create Ledger in Tally
- In Tally: Gateway of Tally > Masters > Create > Accounting Masters > Ledger
- Fill in the required fields and save.

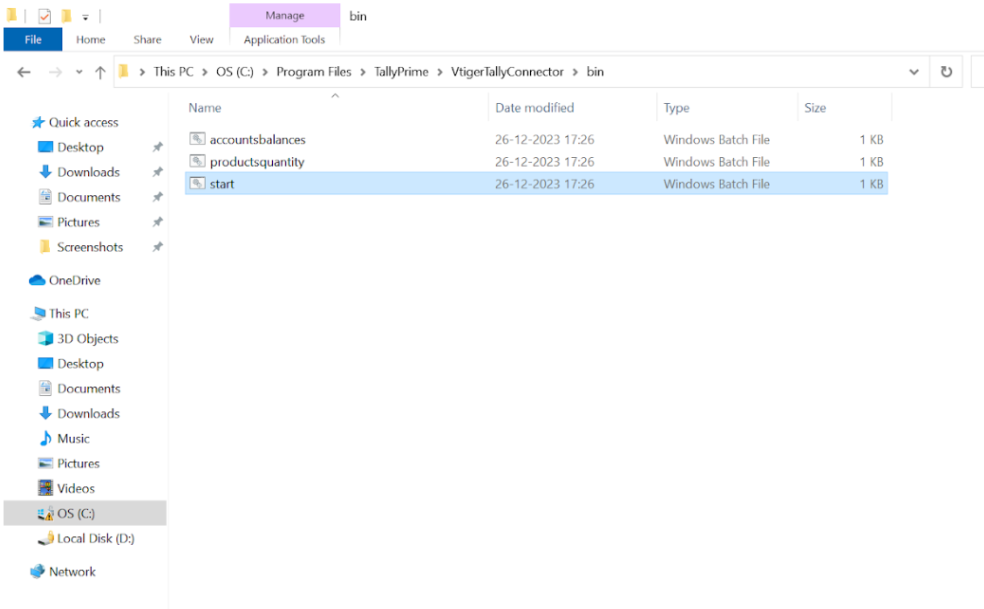
Start the Connector
- Navigate to: C:\Program Files\TallyPrime\VtigerTallyConnector\bin
- Run the file named start (double-click or execute via command line).
- Wait for the service to start successfully.
Validate Sync in Vtiger
- Log in to the CRM.
- Go to the Main Menu.
- Go to the Organizations module.
- Refresh the page.
- You should now see the ledger or organization synced from Tally.
Set Sync Options
- For modules like Sales Orders, you can set record limits.
- Sync Organizations and Products first to ensure smooth Invoice and Sales Order syncs.

Understanding the Sync Process
- First Sync uses the Sync From Date field.
- Subsequent Syncs use the last sync timestamp.
- You can manually update the date to fetch historical data.
- Admins can access detailed logs from each sync batch.
Resetting Data (Optional)
- If synced data contains incorrect values, such as mismatched taxes:
- Use the Reset option at the module level in Vtiger CRM.
- This action clears the data and re-syncs the correct values from Tally.
- Example: Resetting will fix mismatched predefined taxes.