Articles in this section
Creating Articles in Vtiger CRM
Feature Availability
Vtiger Editions: One Pilot | One Growth | One Professional | One Enterprise | One AI
Introduction
The Articles module in Vtiger CRM is a powerful tool that allows businesses to publish structured, long-form information for their customers. Whether you want to share product updates, technical instructions, announcements, or detailed process documentation, Articles help you deliver clear and comprehensive guidance.
While FAQs provide quick answers to common queries, Articles enable you to offer deeper insights and step-by-step explanations. With rich formatting options and full customization capabilities, you can create professional-quality documentation that matches your brand and supports your customers effectively.
Benefits of Articles
The benefits of creating FAQs in Vtiger CRM:
- Content Creation: Create detailed documentation on features, integrations, processes, and add-ons.
- Content Organization: Use categories and tags to structure your content for easy navigation.
- Consistent Information: Provide standardized, up-to-date information to customers.
- Feedback and Improvement: Allow users to rate content and share feedback for continuous improvements.
- Global Accessibility: Make content accessible to users worldwide through the Help Center.
In this article, you will learn about:
- Installing the Article Add-on
- Publishing Articles in Help Center
- Creating an article
- Enhancing your article
- Different view of an article
- Analysing the article metrics
Key Terminology
|
|
|
|
|
|
|
|
|
|
|
|
|
|
|
|
|
|
|
|
|
|
|
|
|
|
|
Installing the Article Add-on
Before you begin using the Articles module, the Articles Add-on must be installed from the Add-ons.
This enables the Articles module under Help Desk and generates the Help Center website URL.
Follow these steps to install the Article Add-on:
- Log in to the CRM.
- Click User Profile in the top right corner of the screen.
- Click Settings.
- Go to Extensions.
- Click Add-ons. The Add-on page opens.
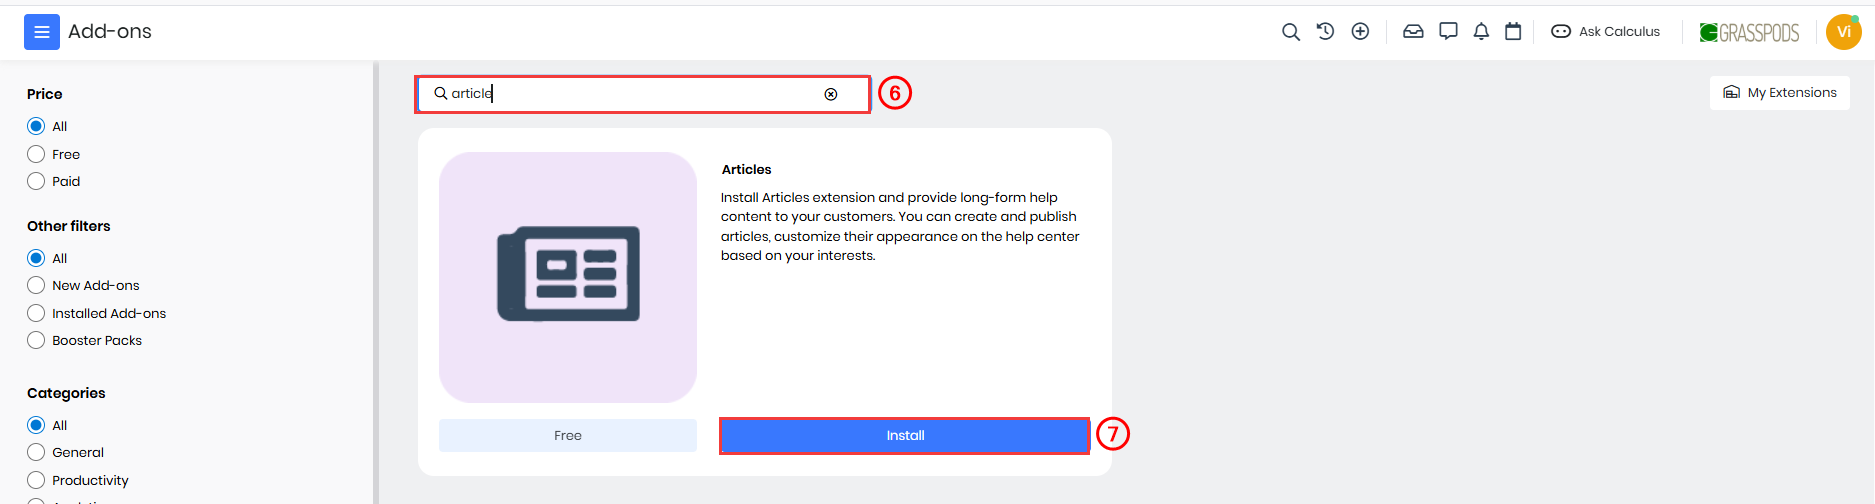
- Type Article in the search bar. The Article add-on appears.
- Click Install. The Are you sure you want to install/upgrade this add-on? message pops up.
- Click Yes to confirm the installation.
Once the installation is complete, the Articles module becomes available under Help Desk.
Publishing Articles in the Help Center
The Help Center (HC) is where all your published articles become accessible to users. It acts as a centralized, customizable website that hosts Articles, FAQs, Updates, and Release Notes. By sharing the Help Center URL, you enable your customers and teams to quickly find accurate information and resolve issues on their own.
The HC is fully customizable, allowing you to adjust its design and layout to align with your brand and content style. Once your Help Center is configured and personalized, you can proceed to create and publish your first article.
To learn more about Help Center, click here.
Creating an Article
You can create an article in Vtiger CRM using any of the following methods:
- From the Articles module
- Using Quick Create
The following sections explain each method in detail.
Note: Make sure that you have configured the Categories and Subcategories first. To learn more about Categories and Subcategories, click here.
Creating an Article from the Articles Module
Follow these steps to create an article:
- Log in to the CRM.
- Click main Menu.
- Go to the Help desk.
- Select Agent Enablement > Article. The Add Article page opens
- Click +Add Article. The Add Article window opens.
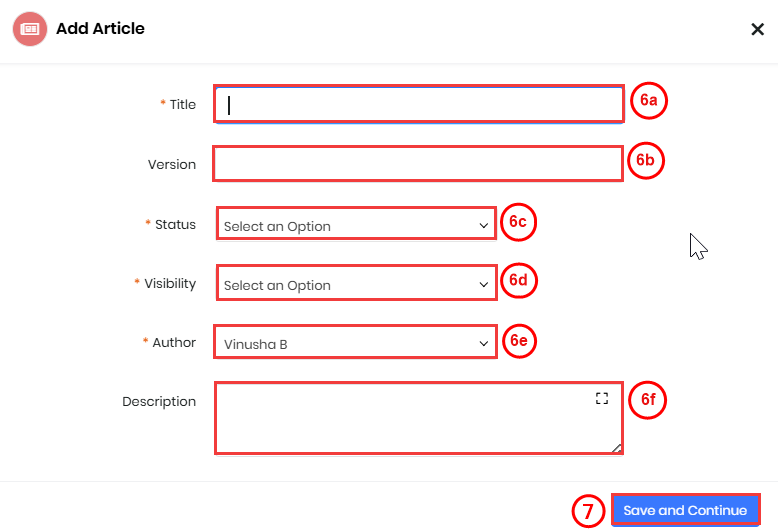
- Fill in the following mandatory information:
- Title - Enter the name of the article.
- Version - Specify the version number of the article. This helps track updates and revisions.
- Status - Pick the Status of your article from the drop-down. Status defines what phase your article is currently in.
- Visibility - Select to whom your article must be visible. It can be made:
- Public - Anybody in the world can read your articles.
- Logged in Contacts - Only the contacts who have logged in using their portal credentials can read your articles.
- Employees - Only your employees can read your articles
- Author - Enter the name of the person responsible for writing or maintaining the article.
- Description - Provide a brief summary of the article’s content or purpose.
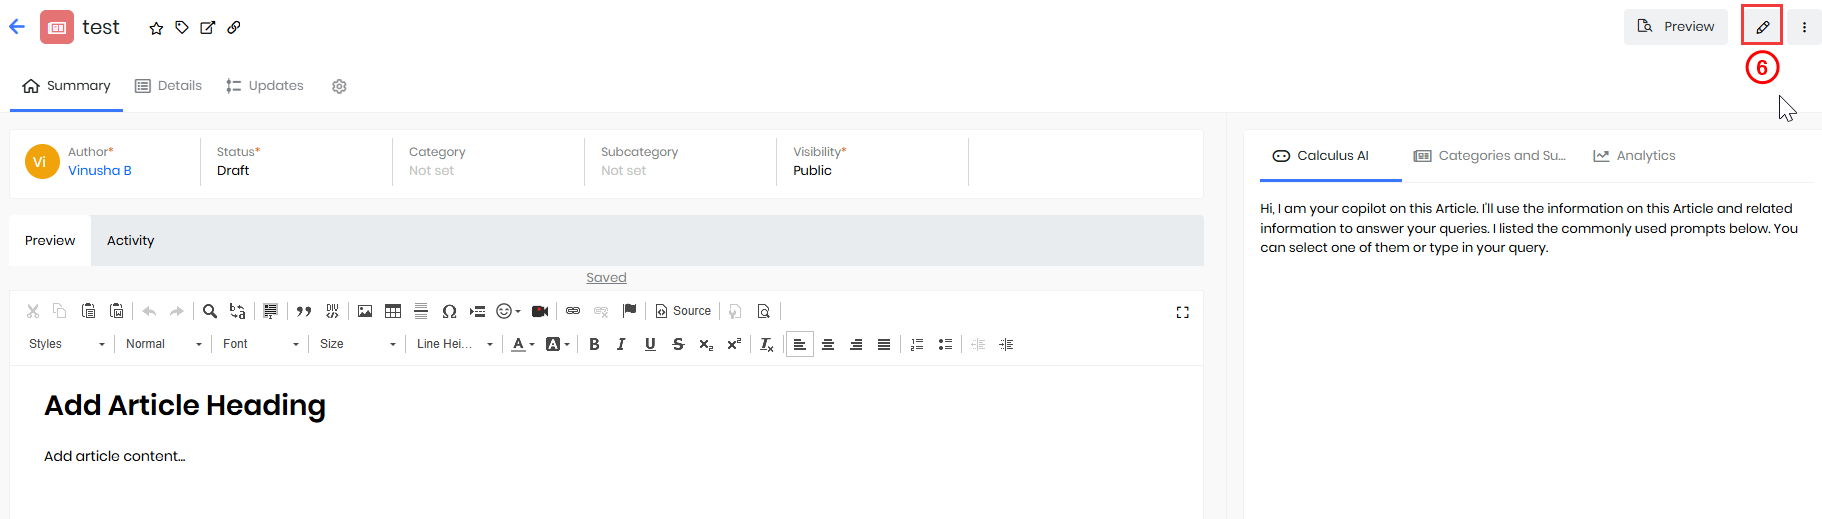
- Click Save and Continue to create the article and write the content.
Note: You can preview your article to see how it will appear on the Help Center (HC). Click the Preview button to review the layout, identify errors, and refine your content before publishing.
Using Quick Create
Articles can also be created by clicking the + icon present on the top bar.
Follow these steps to create an article using Quick Create:
- Log in to the CRM.
- Click the + icon displayed on the top bar on your screen.
- Click the Show all button to view all the modules you can create records using Quick Create.
- Go to Help desk.
- Select Article. The Add Article page opens.
- Fill in the following mandatory information:
- Title - Enter the name of the article.
- Version - Specify the version number of the article. This helps track updates and revisions.
- Status - Pick the Status of your article from the drop-down. Status defines what phase your article is currently in.
- Visibility - Select to whom your article must be visible. It can be made:
- Public - Anybody in the world can read your articles.
- Logged in Contacts - Only the contacts who have logged in using their portal credentials can read your articles.
- Employees - Only your employees can read your articles
- Author - Enter the name of the person responsible for writing or maintaining the article.
- Description - Provide a brief summary of the article’s content or purpose.
- Click Save and Continue to create the article and write the content.
To know more about Quick Create, click here.
Editing an Article
You can edit an Article in two ways:
- From the List View
- From the Summary View
From the List View
Follow these steps to edit an Article from the List View:
- Log in to the CRM.
- Click main Menu.
- Go to the Help desk.
- Select Agent Enablement > Article. The Article List View opens.
- Hover over the Article you want to edit.

- Click Edit from the quick action options. The Editing Article page opens.
- Make the necessary changes in the required sections.
- Click Save.
From the Summary View
- Log in to the CRM.
- Click main Menu.
- Go to the Help desk.
- Select Agent Enablement > Article. The Article List View opens.
- Click on the Article you want to edit. The Summary View of the record opens.
- Click Edit in the top right corner. The Editing Article page opens.
- Make the necessary changes in the required sections.
- Click Save.
Enhancing your Articles
Based on the type of information you want to display, you can add tables, screenshots, images, and links to other articles, websites, etc. This can help when you have to make references to a screen, an external help document, or a website.
Adding screenshots
Follow these steps to add a screenshot to an article:
- Log in to the CRM.
- Click main Menu.
- Go to the Help desk.
- Select Agent Enablement > Article. The Article List View opens.
- Click and open an Article. The Details View opens.
- Go to Preview.
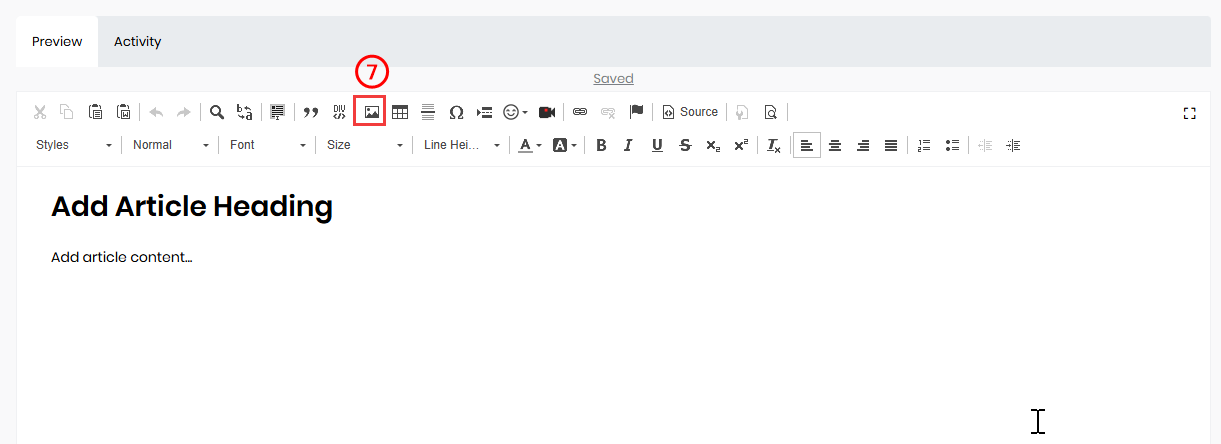
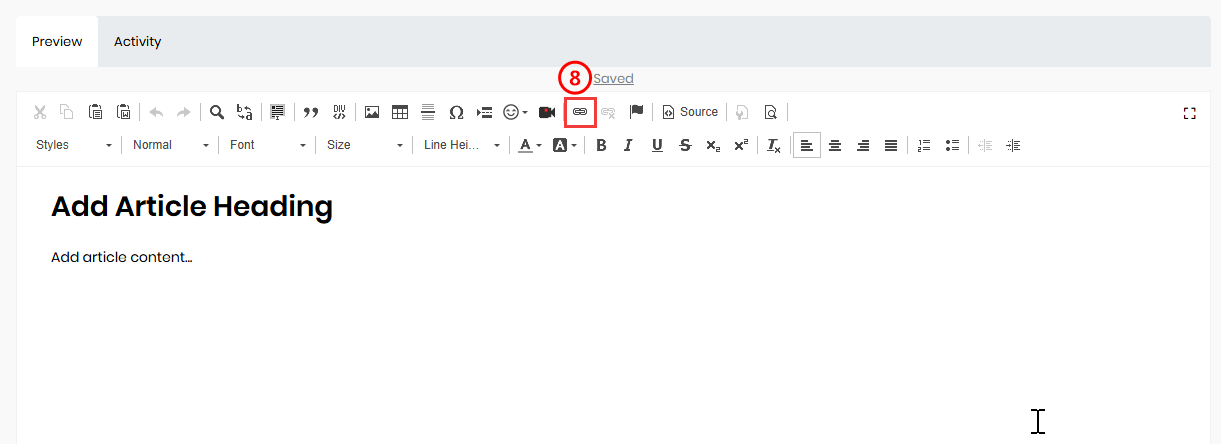
- Click Image provided in the editor’s toolbar.
- Click the Upload tab.
- Click Choose File to browse and select for the image on your local computer.
- Click Send it to the Server.
- Specify image properties such as the alternative text, height, width of the image, alignment, etc., in the Image Info tab. (This is an optional step.)
- Click OK.
The screenshot will be added to the article.
Adding links
Follow these steps to add a link to an external document:
- Log in to the CRM.
- Click main Menu.
- Go to the Help desk.
- Select Agent Enablement > Article. The Article List View opens.
- Click and open an Article. The Details View opens.
- Go to Preview.
- Select the text that you want to link to the external document.
- Click Link in the toolbar.
- Type the URL of the external document in the URL field under the Link Info tab.
- Click OK.
A hyperlink in blue will be added to the text you selected. This indicates that the link is embedded in the text
Article Views
You can access all your articles by navigating to Main Menu > Help Desk > Agent Enablement > Articles. Vtiger CRM offers five viewing options to help you review, manage, and organize your articles efficiently: List View, Summary View, Kanban View, Calendar View, and Grid View.
By default, articles are displayed in List View.
You can easily switch between the different view modes using the icons available at the top-right corner of the module, next to the +Add Article button.
List View

The List View displays all articles in a structured list format, making it easy to browse, sort, and perform quick actions. You can sort records using column headers such as Title, Status, or Updated Time. This view helps you quickly locate and manage articles.
To learn more about the List View, click here.
Summary View
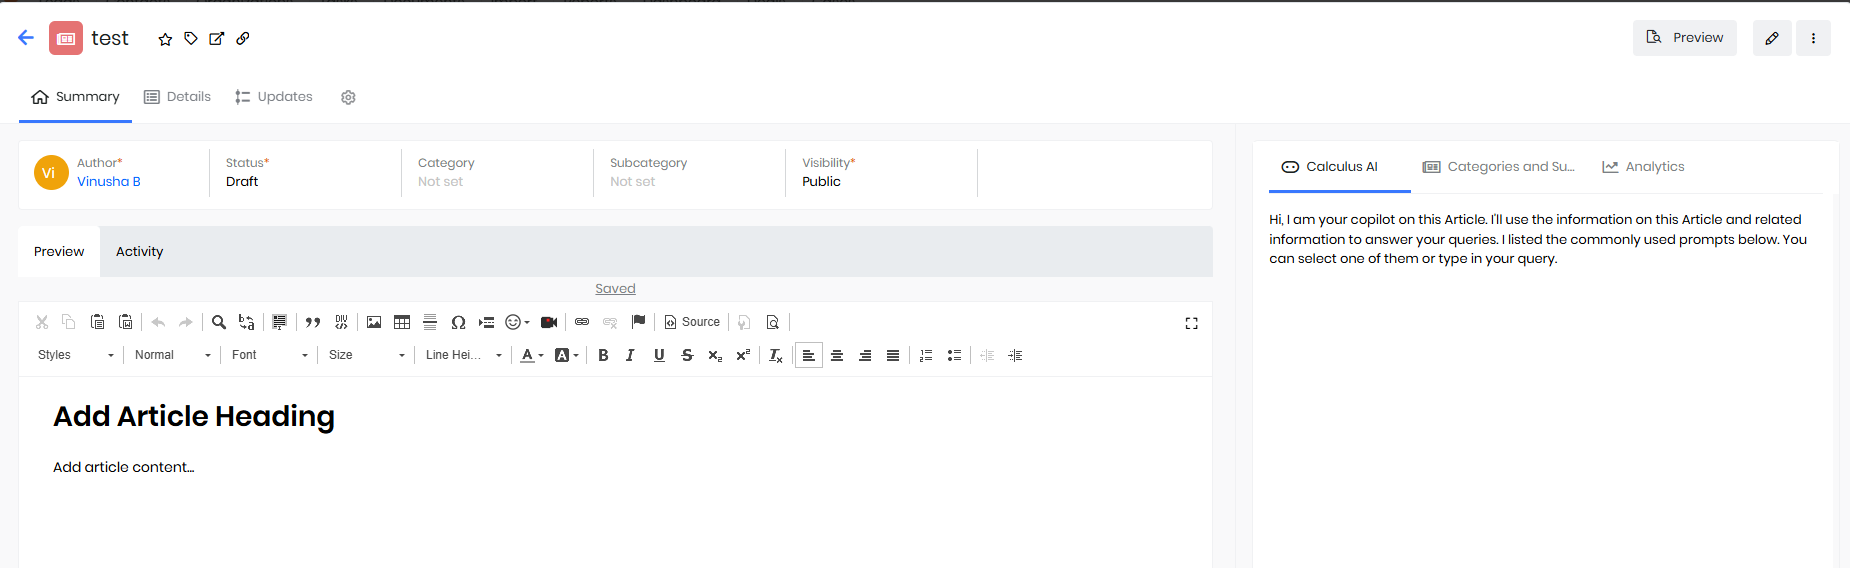
The Summary View provides a complete overview of a specific article on a single page. It displays key information such as the article’s title, category, status, tags, and linked records. You can also perform actions such as editing the article, updating its status, or adding related information.
To learn more about the Summary View, Click here.
Kanban View
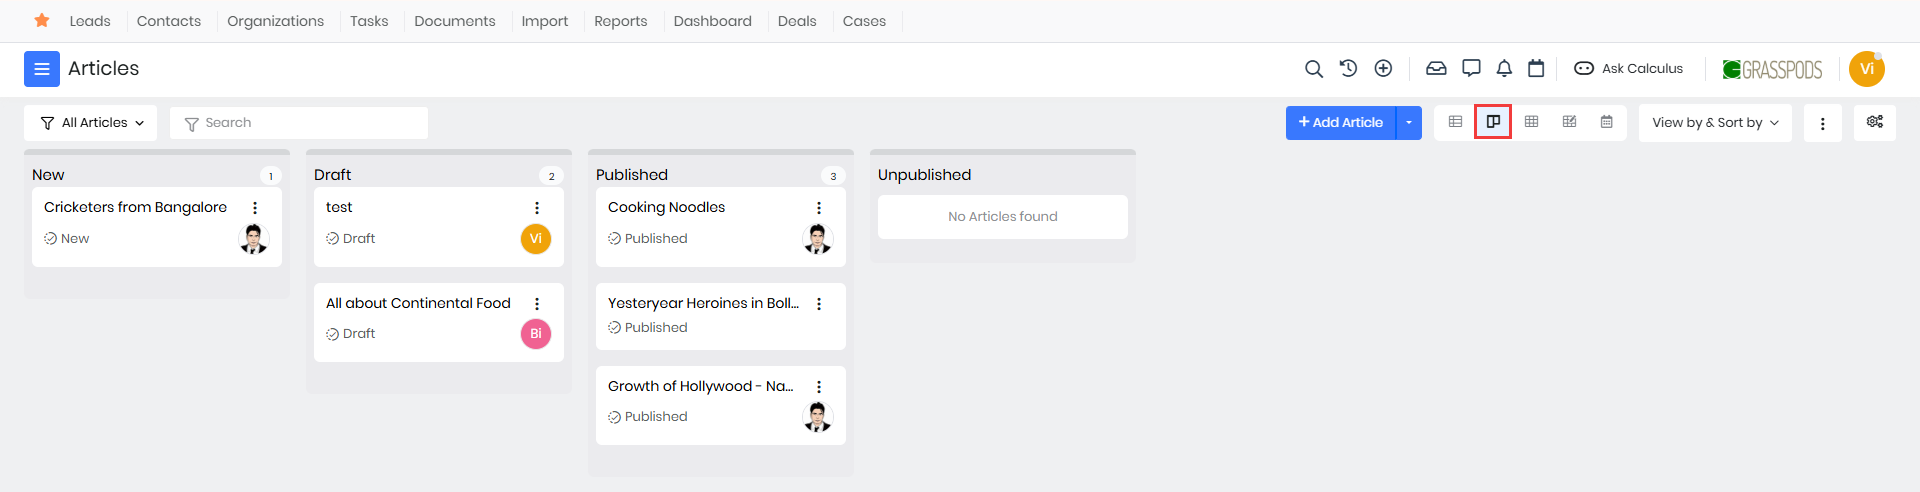
The Kanban View represents articles as cards organized into columns based on their status, such as Draft, Published, To be Reviewed, Reviewed, Obsolete, Junk, or Deleted. This visual layout helps you track the progress of your articles effectively. You can drag and drop cards between columns to update their status instantly.
To learn more about the Kanban View, click here.
Card View
The Card View displays each article as an individual card containing its key details in a clean and organized layout. Each card shows important information such as the Article Name, Category, Sub-category, Status, Created By, and Visible To permissions. This layout helps you quickly understand an article’s classification and accessibility.
From this view, you can also perform actions like opening the article, editing its details, or updating its status.
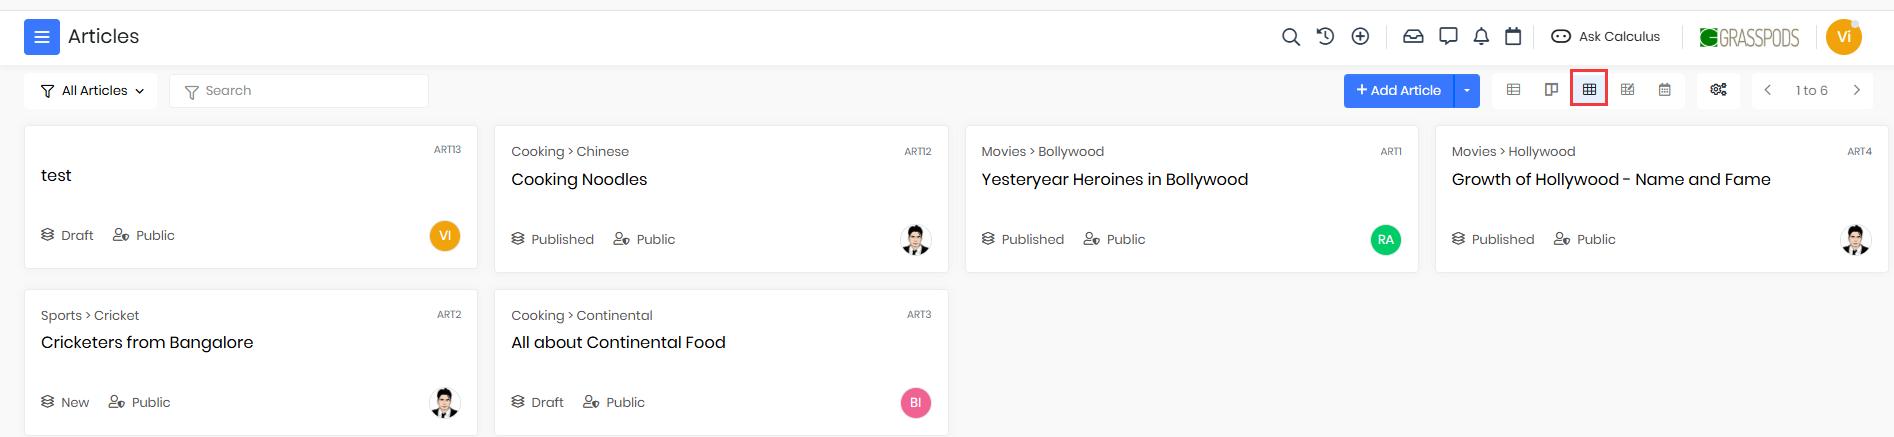
Grid View
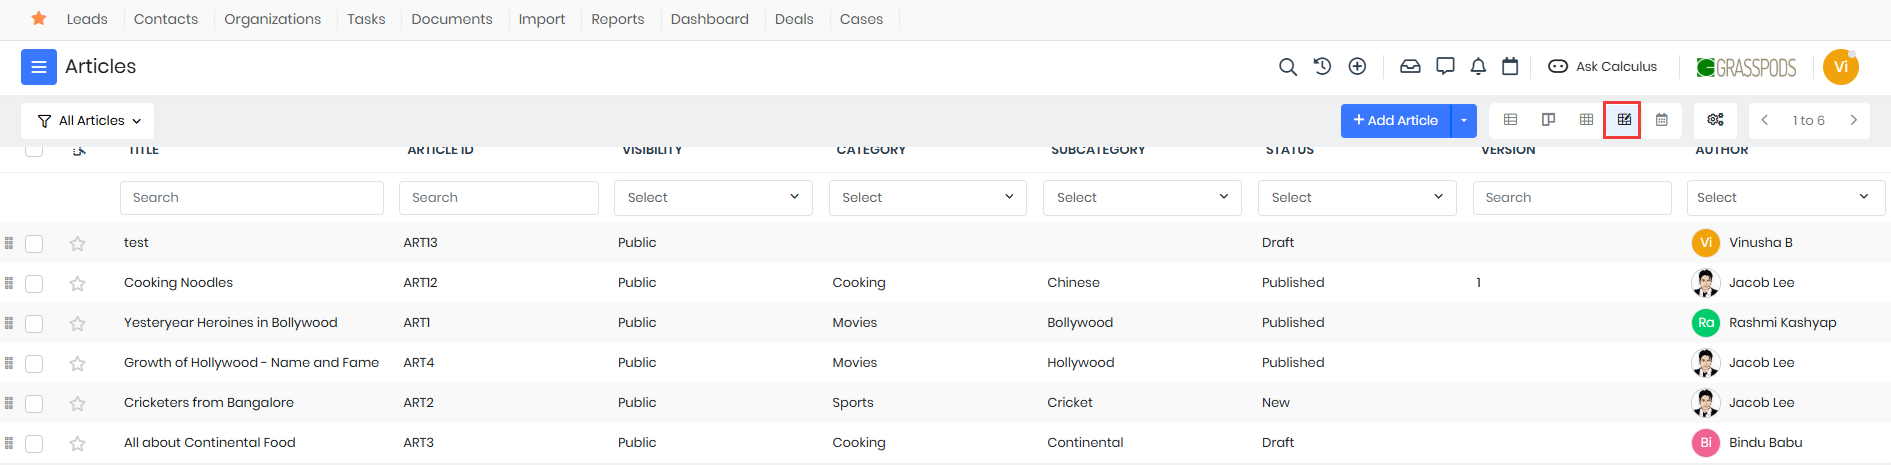
The Grid View displays articles in a spreadsheet-like layout with editable cells. Each article appears as a row, making it useful for bulk editing multiple records at once. You can modify fields such as tags, categories, or statuses directly within the grid without opening individual articles.
To learn more about the Grid View, click here.
Calendar View
 The Calendar View displays articles according to their creation or modification dates in a calendar format. You can navigate between months using the arrows. Clicking an article displays details like the owner, creation date, last modified date, and status. You can also take quick actions from this view, such as:
- Adding comments or sticky notes
- Opening the article in a new window
- Editing the article details
To learn more about the Calendar View, click here.
Analyzing Article Metrics
Once you have published an article, you can analyze the metrics and see how well the customers receive your article. In the Articles’ Summary View > Analytics widget, you can see the metrics’ summary.
Article Views
This metric is a bar chart that will display the number of views on the article.
If you click the More icon, you can see options to print the chart or save it as an image.
Article Rating
This metric shows how many readers have found your article helpful or not helpful.