Articles in this section
Twitter Integration with Social Module
Feature Availability
Vtiger Editions: One Pilot | One Growth | One Professional | One Enterprise | One AI
Introduction
The social module is the social media management module built within the CRM. It allows you to manage social media platforms like Facebook, Google, Instagram, and Twitter simultaneously.
Vtiger Social lets you perform various functions, such as posting, commenting, and replying, just like on your social network sites.
Vtiger Social for Twitter
Integrate your official Twitter account with Vtiger CRM and manage various activities, such as following directly from the Social module screen in the CRM:
- Post a Tweet
- Reply to a Tweet
- Schedule a Tweet
- Like a Tweet
- Retweet a Tweet
- Quote Tweet
- Delete a Tweet
- Select and add Contacts, Leads, Deals, and Cases to your Tweets
- Look up information using the Search Stream on two platforms, Twitter and Instagram
- You can search using specific hashtags, keywords, and Twitter accounts
Vtiger Social helps you monitor and manage your Twitter page, significantly enhancing business and product marketing.
Note: While the Social module is accessible to all users, only Admin users can configure the Social module settings.
Social Posts From Process Designer
When you click on Social Message, the process action window pops up. You can enter the message and select the social media accounts to which the messages should be sent in Vtiger's Social module.
In this article, you will learn how to:
- Compose and post Tweets
- View and reply to Tweets on your Twitter page
- Schedule and Like Tweets on your Twitter page
- Search the Twitter Stream with specific hashtags, keywords, and Twitter accounts.
- Search the Twitter Stream simultaneously on two platforms, such as Twitter and Instagram
- Add New Contacts, Leads, Deals, and Cases from your Twitter page
Key Terminology
|
|
|
| | |
| | |
| | |
| | |
| |
|
| | |
|
| |
Using Twitter in the Social Module
Let us learn how to set up and use your Twitter account from the Social module.
The Social module is available by default in the CRM.
Follow these steps to access the Social module:
- Log in to the CRM.
- Click the main Menu.
- Go to Marketing.
- Look for Campaigns.
- Select Social. The Social module dashboard opens.
Requirements
You need to have a Twitter business account to integrate your Twitter handle with Vtiger CRM.
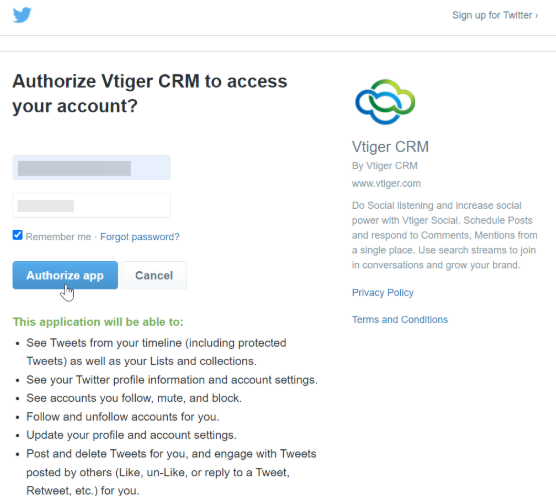
Authorizing your Twitter account in the Social module
To use your account from the Social module, you need to first authorize it.
Follow these steps to authorize and use your Twitter account from the Social module:
- Log in to the CRM.
- Click the main Menu.
- Go to Marketing.
- Look for Campaigns.
- Select Social. You will be directed to the Social module.
- Select Twitter. The Twitter login page opens.
- Click the Authorize app. Twitter will now be displayed under the Social module.
- Click Twitter.
Using Twitter in the Social Module
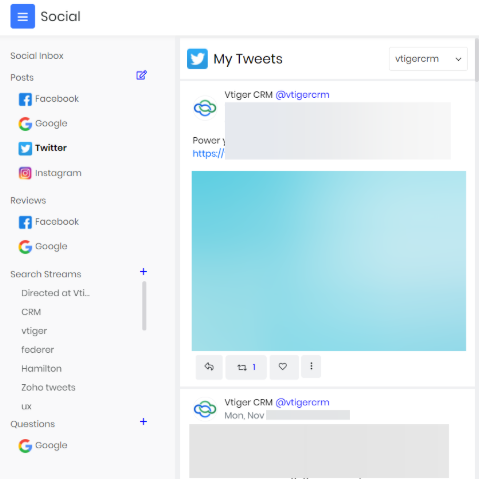
Your Vtiger Social Twitter page consists of three sections, namely:
- My Tweets
- Mentions
- Scheduled
Let us understand each section in detail.
My Tweets
My Tweets section is where you can manage your Tweets. In this section, you can:
- Post a Tweet
- Reply to a Tweet
- Retweet and Quote a Tweet
- Like a Tweet
You can also select and add Contacts, Leads, Deals, and Cases to your Tweets.
Let us look into each of these functionalities.
Posting a Tweet
Let us compose and post a Tweet.

Follow these steps to compose and post a Tweet:
- Log in to the CRM.
- Click the main Menu.
- Go to Marketing.
- Look for Campaigns.
- Select Social. The Social module dashboard opens.
- On the left-hand side, under Posts, click Twitter.
- Click the Compose Post icon. The New Post window opens.
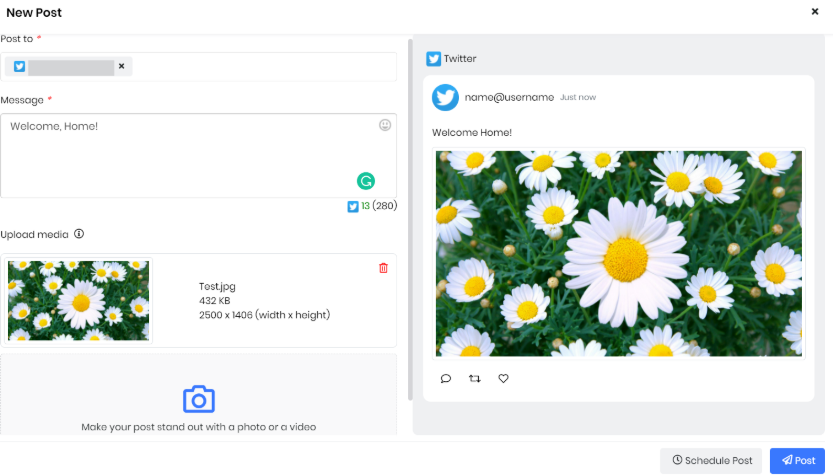
8. Enter or select the following information in the New Post window:
- Post to - Select your Twitter account.
- Message - Enter your Tweet content.
- Upload media - Upload any (image, audio, video) files to be Tweeted. You can drop your files here or click Browse to upload files from your system. You can view the preview of your Tweet on the right-hand side of the New Post window.
- Click Post.
The My Tweets screen will display all the Tweets you post.
Note:
- Plan and prepare your content before you create a Tweet.
- Review content for grammar and punctuation before you post a Tweet.
Replying to a Tweet
The reply option lets you respond to or add comments to a Tweet.
Follow these steps to reply to a Tweet:
- Log in to the CRM.
- Click the main Menu.
- Go to Marketing.
- Look for Campaigns.
- Select Social. The Social module dashboard opens.
- On the left-hand side, click Twitter under Posts.
- Choose the Tweet you want to reply to.
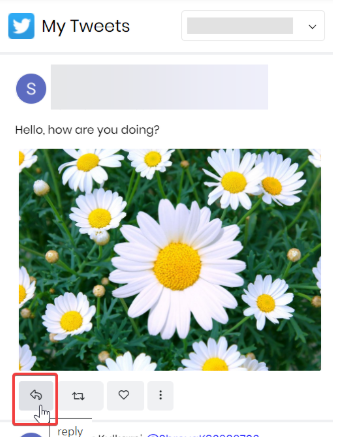
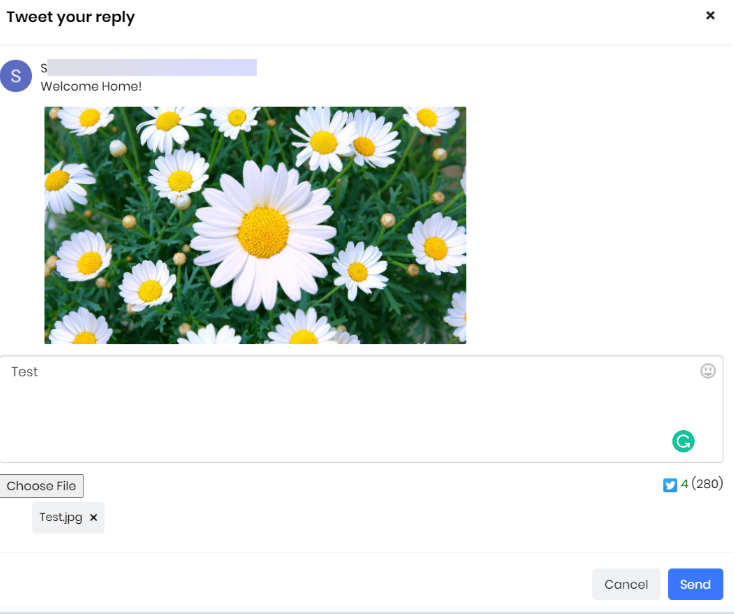
- Click the reply icon at the bottom of the Tweet. The Tweet your reply window opens.
- Tweet your reply in the Tweet your reply window.
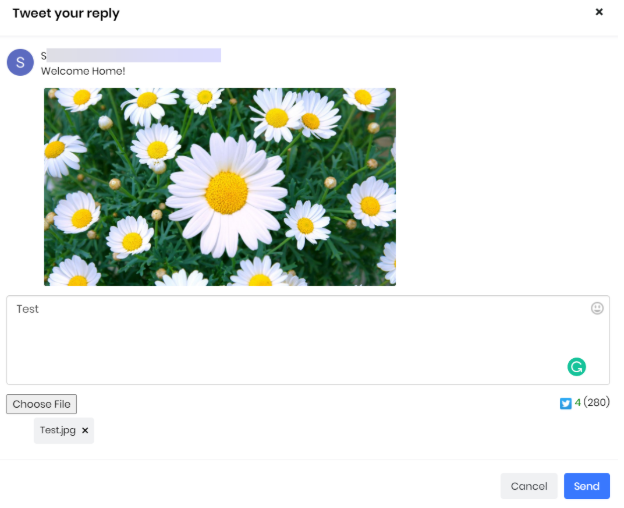
- Type your reply in the enter message window. Note: Make sure the content does not exceed the 280-character limit.
- Click Choose File to upload any (image, audio, video) files from your system.
- Click Send.
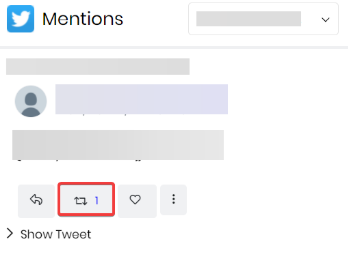
My Tweets will display all your replies at the top. 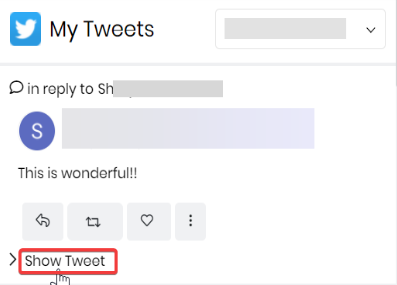
Click the Show Tweet button to view the original Tweet you replied to.
Retweeting a Tweet
The Retweet option automatically reposts an existing Tweet. This section provides the Quote Tweet option as well.
Follow these steps to retweet a Tweet:
- Log in to the CRM.
- Click the main Menu.
- Go to Marketing.
- Look for Campaigns.
- Select Social. The Social module dashboard opens.
- On the left-hand side, under Posts, click Twitter.
- Choose the Tweet you want to Retweet.
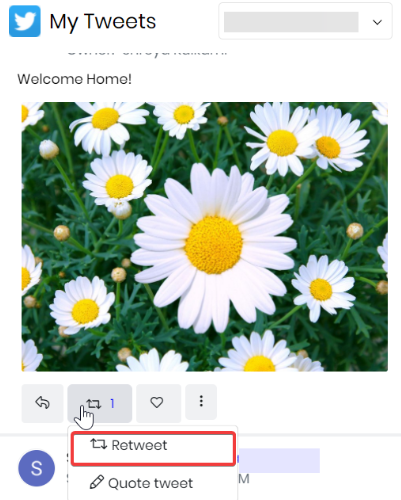
- Click the Retweet icon at the bottom of the Tweet.
The specific Tweet will be reposted on your Twitter page, and only the Retweet count will be displayed on CRM.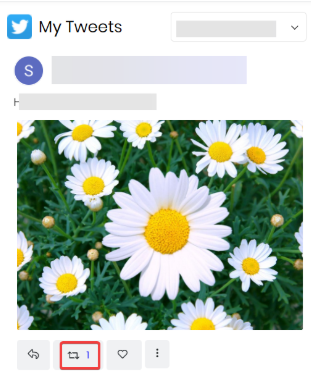
Quoting (sharing) a Tweet
The Quote Tweet option allows you to share a Tweet and add your comments to it.
Follow these steps to quote (share) a Tweet:
- Log in to the CRM.
- Click the main Menu.
- Go to Marketing.
- Look for Campaigns.
- Select Social. The Social module dashboard opens.
- On the left-hand side, under Posts, click Twitter.
- Choose the Tweet you want to quote (share).
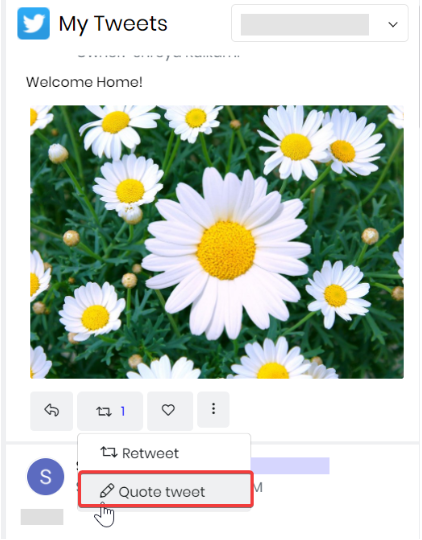
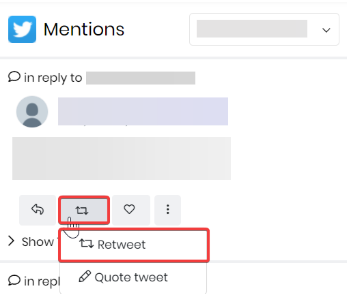
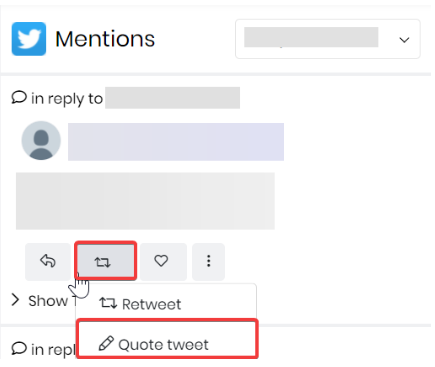
- Click the Retweet icon at the bottom of the Tweet.
- Select Quote Tweet. The Quote Tweet window opens.
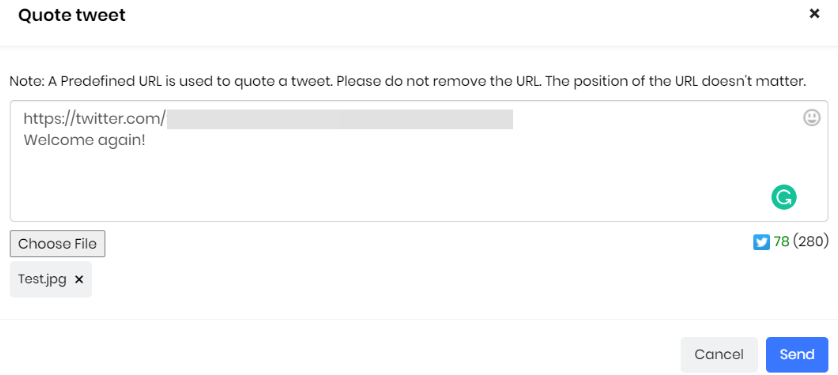
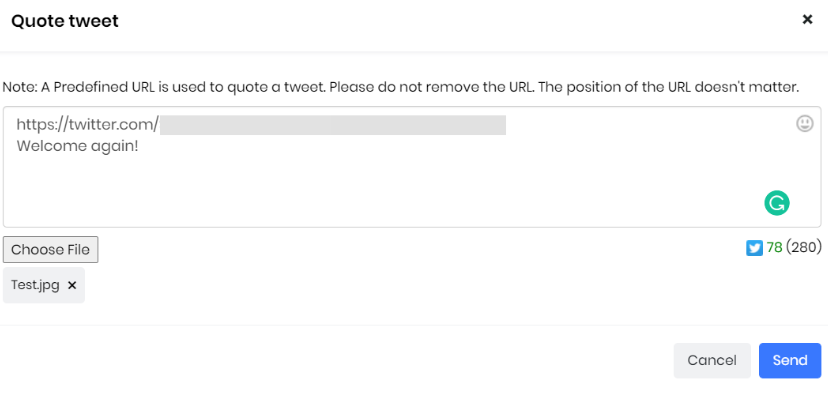
- Enter your comments for the specific Tweet. Note: Ensure the predefined URL is present, and you do not remove it, and the content does not exceed the 280-character limit.
- Click Choose File to upload image, audio, or video files (if any) from your system.
- Click Send.
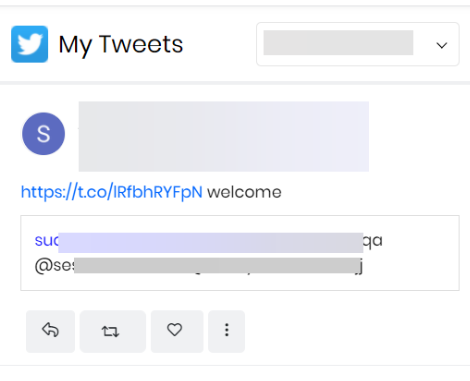
The specific Tweet will appear under My Tweets, showing your comments alongside the original Tweet. A URL to the Twitter page is generated, directing you to the user’s Twitter account to which you quoted a Tweet.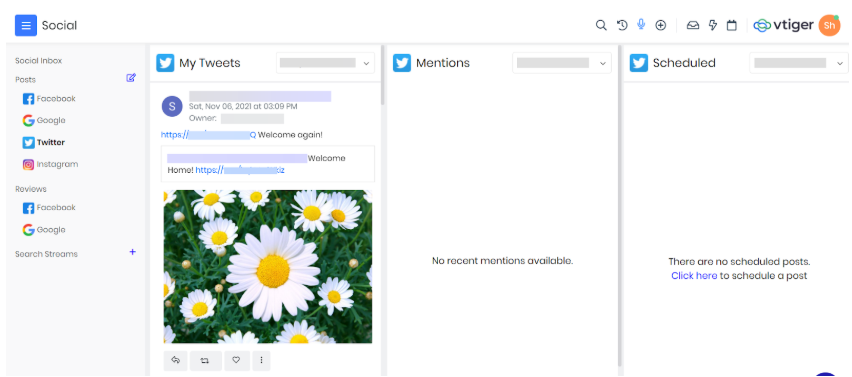
Liking a Tweet
The Like Tweet option allows you to express your appreciation for a Tweet.
Follow these steps to like a Tweet:
- Log in to the CRM.
- Click the main Menu.
- Go to Marketing.
- Look for Campaigns.
- Select Social. The Social module dashboard opens.
- On the left-hand side, under Posts, click Twitter.
- Choose the Tweet you want to like.
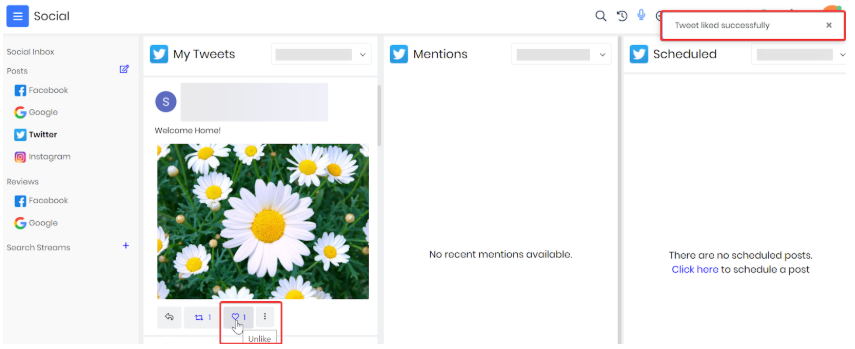
- Click the Like icon at the bottom of the Tweet.
Viewing a User’s Profile

You can view a Twitter user’s account and their profile by clicking on the username.
You can view details such as who they are following, the number of Tweets they have made, and the profile description. You can also view all the Tweets they have made in order from the latest to the oldest.
Tracking the Number of Retweets and Likes
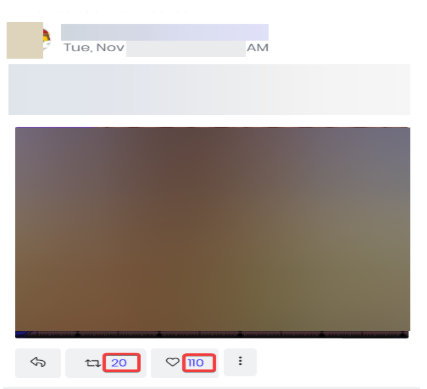
You can view a Tweet’s Retweet and Like counts beside their icons.
Clicking the count also displays the user profiles of those who have retweeted and liked the specific Tweet. You can view the user profiles of the recent 100 Likes.
Actions
Actions (three dots) allow you to select and add a contact, lead, deal, or case record to a Tweet.
Using Actions, you can:
- Add a Contact
- Select a Contact
- Add a Lead
- Select a Lead
- Add a Deal
- Add a Case
- View Contacts, Leads, Deals, and Cases already added
Adding a Contact
Let us add new Contacts who are mentioned in your Tweets or who replied to your Tweets.
Follow these steps to add a contact:
- Log in to the CRM.
- Click the main Menu.
- Go to Marketing.
- Look for Campaigns.
- Select Social. The Social module dashboard opens.
- On the left-hand side, under Posts, click Twitter.
- Choose the Tweet.
- Click Actions.
- Click Add Contacts.
- Click New Contact. The Add Contact window OPENS.
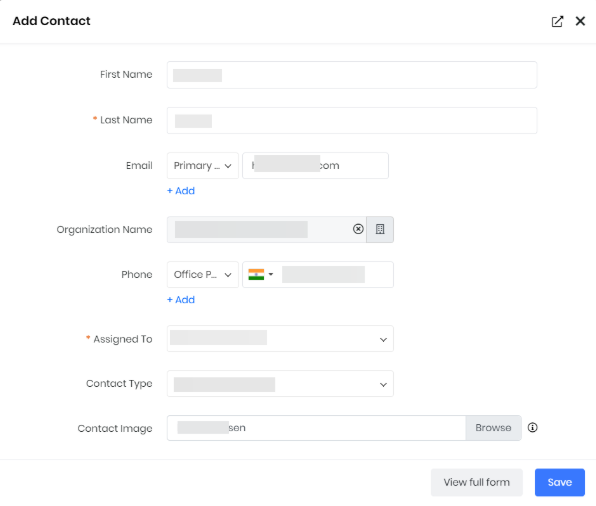
- Enter or select the following information in the Add Contact window
- The user’s name, by default, is taken as the Last Name for the contact record.
- The user’s Tweet is, by default, taken as the Description for the contact record.
- Enter the other details of the Contact record.
- Click Save.
The created contact record will be available in the Contacts module.
Selecting a Contact
Let us link the contact records of existing CRM users who have mentioned or replied to your Tweets.
Follow these steps to select and link a contact:
- Log in to the CRM.
- Click the main Menu.
- Go to Marketing.
- Look for Campaigns.
- Select Social. The Social module dashboard opens.
- On the left-hand side, under Posts, click Twitter.
- Choose the Tweet.
- Click Actions.
- Click Select Contact. You will be directed to the Select Contact window.
- The user (Contact) who tweeted will be displayed if they are already available in the CRM as a contact.
- Select the respective contact record.
With this, you have successfully linked an existing CRM contact record with Twitter.
Adding a Lead
Let us add users who mentioned or replied to your Tweets as new leads in the CRM.
Follow these steps to add a lead:
- Click Actions.
- Click Add Lead. You will be directed to the Add Lead window.
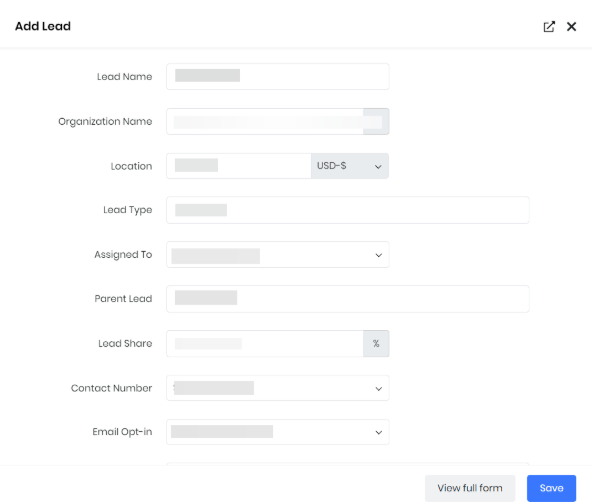
- The user's Twitter handle is added by default as the Last Name.
- Enter the other details of the Lead record.
- Click Save.
With this, you have successfully added a lead and created its lead record, which will be saved in the leads module.
Selecting (linking) a Lead
Let us link the lead records of users who have mentioned or replied to your Tweets, who are existing CRM Contacts.
Follow these steps to select and link a lead:
- Click Actions.
- Click Select Lead. You will be directed to the Select Lead window.
- The user (Lead) who Tweeted will be displayed if already available on your CRM contacts.
- Select the respective lead record.
With this, you have successfully linked an existing CRM lead record with Twitter.
Adding a Deal
Let us add new deals mentioned or replied to on your Tweets that you think are good enough business deals to pursue.
Follow these steps to add a deal:
- Click Actions.
- Click Add Deal. You will be directed to the Add Deal window.
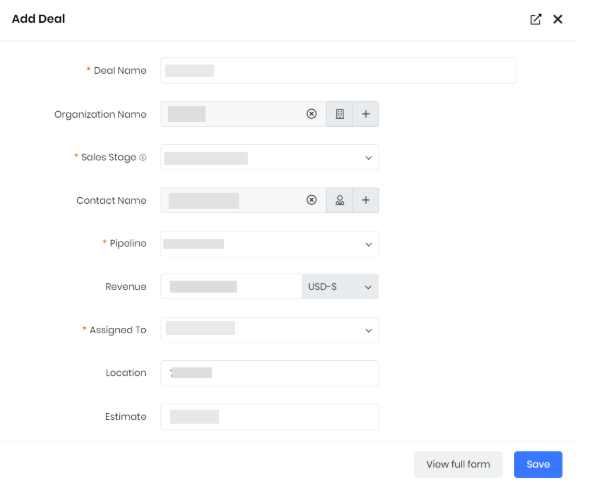
- The user who tweeted the deal is, by default, taken as the Deal Name for the deal record.
- The user’s Tweet (deal) is, by default, taken as the Executive Summary for the deal record.
- Enter all the deal details in the Add deal window for the deal record.
- Click Save.
With this, you have successfully added a deal and created its deal record, which will be saved in the deals module.
Adding a Case
Let us record complaints or any special inquiries as Cases mentioned or replied to on your Tweets.
Follow these steps to add a case:
- Click Actions.
- Click Add Case. You will be directed to the Add Case window.
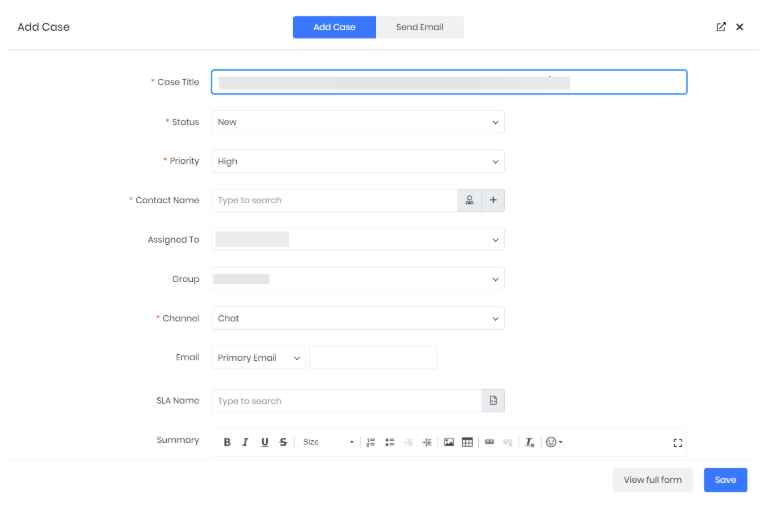
- The user’s Tweet (case) is, by default, taken as the Summary and Case Title for the case record.
- Enter all the case details in the add case window.
- Click Save.
Viewing Contacts, Leads, Deals, and Cases
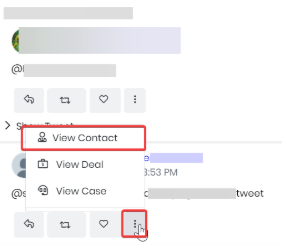
Once you add or select Contacts, Leads, Deals and Cases, you can view the added and selected contacts, leads, deals, and cases on My Tweets and Mentions by clicking Actions.
- View Contact - If you want to view the contact added.
- View Lead - If you want to view the lead added.
- View Deal - If you want to view the deal that was added.
- View Case - If you want to view the case that was added.
With this, you will be directed to their respective contact, lead, deal, and case records.
You can view the contact, lead, deal, and case records created on the Contacts, Lead, Deals, and Cases module respectively. For a quicker search, you can input the keyword Twitter in the source field.
Deleting a Tweet
Let us delete a Tweet.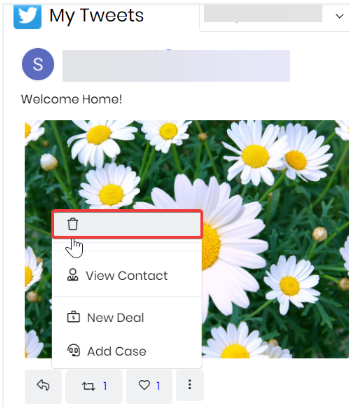
- Click Actions.
- Click the Delete icon.
- You will be directed to the Are you sure you want to delete? pop-up.
- Click Ok.
With this, you have successfully deleted a Tweet.
Mentions
The Mentions section is where you can view the users who have mentioned you (replied to you) on your Tweets, as well as the replies to the mentions. In this section, you can:
- Reply to a mention
- Retweet and Quote Tweet a mention
- Like a mention
- Actions such as Add New Contacts, Leads, Deals, and Cases, and viewing the same from a mention
Let us look into each of these functionalities.
Replying to a Mention
The reply option lets you respond to or add comments to a Tweet.
Follow these steps to reply to a Mention:
- Log in to the CRM.
- Click the main Menu.
- Go to Marketing.
- Click Campaigns.
- Select Social. The Social module dashboard opens.
- On the left-hand side, under Posts, click Twitter.
- Choose the mentioned Tweet you want to reply to.
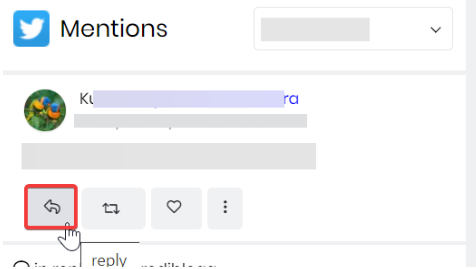
- Click the reply icon at the bottom of the mentioned Tweet. The Tweet your reply window opens.
- Typing your reply content in the enter message input window. Make sure the content does not exceed the 280-word limit.
- Click Choose File to upload image, audio, and video files from your system.
- Click Send.
With this, you have successfully replied to the Tweet you have been mentioned.
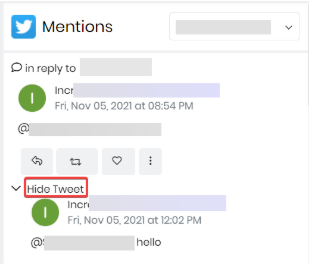
Your reply to the mentioned Tweet will be displayed under Mentions at the top, displaying your reply. To view the original Tweet (the mentioned Tweet you replied to), click Show Tweet and Hide Tweet to hide the same as shown below.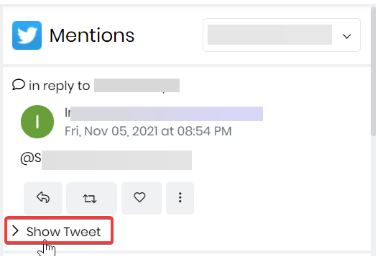
Retweeting a Mention
The retweet option automatically reposts the existing mentioned Tweet. This section provides the Quote Tweet option as well.
Follow these steps to retweet a mention:
- Log in to the CRM.
- Click the main Menu.
- Go to Marketing.
- Look for Campaigns.
- Select Social. The Social module dashboard opens.
- On the left-hand side, under Posts, click Twitter.
- Choose the mentioned Tweet you want to retweet.
-
Click the Retweet icon at the bottom of the mentioned Tweet.
With this, you have successfully retweeted a mention Tweet.
The Retweeted mentioned Tweet will be reposted on your Twitter page; only the Retweet count will be displayed on CRM, as shown below.
Quote Tweeting a Mention
The Quote Tweet option allows you to share a mentioned Tweet and add your comments to it.
Follow these steps to Quote Tweet a Tweet:
- Log in to the CRM.
- Click the main Menu.
- Go to Marketing.
- Look for Campaigns.
- Select Social. The Social module dashboard opens.
- On the left-hand side, under Posts, click Twitter.
- Choose the Tweet to which you want to Quote-Tweet.
- Click the Retweet icon at the bottom of the Tweet.
- Select Quote Tweet. The Quote Tweet window opens.
- Enter your comments for the specific Tweet. Note: Make sure the predefined URL is present, and you do not remove it, and the content does not exceed the 280-word limit.
- Click Choose File to upload image, audio, and video files from your system.
- Click Send.
Your mentioned Quote Tweet will be displayed on My Tweets at the top, displaying your comments as well as the original Tweet. A URL is generated directing you to the user’s Twitter account, to which you quote-tweet as well as your quote-tweet.
Liking a Mention
The Like Tweet option allows you to express your appreciation for a mention Tweet.
Follow these steps to like a mention: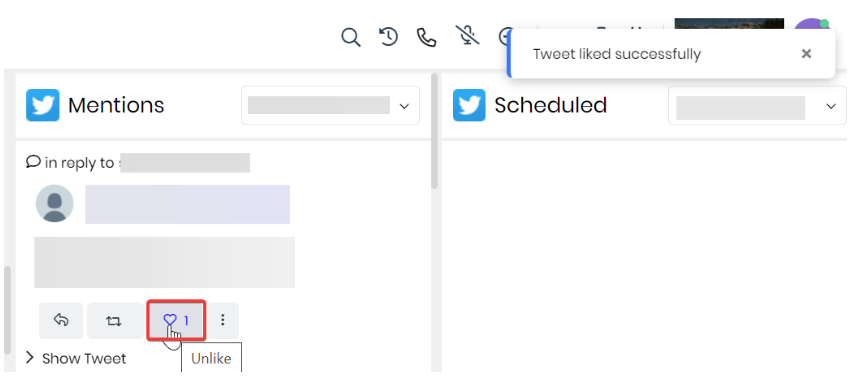
- Log in to the CRM.
- Click the main Menu.
- Go to Marketing.
- Look for Campaigns.
- Select Social. You will be directed to the Social module.
- On the left-hand side, under Posts, click Twitter.
- Choose the mentioned Tweet you want to like.
- Click the Like icon at the bottom of the mentioned Tweet.
Actions
Action functionalities remain the same as illustrated in the My Tweets section.
Scheduled
The scheduled section lets you compose your Tweets and post them later.
Follow these steps to schedule a Tweet:
- Log in to the CRM.
- Click the main Menu.
- Go to Marketing.
- Look for Campaigns.
- Select Social. You will be directed to the Social module.
- On the left-hand side, under Posts, click Twitter.
- Click the Compose Post icon. You will be directed to the New Post window.
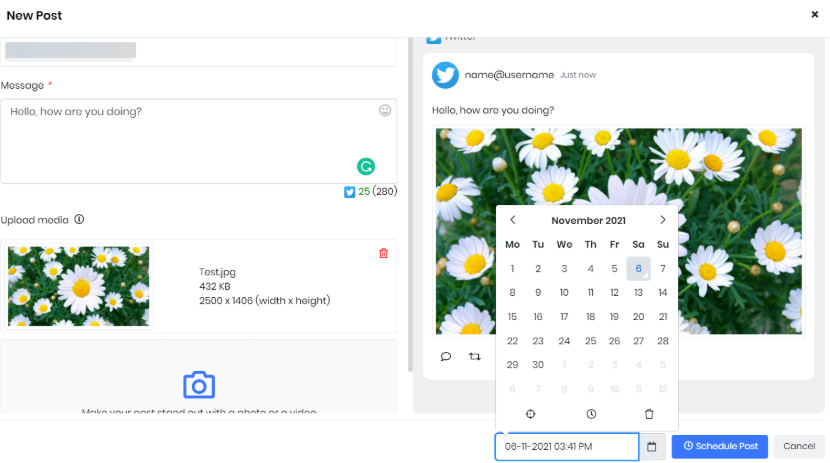
- Enter the following information:
- Post to - Select your Twitter account.
- Message - Enter your Tweet content.
- Upload media - Upload your images, audio/video files to be Tweeted. You can drop your files here or click Browse to upload files from your system.
- You can always view the preview of your Tweet on the right-hand side of the New Post window.
- Click Schedule Post.
- Click the Calendar icon.
- Select the required month and date.
- Click the time icon to set the required time slot. The delete icon helps you clear the selection.
- Once the date and time are set, click Schedule Post.
Your Tweet scheduled for the specific date and time will be displayed under Scheduled and posted then, as shown below.
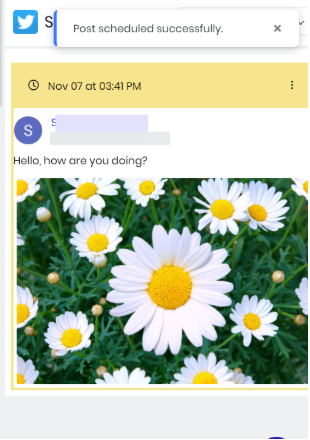
With this, you have successfully scheduled a Tweet.
Rescheduling a Tweet
Rescheduling allows you to reschedule an already scheduled Tweet
Follow these steps to reschedule a Tweet:
- Click the Actions on the top right corner of the Tweet.
- Click Reschedule. You will be directed to the Reschedule window.
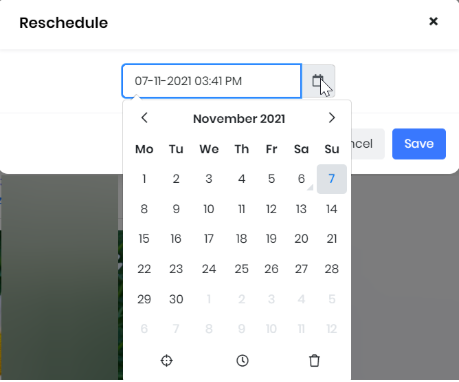
- Click the Calendar icon.
- Select the required month and date.
- Click the time icon to set the required time slot.
- The delete icon helps you clear the selection.
- Click Save.
Your scheduled Tweet rescheduled for the specific date and time will be displayed under Scheduled and posted then.
With this, you have successfully rescheduled a Tweet.
Deleting a Scheduled Tweet
Let us delete a scheduled Tweet.
Follow these steps to delete a scheduled Tweet: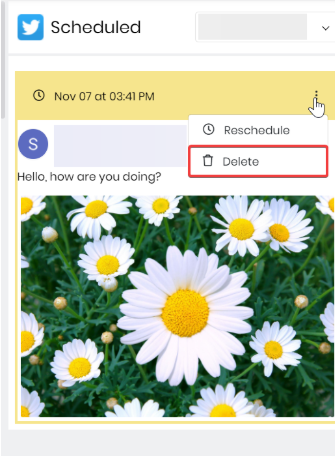
- Click Actions on the top right corner of the scheduled Tweet.
- Click the Delete icon.
- You will be directed to the Are you sure you want to delete? pop-up.
- Click Ok. The below success message will be displayed.
With this, you have successfully deleted a scheduled Tweet.
Note: In Vtiger CRM, if a user Tweets or schedules a Tweet, the user’s name will be displayed as Owner above the Tweet.
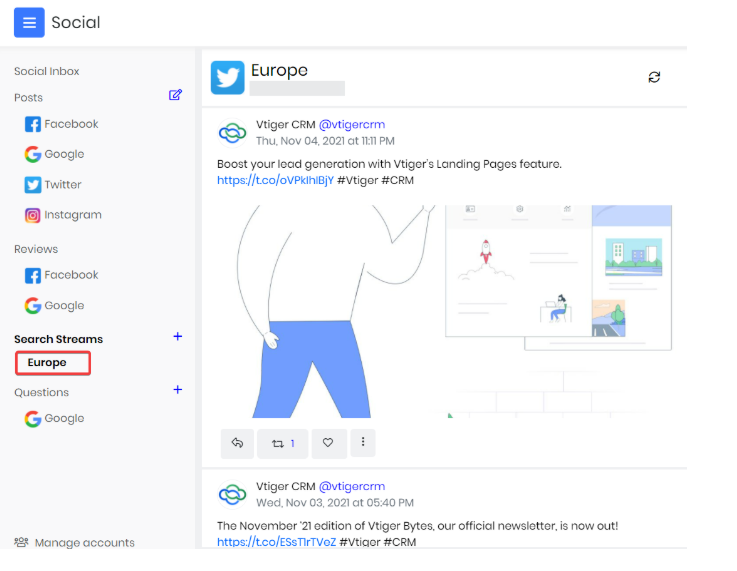
Search Streams
Search Stream allows you to look for Tweets with keywords, hashtags, and specific Twitter accounts.
Follow these steps to do a Search Stream:
- Click the + icon mark beside Search Streams as shown below.
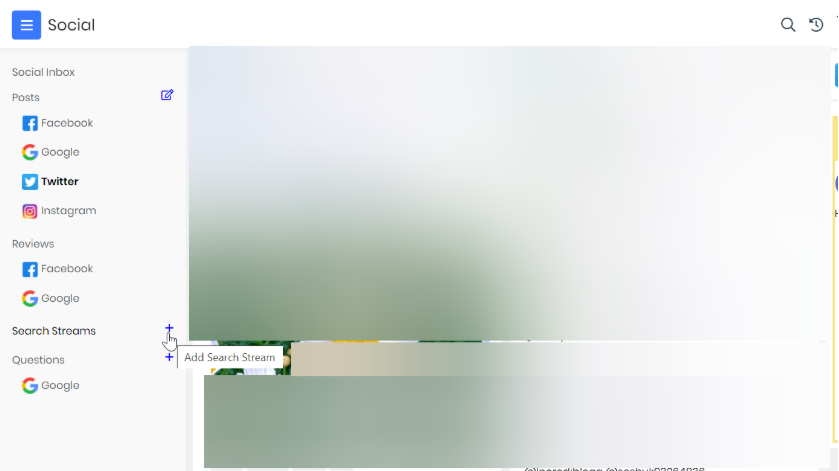
- You will be directed to the Add Search Stream window.
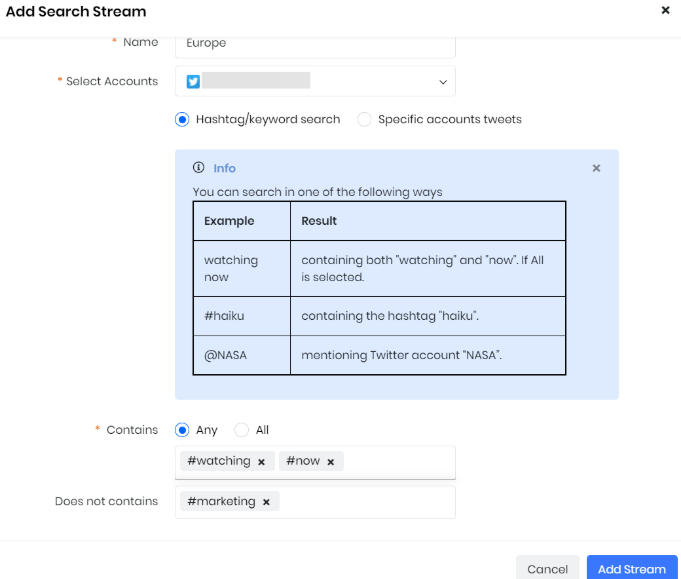
- In the Name field, enter a name for your search stream.
- In the Select Accounts field, select your desired account. The Add Search Stream window opens as shown below.
5. Select Hashtag/keyword search if you are looking for Tweets with particular hashtags or keywords.
- For Contains, if you have multiple keywords or accounts to look for, select:
- Any: If you want to retrieve all Tweets having one of those keywords or accounts.
- All: If you want to retrieve Tweets having all of those keywords or accounts.
- Under Contains section:
- Enter the keywords with # or @ suffix to retrieve Tweets containing them.
- In the Does not contains field, enter the keywords to not retrieve Tweets containing them.
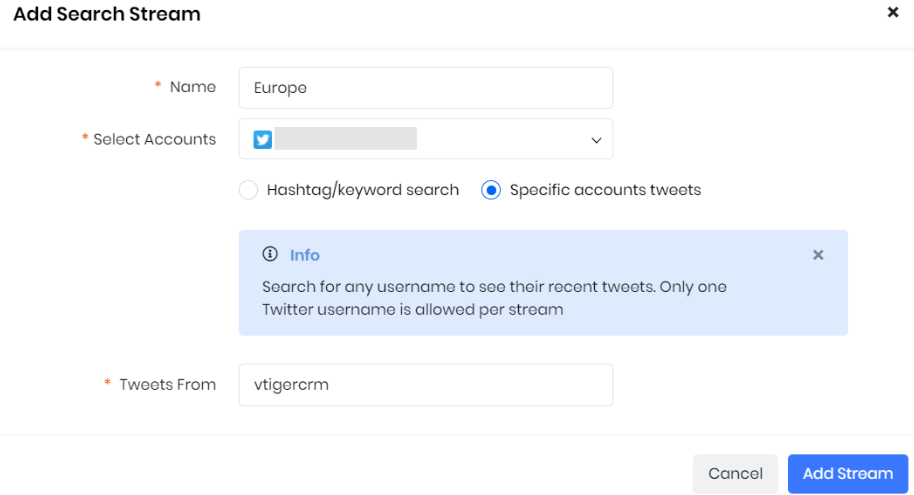
6. Select Specific accounts Tweets if you are looking for Tweets from specific accounts.
a. In the Tweets From field, enter a Twitter username (without @) to retrieve all the Tweets related to it.
Note: You will be able to look for only one specific account at a time.

7. Select Lists, if you are looking for Tweets from Lists that you have created in your Twitter
account (Via Twitter or Vtiger Social > Twitter).
a. Choose a List or create a new List to retrieve all Tweets related to it
- To create a new list:
- Click New List. The Add List window opens.
- Enter the following details for the new List:
- Name
- Description
- Select:
- Public - If you want the List to be displayed to the public.
- Private - If you do not want the List to be displayed to the public.
8. Click Add Stream.
9. All the Tweets as per the set search stream conditions will be displayed.
10. The performed Search Stream will also be saved under Search Streams with the
same name.
Hovering or clicking the dropdown next to a browsed search stream title, you can view the following details about it:
1. Name - The name
2. Type - Type of search (Hashtag/keyword search or Specific accounts, Tweets, or Lists)
3. Contains - Contains Type and related hash keyword
4. Does not contain - Does not contain hash keywords
Note: You can search streams a maximum of 5 times. If you still plan to search, you will have to delete an existing search stream to add a new one.
Simultaneously Adding Channels
Under Search Streams, Vtiger offers a very beneficial Add Channel provision.
Add Channel allows you to simultaneously search streams on two social media platforms, such as Twitter and Instagram, helping you avoid dual keyword input and save time.
Follow the steps below to add a channel:
- Under Search Streams, hover the mouse on the desired saved search stream.
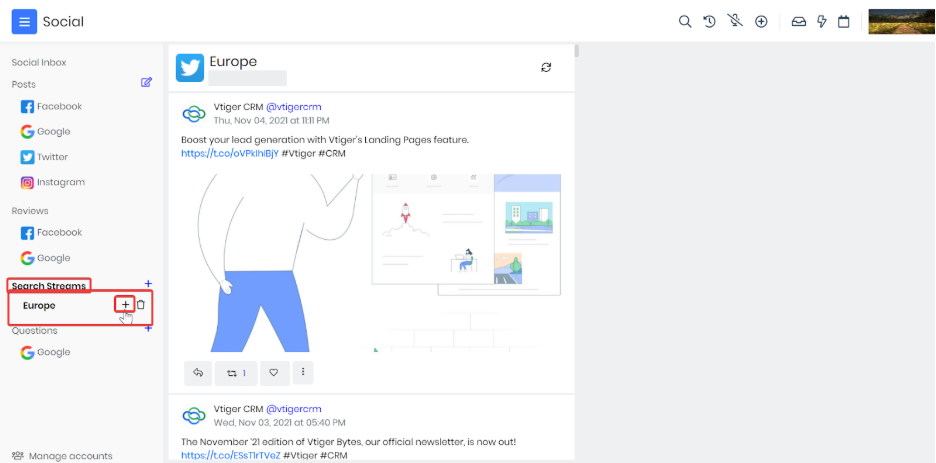
- Click Add Channel. You will be directed to the Add Channel window.
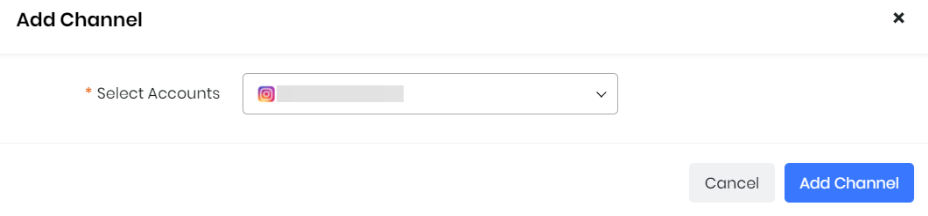
- Select your Instagram account.
- Click Add Channel.
- All the Twitter and Instagram posts available with the same keyword will be simultaneously displayed.
With this, you have successfully added a Channel.
Managing your Account from Social Settings
You can manage your social accounts from the Social Settings window.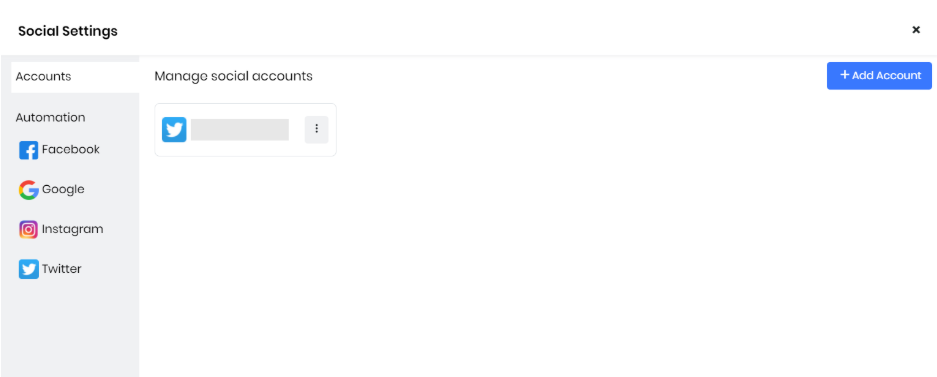
You can:
- Add, disconnect, or remove your account
- Set up automation for actions like creating leads.
Let’s look at each of them.
Adding an account
Let us add a Twitter account.
Follow these steps to add a Twitter account to the Social module:
- Log in to the CRM.
- Click the main Menu.
- Go to Marketing.
- Look for Campaigns.
- Select Social. You will be directed to the Social module.
- Click Manage Accounts in the bottom left corner of the screen. You will be directed to the Social Settings window.
- Click +Add Account.
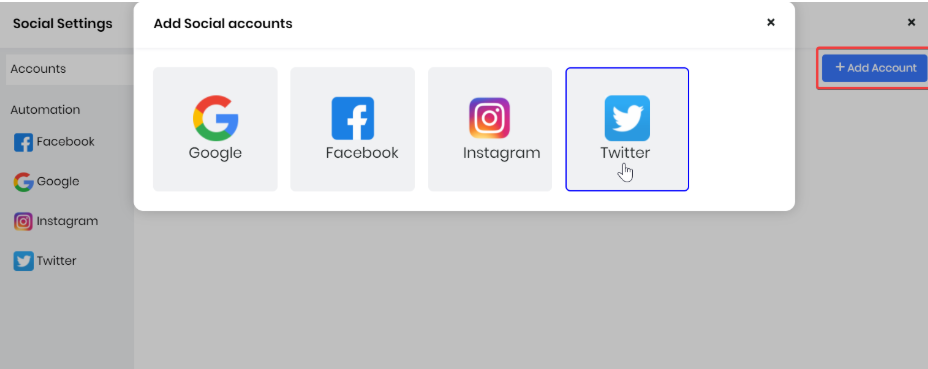
- Select Twitter.
- You will be directed to enter your Twitter login details.
- Click the Authorize app. The Social module opens.
Note:
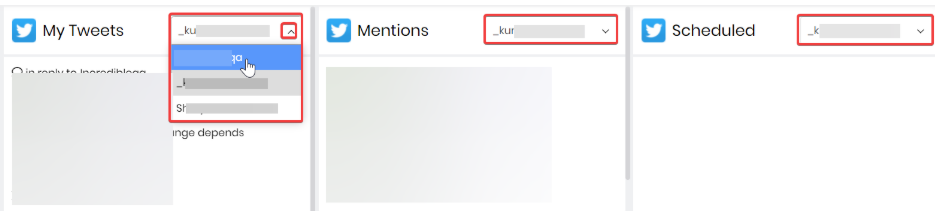
- You can add multiple Twitter accounts.
- You can switch to different Twitter accounts on My Tweets, Mentions, and Scheduled by clicking the dropdown next to the titles and selecting the Twitter account, as shown below.
Disconnecting an account
Disconnect helps you disable your Twitter account from the Social module. When you disconnect your account, only the sync stops between Twitter and CRM. Old Tweets and data will still be visible.
Follow these steps to disconnect your Twitter account from the Social module:
- Log in to the CRM.
- Click the main Menu.
- Go to Marketing.
- Click Campaigns.
- Select Social. You will land on the Social module.
- Click Manage Accounts in the bottom left corner of the screen. You will be directed to the Social Settings window.
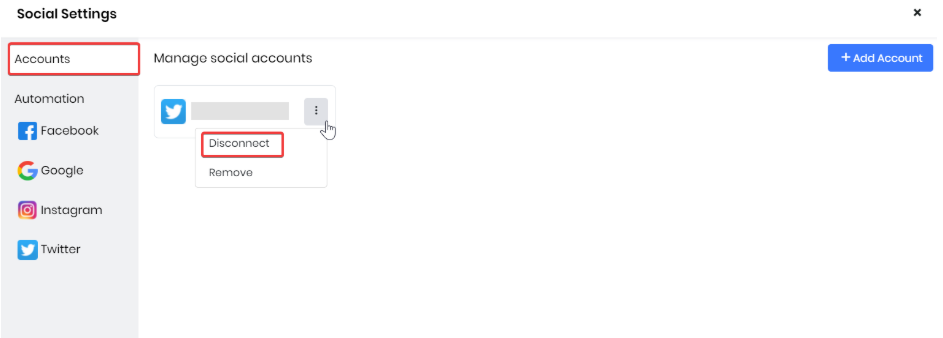
- Click the Actions icon on the account you want to disconnect.
- Click Disconnect.
- Click OK.
The Twitter account will be disconnected from the Social module.
Removing an account
Removing deletes your Twitter account from the Social module. When you remove an account, it will no longer be visible in the Social module.
Follow these steps to remove a Twitter account from the Social module:
- Log in to the CRM.
- Click the main Menu.
- Go to Marketing.
- Click Campaigns.
- Select Social. The Social module dashboard opens.
- Click Manage Accounts in the bottom left corner of the screen. The Social Settings window opens.
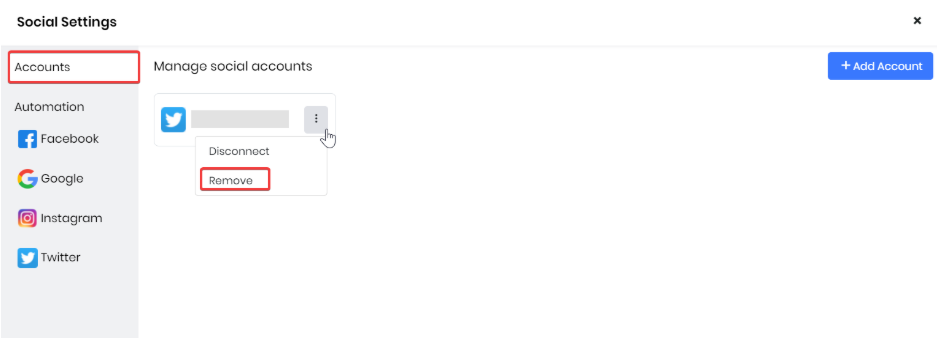
- Click the Actions icon on the account you want to remove.
- Click Remove.
- Click OK.
The Twitter account will be removed from the Social module.
Note: Deleting a Tweet from Twitter will not be reflected on the Vtiger CRM Social Twitter page.
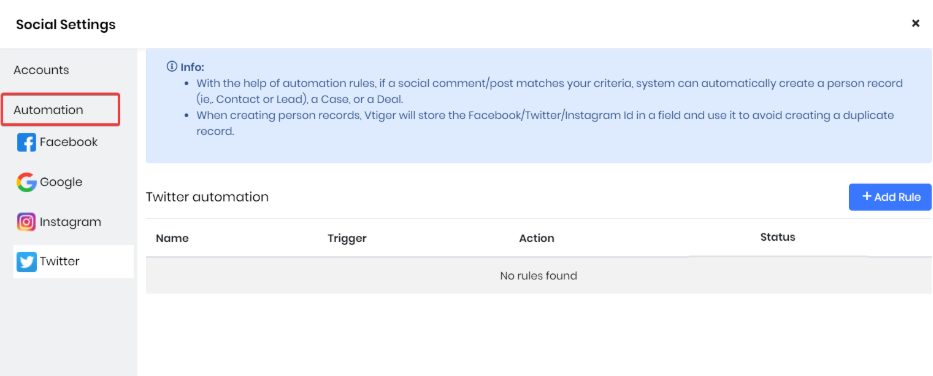
Automation
With automation rules, you can automatically create contact, lead, and case records in the CRM. You can trigger the creation of records when a user leaves a reply on your Twitter page.
For instance, if you receive a reply that says, How do I buy this product? You can assume this to be a lead for your business and create a lead record for the user.
Additionally, you can specify tags or keywords that must be present in the reply. For instance, the tag is want to subscribe and a user Tweets a reply that matches the tag. You can assume them to be a lead and trigger the creation of a lead record.
Follow these steps to add a rule:
- Log in to the CRM.
- Click the main Menu.
- Go to Marketing.
- Click Campaigns.
- Select Social. The Social module dashboard opens.
- Click Manage Accounts in the bottom left corner of the screen. The Social Settings window opens.
- Click Twitter under automation on the left-hand side.
- Click on +Add Rule. The Add Automation window opens.
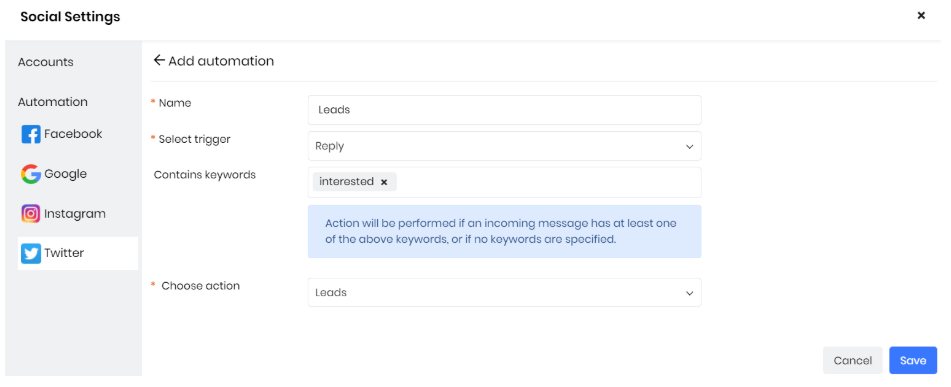
- Enter or select the following information:
- Name - Provide a title for the rule.
- Select trigger - Choose when the record must be created (on receiving a reply).
- Contains Keywords - Enter the keywords that must be present in the reply.
- Choose action - Choose which record to create.
- Click Save
Once saved, the rule will trigger and create the selected record based on the defined keywords.