Articles in this section
Vtiger Marketing Campaigns
Feature Availability
One Pilot | One Growth | One Professional | One Enterprise
Introduction
Campaigns can help you create and record the details of a marketing campaign. Furthermore, you can sync your campaigns and contacts with Mailchimp!
A marketing campaign is a planned strategy of actions taken to promote a product, service, or brand through a series of activities across multiple channels.
The Campaigns feature in Vtiger CRM can help you with your marketing campaign strategy. It helps you create, record details, and manage your marketing campaign directly from the CRM.
For example, if you are hosting a trade show to promote your business, you can create a campaign type Trade Show campaign in Vtiger CRM. Additionally, you can record the budget, expenses, responses, etc., of the trade show and record the details of the leads captured during the trade show.
Campaigns in Vtiger CRM
Vtiger CRM offers a versatile Campaigns module that allows businesses to execute various types of marketing campaigns tailored to their needs.
Vtiger provides the following campaigns:
- Email Campaigns
- SMS Campaigns
- Surveys
- Social
Integrations for Marketing Campaigns
Vtiger integrates with third-party tools for businesses to streamline their processes, expand communication channels, and gain deeper insights.
Following are the integrations available for marketing campaigns in Vtiger CRM:
- Email Marketing Tools: Integration with Mailchimp to design and execute professional email campaigns.
- Social Media Platforms: Integration with platforms like Facebook, LinkedIn, or Twitter to manage and monitor social media campaigns seamlessly.
- Analytics and Reporting: Integration with Google Analytics to measure the impact of your campaigns and optimize for better results.
- Communication Tools: SMS and instant messaging campaigns can be enabled through Twilio or WhatsApp Business integrations, increasing client outreach.
Benefits of Marketing Campaigns
The following are the benefits of using Vtiger marketing campaigns:
- Capture and nurture leads through targeted email campaigns, social media marketing, and other channels.
- Segment your audience based on various criteria, such as demographics, interests, and behavior.
- Easily create, manage, and track multiple marketing campaigns from a single platform.
- Organize and prioritize campaigns based on your business objectives.
- Track key metrics like open rates, click-through rates, and conversion rates.
- Analyze campaign performance to identify areas for improvement.
- Creating a Campaign
- Marketing Campaigns in Vtiger CRM
- Linking Contacts to a Campaign
- Duplicating a Campaign
- Adding Custom Campaign Types
Key Terminology
| Field Name | Description |
| Email Campaign | An email campaign is a series of marketing or promotional emails sent to a group of people to share information, promote products or services, or encourage specific actions like making a purchase, signing up, or providing feedback. |
| Campaign Metrics | Campaign metrics are measurable data points used to evaluate the performance and effectiveness of a marketing campaign. |
| Target Audience | The target audience of the campaign based on demography, interests, location, etc. |
| SMS Campaign | An SMS campaign is a marketing strategy where businesses send promotional, informational, or transactional messages via text to a targeted group of recipients |
| Surveys | Surveys are sets of questions designed to collect feedback, opinions, or information from people to understand their preferences, needs, or experiences. |
| Social Media Integration | Social media integration is the process of connecting social media platforms with other tools, like websites or CRMs, to manage posts, track interactions, and gather insights all in one place. |
Creating a Campaign
You can create a campaign in two ways:
- From the Campaigns module
- Using Quick Create
From the Campaigns module
Follow these steps to create a campaign:
- Log in to your CRM account.
- Click the Main Menu.
- Go to Marketing.
- Click Campaigns.
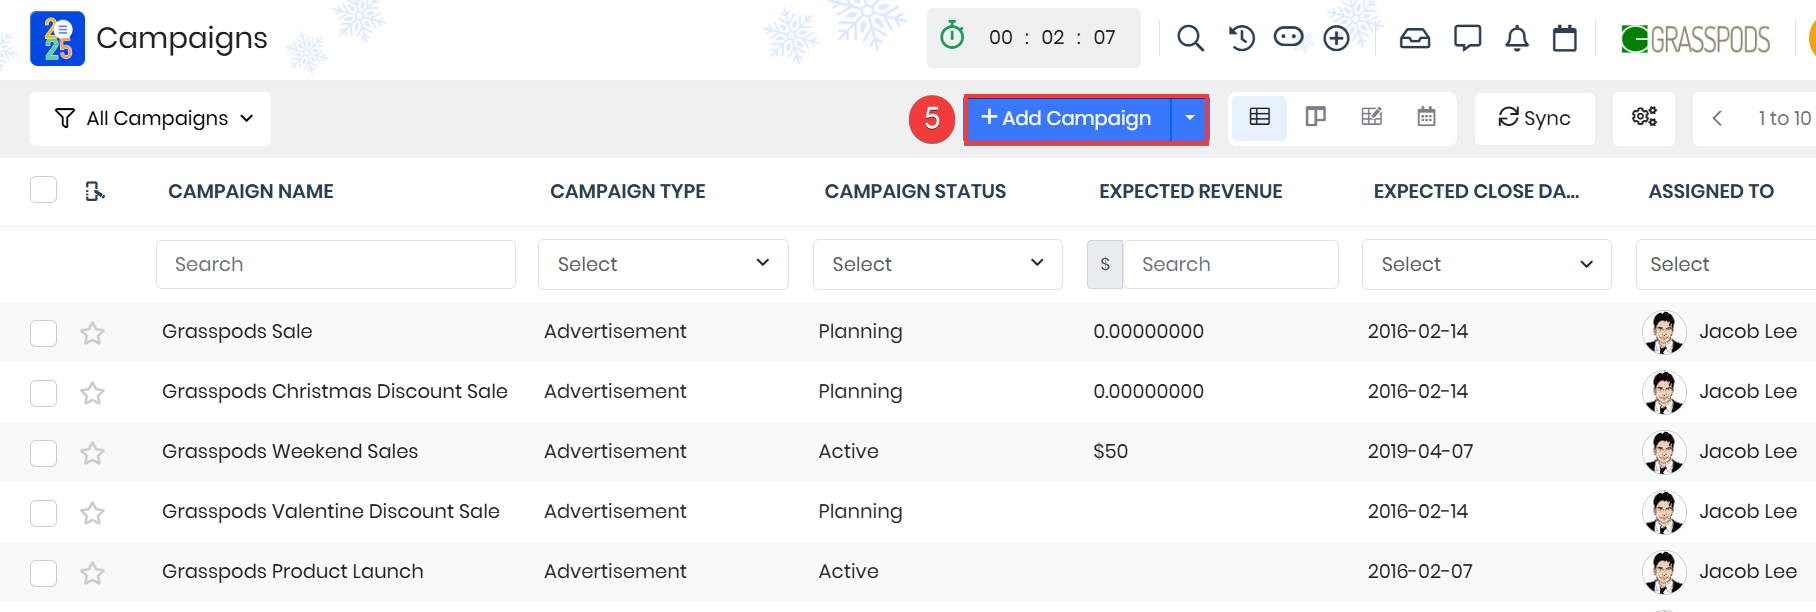
- Click +Add Campaign.
- Enter the following mandatory fields:
- Campaign Name: This is the name of the campaign. It is recommended that the campaign name must be specific to distinguish it from the other campaigns.
- Assigned To: This is the user or group to whom the campaign is assigned or the owner of the campaign.
- Expected Close Date: This refers to the target date by which the campaign is expected to complete.
- Click Save.
Using Quick Create
With Quick Create, you can create a campaign quickly by filling in only the necessary details. You can access this feature from any screen, which saves you a lot of time.
Follow these steps to create a campaign using Quick Create:
- Log in to the CRM.
- Click the + icon displayed on the top right side of your screen.
- Click Show All to view all the modules you can create records using Quick Create.
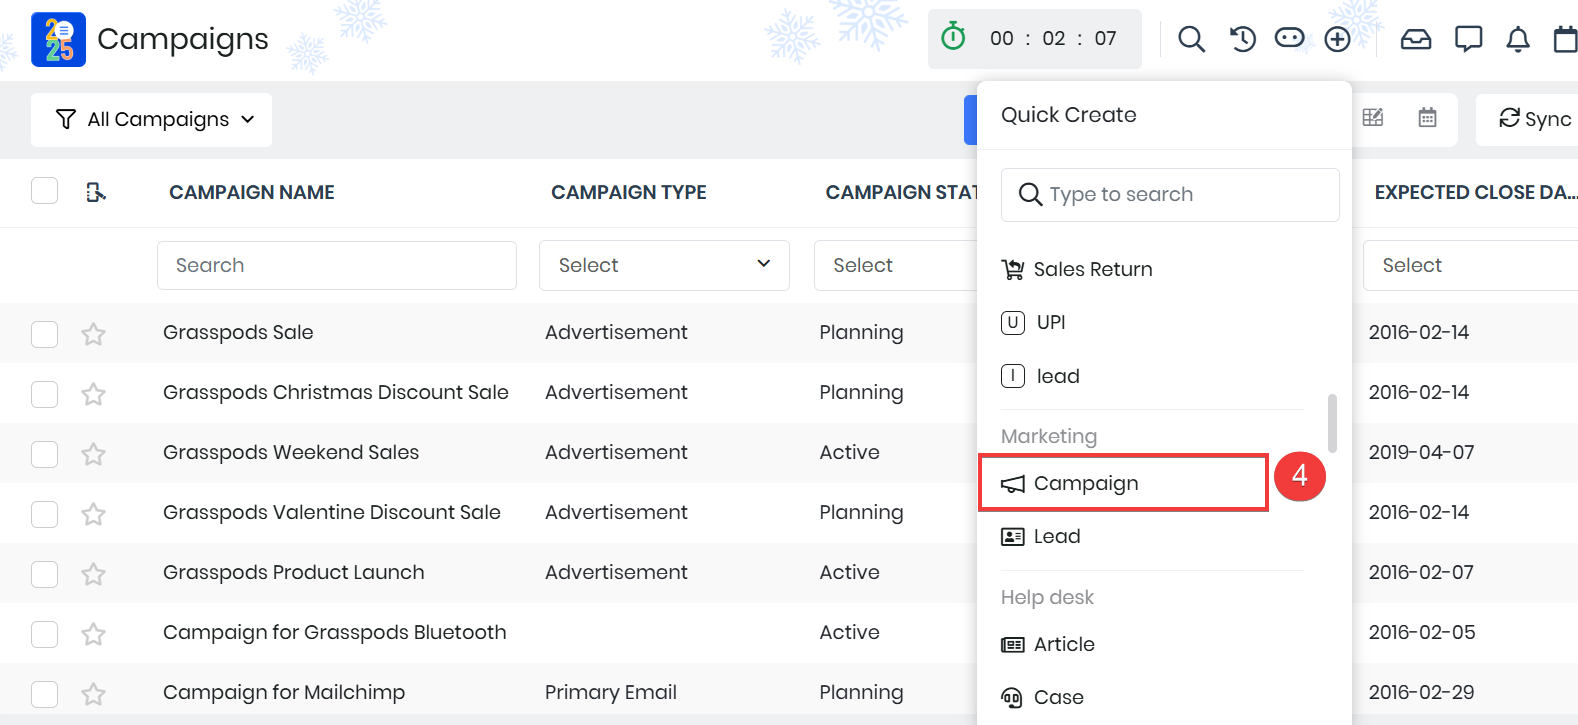
- Select Campaign.
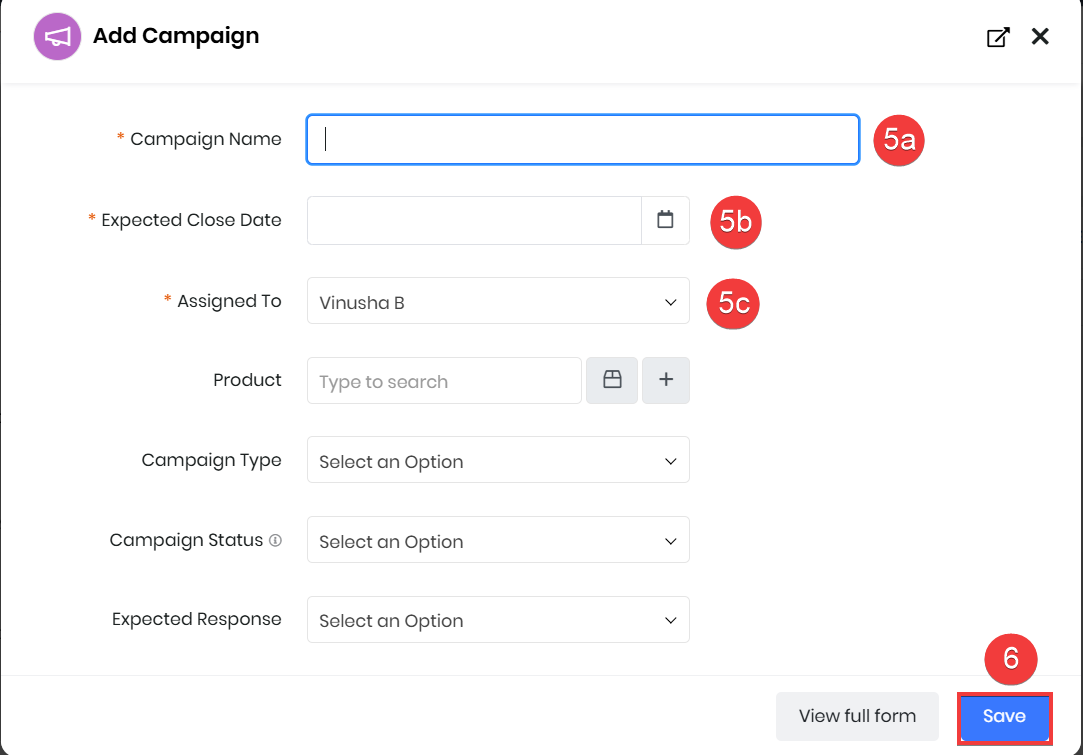
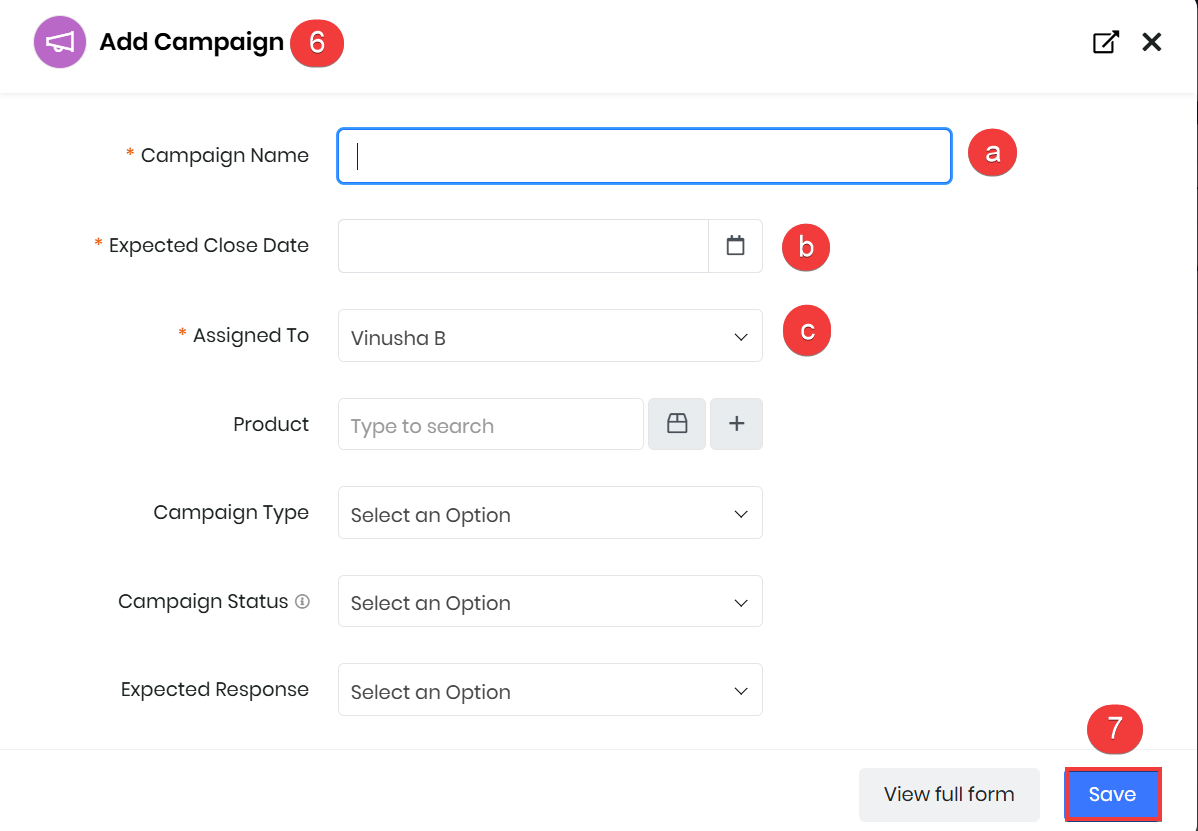
- Enter the following mandatory details:
- Campaign Name: This is the name of the campaign. It is recommended that the campaign name must be specific to distinguish it from the other campaigns.
- Assigned To: This is the user or group to whom the campaign is assigned or the owner of the campaign.
- Expected Close Date: This refers to the target date by which the campaign is expected to complete.
- Click Save.
To learn more about Quick Create, click here.
Now, let's look at the marketing campaigns in Vtiger CRM.
Email Campaigns
Email campaigns are a sequence of marketing emails. They are designed to market a business or a product and contain promotional offers and valuable content for the subscribers.
Vtiger CRM allows you to create two types of email campaigns:
Regular
Regular email campaigns are promotional emails sent to your contacts. You can send them immediately or at a scheduled time.
Autoresponder
Autoresponder email campaigns are emails you send in response to the contacts’ reaction to your previous email campaign. They are sent automatically when triggered at the scheduled date and time. You must set up trigger conditions, such as the date and the time at which they must be sent.
Creating a Regular Email Campaign
You can create an email campaign from the Campaign module. Follow these steps to create a regular email campaign:
- Log in to your CRM account.
- Click the Main Menu.
- Go to Marketing.
- Select Email Campaigns.
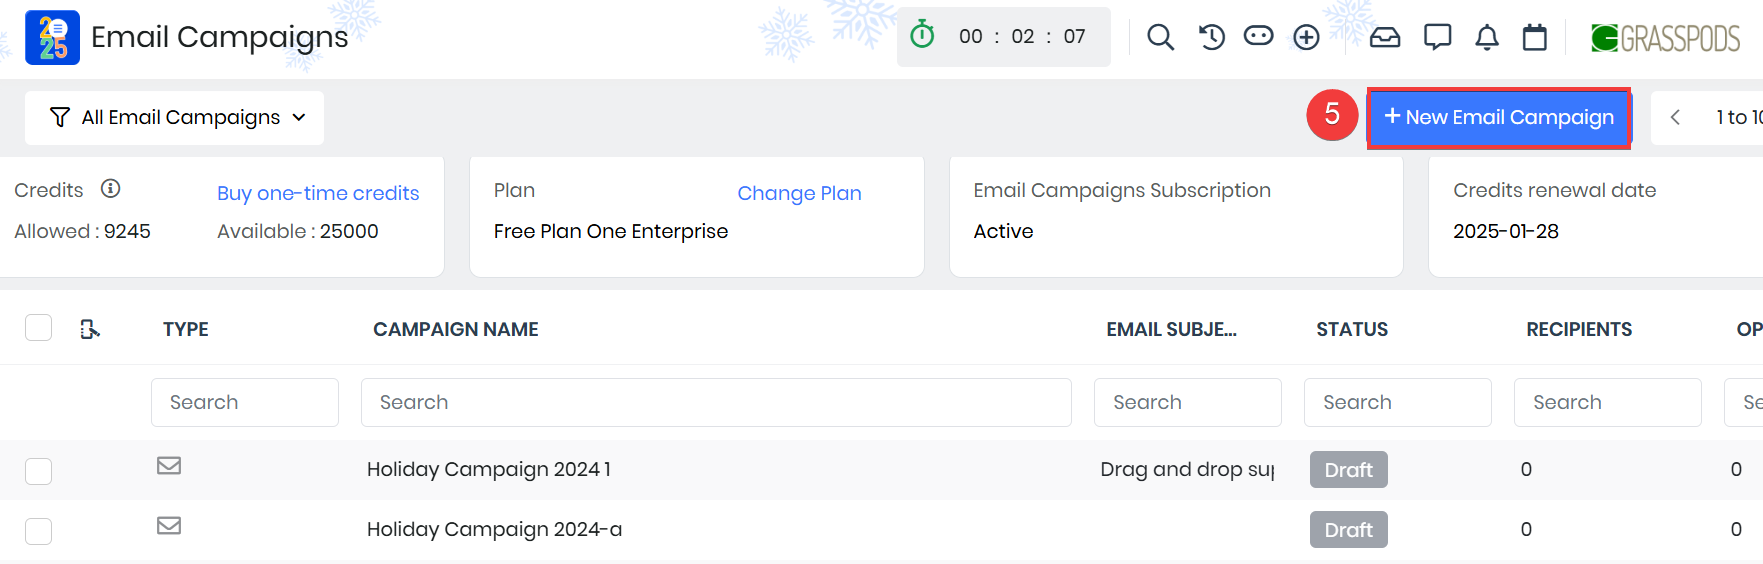
- Click +New Email Campaign.

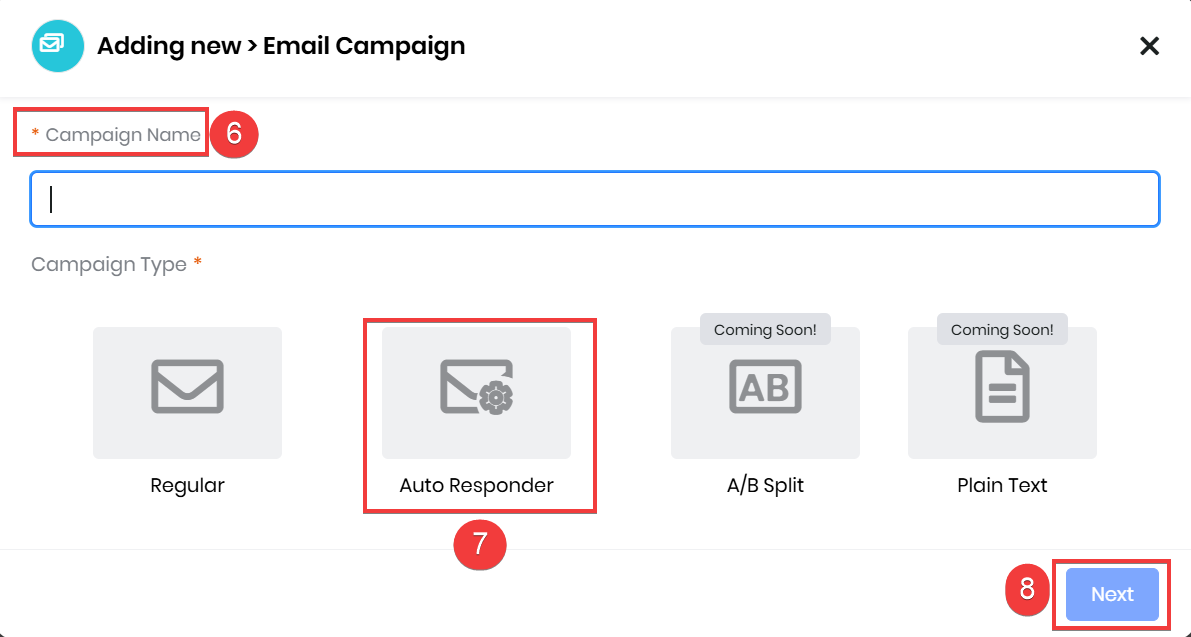
- Enter the Campaign Name.
- Select Regular.
- Click Next. The email campaign gets created in Draft mode.

- Enter or select the following information:
- Recipient
- Select a marketing list from the drop-down or click Create New Marketing List to create a new one. To learn about creating a marketing list, click here.
- Enable Email will be sent to all subscribers to send the email campaign to all the subscribers on the marketing list.
- Enable Choose a segment to send the email campaign to a filtered list of subscribers on the marketing list.
- Click Create a Segment to filter the list of subscribers by applying conditions. To learn about creating a segment, click here.
- Click Save.
- Sender Information
- Enter From Name, From Email, and Reply-To email address.
- Assign the email campaign to a user under the Assigned To field.
- Enable Real-Time Alerts to receive alerts when the recipients open the email.
- Enable Google Analytics Tracking to allow Google Analytics to track the clicks on links in the email body.
- Click Save.
- Content
- Click Select Template to choose an email template for your emails. To learn about creating/editing email templates, click here.
- Look for your desired template by using the search bar.
- Select a template.
- Click Done. An unsubscribe link is added to the bottom of the email.
- Click Design from scratch to design a template.
- Click one of these tabs: Themes, Blueprints, My Templates, or Marketplace. You can create a template by choosing one of these options.
- Enter or select the information for the following:
- Subject: Enter a subject for your email campaign.
- Preview Text: Enter the required preview text.
- HTML or Plain Text: Use either to add email content.
- Insert Links: Click to add links to other documents or websites.
- Merge Tags: Use merge tags to add HTML tags.
- Click Preview to preview your email.
- Click Done after designing the template. An unsubscribe link is added to the bottom of the email.
- Recipient
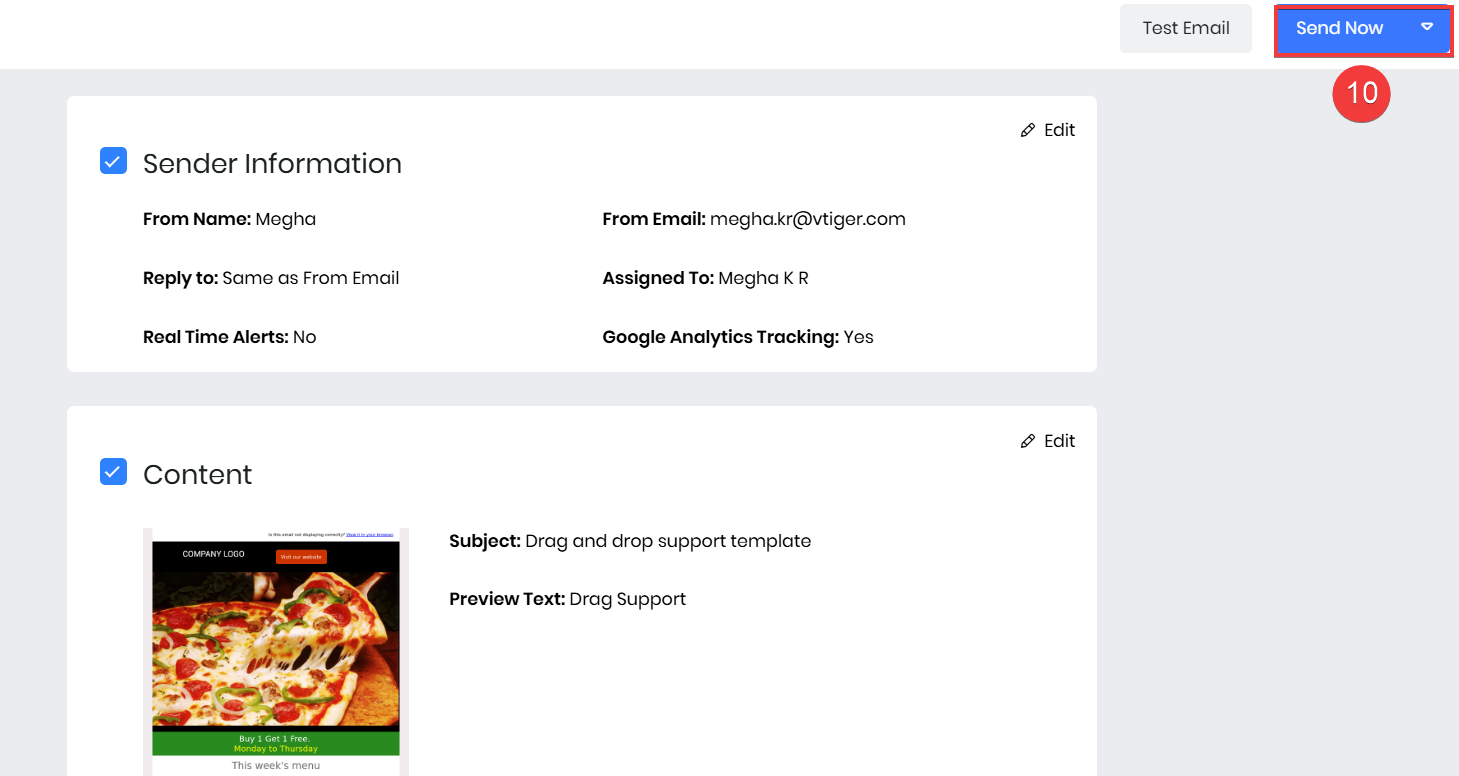
- Click Send Now.
Creating an Autoresponder Email Campaign
Follow these steps to create an autoresponder email campaign:
- Log in to your CRM account.
- Click the Main Menu.
- Go to Marketing.
- Click Email Campaigns.
- Click +New Email Campaign.
- Enter the Campaign Name
- Select Autoresponder.
- Click Next.
- Enter the following details:
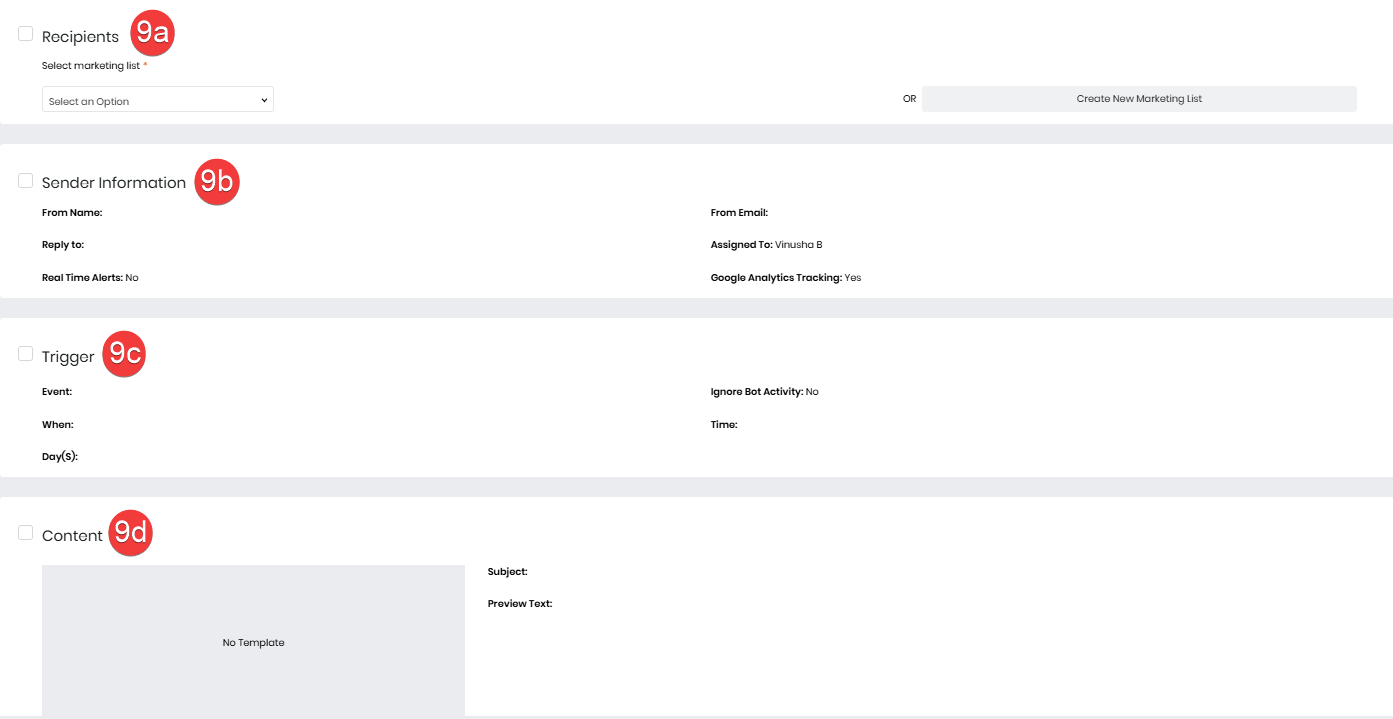
- Recipients
- Sender Information
- Trigger
- Select an event to trigger the autoresponder - Choose what must trigger the autoresponder. For example, when a recipient clicks a link in the previous campaign, opens the previous campaign, etc.
- Select a campaign list - Select the campaign in response to which the autoresponder must be sent.
- When to send - Choose how many days, hours, weeks, minutes, etc., after the previous campaign, the autoresponder must be triggered.
- Select the day(s) on which the campaign has to be sent - Select all the days.
- Click Save.
- Content
- Click Select Template to choose an email template for your emails. To learn about creating/editing email templates, click here.
- Look for your desired template by using the search bar.
- Select a template.
- Edit the template if required.
- Click Done. An unsubscribe link is added to the bottom of the email.
- Click Design from scratch.
- Click one of these tabs – Themes, Blueprints, My Templates, or By Coding. You can create a template by picking one of these options.
- Click Done after designing the template. An unsubscribe link is added to the bottom of the email.
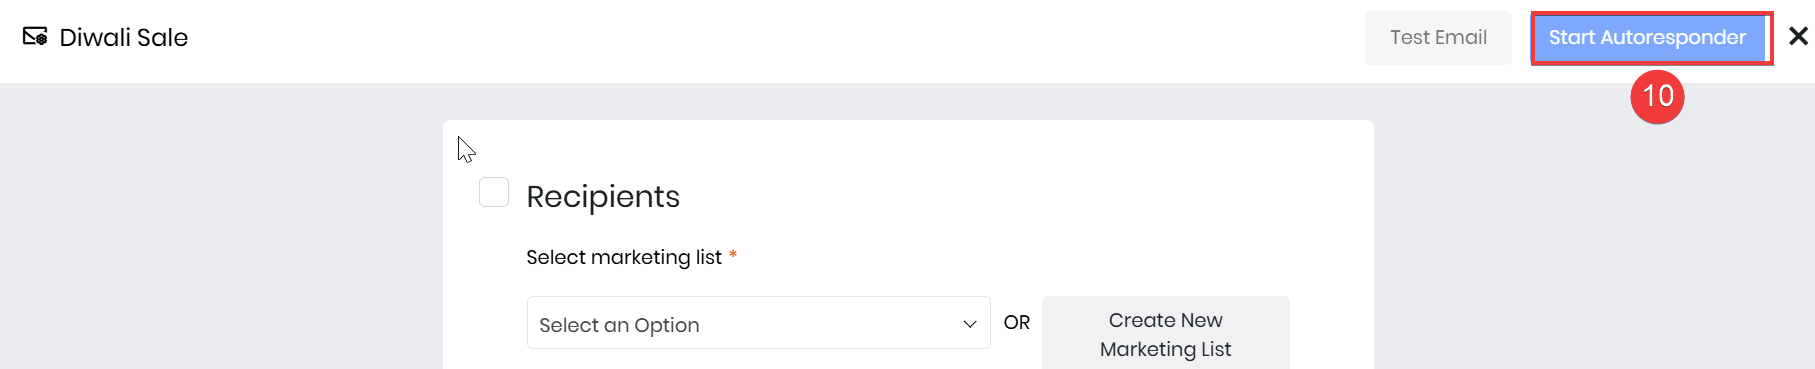
- Click Start Autoresponder.
- Click Ok to confirm
Viewing Campaign Metrics
You can find an email campaign’s metrics in the campaign record.
Follow these steps to see the email campaign metrics:
- Log in to your CRM account.
- Click the Main Menu.
- Go to Marketing.
- Select Email Campaigns.
- Open an email campaign.
You can see the campaign metrics on the right-hand side. They give you the following details:
- Sent - Number of emails sent through the campaign.
- Opens - Number of unique opens.
- Clicks - Number of click actions (on any link) in the email.
- Bounces - Number of emails that have bounced.
- Unsubscribes - Number of recipients who have unsubscribed from the email campaign.
- Complaints - Number of emails that were reported as spam.
- Unopened - Number of unopened emails.
Viewing Email Campaigns Report
To view the details of the contacts to whom you have sent the campaign, contacts who have opened the campaign, etc., you can use Reports in Email Campaigns.
Follow these steps to view and download email campaign reports:
- Log in to your CRM account.
- Click the Main Menu.
- Go to Marketing.
- Select Email Campaigns.
- Open an email campaign.
- Click a number under Campaign Metrics. For example, click the number under Sent. You will see the Reports page.
- Click the downward arrow on the top-left of the report columns to view different reports.
SMS Campaigns
SMS marketing is a text-based service used to send promotional messages such as discount offers and product updates. However, you need a person’s consent to send them these messages.
With Vtiger CRM’s SMS module, you can:
- Create and send out mass SMS messages
- Track delivery statuses in real-time
- Configure reply actions for SMS replies
Prerequisites to create an SMS campaign:
- You must install the SMS Campaigns extension from the Extension Store
- An SMS provider needs to be configured, without which you cannot send SMS messages
- You must create an SMS campaign from the installed extension
To learn more about the prerequisites, click here.
Creating an SMS Campaign
Follow these steps to create an SMS campaign:
- Click the Main Menu.
- Go to Marketing.
- Select SMS Campaigns.
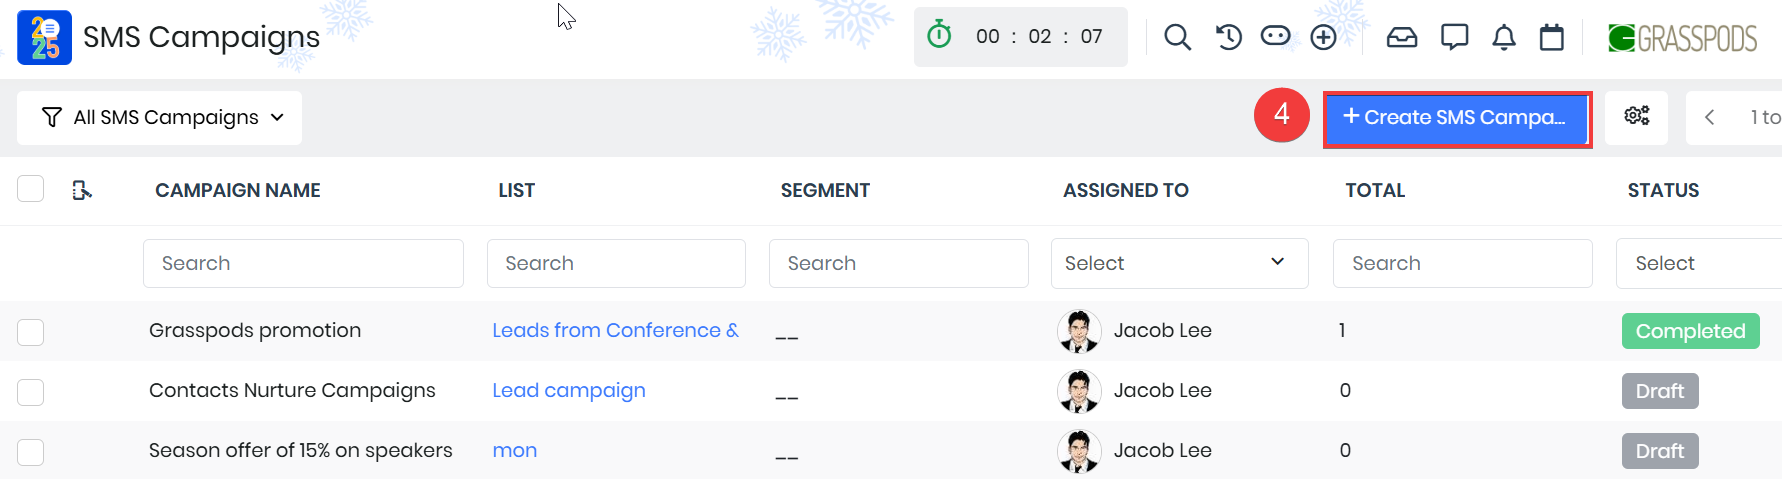
- Click the +Create SMS Campaign button.
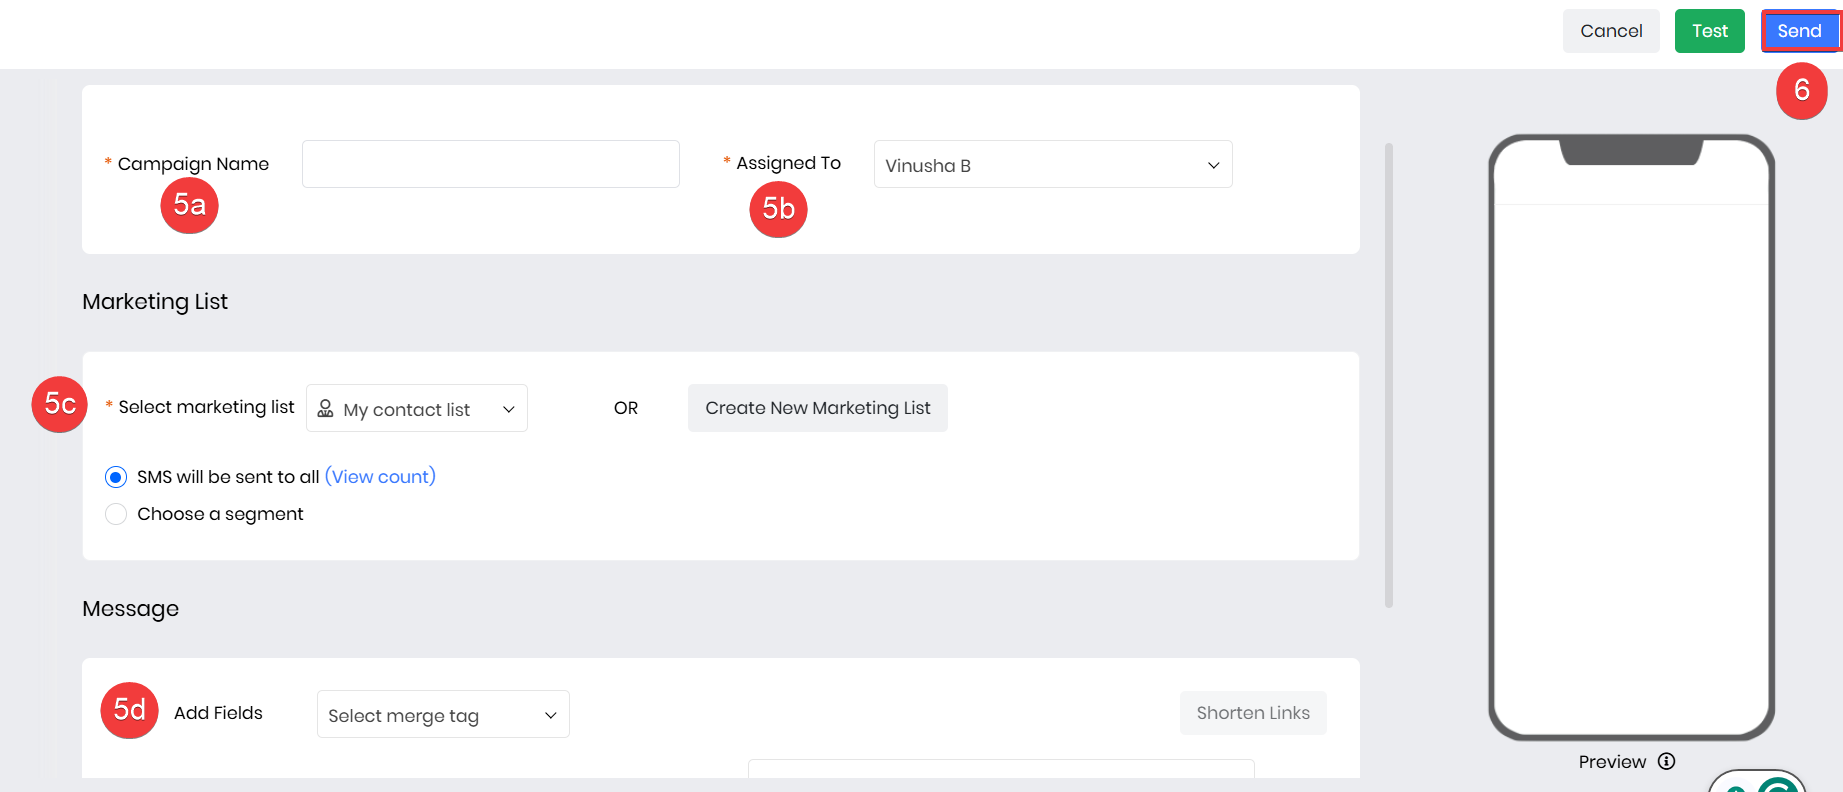
- Enter the following information:
- Campaign Name - This is the name of the SMS campaign. It is recommended that the campaign name must be specific to distinguish it from the other campaigns.
- Assigned To - This is the user or group to whom the SMS campaign is assigned or the owner of the SMS campaign.
- Select marketing list - This is the list of users to whom you want to send the campaign. You can select an existing marketing list from the drop-down or create a new one by clicking the Create New Marketing List button. To learn how to create a marketing list, click here.
- Add Fields - You can add field names in the SMS body with the help of merge tags. For example, if you add the merge tag $contacts-firstname$, the tag is replaced with the contact’s first name saved in the CRM.
- Click Send to send the campaign to the marketing list.
Viewing Campaign Statistics
You can generate these statistics in the form of a pie chart. The chart shows the campaign's delivery, error, and failure rates..
Follow these steps to view SMS campaign statistics:
- Click the Main Menu.
- Go to Marketing.
- Select SMS Campaigns.
- Open an SMS campaign for which you want to see the statistics.
You will see the campaign statistics when you open an SMS campaign.
Surveys
Send polls or surveys to your customers and employees to gather their opinions and feedback on something.
For instance, if you provide an onsite service to your customers, you can send them a survey after the service to get their feedback.
You can create two types of surveys in Vtiger.
- Internal surveys: These surveys are accessible only to your CRM users.
- External surveys: You can send these surveys to non-CRM users such as your customers, vendors, etc.
Creating and Publishing an Internal Surveys
Follow these steps to create an internal survey:
- Log in to your CRM account.
- Click the Main Menu.
- Go to Essentials.
- Select Surveys.
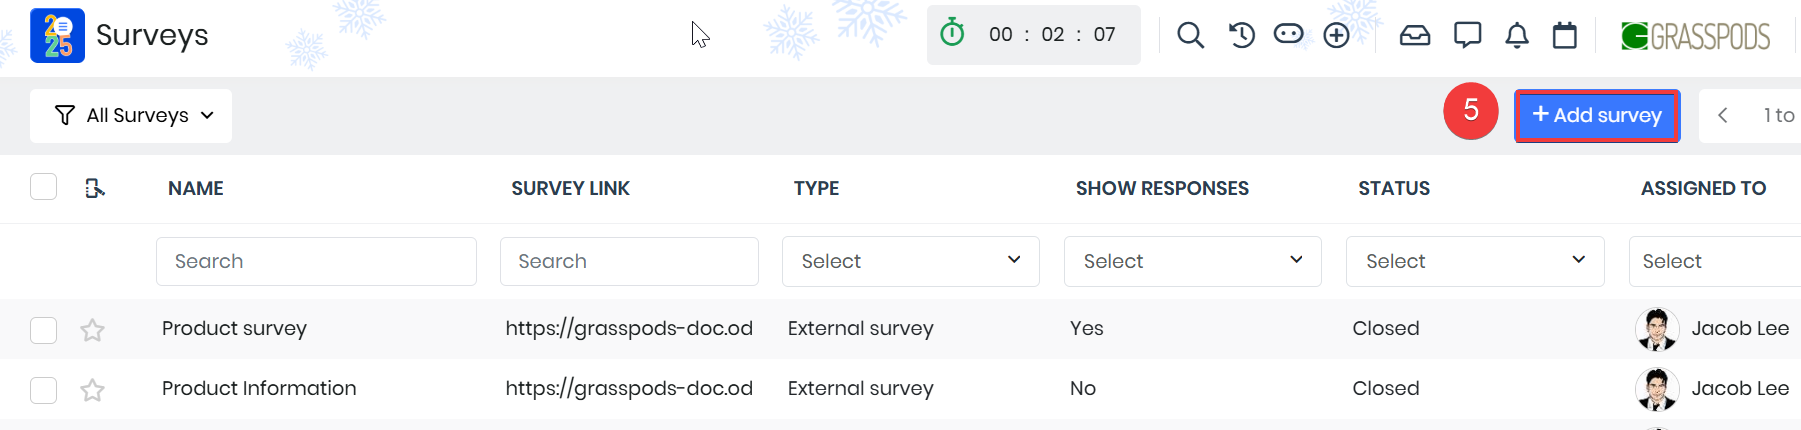
- Click +Add Survey.
- Enter the Survey Details:
- Name - Enter the survey name.
- Survey link - Enter the link to the survey.
- Type - Choose Internal as the survey type.
- Expiry date - The survey will become inactive after this date.
- Assigned To - This is the owner of the survey.
- CSS file URL - Enter the CSS file URL you want to use to style the survey page. This is optional.
- Show responses - Enable the checkmark if you want the survey takers to be able to see their answers.
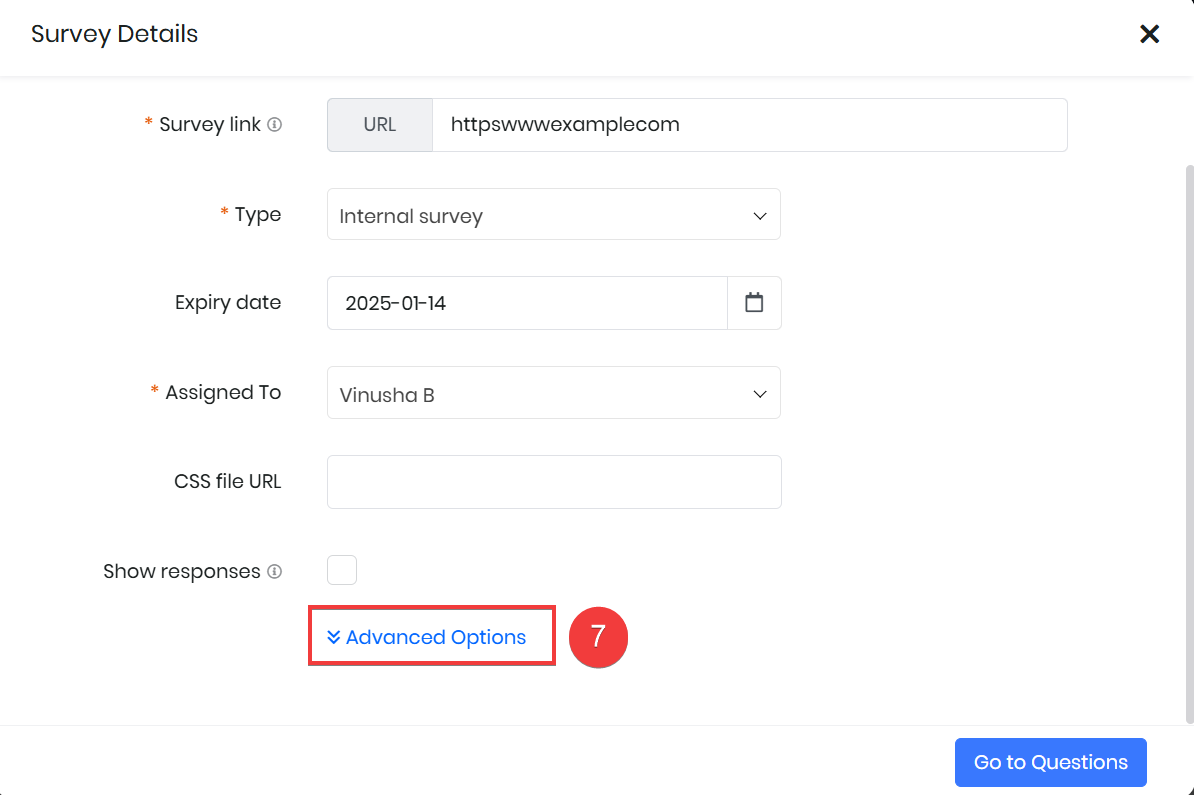
- Click Advanced Options.
- Enter the following information:
- Survey header - Enter the text that must appear on the page header.
- Survey footer - Enter the text that must appear on the page footer.
- Survey logo - You can insert a logo of size within 2 MB here. For example, the company logo.
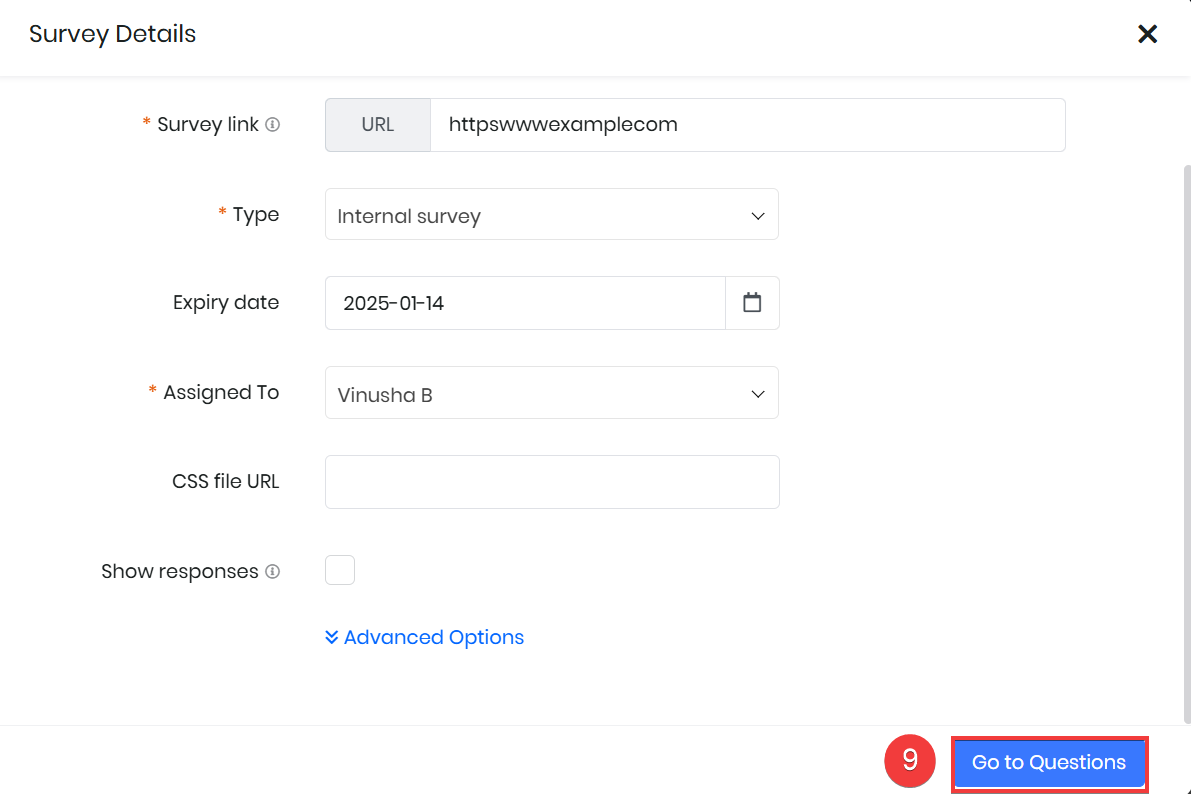
- Click Go to Questions.
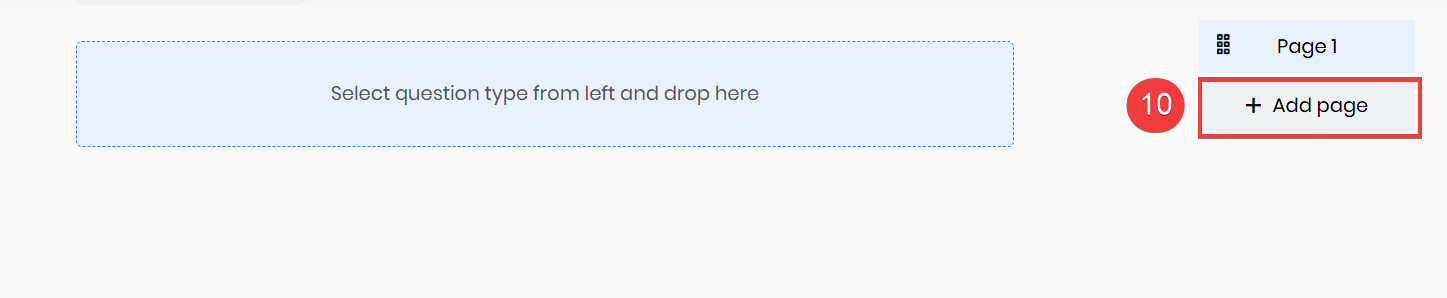
- Click +Add page details.
- Add a page title and description. You can add multiple pages to a survey. To add another page, click +Add page shown on the right.
- Add different question types by dragging them from the left.
- For the radio button, checkbox, and dropdown questions, you must also enter the answer options.
- You can also duplicate questions and add logic to them. Hover over a question to see these options.
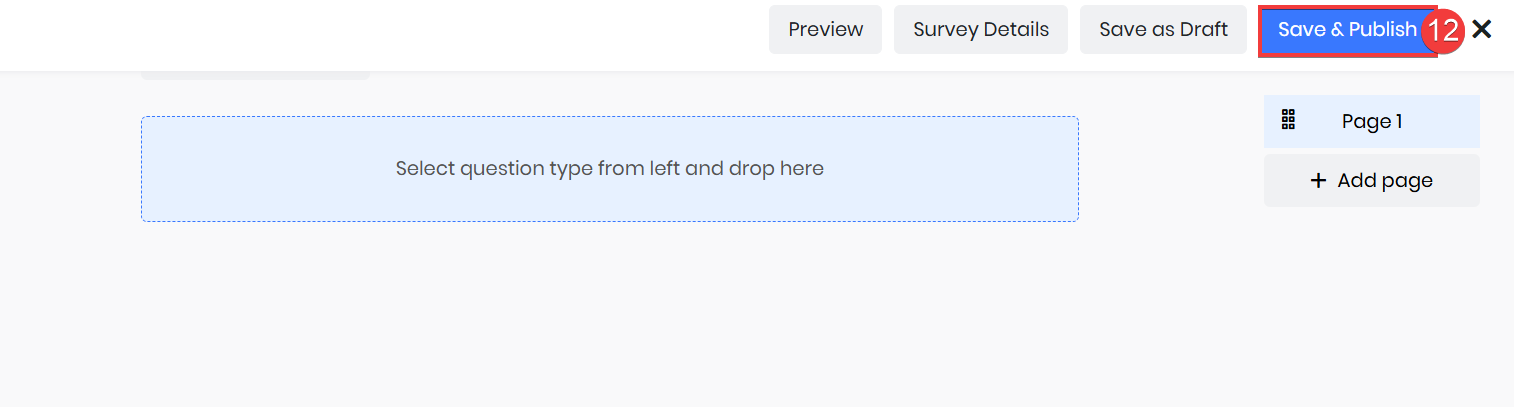
- Click Save & Publish. You can click Save as Draft to save the survey and edit it later.
When you save and publish a survey, it becomes active and accessible.
Creating and Publishing an External Surveys
In addition to the details you enter in an internal survey, you also have the following options in external surveys:
- Enabling captcha
- Taking anonymous responses
- Creating contacts
Follow these steps to create an external survey:
- Log in to your CRM account.
- Click the Main Menu.
- Go to Essentials.
- Select Surveys.
- Click +Add Survey.
- Enter the Survey Details:
- Name - Enter the survey name.
- Survey link - Enter the link to the survey.
- Type - Choose Internal as the survey type.
- Expiry date - The survey will become inactive after this date.
- Assigned To - This is the owner of the survey.
- CSS file URL - Enter the CSS file URL you want to use to style the survey page. This is optional.
- Show responses - Enable the checkmark if you want the survey takers to be able to see their answers.
- Click Advanced Options.
- Enter the following information:
- Survey header - Enter the text that must appear on the page header.
- Survey footer - Enter the text that must appear on the page footer.
- Survey logo - You can insert a logo of size within 2 MB here. For example, the company logo.
- Captcha - If you enable this, the respondents must submit a captcha before submitting the survey response. This helps in avoiding spam responses and bots.
- Anonymous - If you enable this, responses will become anonymous.
- Create contact - If you enable this, contact records are created in the CRM using the respondents’ details.
- Click Go to Questions.
- Click +Add page details.
- Add a page title and description.
- You can add multiple pages to a survey.
- To add another page, click +Add page shown on the right.
- Add different question types by dragging them from the left.
- For the radio button, checkbox, and dropdown questions, you must also enter the answer options.
- You can also duplicate questions and add logic to them. Hover over a question to see these options
- Click Save & Publish. You can click Save as Draft to save the survey and edit it later.
When you save and publish a survey, it becomes active and accessible.
To learn more about surveys, click here.
Social Module
The Social Module in Vtiger CRM is designed to integrate and streamline social media marketing efforts directly within the CRM platform.
Vtiger’s social module lets you to manage your social media platforms such as Facebook, Instagram, and Twitter, simultaneously. The Social module gives you a dashboard from where you can perform the following actions:
- Post
- Comment on a Post
- Reply to a comment
- Create a comment stream
- Schedule a Post
- Delete a comment or reply
- Select and add Contacts, Leads, Deals, and Cases to your Posts.
- Look up information using the Search Stream using specific hashtags and keywords.
Benefits of using the Social Module
The following are the benefits of using the social module for marketing in Vtiger CRM:
- Use a centralized hub to manage all communication.
- Streamline your social media communication.
- Save time with automation and post across various channels without manual effort.
- Explore social media trends from the CRM.
Linking Contacts to a Campaign
You can sync campaigns and contacts with your Mailchimp account by linking contacts to a campaign in Vtiger.
- Log in to your CRM account.
- Click the Main Menu.
- Go to Marketing
- Select Campaigns.
- Open a Campaign.
- Click the Contacts tab from the Summary view of the selected campaign.
- Link existing or create new contacts.
- Linking
- Click Link Contacts.
- Select multiple contacts by enabling the checkboxes when you hover on the left.
- Click Add on the top right corner. The selected contacts will be linked.
- Creating:
- Click + Add Contact.
- Fill out the mandatory fields.
- Click Save. A Contact will be created.
- Linking
To learn about syncing campaigns and contacts with Mailchimp, click here.
Duplicating a Campaign
When you duplicate a campaign, you can copy all the details of an existing campaign to create a new campaign record with a new title.
Follow these steps to duplicate a campaign:
- Log in to your CRM account.
- Click the Main Menu.
- Go to Marketing.
- Click Campaigns. You will land on the List View of Campaigns.
- Select and open the campaign that you want to duplicate.
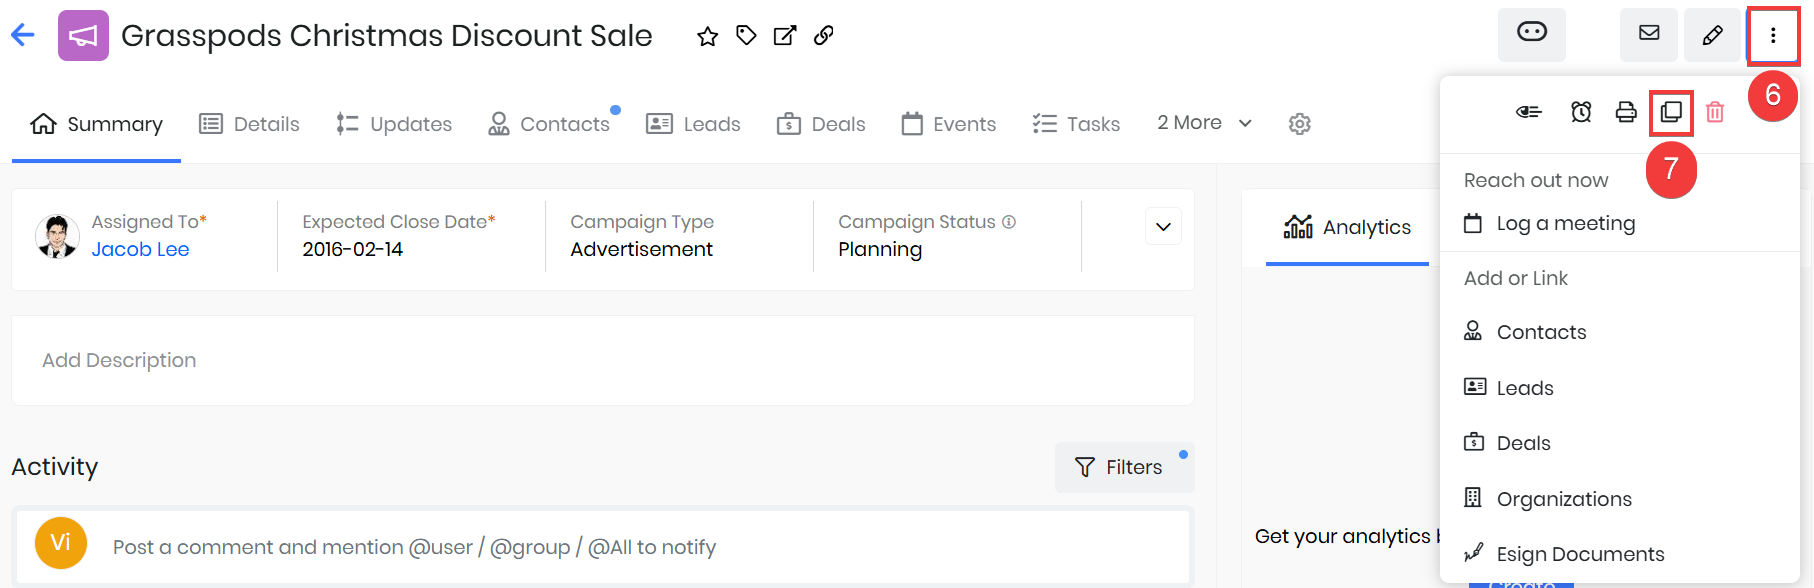
- Click the More icon located beside the campaign name in the Summary View.
- Click the Duplicate icon.
- Edit any field if required.
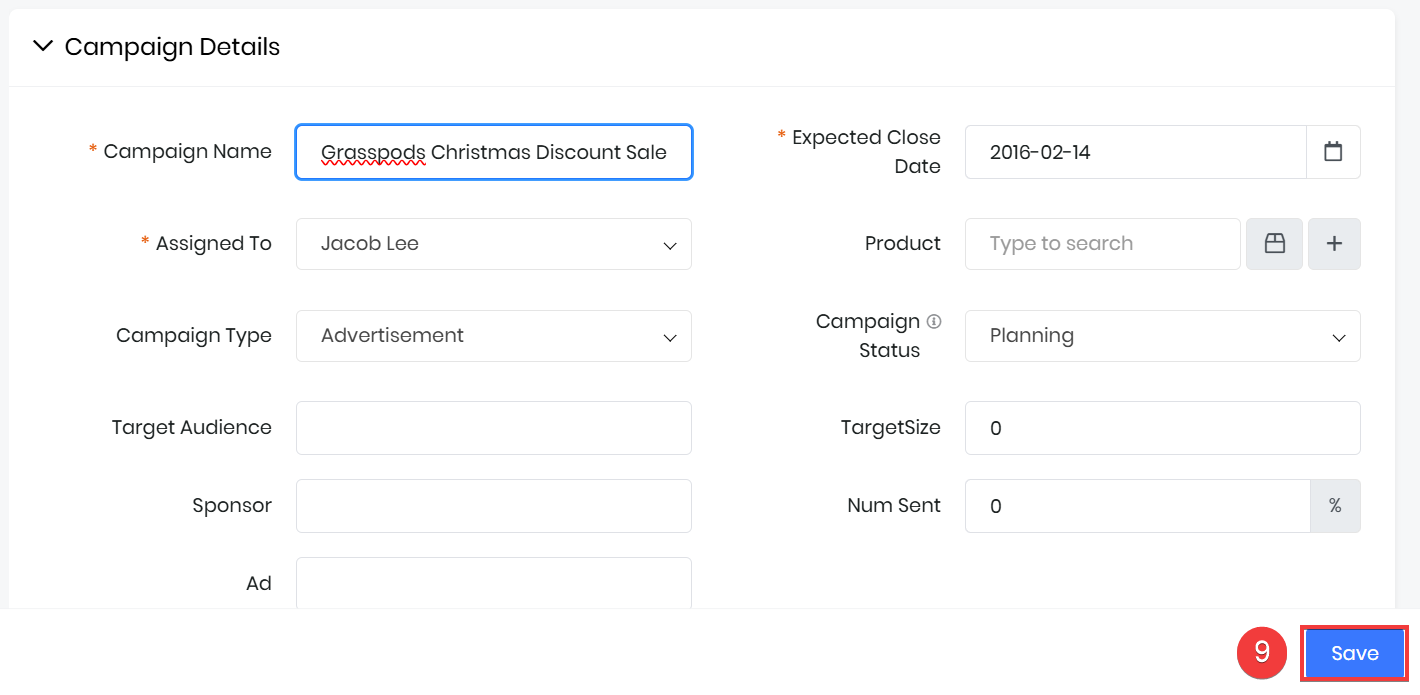
- Click Save.
Adding Custom Campaign Types
Custom Campaign Types allow businesses to create personalized categories for their marketing campaigns tailored to their specific needs and strategies.
Vtiger CRM provides the following campaign types by default:
- Conference
- Webinar
- Trade Show
- Public Relations
- Partners
- Referral Program
- Advertisement
- Banner Ads
- Direct Mail
- Primary Email
- Telemarketing
You can also create new campaign types by adding values to the Campaign Type picklist.
Follow these steps to create a new campaign type:
- Log in to your CRM account.
- Click the User Menu on the top right corner of the screen.
- Click Settings.
- Select Picklist Field Values under Configuration.
- Select Campaigns from the Select Module drop-down.
- Select Campaign Type from the Select Picklist in the Campaigns drop-down.
- Click +Add Value to add a picklist item.
- Enter the picklist item value.
- Pick roles under Who can assign this value to a record? Users with the role that you pick can set their campaign type in a record.
- Pick a color for the value.
- Click Save.
You can view the newly added value under the Campaign Type Values column.