Articles in this section
Publishing an Exercise in the LMS
Introduction
What are Exercises?
Exercises are assessments that you can add to a concept (lesson).
You can create an exercise for a lesson by adding questions and answers in the Questions module. You can add multiple questions to an exercise in the different formats.
- Plain text
- Multiple choice with the following options
- Checkbox
- Dropdown
- Radio button
- Agree and Disagree
- True and False
You can set up questions for an exercise in the following types of patterns:
- Random - The LMS auto-selects the specified number of questions from the Questions module.
- Fixed - You can select questions from the Questions module.
- You first need to add questions and link them to the exercise, concept, and course in the Questions module.
- Questions have automated weightage % and maximum score allotted.
- You can set up a maximum pass percentage for an exercise.
- Students can make multiple attempts to pass an exercise.
- Once students submit answers in the Portal, you can:
- View responses for it
- Review submitted answers
- Allot scores for students' answers individually
- Adding exercises to a concept
- Viewing responses, review, and allot scores for exercise questions
Adding an Exercise
Follow these steps to add an exercise:
- Log in to your CRM account.
- Click the Main Menu.
- Go to the LMS.
- Click Exercises. The Exercises List View opens.

- Click +Add Exercise. The Add Exercise window opens.
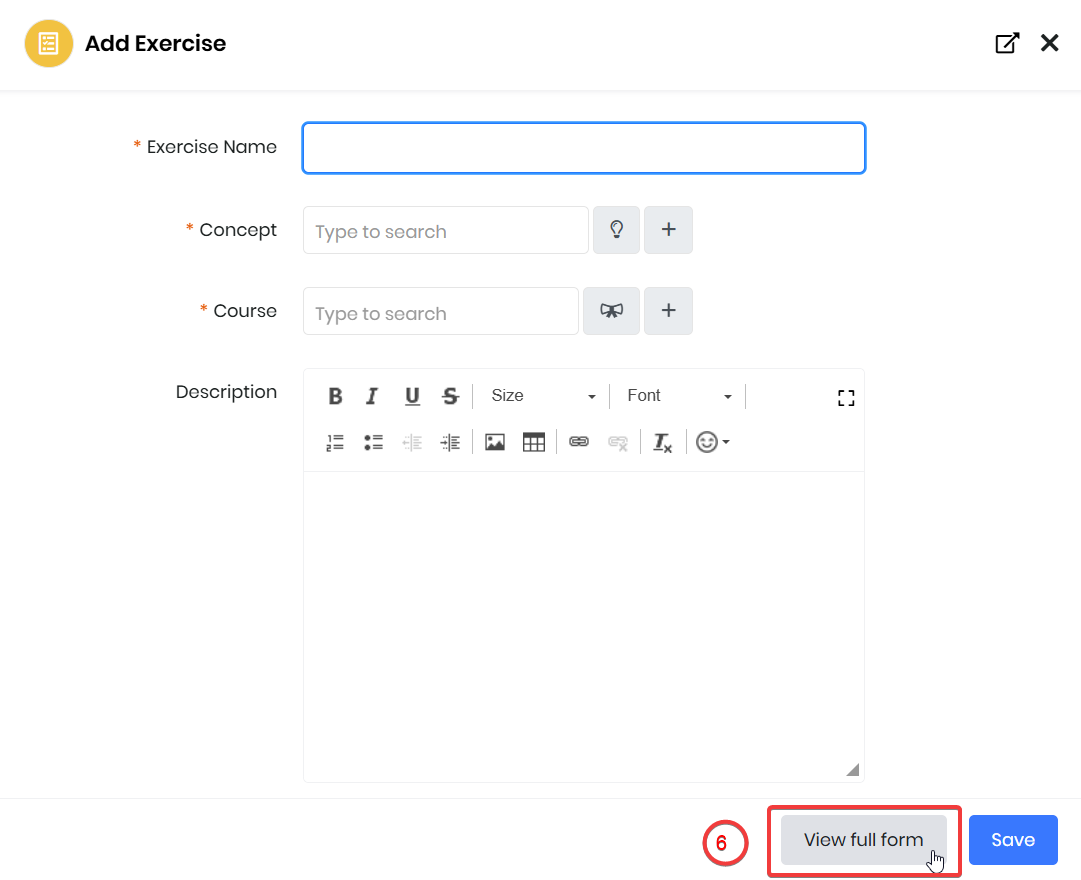
- Click View Full Form. The Creating Exercise > Basic Information window opens.
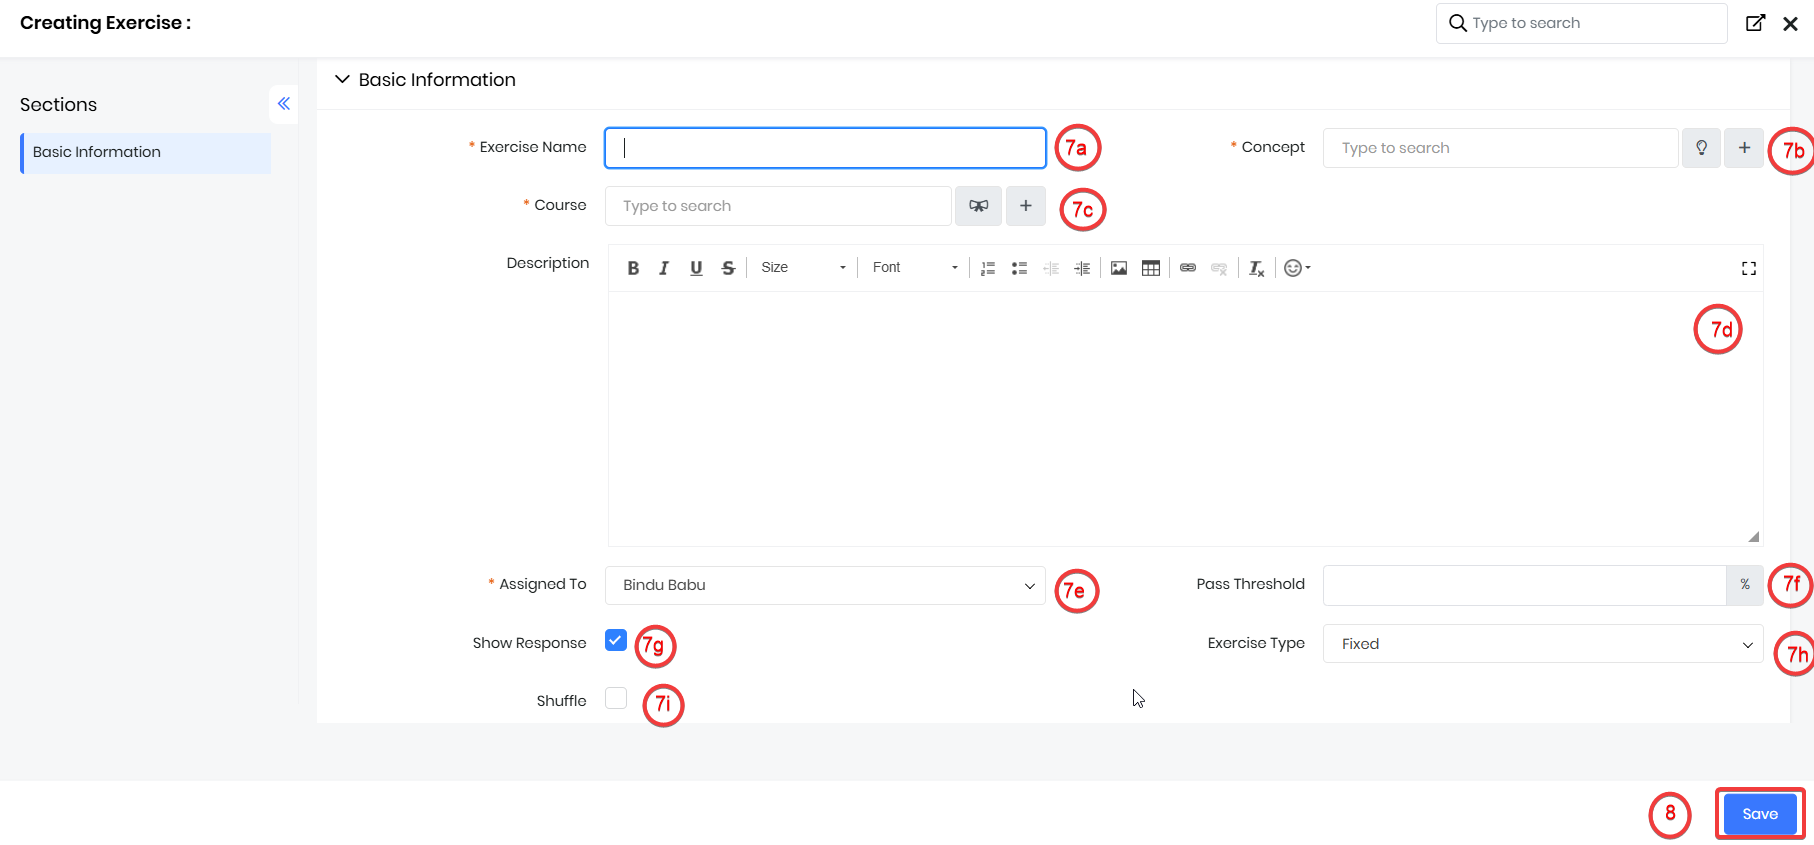
- Enter or select the following information:
- Exercise Name - Name of the exercise.
- Concept - Select or create a concept for which you are creating the exercise.
- Course - The related course is selected.
- Description - Description of the exercise.
- Assigned To - Owner of the exercise.
- Pass Threshold - The minimum pass percentage for students to pass the exercise.
- Show Response - Enable the checkbox if you want students to view their responses after submitting the exercise.
- Exercise Type - Select one of the following options:
- Fixed - If you want to select questions of your choice for the exercise. If you select Fixed, you will have to go to the Summary View of the exercise record to select questions of your choice.
- Random - Select the Number of Questions that you want the system to select.
- Shuffle - Enable the checkbox if you want questions to be shuffled and displayed for the exercise each time a student attempts it in the LMS Portal.
- Click Save.
After successfully adding the exercise, you will see a success message on the top right corner of your screen.
Note:
- When you select the Random option, the CRM auto-selects and publishes questions only linked to the course and concept you chose for the exercise.
- Only questions with Scope Excercise and Exercise & Quiz will be auto-selected.
Viewing Response for Exercises
If you are an instructor or the administrator or the one who added an exercise, you will receive a desktop and email notification when students, in the LMS Portal, submit their answers for Textarea or File Upload exercise question types.
Once you publish an exercise and students submit their answers, you can do the following in the Summary View of the Exercise record: