Articles in this section
Managing Organizations
Feature Availability
Vtiger Editions: One Pilot | One Growth | One Professional | One Enterprise | One AI
Introduction to Organizations
An organization represents a company you are doing business with. It could have multiple employees and sell multiple products or services. Organization records are typically created for those who buy from your business. Now, a Contact can be someone doing business personally or representing an organization you are doing business with. You create a contact record whenever you have a potential lead or new contact. You can create an organization record linking the contact to the organization.
Note: An organization record might be linked to multiple contacts.
Managing Organization Records
You can take many actions in the CRM to manage organizational data. You can add, edit, delete, or view data. You can also display data based on filters and create reports. This section will discuss the following:
- Displaying organizational records
- Adding an organization
- Editing organizational data
- Deleting organizational data
Benefits
The Vtiger Advantage! Vtiger CRM provides many advantages by interlinking organizations with contacts, deals, and quotes.
|
Creating an Organization Record
You can create an organization record from the Organizations module or while creating a contact.Note: While adding an organization, you can also create quotes, contacts, contracts, sales orders, invoices, etc.
From Organization - Add Organization button
You can manually create a new organization record using the Organization's List view screen button. You can use this feature when:- You need to enter a lot of details into the organization's record or
- You want to enter only a few points when short of time and revisit the record later.
- Log in to the CRM.
- Go to Essentials > Lead & Contact Management.
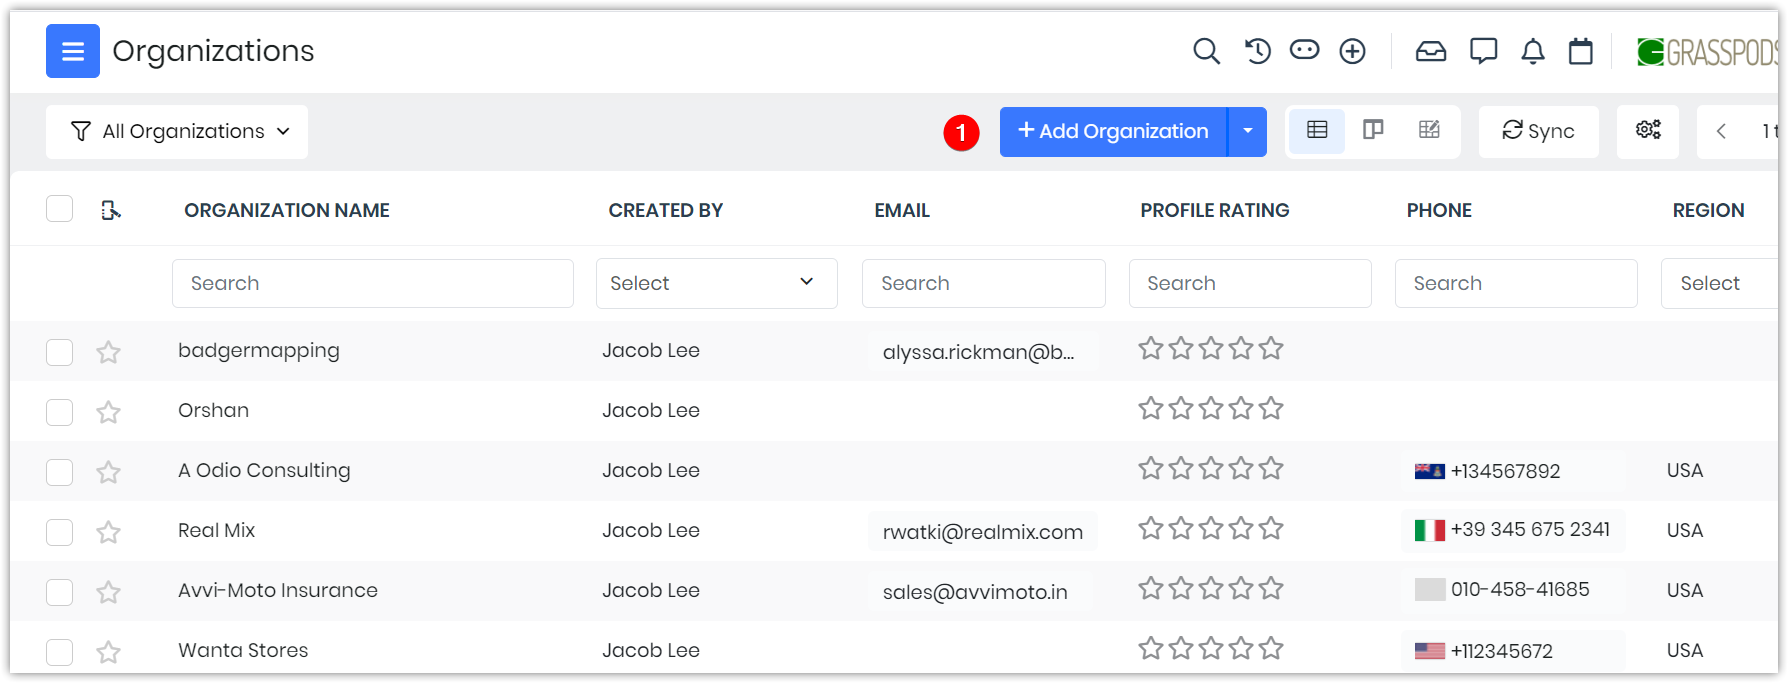
- Select Organizations. The Organizations page opens.
- Click the Add Organization button on the top right corner. The Add Organization page opens.
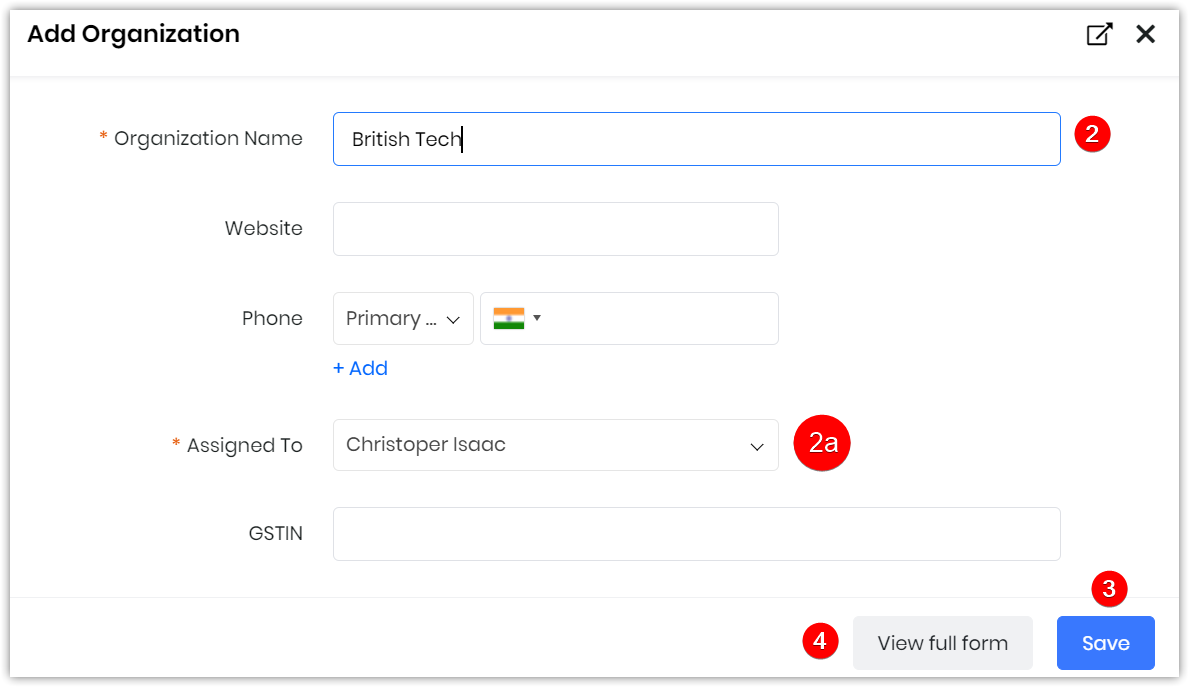
- Fill in the necessary detaisls for your organization record.
- Note: All fields marked with an * are mandatory fields.
- Click Save.
- Click View full form if you need to add more details.
- Note:
- You can enter extensive details for an organization, including VAS information, discounts, contact details, billing, lead scores, etc.
- You can also use this screen to reach an organization or create a quote, contacts, contracts, sales orders, etc.
- Note:
Using Quick Create
You can create an organization record using the + icon (Quick Create) on the top right corner of all screens in the CRM. You can add essential details and save the record. You can then come back later and fill in other information. This might be helpful if you are running out of time. While adding a new contact into Vtiger CRM, you can add the organization in the Add Contacts screen itself.
Note: You can also add a new contact for an existing organization. In that case, you will select the organization from a list of available organizations.
Follow these steps to create an organization record using the Quick Create icon:
- Log in to the CRM.
- Click the + icon on the top right corner.
- Click Organization under Essentials.
- In the Create Organization view, fill in the organization details.
- Click Save.
Editing Organization Data
You can edit single or multiple organization records from the List View. You can edit the information for a single record in the Summary View.
Editing in the List View (for single or multiple record)
When you open the Organization module, the List View lists available organizations. You can edit a single record or multiple records (together) depending on the action you want to take. To edit a record, enable the editing toolbar and select single or multiple records using the radio button.
Use the options available on this toolbar to quickly edit, delete, and comment on each organization record in the List View.
Editing in the Summary View (for a single record)
Follow these steps to edit a record:- Log in to the CRM.
- Go to Essentials > Lead & Contact Management.
- Select Organizations. The Organizations page opens.
- Select the record you want to edit. The Summary View window opens.
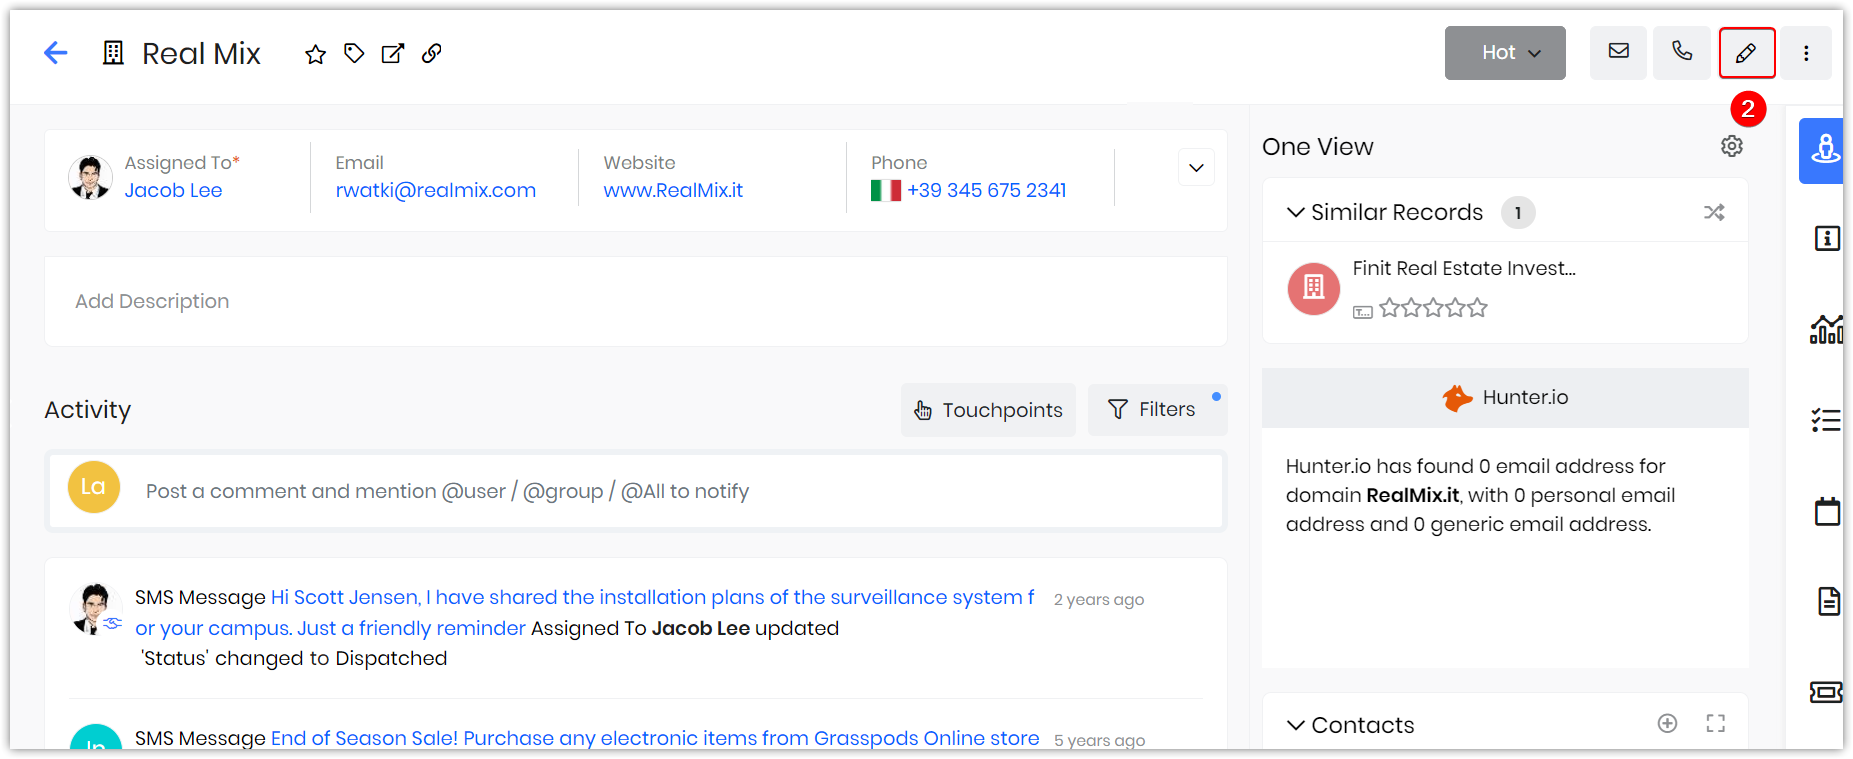
- Click the Edit icon to edit information like organization details, address, description, and profile picture. An Editing window opens.
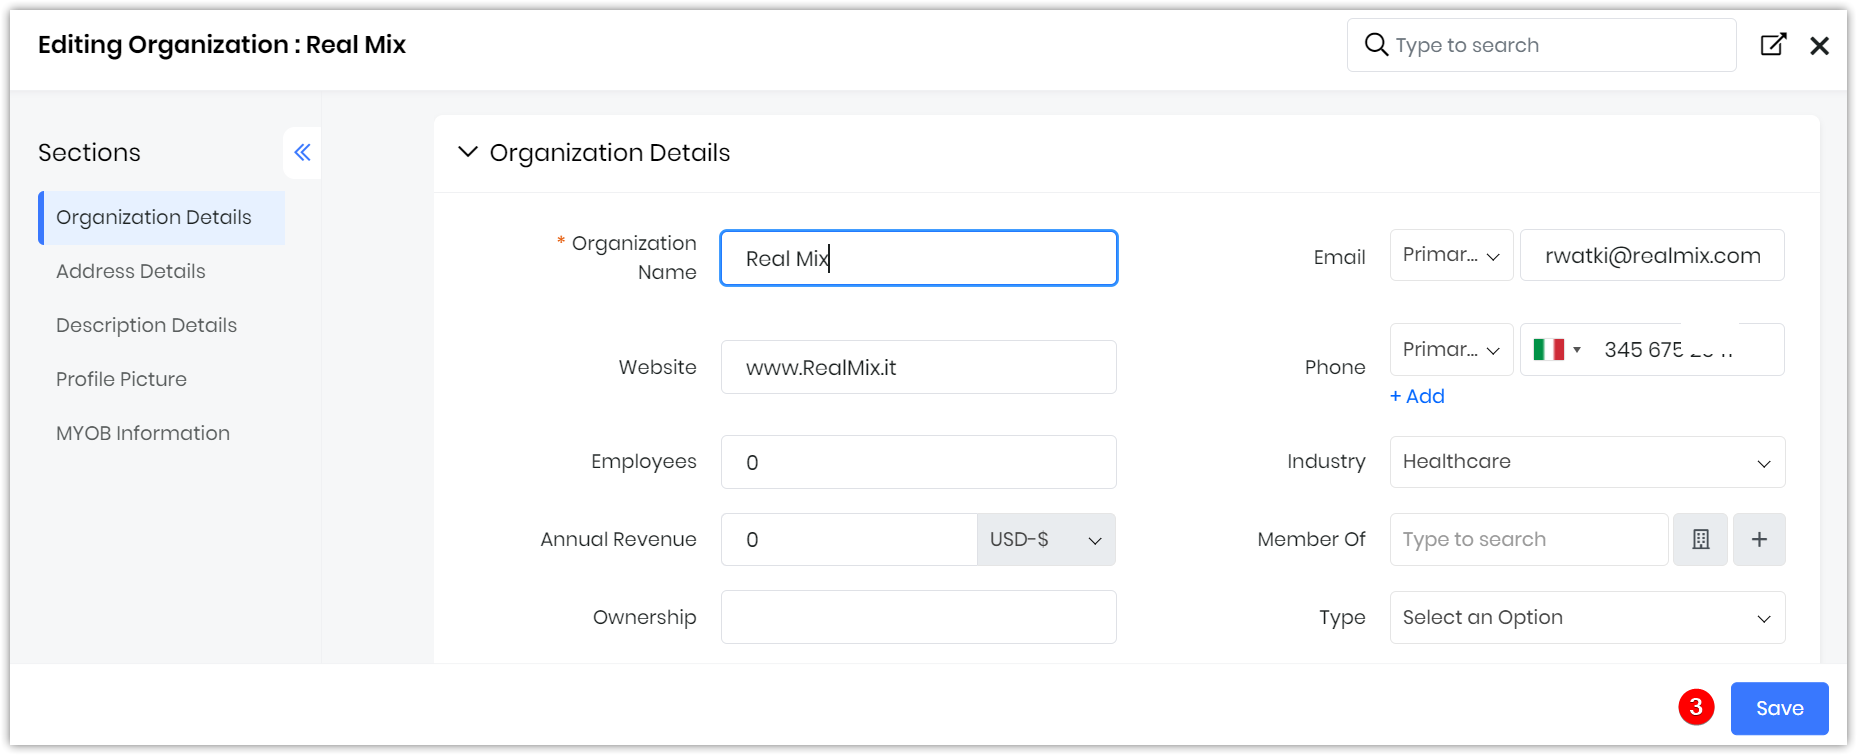
- Click Save.
Deleting an Organization Record
You can delete an organization record from the List View and the Summary View of the Organization module.The Organization record will be in the Recycle Bin for 30 days, after which it will be permanently deleted. You can restore a deleted record within 30 days. Even if an Organization record is deleted, all related information, such as contacts, deals, quotes, etc., will still be available in the system, but the Organization field will be shown as blank. Once you restore an organization record, all links to the related information will also be restored.
Note: To safeguard data, not everyone can delete an Organization record. You can delete a record if you have admin or standard access.
Follow these steps to delete a record from the List View:
- Log in to the CRM.
- Go to Essentials.
- Click on Organization. The List View displays the available Organization records.
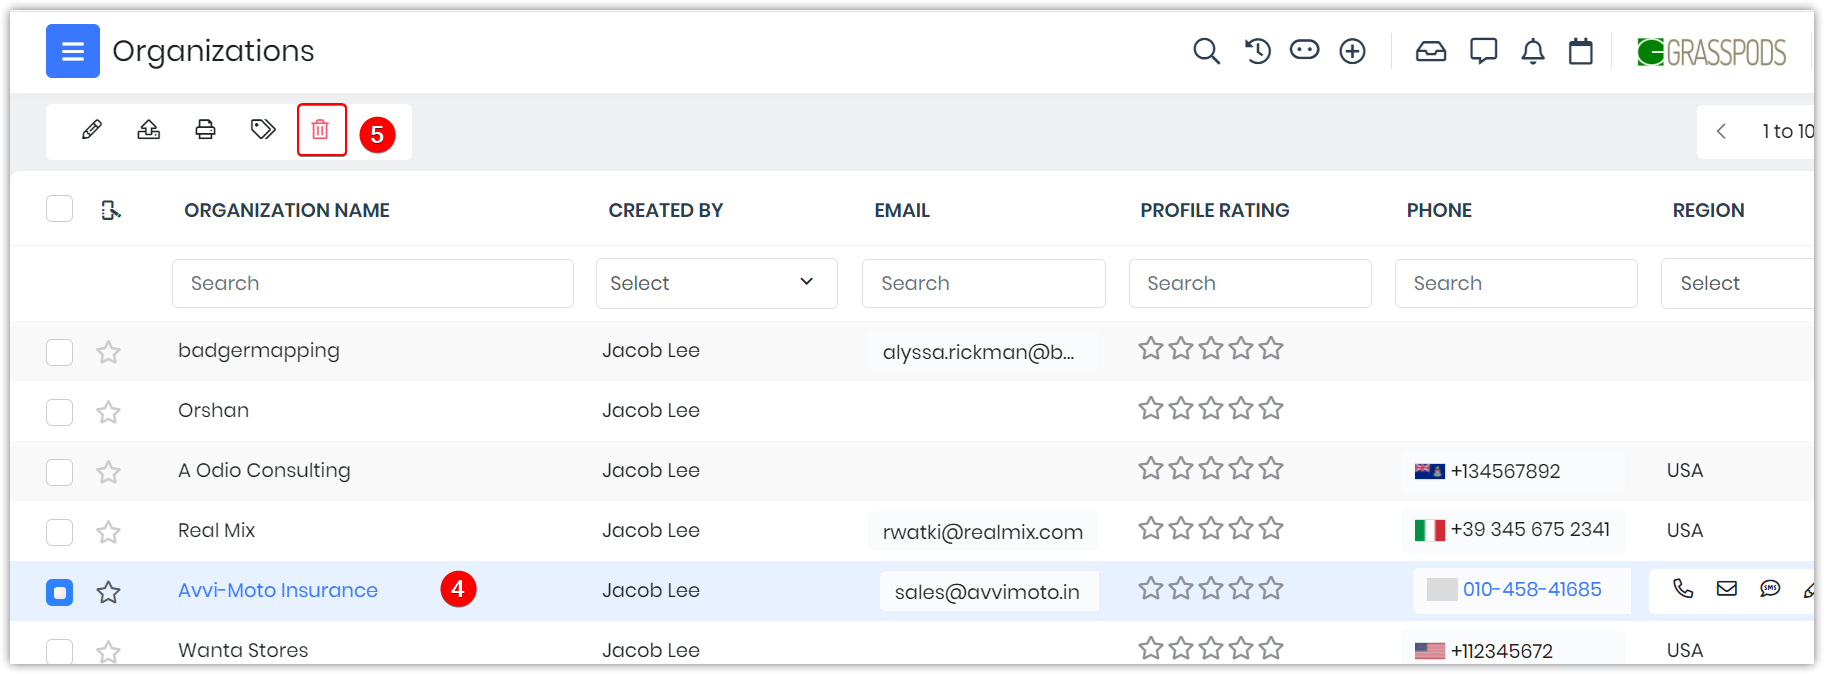
- Select the record you want to delete. The actions tab is displayed on top.
- Click the Delete icon to delete the record.
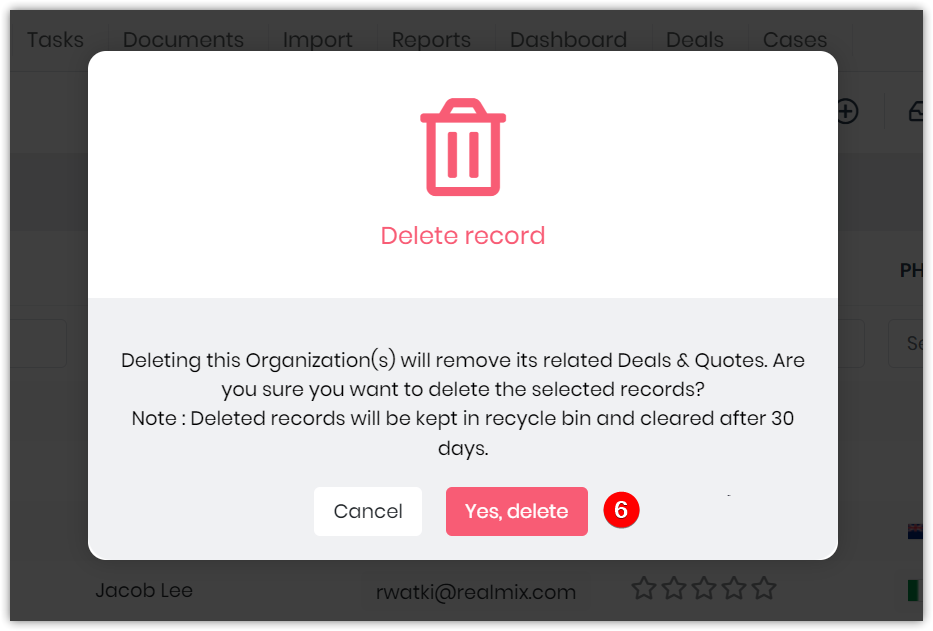
- Click Yes in the Delete window to confirm.
- Log in to the CRM.
- Go to Essentials.
- Click on Organization. The List View displays the available Organization records.
- Select the record you want to delete. The Summary View opens.
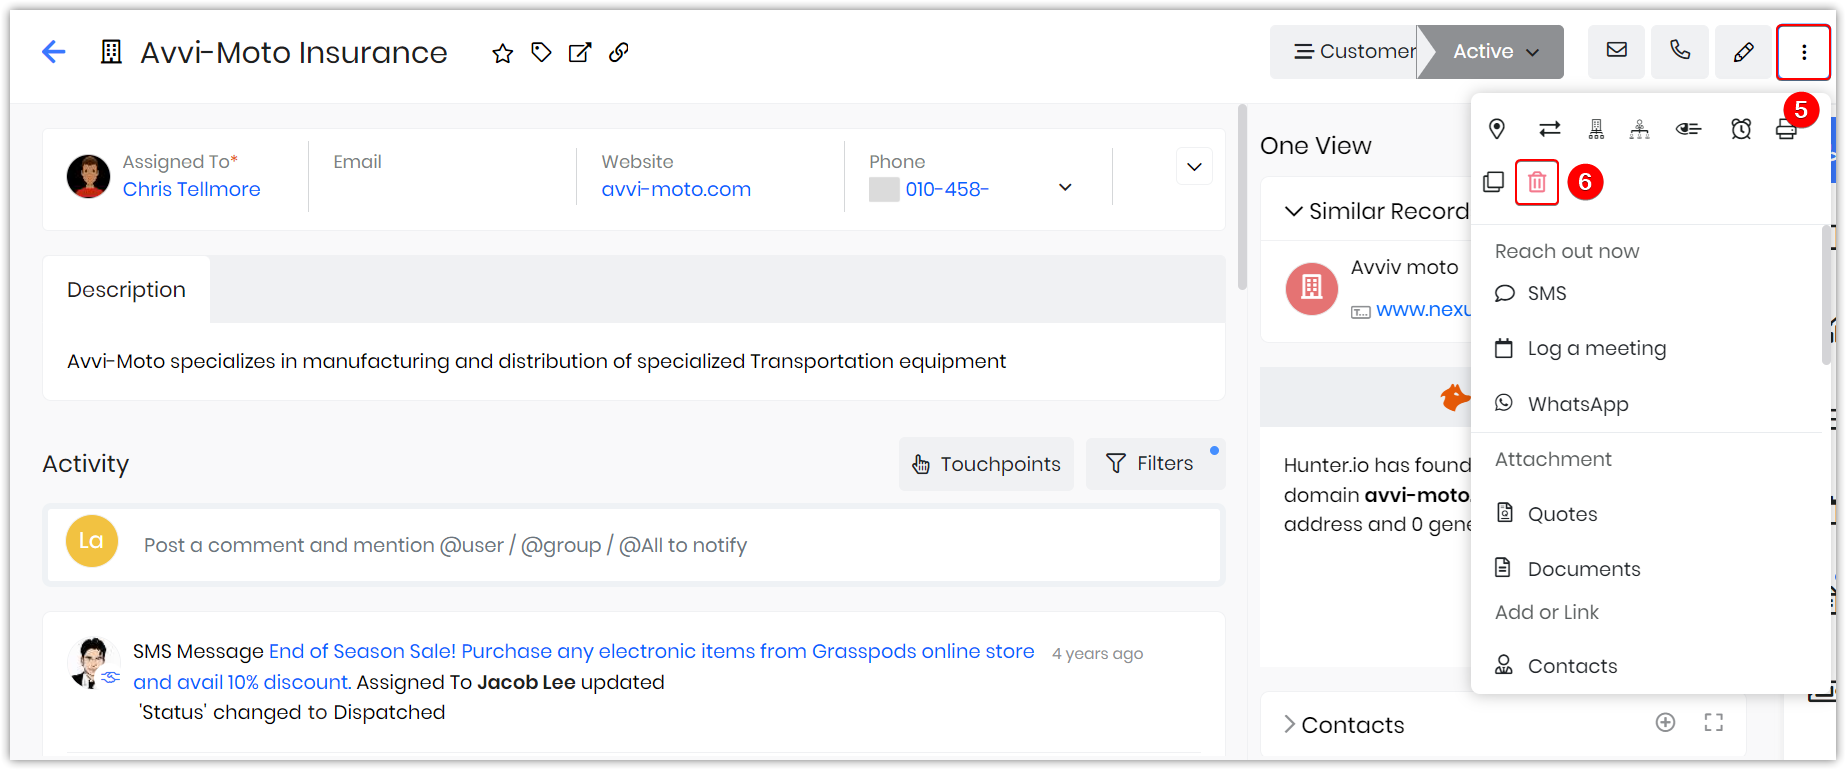
- Click on the More icon.
- Click on the Delete icon.
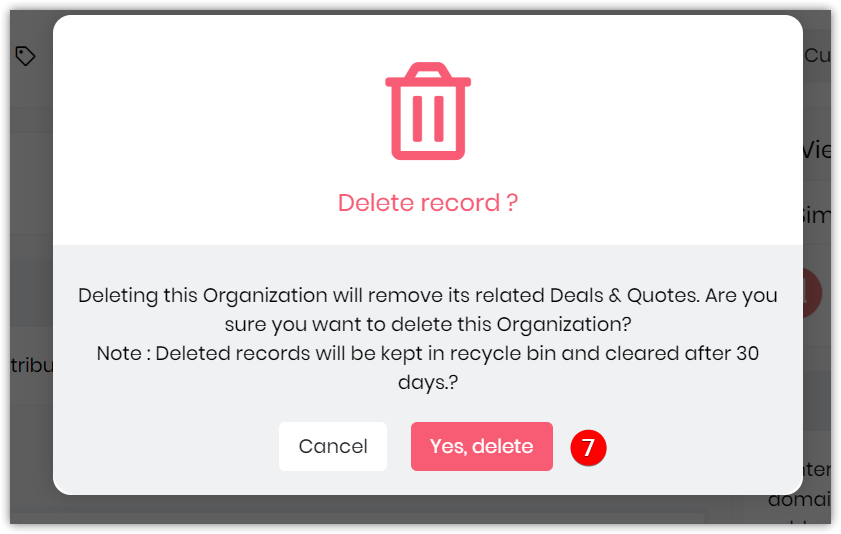
- Click Yes in the Delete window to confirm.
- Note: Deleted records will be kept in the recycle bin and cleared after 30 days.
- Note: Deleted records will be kept in the recycle bin and cleared after 30 days.
Communicating with a Contact
- We have discussed so much about an organization record here, but what if you wanted to reach the contact linked to an organization record? That's easy.
- You can speak to, email, or send an SMS to any contacts associated with an organization record in the List View or the Summary View. Simply click on relevant icons and get in touch.
Displaying Organizational Data
Vtiger CRM allows you to display data in the List View, Summary View, and Details View. While you can use the List view to display multiple records, you need to use the Summary and Deep Dive views to display the details for a single record. Let us begin with the List View.
List View
The List View is the default screen when you open Essentials > Organizations. This view displays a list of organizations and information related to an organizational record and lifecycle stages. Fields display information such as the time a lead was created, who it was assigned to, when was the last time you were in contact and how, the name of the contact’s organization, the contact's last name, and the contact’s email address.In the List View, you can create customized lists by using filters to select the type and number of fields you want to display. And the List View screen displays the details you have chosen. The screen that opens depends on the filter options you had chosen on your previous login. You can also personalize the display by:
- Using the Search option
- Managing the columns in the list using the More (፧) icon
Actions in the List View
In the List View, you can edit, add a comment, delete a record, export a record, print information, add tag names, transfer ownership, and send an email using the edit toolbar.Note: The edit toolbar won’t be enabled or visible till you select a particular record to edit.
- To enable the toolbar, select a record by using the radio buttons next to a contact.
- The Follow icon allows you to follow a contact.
- Use the Edit icon to edit information about a contact, including basic information, addresses, sensitive data, approvals, etc.
- Use the Comment icon to add comments.
- Use the Recycle Bin icon to delete records.
- Use the Export icon to export records. You can export selected records or records on a particular page or all the data.
- Use the Print icon to print records. You can select the template in which you want to print a record. You can edit and export a record, create a PDF and send the information by email, print a paper version, or save it as a PDF document.
- Use the Tag icon to select or add a new tag.
- Use the Transfer Ownership icon to transfer or assign the ownership of a record to another sales rep or employee of the firm by selecting the related module and the name of the new owner. You can also transfer closed records using this action.
- Use the Email icon to compose and send an email about a record.
Summary View
The Summary View displays the key details for the selected Organization. To go to the Summary View, choose and click on the record for which you want to view information.In the Summary View, you can:
- View details such as name, phone number, etc
- Viewing the time zone for contacts ensures that date and time information in automated emails and SMS messages is displayed based on the contact's specific time zone rather than the assigned user's time zone.
- View all the activities that have been performed on the record
- Set different filters to view details (Like internal comments, updates, and completed tasks)
- Change the lifecycle stage
- Go to the Deep Dive View for the organization
- View the contacts, quotes, sales orders, invoices, etc, related to the organization.
- Use the One View widget to display data on Contacts, Quotes, Invoices, Projects, and other details associated with the selected record.
- View different widgets on the rightmost panel to help display specific information for the organization.
Details View
- The Details View for an organization record displays all the information about a selected organization.
- In the Details View of an Organization record, the Last Contacted On field displays the date when the record was last contacted.
- The Source column in Touchpoints indicates how emails or SMS messages were sent, such as CRM, Workflow, Approval, or Mailroom.
- The Last Contacted Via field shows the communication channel and Source (e.g., email or SMS) used to contact the record as listed below.
- Workflow – Emails
- Approvals – Emails
- Process – Emails
- Workflow-SMSNotifier
- Approval-SMSNotifier
- Process-SMS
- Invitation-Email – For calendar invite emails.
- For calendar invite emails, the Last Contacted Via field is updated as Invitation-Emails, but no entry is created in Touchpoints since no email record is generated.
Track Emails sent from the Organizations Module
- You can track emails that are opened and links that are clicked for Organization module records. Enable email tracking in the email Settings page.
- All actions related to email opens and link clicks will be logged in the Touch Points, Updates section, and Dashboard History of the Organization record.
- You can also track email open and click actions for emails sent via Workflows and Inbox, Approvals emails, Process Designer emails, emails with PDFs, emails sent from related apps, and emails sent from the Vtiger CRM Mobile app.
One View in the Organization Module
One View widget is a one-stop destination to view all the important modules related to an organization, such as Contacts, Deals, Cases, Quotes, Invoices, Sales Orders, and Projects. Let us see what the One view widget in the Organization module displays the following modules:- Contacts: This widget displays details of contacts associated with an organizational record.
- You can view key fields for each contact and social media information.
- You can also reach out to a contact from this section using Call, Email, and the SMS icon.
- You can also unlink a contact from an organization.
- Cases: This widget displays cases raised by the contacts of an organization.
- You can create a case by using the + icon.
- You can also unlink a case once it is closed.
- Deals: This widget displays deals linked to an organization record.
- You can create potentials using the + icon through this widget.
- Quotes: This widget displays quotes linked to an organization record.
- You can directly create a quote from this widget using the + icon.
- Invoices: This widget displays invoices generated for an organization.
- You can directly create an invoice from this widget using the + icon.
- Sales Orders (SO): This widget displays SO details for an organization.
- You can directly create a sales order from this widget using the + icon.
- Projects: This widget displays project details for the projects created for an organization.
- You can directly create a project from this widget using the + icon.