Articles in this section
Products in Vtiger CRM
Introduction to Products
Products represent a stock of goods in your inventory. Products can be either procured from your suppliers or rendered to your customers, depending upon the nature of your organization.
Interestingly, if your company sells and purchases goods, the Products module will bridge the sales and purchase departments.
Feature Availability
|
|
|
|
|
| |
|
| |||||
|
|
|
|
|
|
|
List View in Products
In Vtiger CRM, you can look at all the products in List View. By default, List View is the screen that is visible when you click the Products tab. This view sorts and lists all products based on the last modified product.
Columns in the List View
The columns that are visible by default in the List View are:
- Product Name - Displays the name of the product.
- Part Number - Displays the part number of the product.
- Commission Rate - Displays the commission rate of the product.
- Qty. in Stock - Displays the quantity available in stock.
- Qty/Unit - Displays the number of units.
- Unit Price - Displays the price of each unit.
List actions
You can perform many quick actions, such as Edit, Delete, Export, Comment, etc, on product records in the List View. To learn more about List View actions in Vtiger CRM, click here.
Ways to View a Product
Summary View
Summary View is the view that appears when you click a particular record from the List View. The Summary View displays a collection of all the key information of the record. The Summary View can be divided into four sections. Each section has a particular functionality.
Summary View Actions
- Follow: You can follow any product record to get updates on all the activities performed on that record.
- Tags: You can add tag names to the record to identify the record easily.
- Print: You can print the product or save it as a PDF for future reference.
- Duplicate: You can duplicate the current record and have all the details reflected in a new record.
- Delete: You can delete a record by clicking this button.
Activity
This section lists all the activities performed on that particular record. You can also add filters and view specific activities.
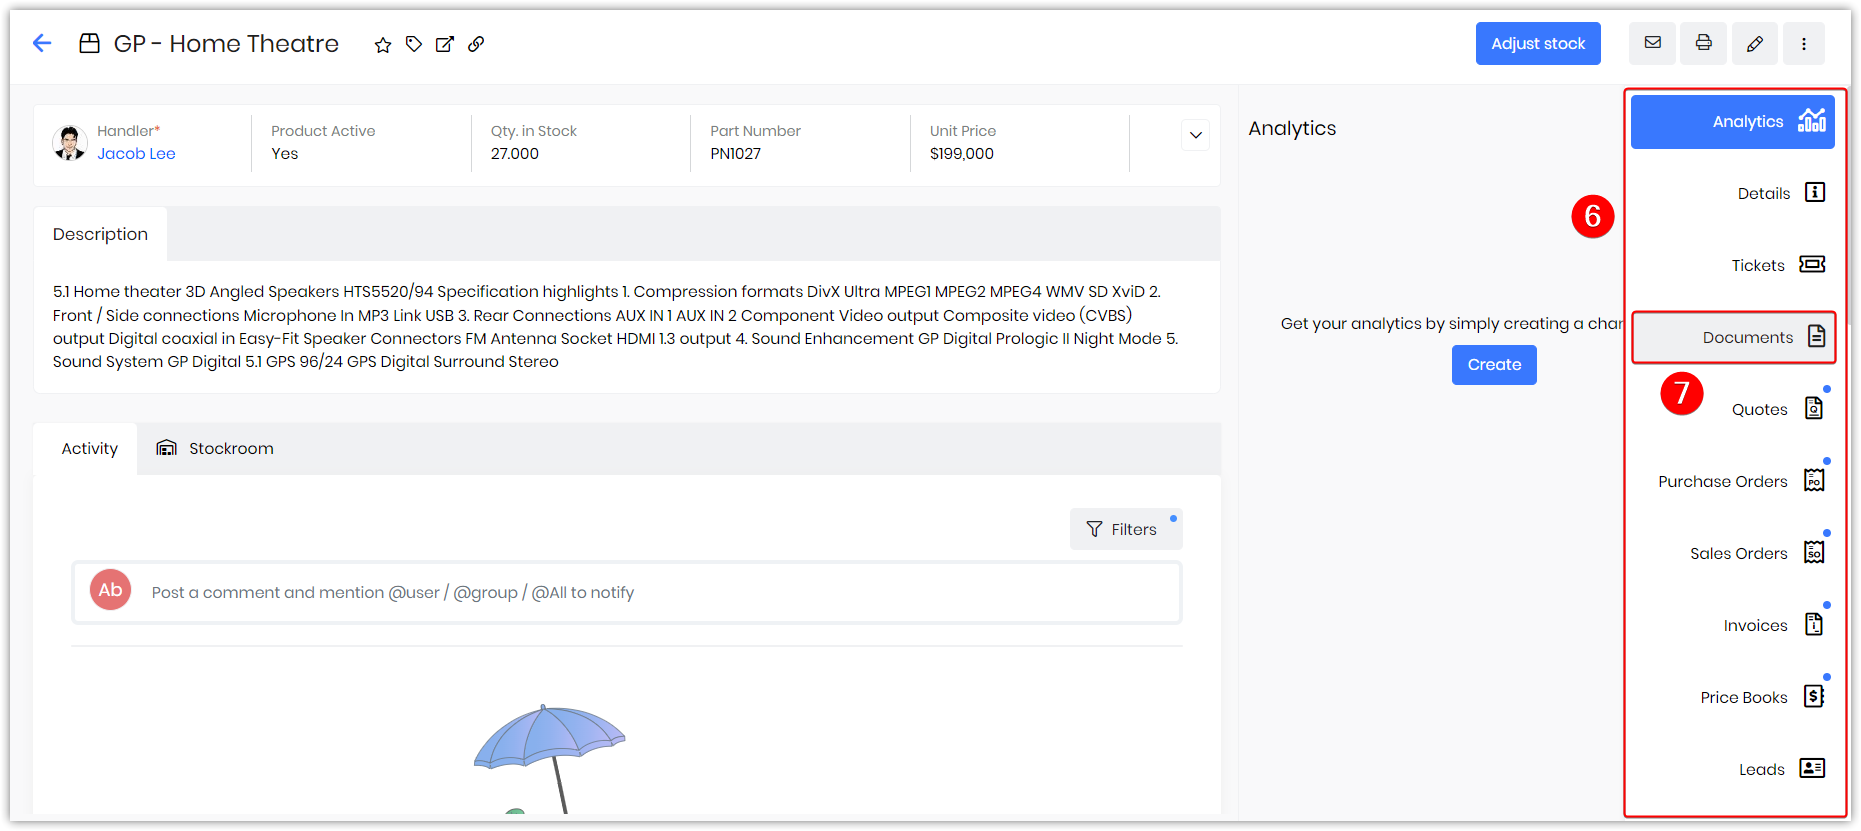
More button
When you click on the do button on the right-hand top corner of the Summary view, you will see the following:
- Add or Create - You can add or create other modules related to the product.
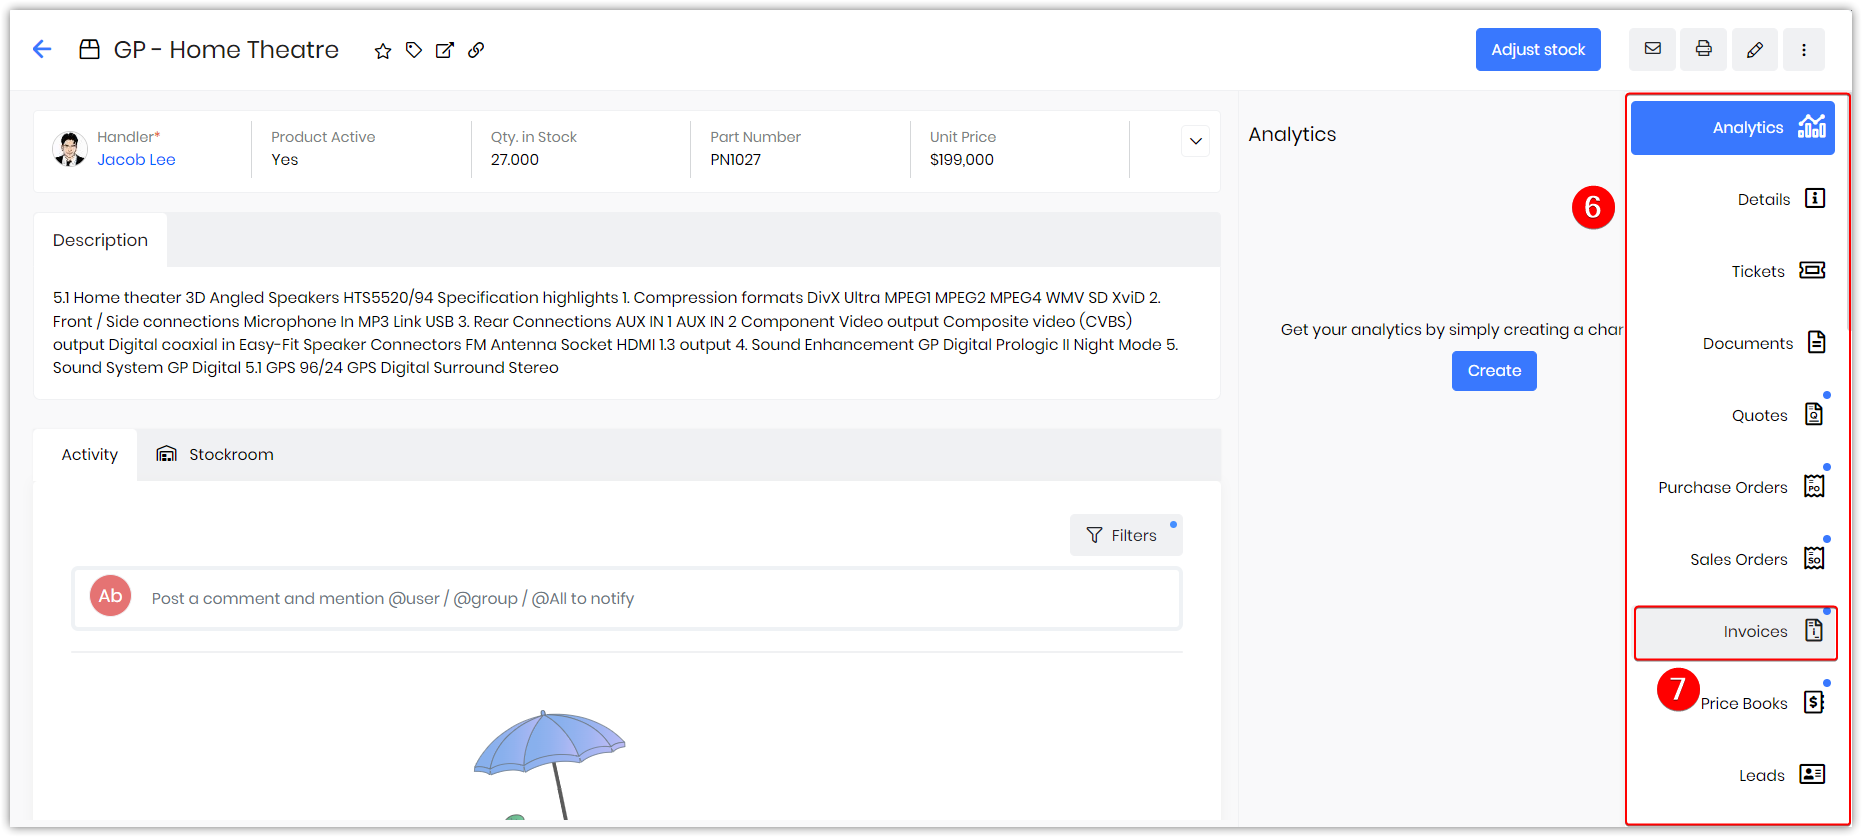
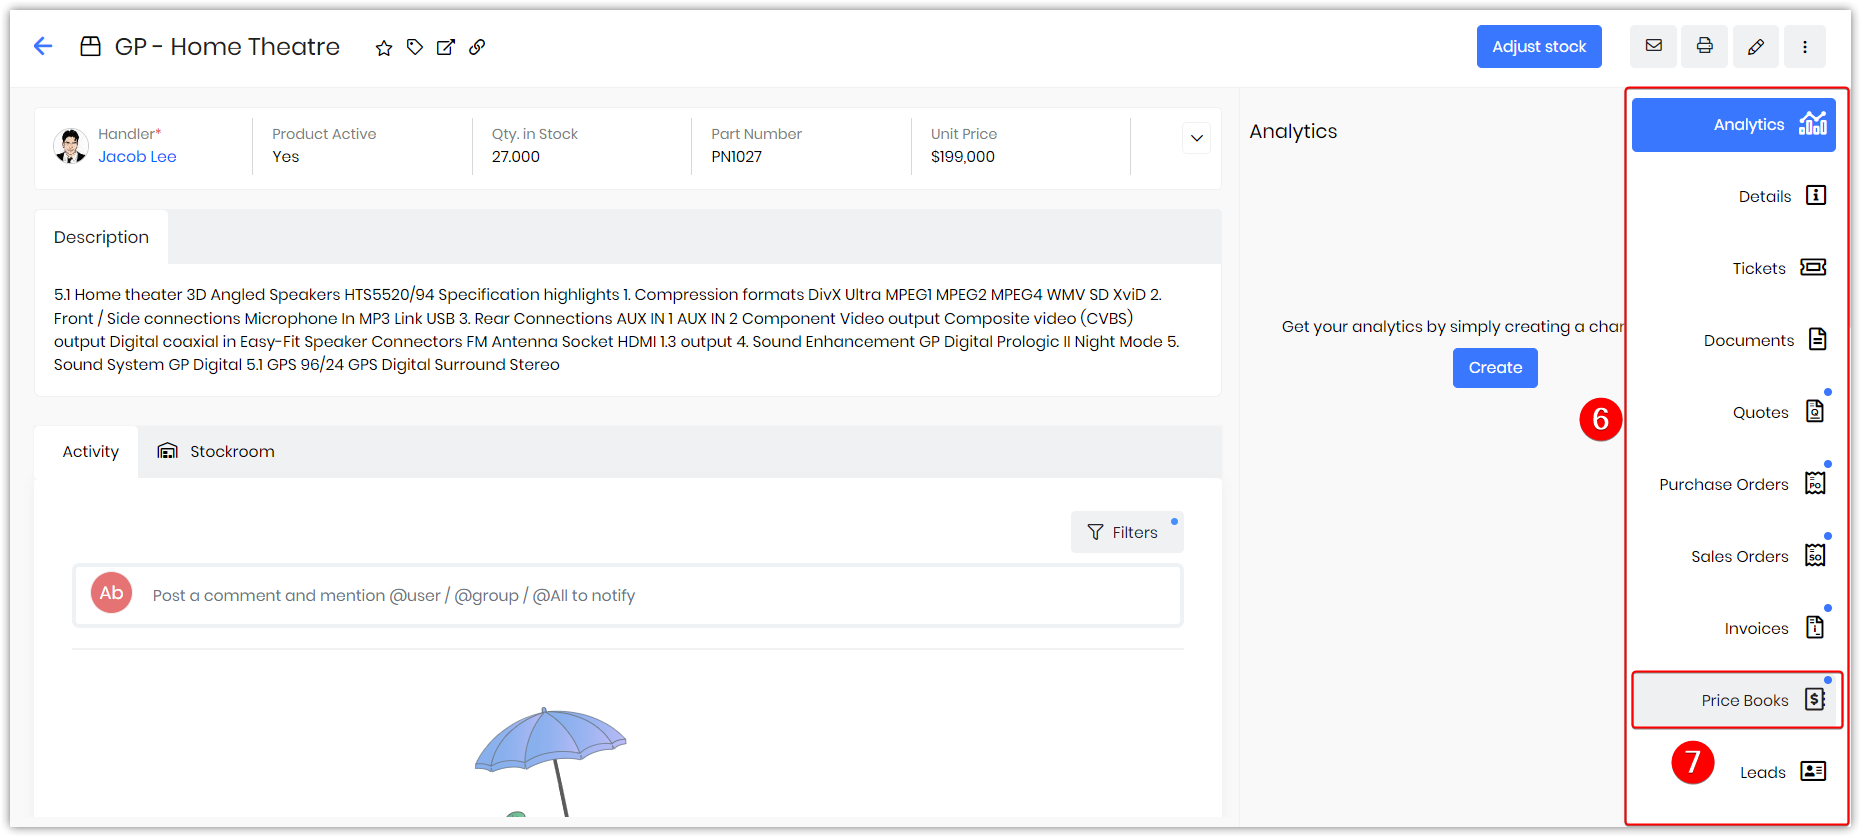
Widgets
- Analytics - You can view all the metrics related to the product in the form of charts, mini-lists, etc. You can also create new ones here by clicking the + button.
- Documents - You can create a new document or add an existing document to the product. All the related document details are displayed here.
- Sales Ops - You can create or add a quote, invoice, sales order or purchase order from here and also view the related record’s details.
- Price Books - You can create a new price book or add an existing one. You can also view the details of the related price book here.
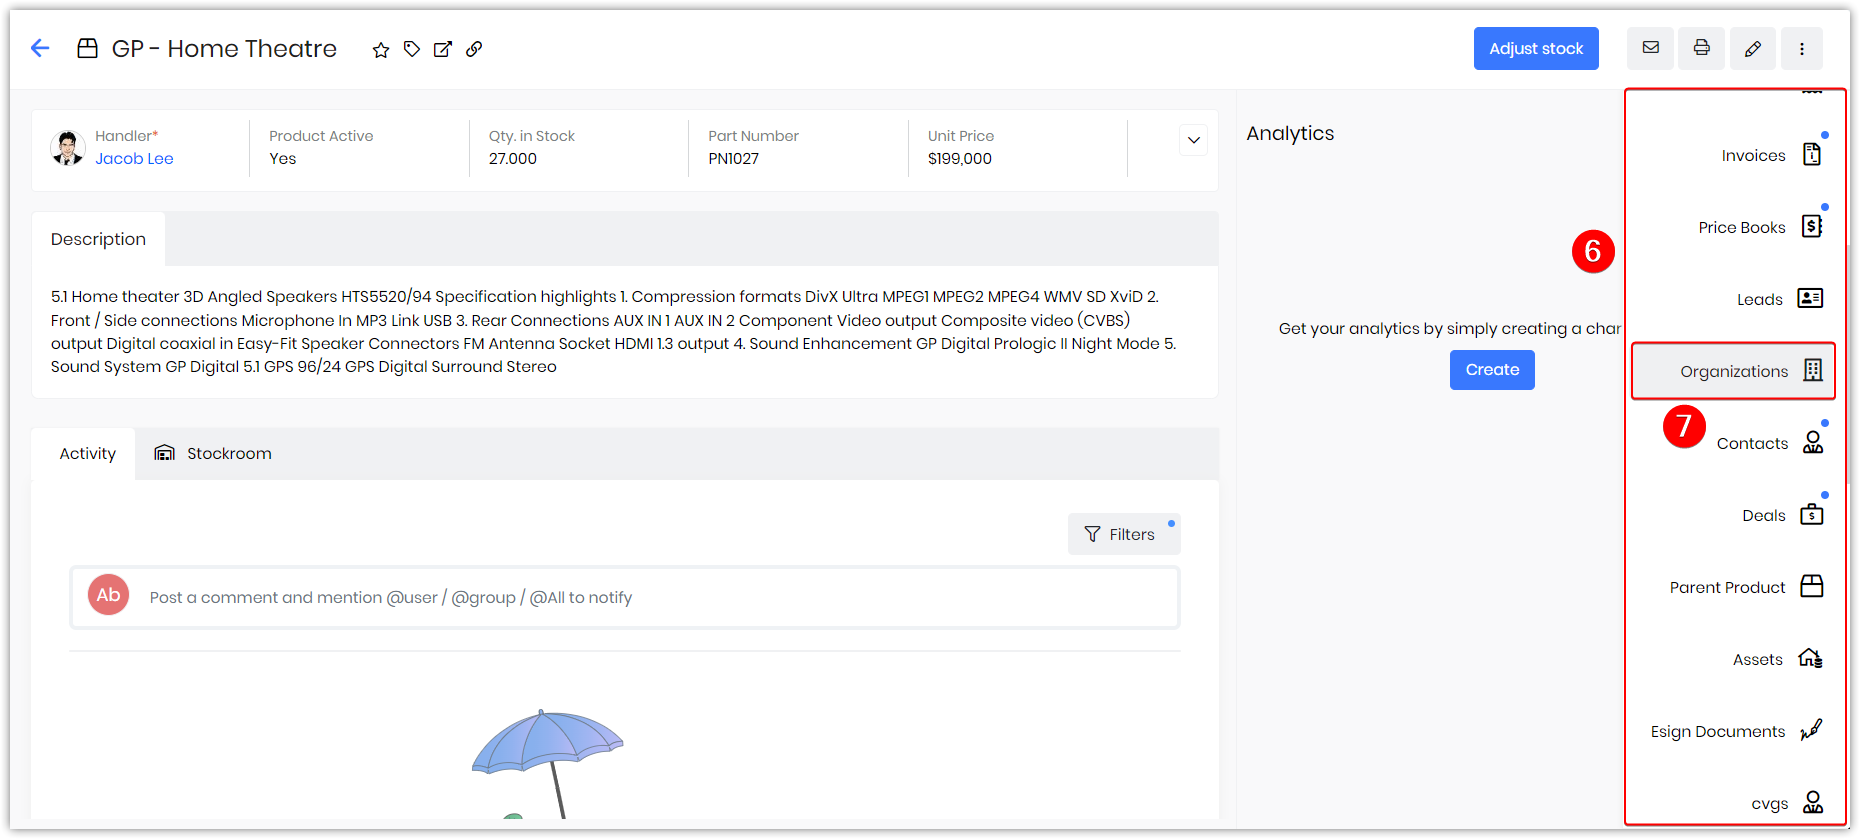
- Organizations - You can create a new organization or add an existing organization to the product. All the related organization details are displayed here.
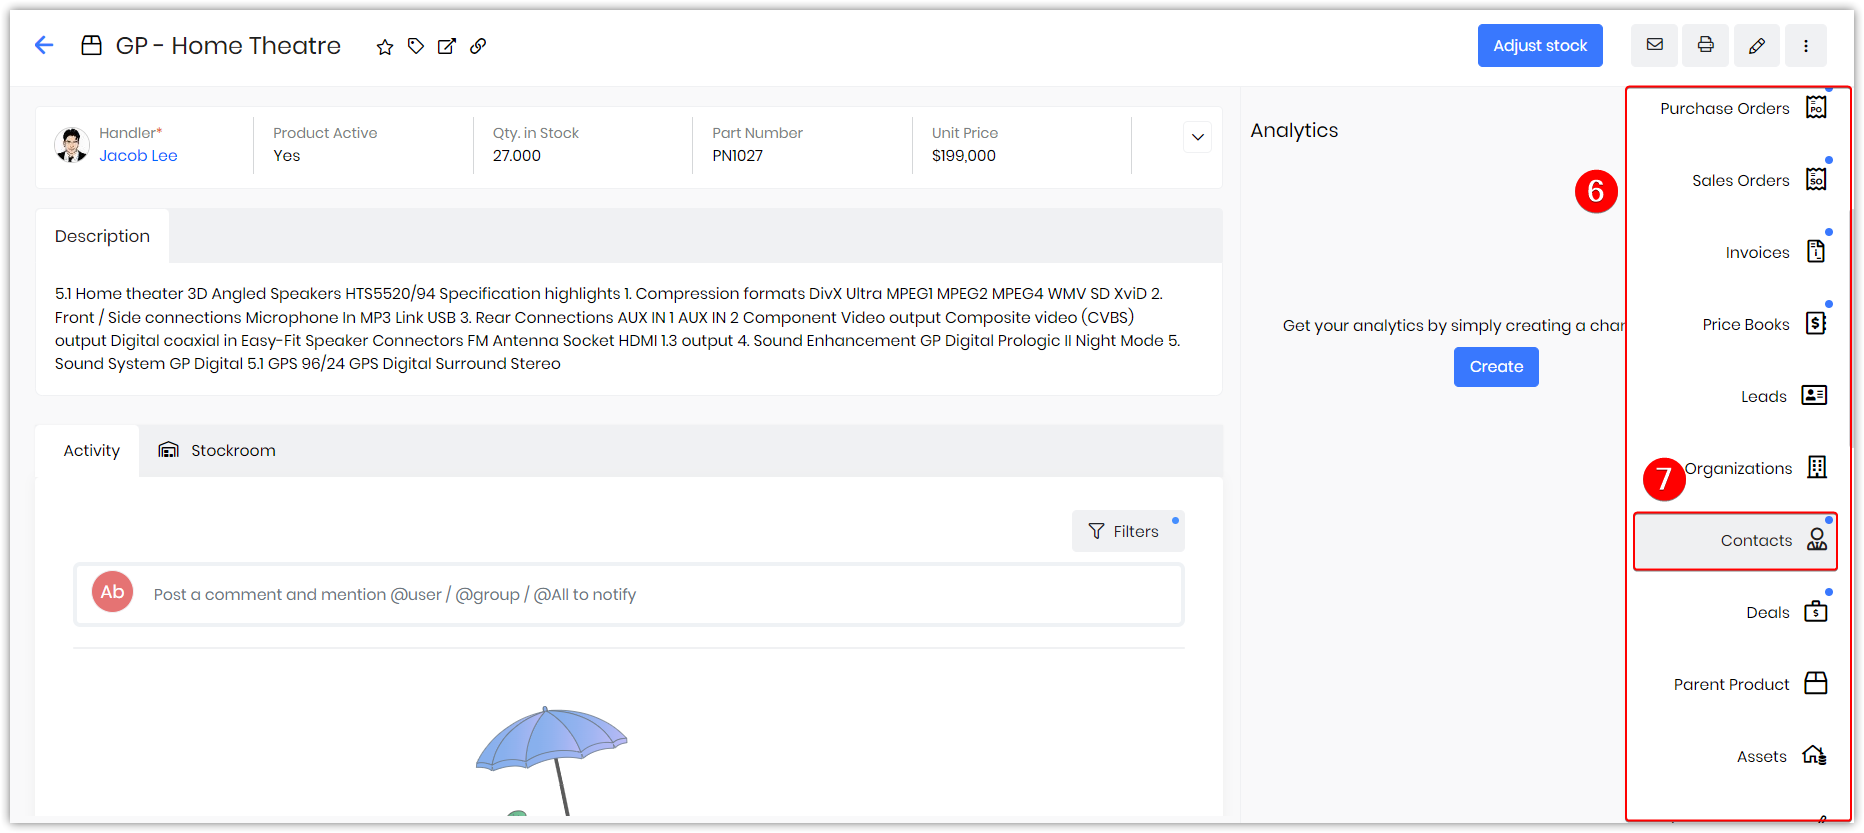
- Person - You can create a new contact or add an existing contact to the product. All the related contact details are displayed here.
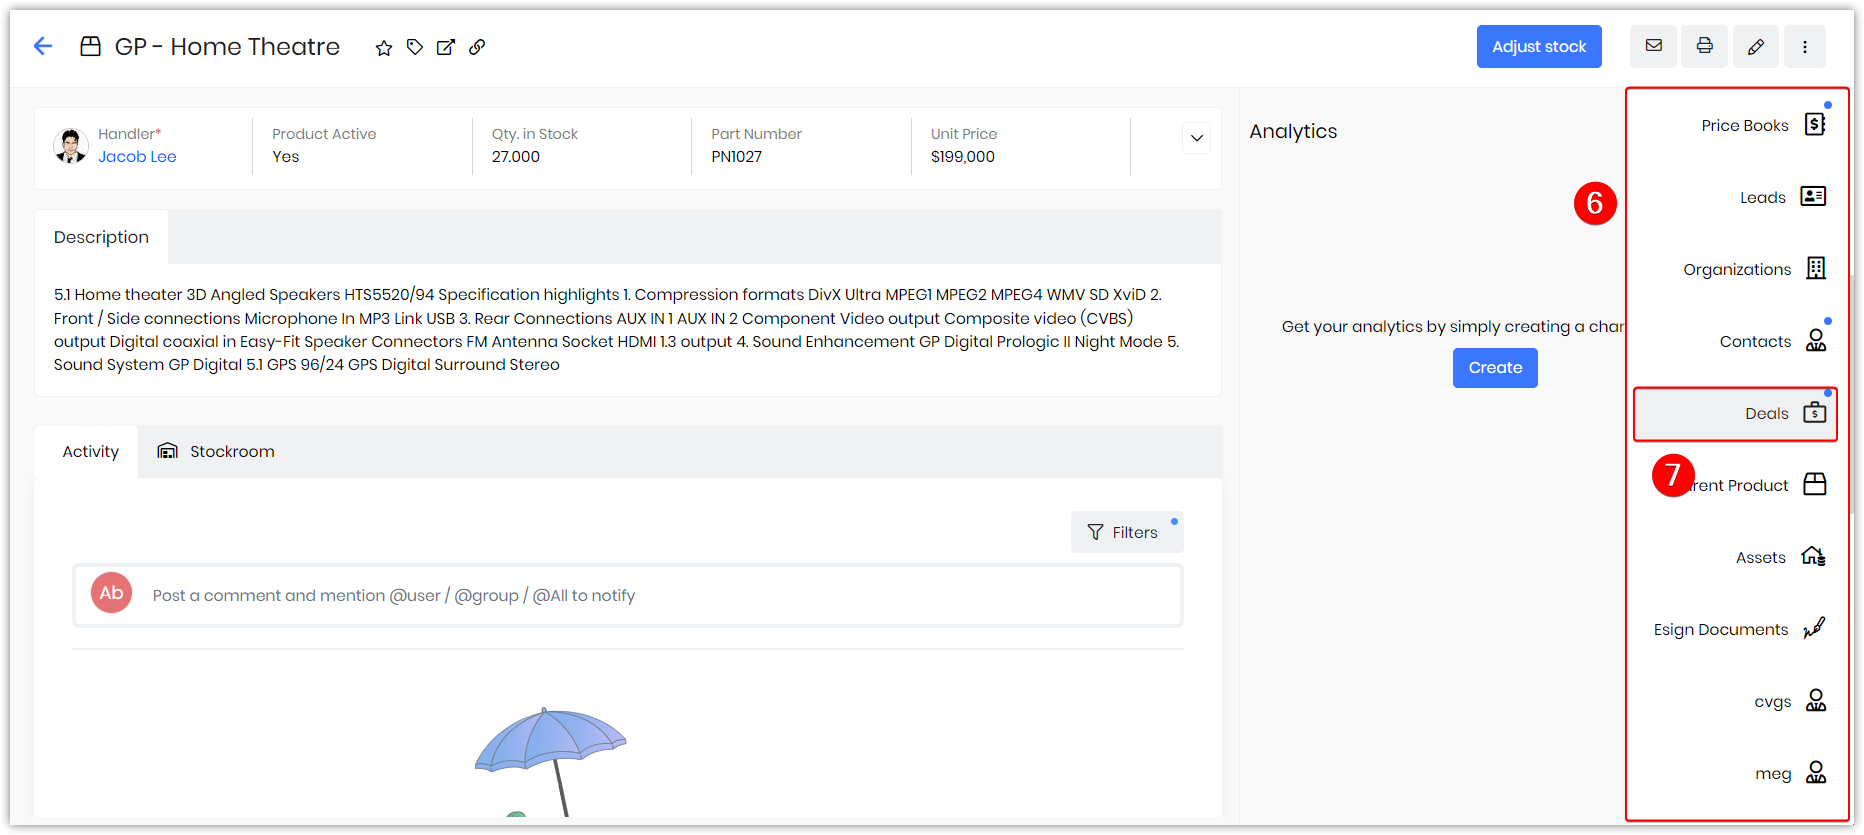
- Deals - You can create a new deal or add an existing deal to the product. All the related deal details are displayed here.
- Items - You can create or add product bundles, parent products or assets from here. All the related record details are displayed here.
- Issues - You can create a new case or add an existing case to the product. All the related case details are displayed here.
How to Create a Product
From Products’ List View
- Log in to your CRM account.
- Click the Main Menu.

- Go to the Inventory.
- Select the Products.
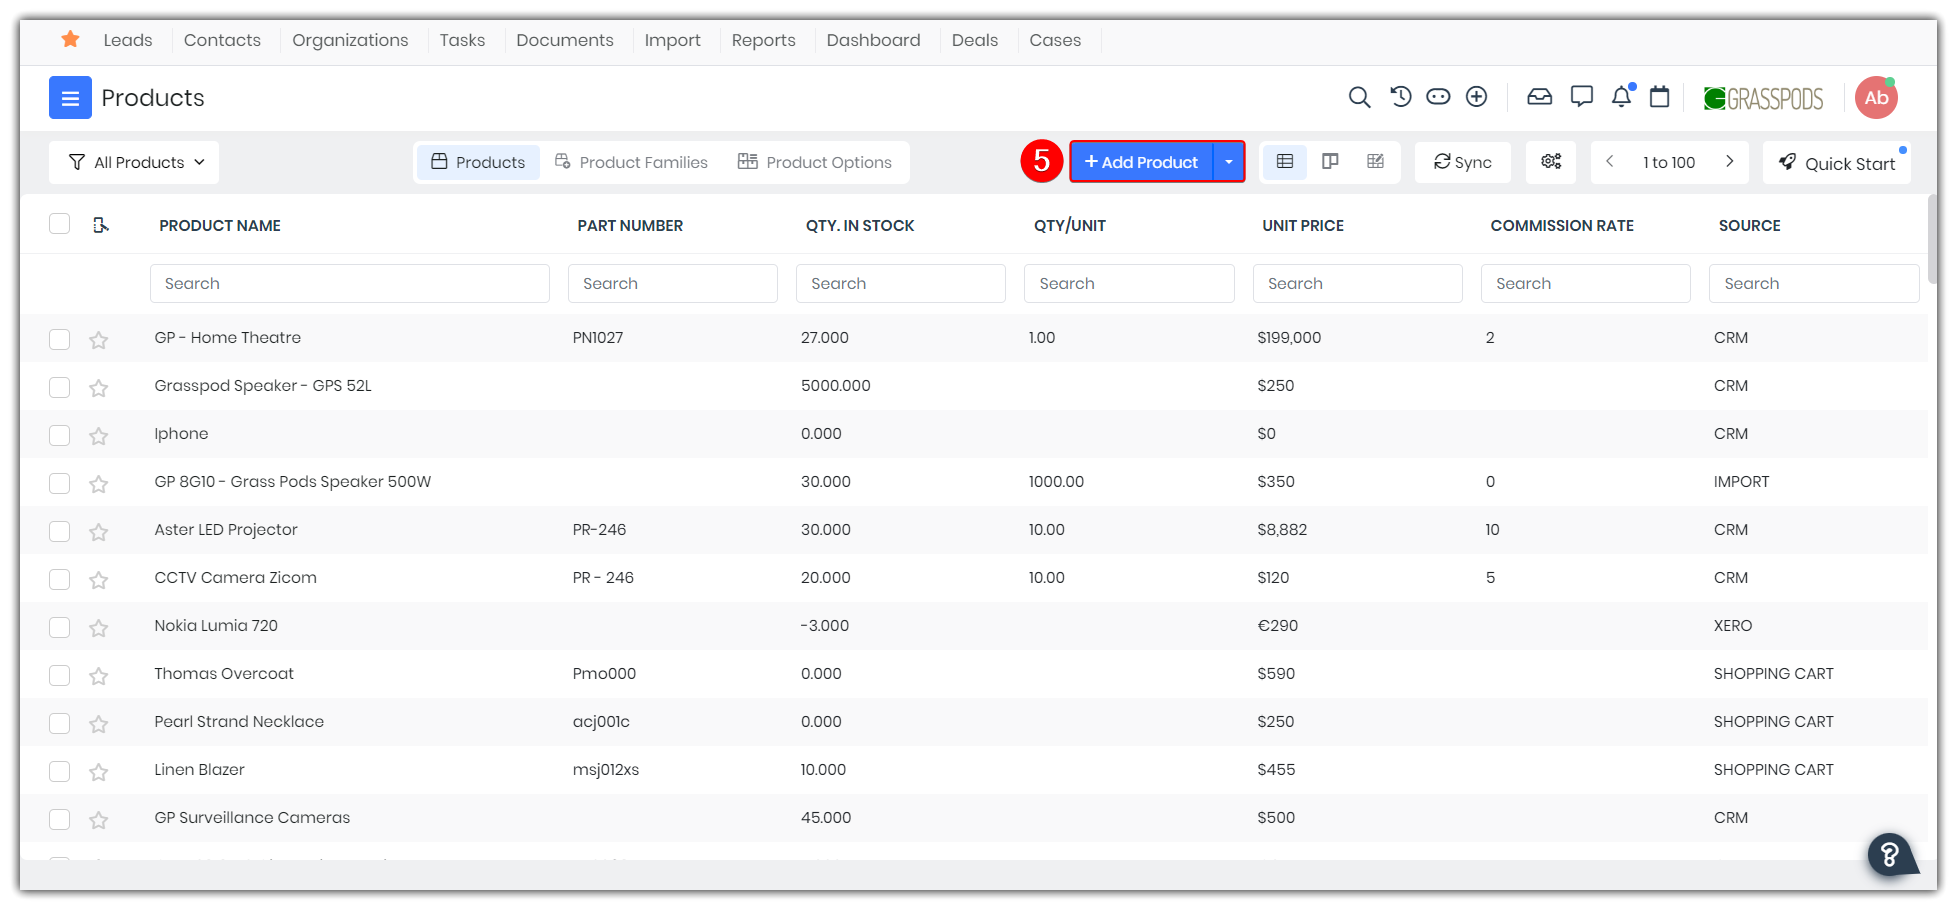
- Click the +Add Product button.
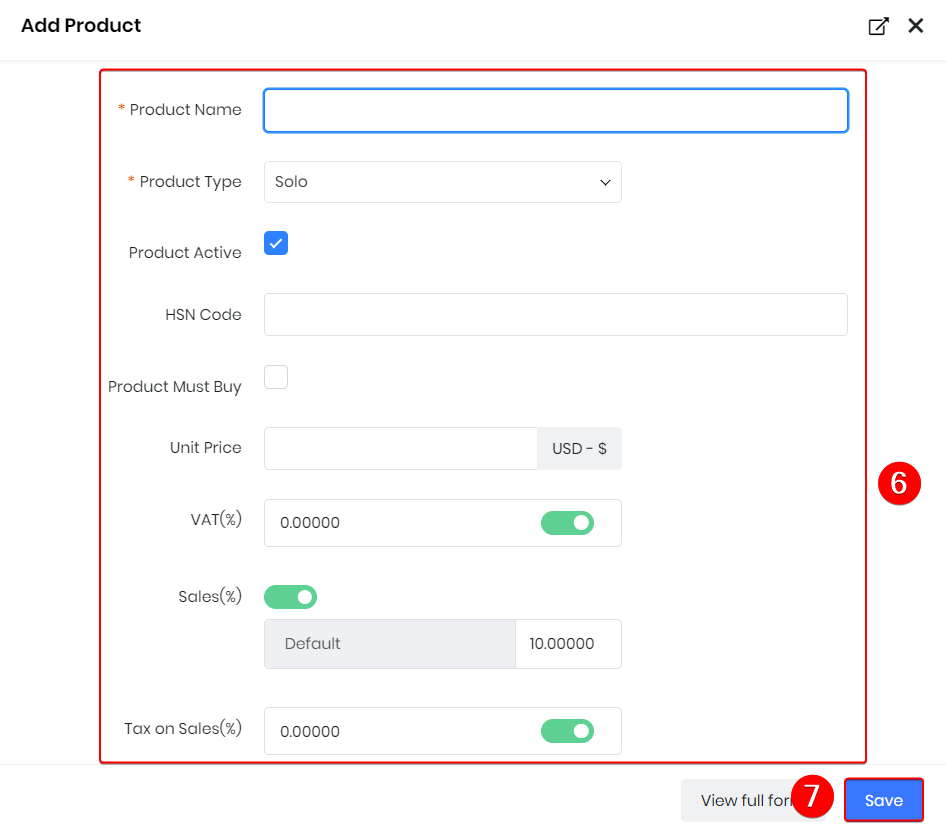
- Fill in all the necessary details.
- Click Save to create the product.
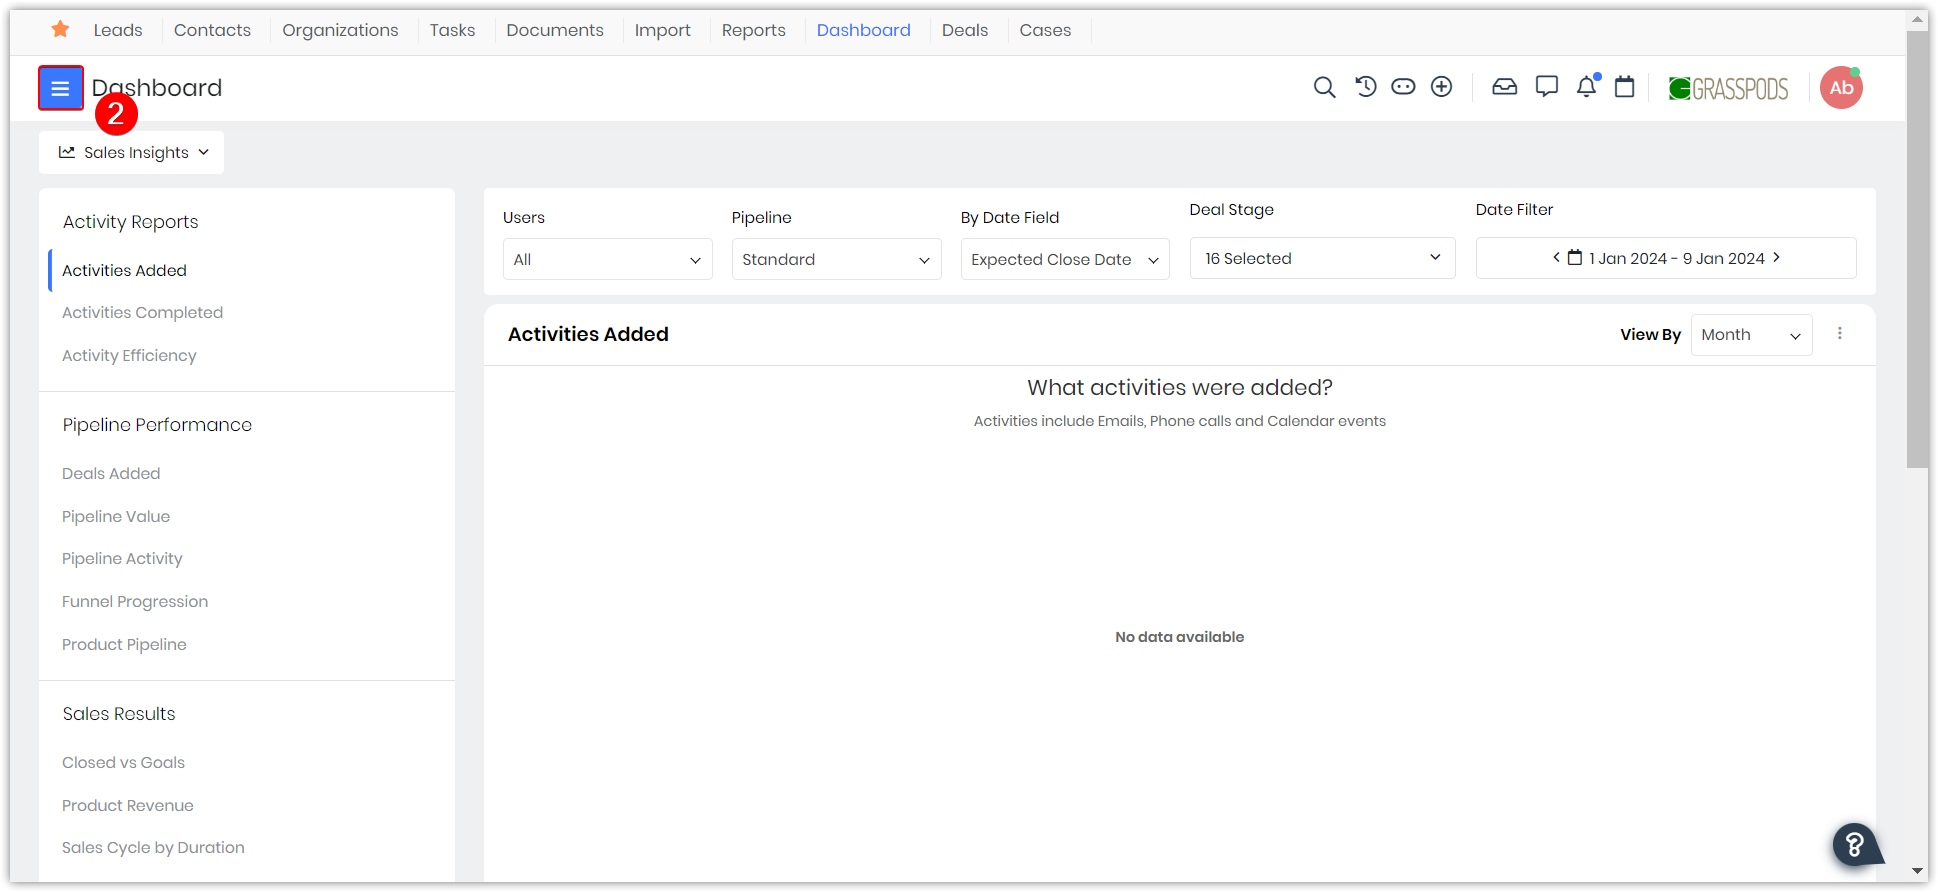
From Quick Create
Products can also be created by clicking the + button present on the right-hand top corner of the screen.
Follow these steps to create a product using Quick Create:
- Log into your CRM account.
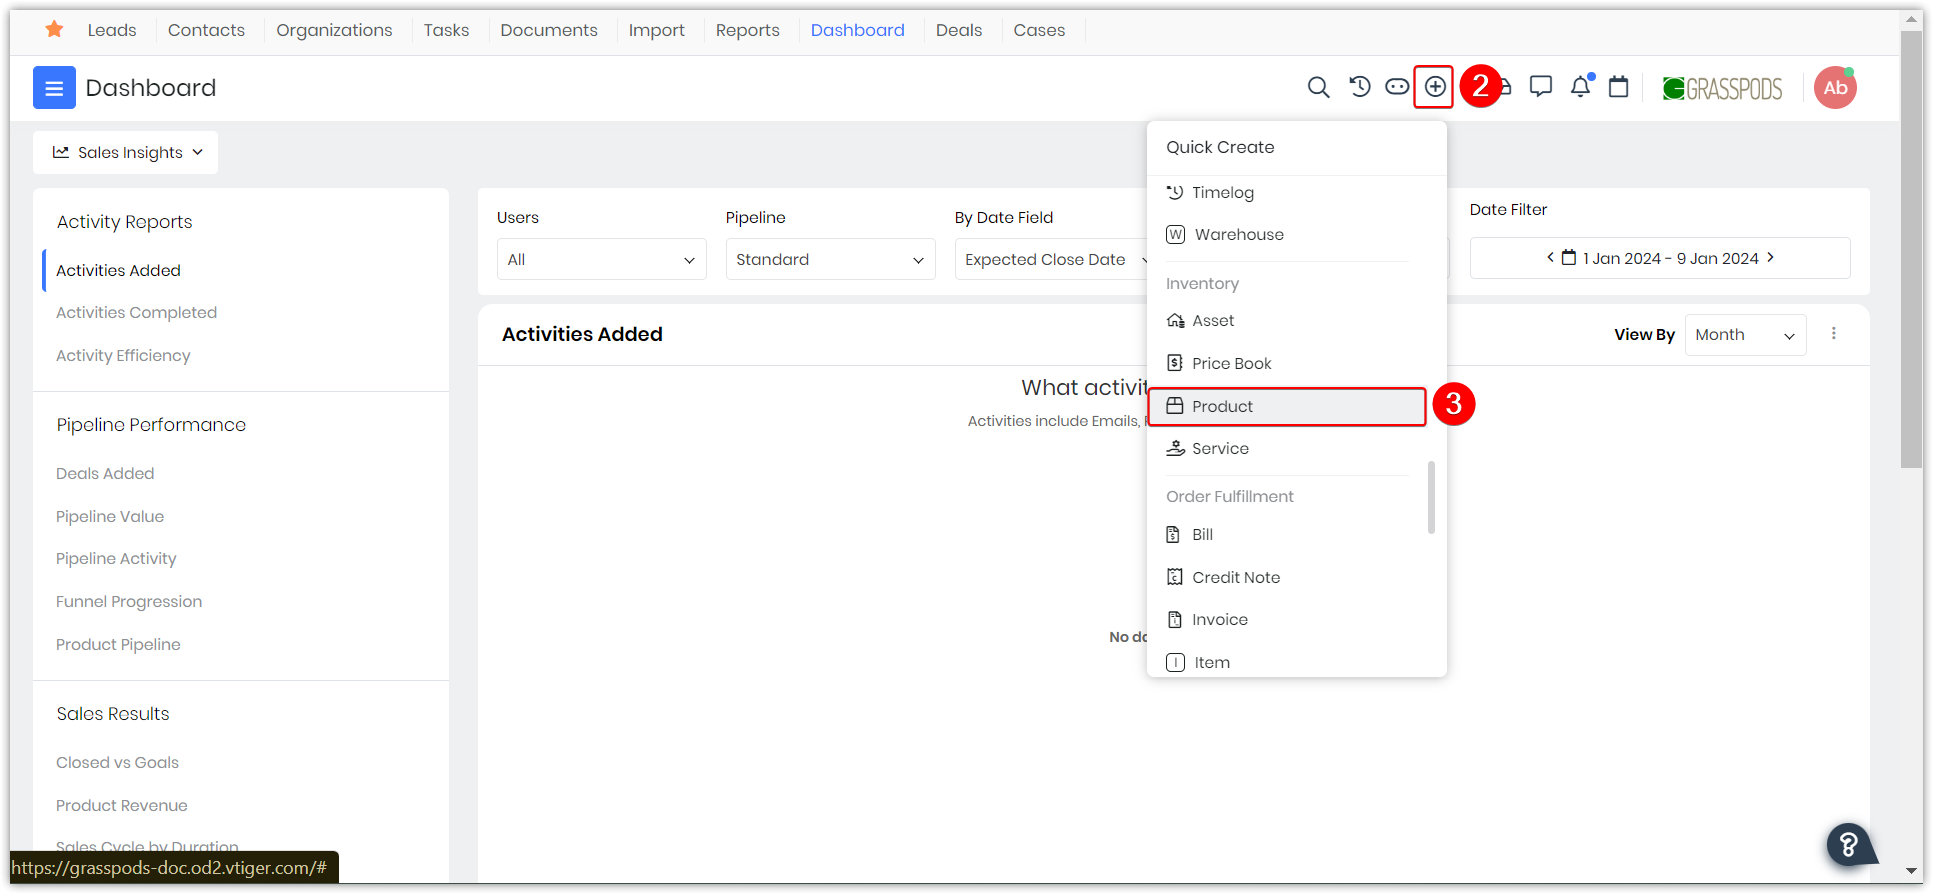
- Click the Quick Create icon displayed on the top right side of your screen.
- Select Product from Inventory.

- Enter all the mandatory details.
- Click Save to save the record.
To know more about Quick Create, click here.
Note:
- You can now add a product as a line item when creating an Inventory or Deal record from the Product workflow.
- You can create an Inventory record (SO, PO, Invoice, and Quote) from the Products or Services workflow or process.
- When you create a Deal (PS Line items enabled) from Products workflows, a product can be added as a line item in the Deal using the Add Product as item option.
Usage of Products module in other modules
Products are used while creating invoices, sales orders, purchase orders, and quotes. You can add multiple products in the Item Details block. The Item Name field allows you to search for a product using either its Product Name or Part Number, making it especially useful if you recognize the product by its Part Number rather than its name.
Example: If a product has the Part Number A12345 and the Product Name Wireless Mouse, you can type A12345 in the Item Name field, and the system will show Wireless Mouse as the product name.
For your understanding, we will add Products to a Sales Order.
Follow these steps to add products in other modules:
- Log in to the CRM.
- Click the Main Menu.
- Go to Inventory.
- Click Order Fulfillment > Sales Order. The Sales Order page opens.
- Open a Sales Order record.
- Go to Item Details.
- Click Product. The Product window opens.
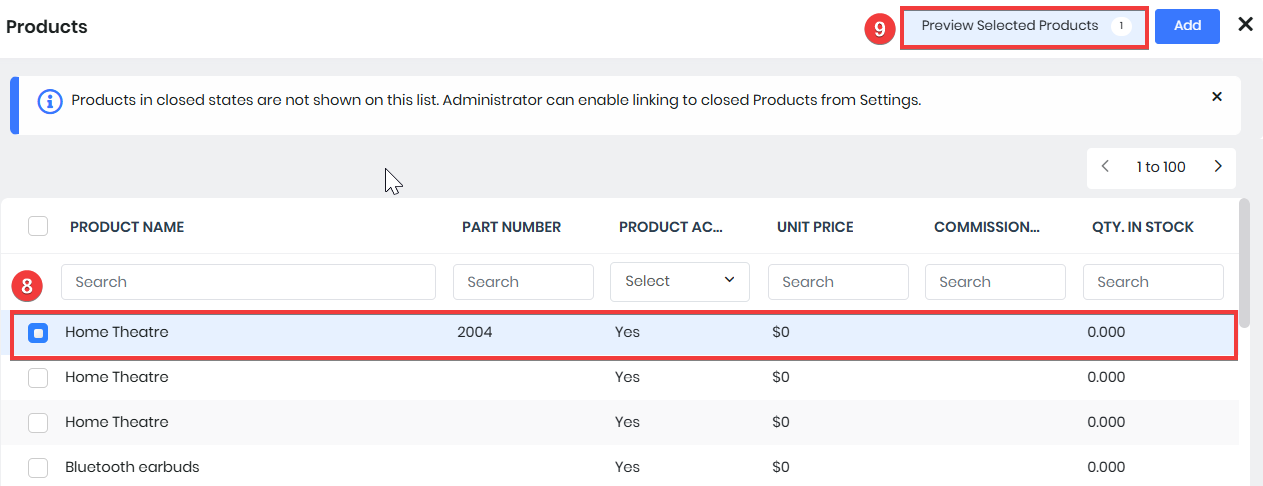
- Select the Products.
- Click the Preview Selected Products. The Selected Product page opens.
- Enter or select the following information in the Preview:
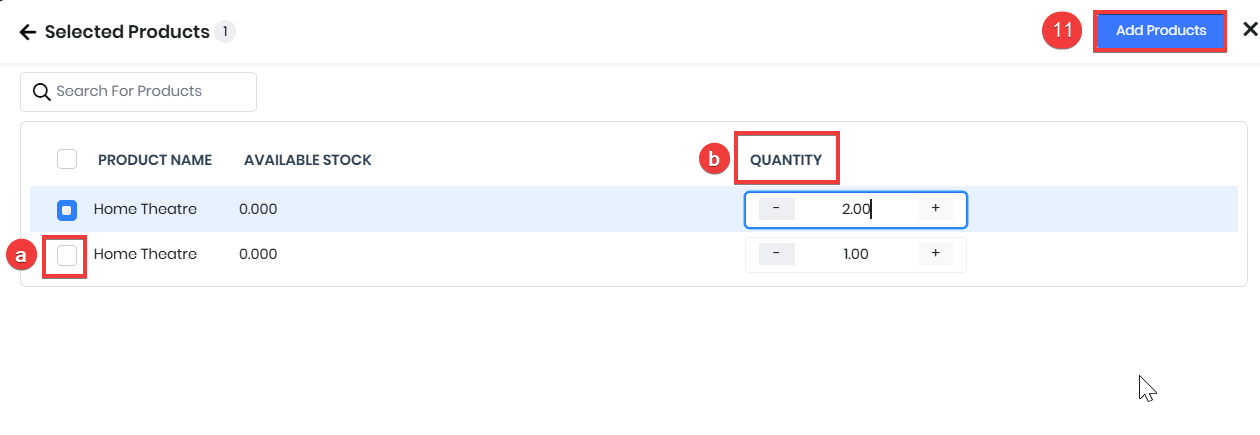
- Disable - Click the check box to remove the selected Product.
- Quantity - Add the Quantity of the product.
- Click Add Products.
Actions Possible on a Product
You can perform the following actions on a product:
Duplicating a Product
You can create a new product by duplicating information from an existing product.
Follow these steps to duplicate a product record:
- Log in to your CRM account.
- Click the Main Menu.
- Go to the Inventory.
- Select Products.
- Open the required product record.
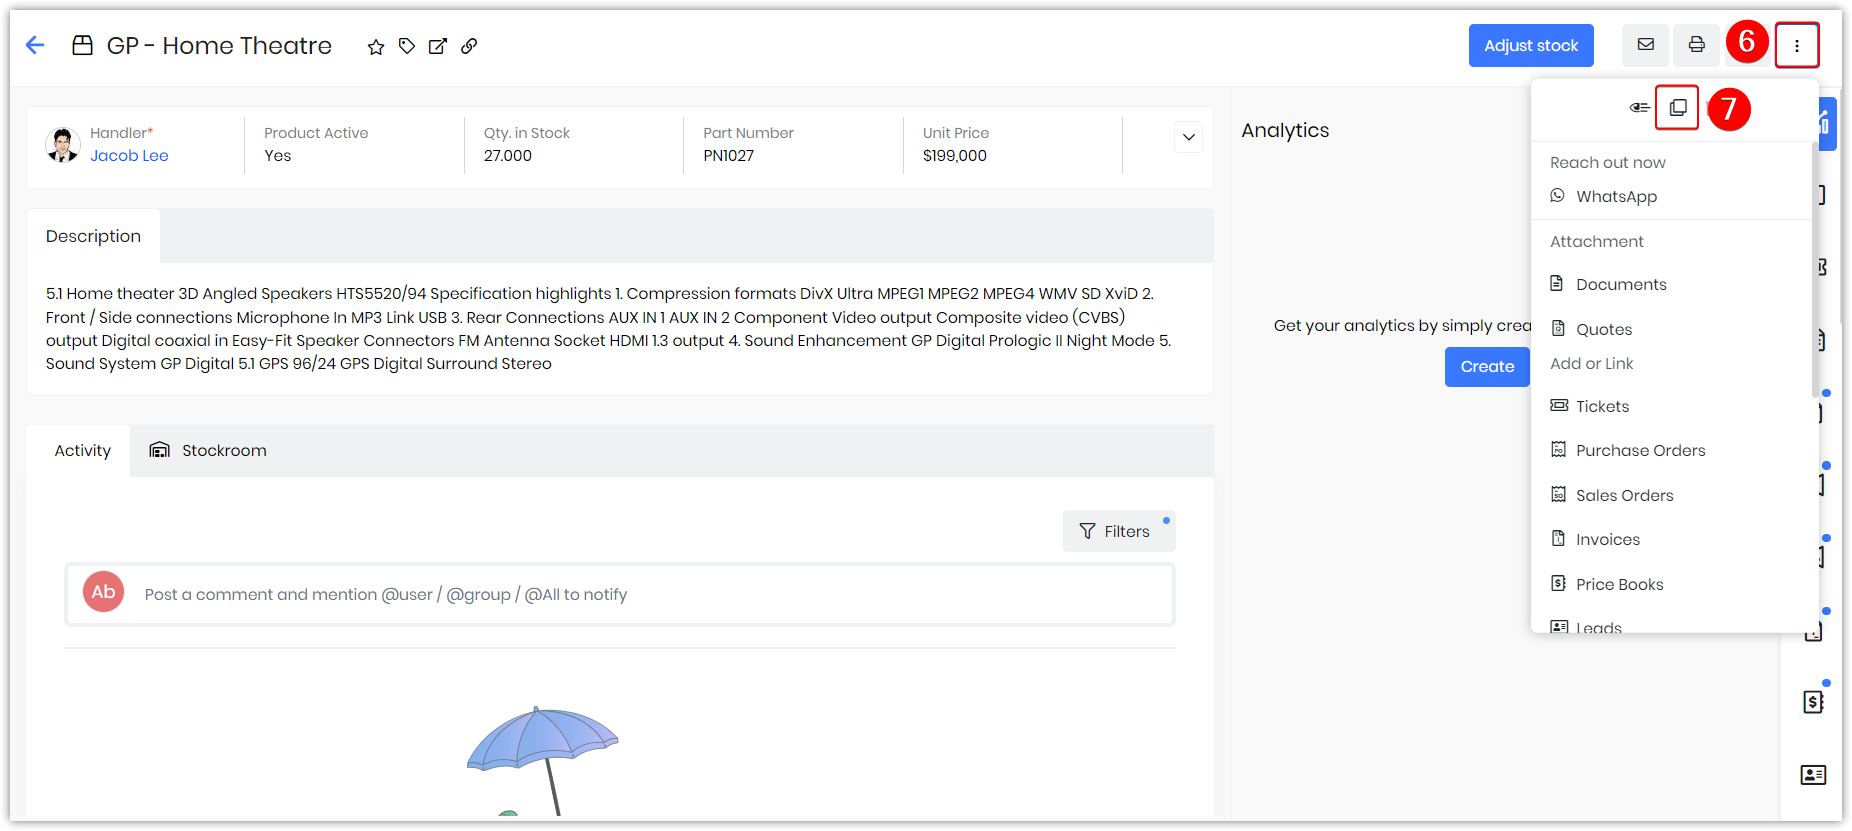
- Click the More icon.
- Click the Duplicate icon.
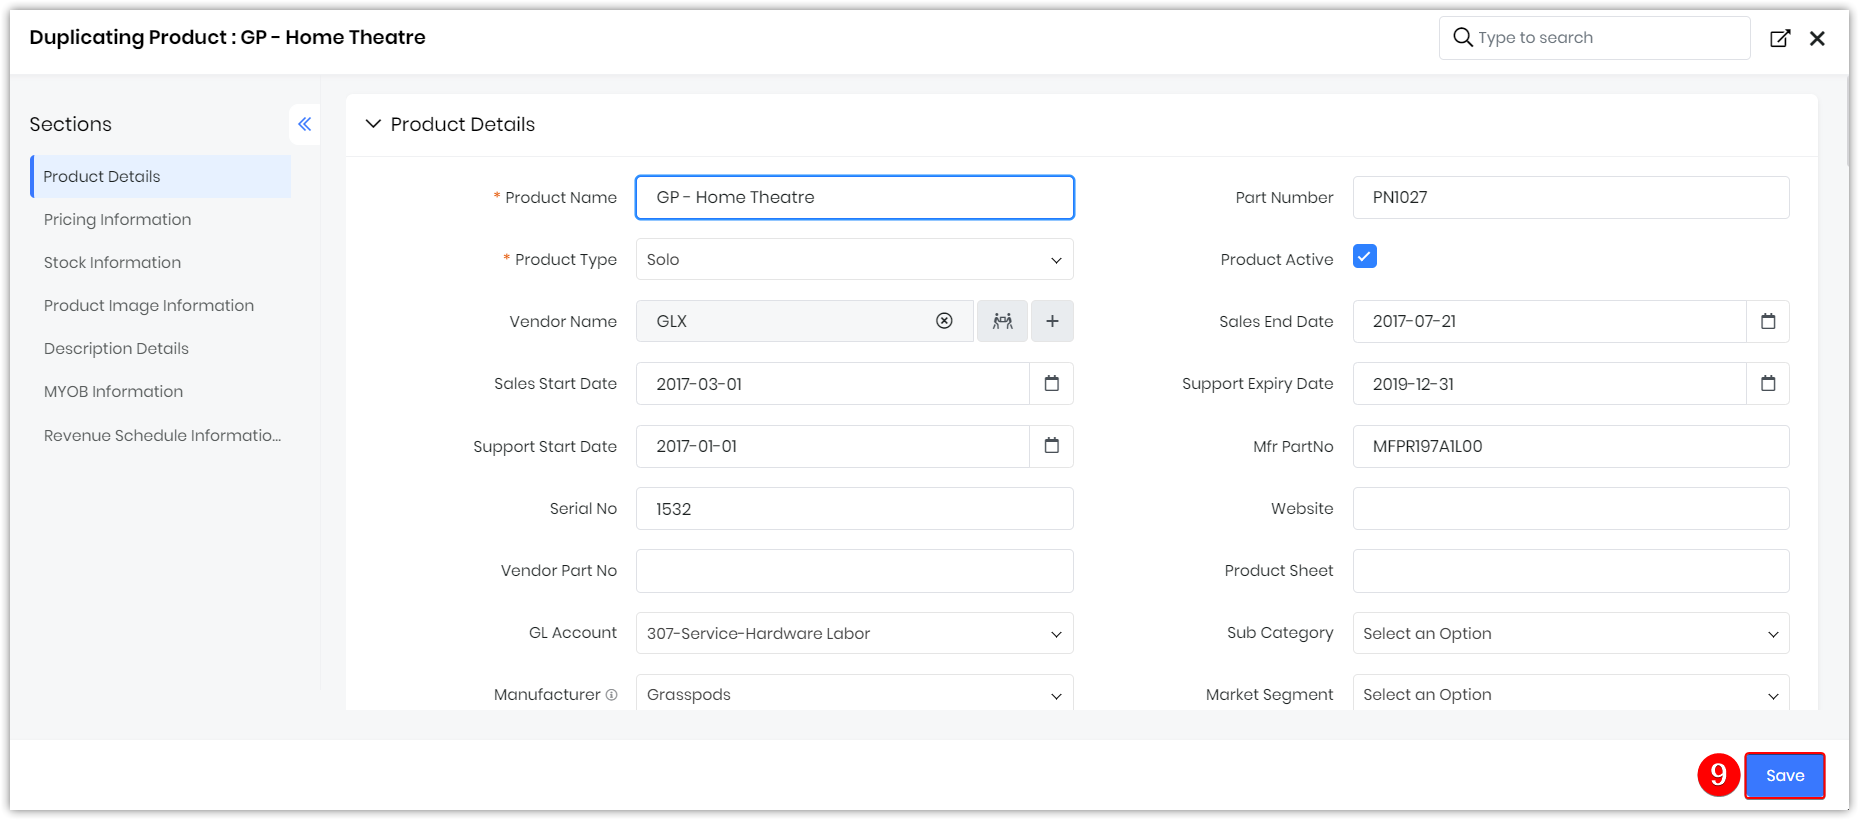
- You can enter the new details.
- Click Save.
A new product record will be created.
Generate Related Documents
Add a Document
Use Vtiger’s Documents module to solve the problems of organizing and sharing! It acts as a repository for all the documents that you create or those shared with you by your customers or sales team.
Follow these steps to add a document:
- Log in to your CRM account.
- Click the Menu Menu.
- Go to Inventory.
- Select Products.
- Open the required product record.
- Click the Related tab in the Summary View.
- Select Documents.
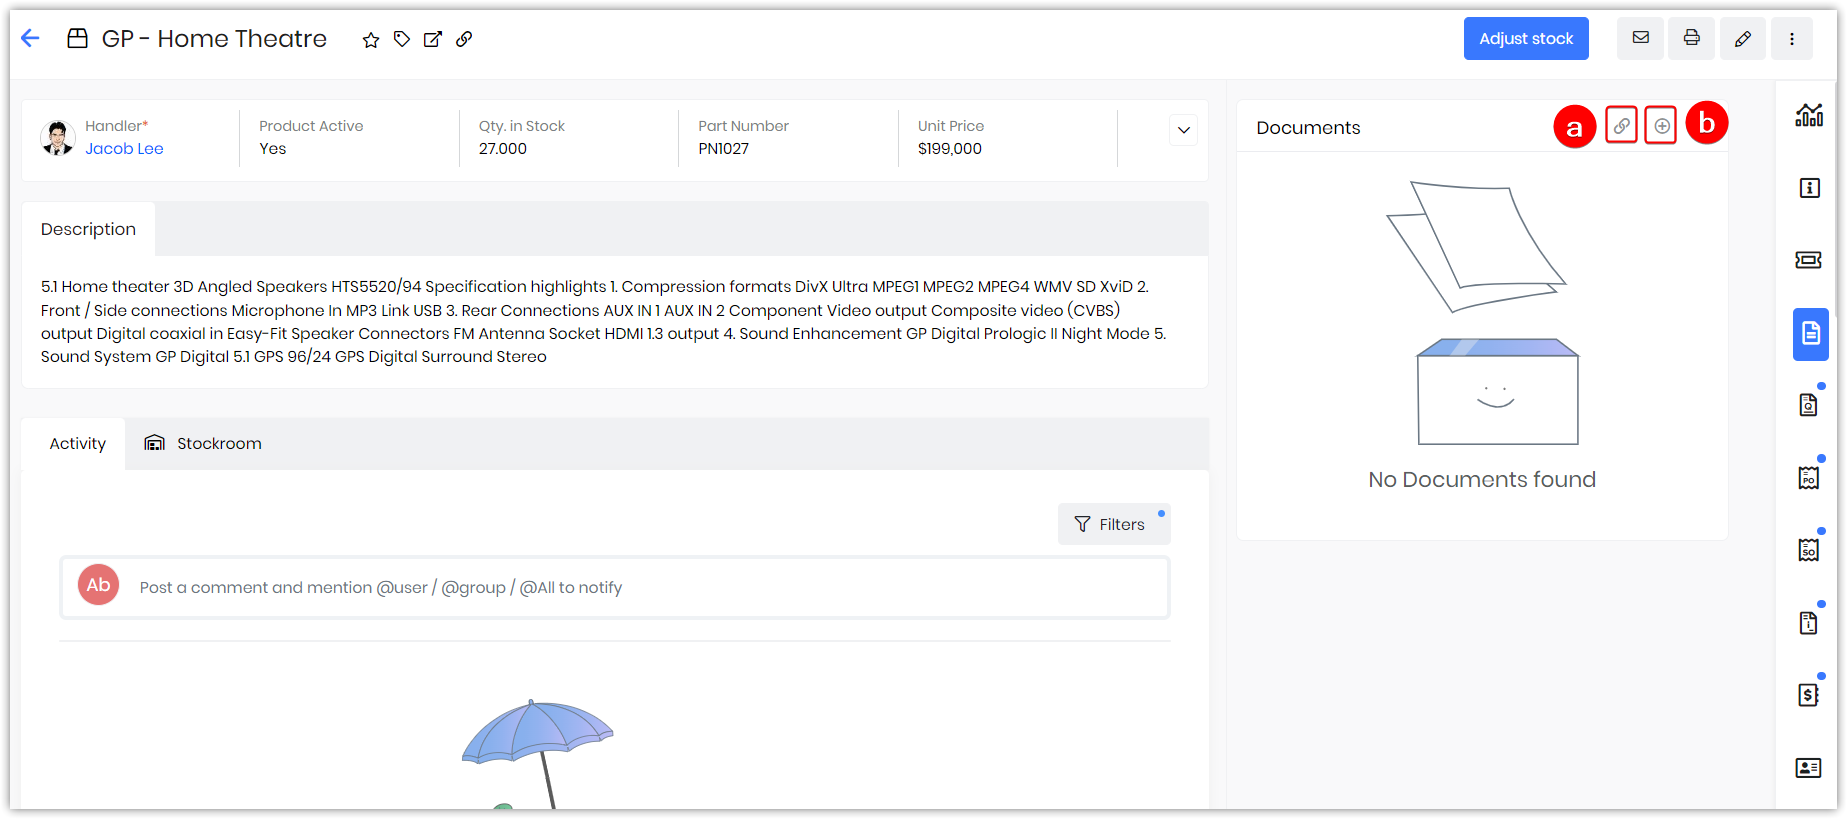
- Here, you see two options on your screen:
- Link Documents - If you want to add an existing document, select this option.
- Hover over a record in the list of all existing documents to display the radio buttons.
- Click the radio button on the left side of the record to select the record.
- Click the Add Selected button present below the list.
- Create Documents - If you want to add a new document, select this option.
- Fill in all the necessary details.
- Link Documents - If you want to add an existing document, select this option.
- Click Save.
Generate a Quote
A Quote is a formal document presented by the company’s sales team to a potential customer, upon request for quotation. It contains a detailed list of products and services, prices, taxes, terms, and discounts.
Follow these steps to generate a quote:
- Log in to your CRM account.
- Click the Menu Menu.
- Go to Inventory.
- Select Products.
- Open the required product record.
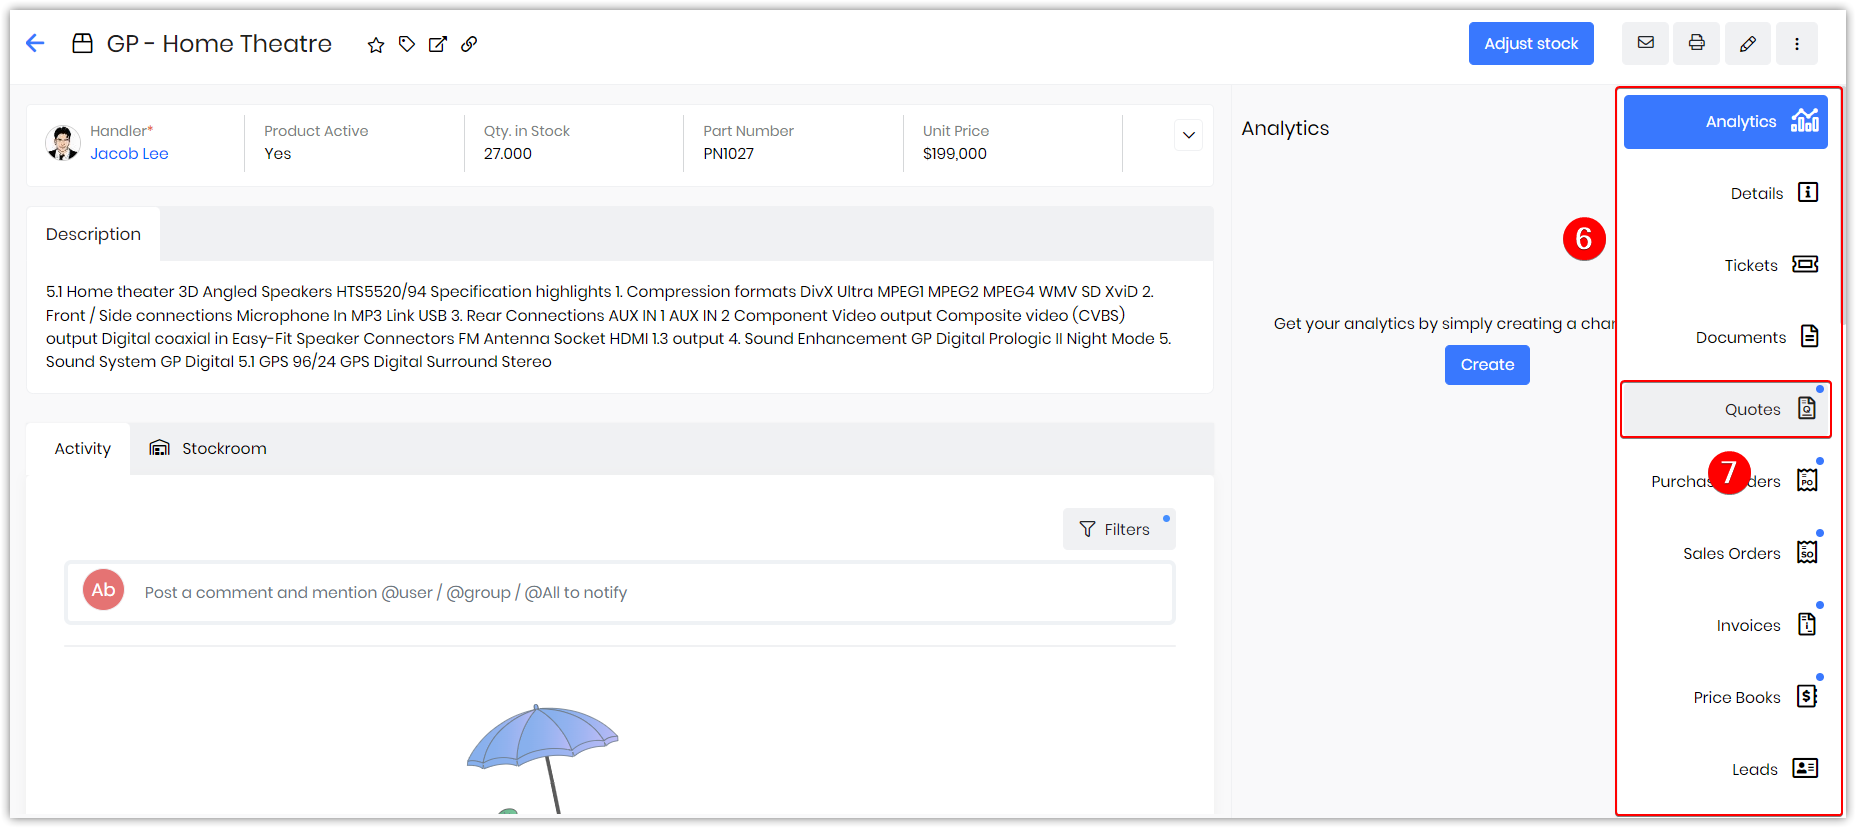
- Click the Related tab in the Summary View.
- Select Quotes.
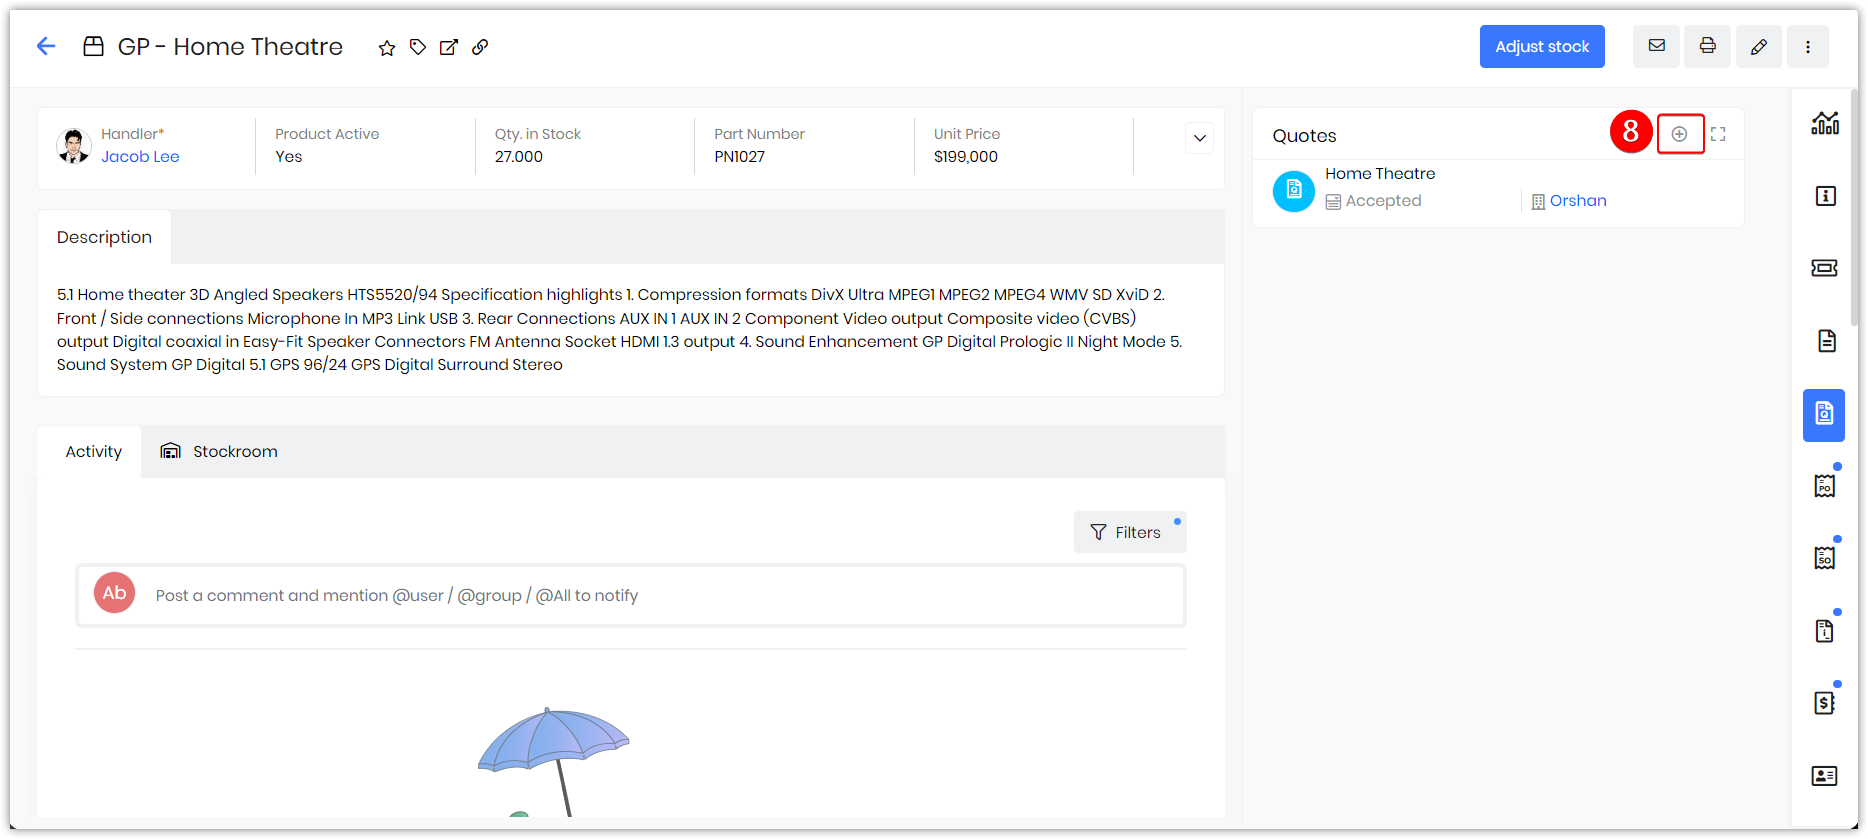
- Click the Add icon.
- Enter all the necessary details.
- Click Save.
The linked quote will be seen in the Sales Ops widget in the Summary View of the products’ record.
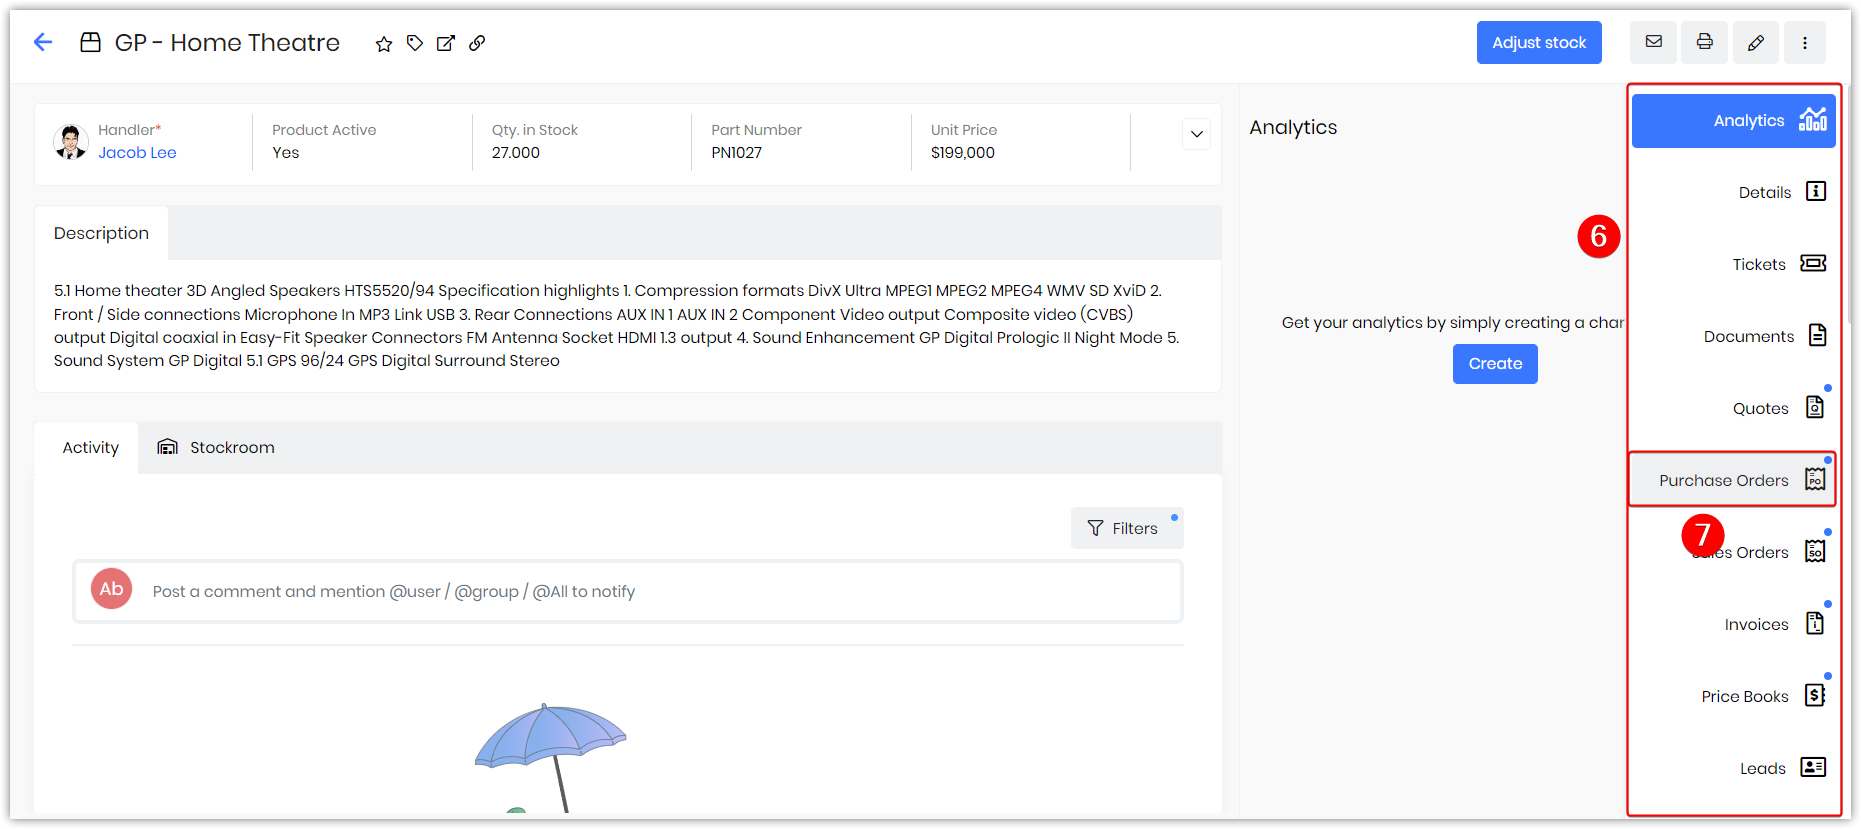
Generate a Purchase Order
A Purchase order (PO), is the first official offer issued by a customer to the company’s sales team indicating types, quantities, and agreed prices for products or services.Follow these steps to generate a PO:
- Log in to your CRM account.
- Click the Menu Menu.
- Go to Inventory.
- Select Products.
- Open the required product record.
- Click the Related tab in the Summary View.
- Select Purchase Orders.
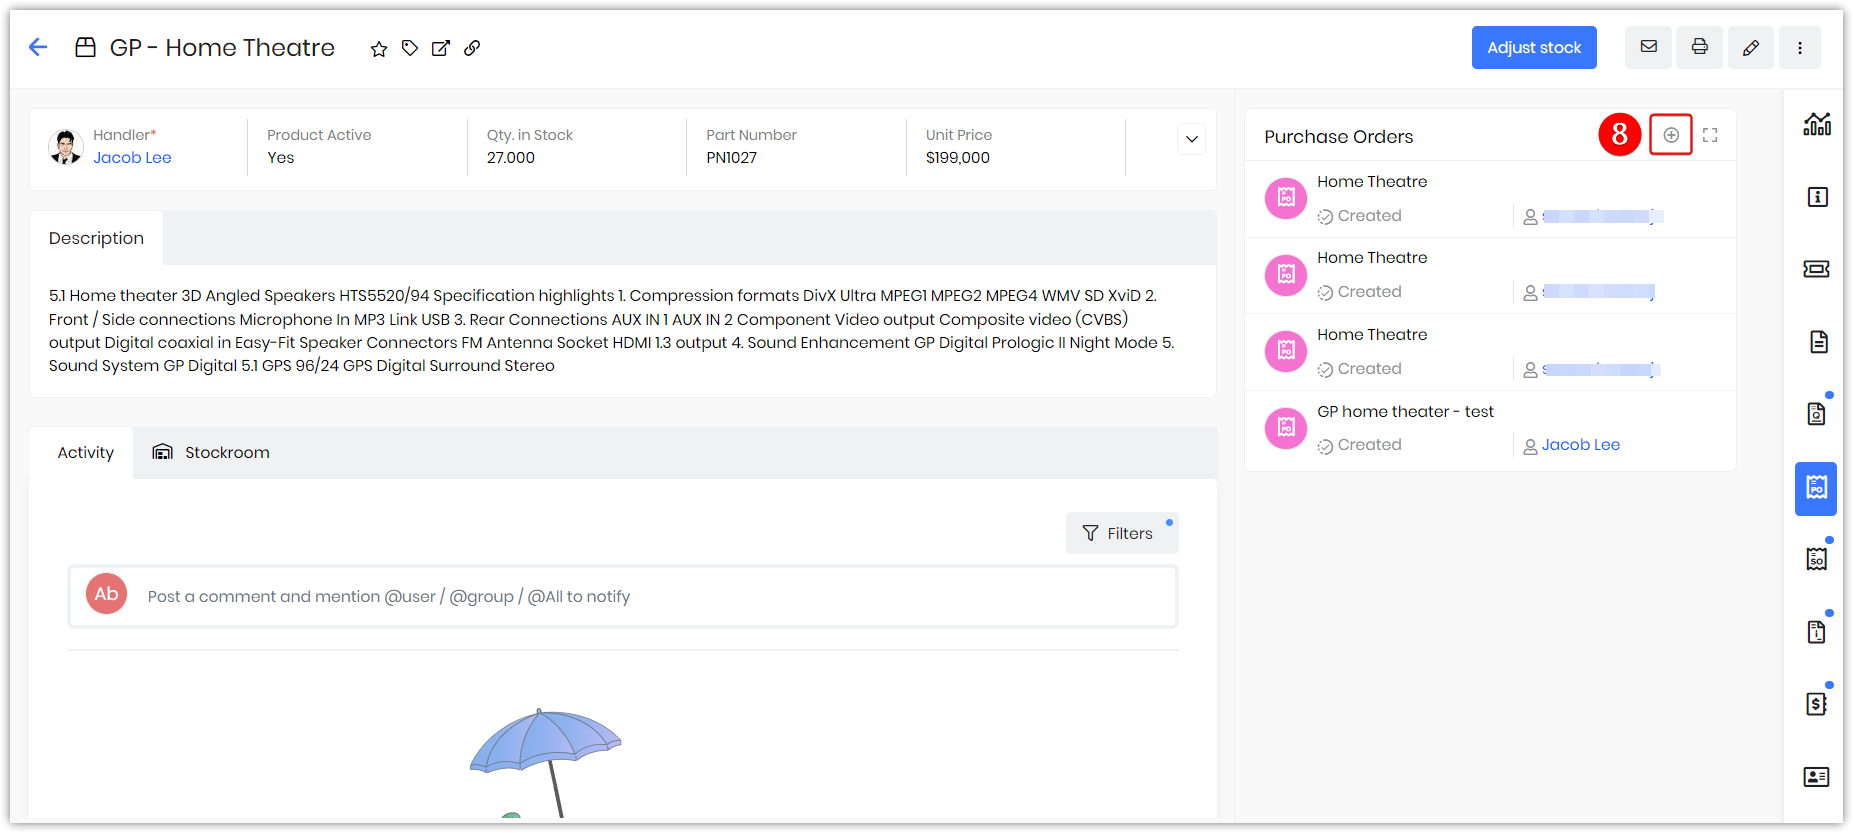
- Click the Add icon.
- Enter all the necessary details and
- Click Save.
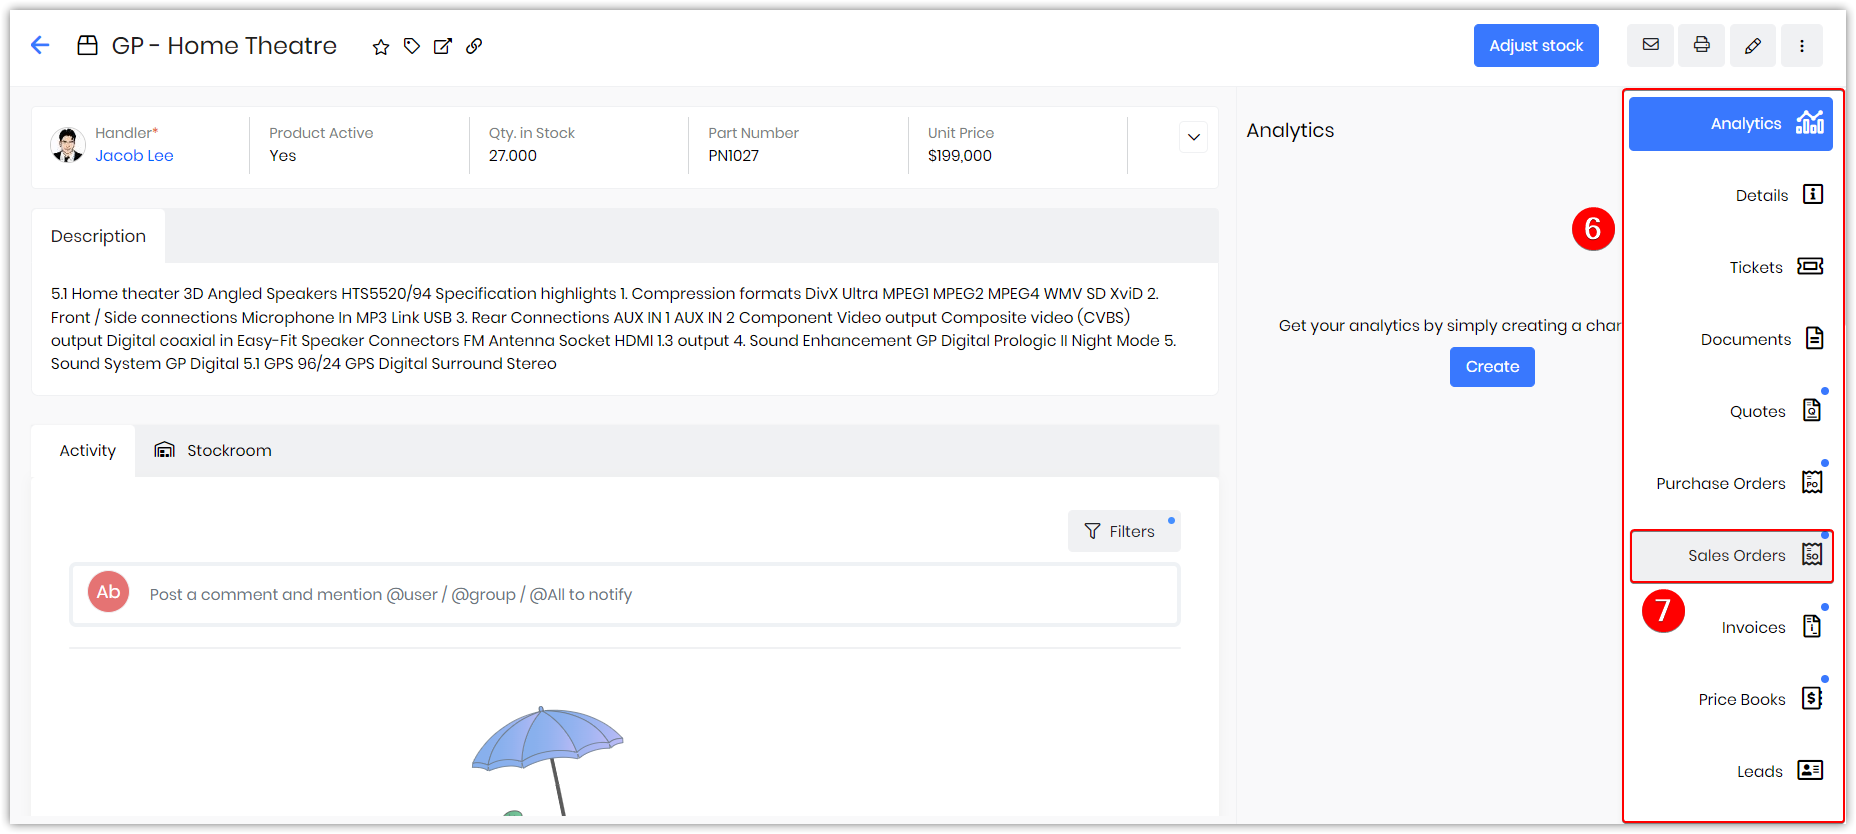
Generate a Sales Order
The Sales Order (SO), is issued by the company’s sales team to the customer. You can generate a sales order for products and/or services. Vtiger CRM gives the option of generating Sales orders from within the Product.
Follow these steps to generate a SO:
- Log in to your CRM account.
- Click the Menu Menu.
- Go to Inventory.
- Select Products.
- Open the required product record.
- Click the Related tab in the Summary View.
- Select Sales Orders.
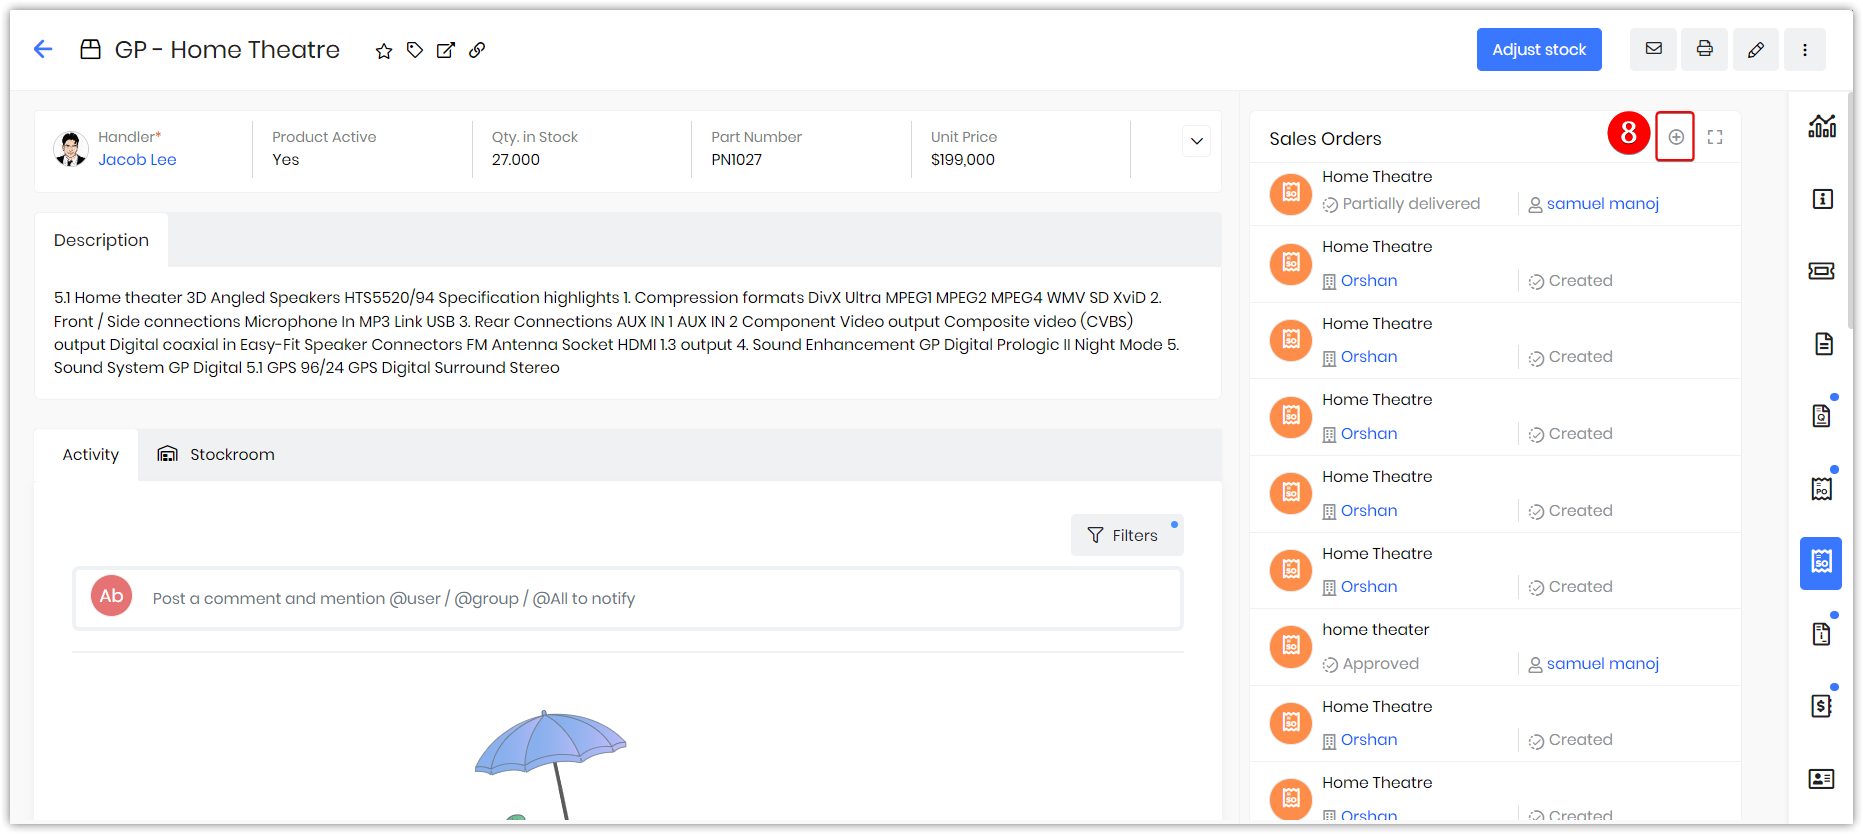
- Click the Add icon.
- Enter all the necessary details.
- Click Save.
The linked SO will be seen in the Sales Ops widget in the Summary View of the products’ record.
Generate an Invoice
An Invoice or a Bill is a non-negotiable itemized statement issued for the products or services rendered to the customer.
Follow these steps to generate an invoice:
- Log in to your CRM account.
- Click the Menu Menu.
- Go to Inventory.
- Select Products.
- Open the required product record.
- Click the Related tab in the Summary View.
- Select Invoices.
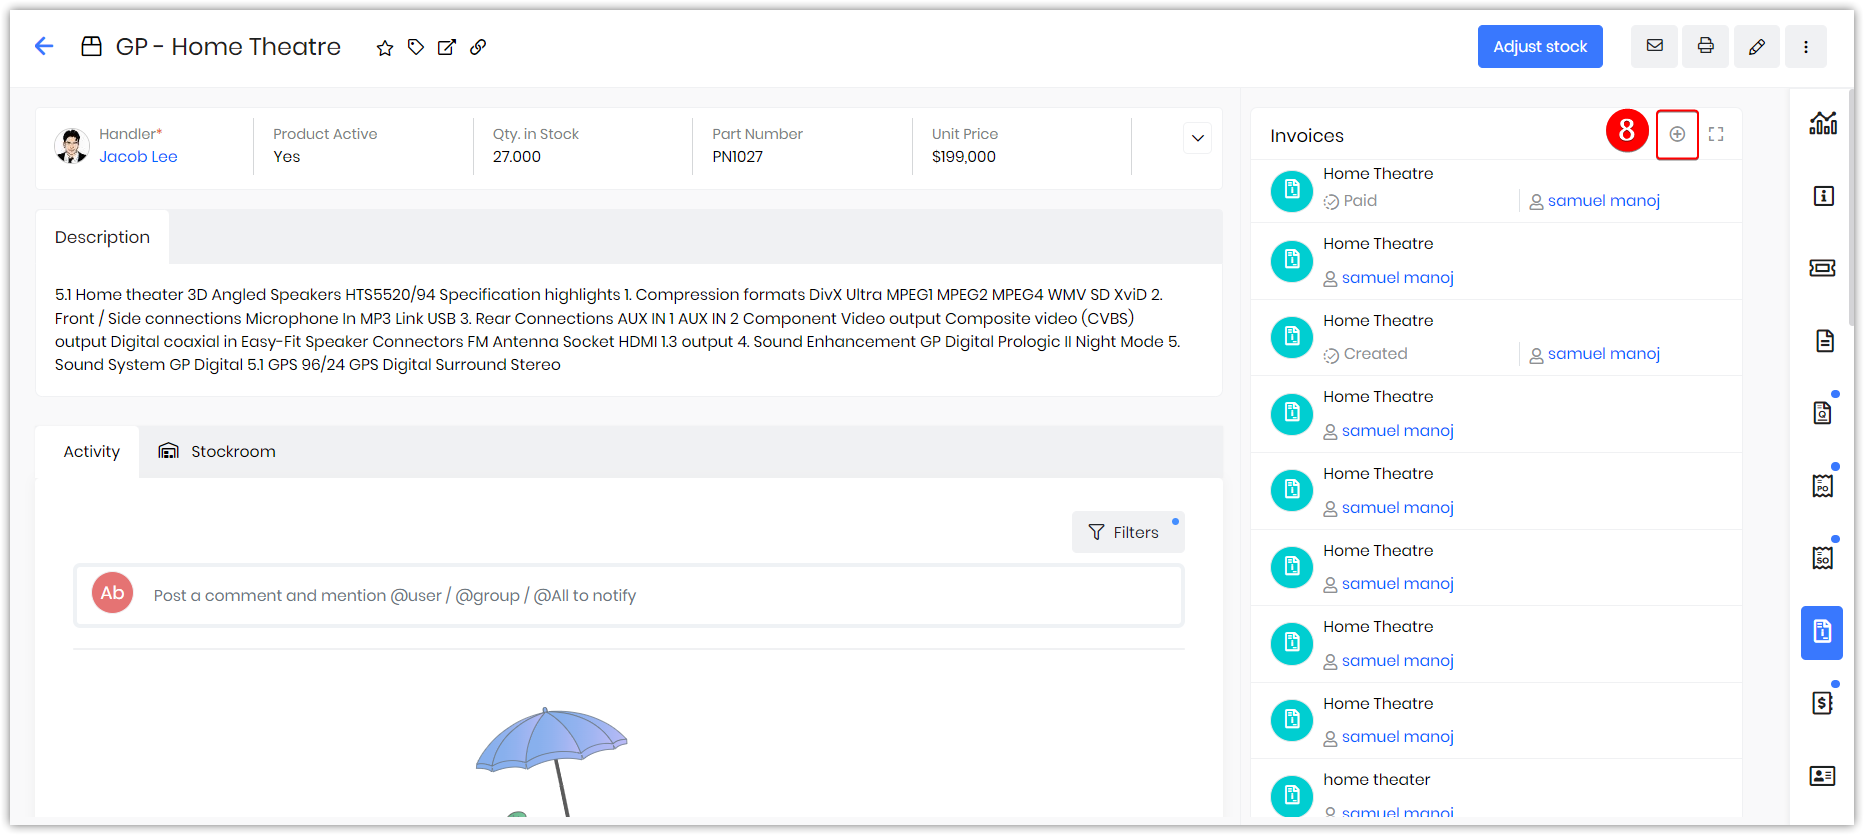
- Click the Add icon.
- Enter all the necessary details.
- Click Save.
The linked invoice will be seen in the Sales Ops widget in the Summary View of the products’ record.
Generate a Price Book
Price Books allows you to define different prices for products and services. The prices of the items can vary at times depending on the customers and their needs.
Follow these steps to generate a price book:
- Log in to your CRM account.
- Click the Menu Menu.
- Go to Inventory.
- Select Products.
- Open the required product record.
- Click the Related tab in the Summary View.
- Select Price Books.
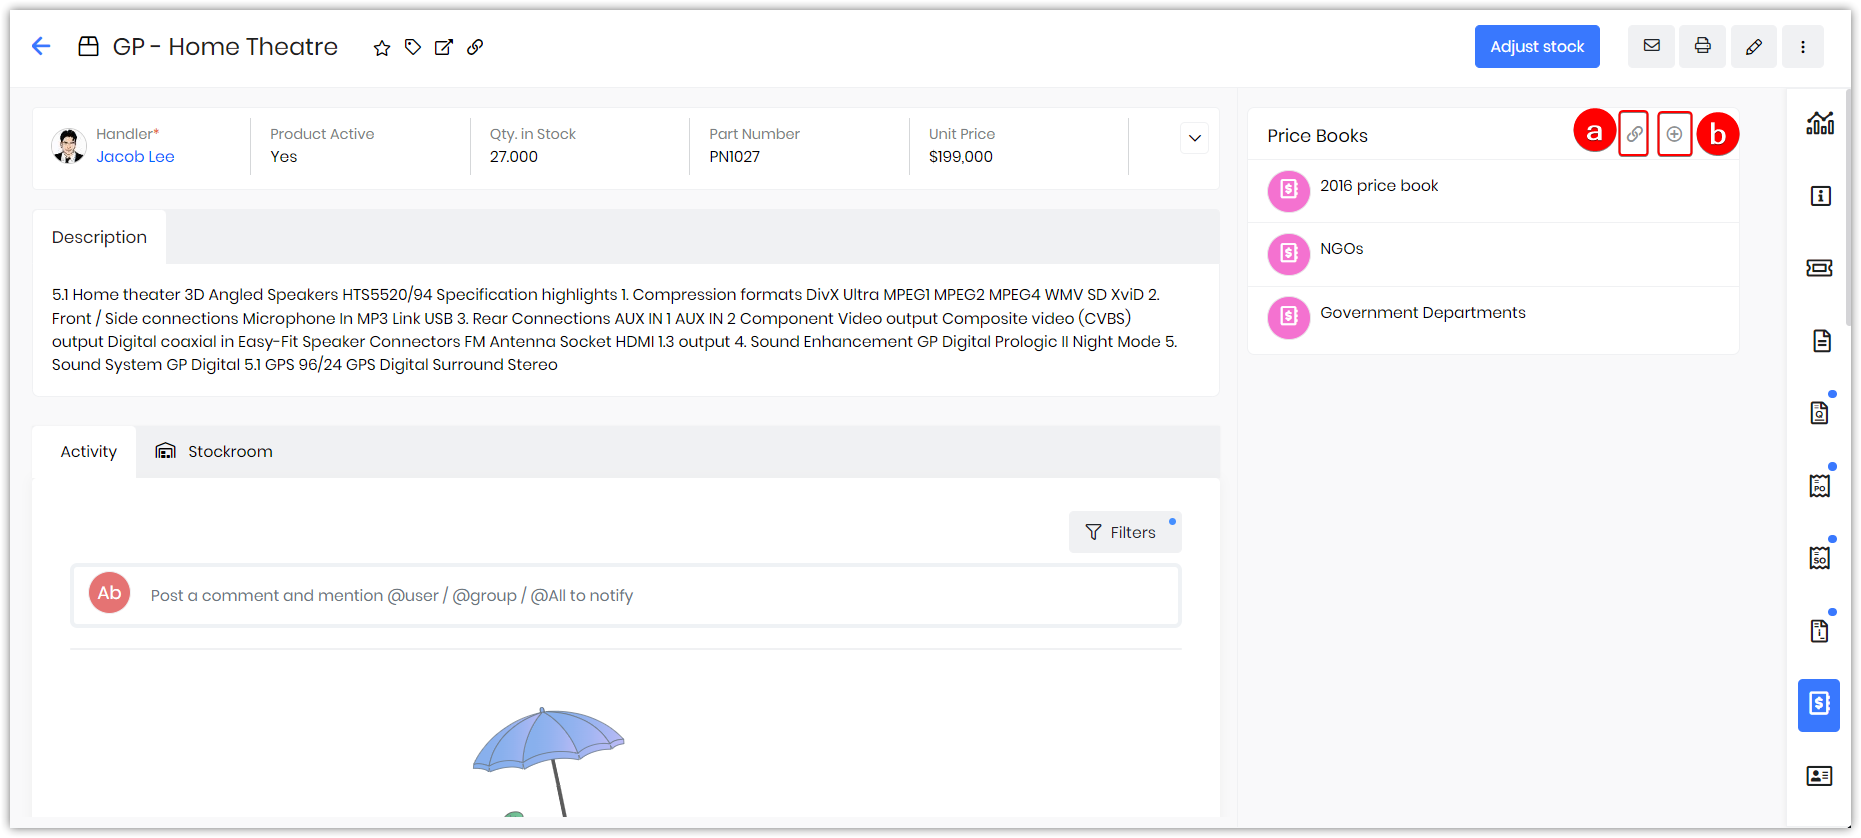
- Here, you see two options on your screen:
- Link Price Books - If you want to add an existing price book, select this option.
- Hover over a record in the list of all existing price books to display the radio buttons.
- Click the radio button on the left side of the record to select the record.
- Click the Add Selected button present below of the list.
- Create Price Books - If you want to add a new price book, select this option.
- Fill in all the necessary details.
- Link Price Books - If you want to add an existing price book, select this option.
- Click Save.
The linked price book will be seen in the Price Books widget in the Summary View of the products’ record.
Generate an Organization
An organization represents a company you are doing business with. It could have multiple employees and sell multiple products or services.
Follow these steps to generate an organization:
- Log in to your CRM account.
- Click the Menu Menu.
- Go to Inventory.
- Select Products.
- Open the required product record.
- Click the Related tab in the Summary View.
- Select Organizations.
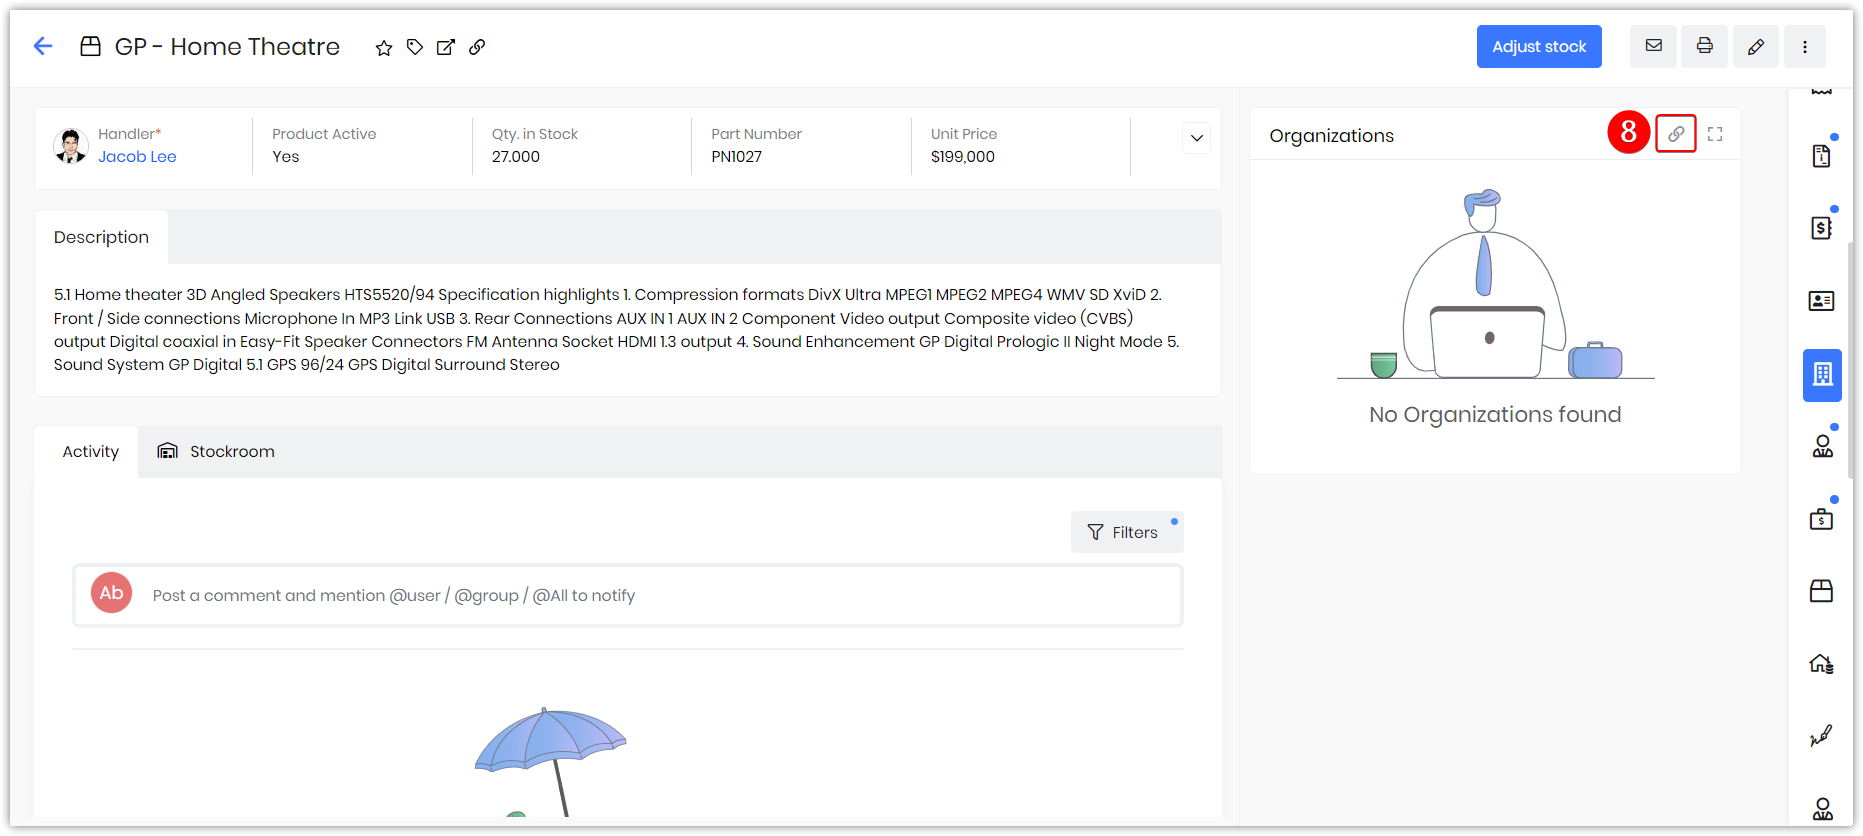
- Click the Link icon.
- Select an organization from the list of all available organizations.
- Click the Add Selected button.
The linked organization will be seen in the Organizations widget in the Summary View of the products’ record.
Generate a Contact
A contact is a person that you are doing business with, likely a prospect or a customer. Contact can be acting in an individual capacity (if your business sells to consumers) or representing a business.
Follow these steps to generate a contact:
- Log in to your CRM account.
- Click the Menu Menu.
- Go to Inventory.
- Select Products.
- Open the required product record.
- Click the Related tab in the Summary View.
- Select Contacts.
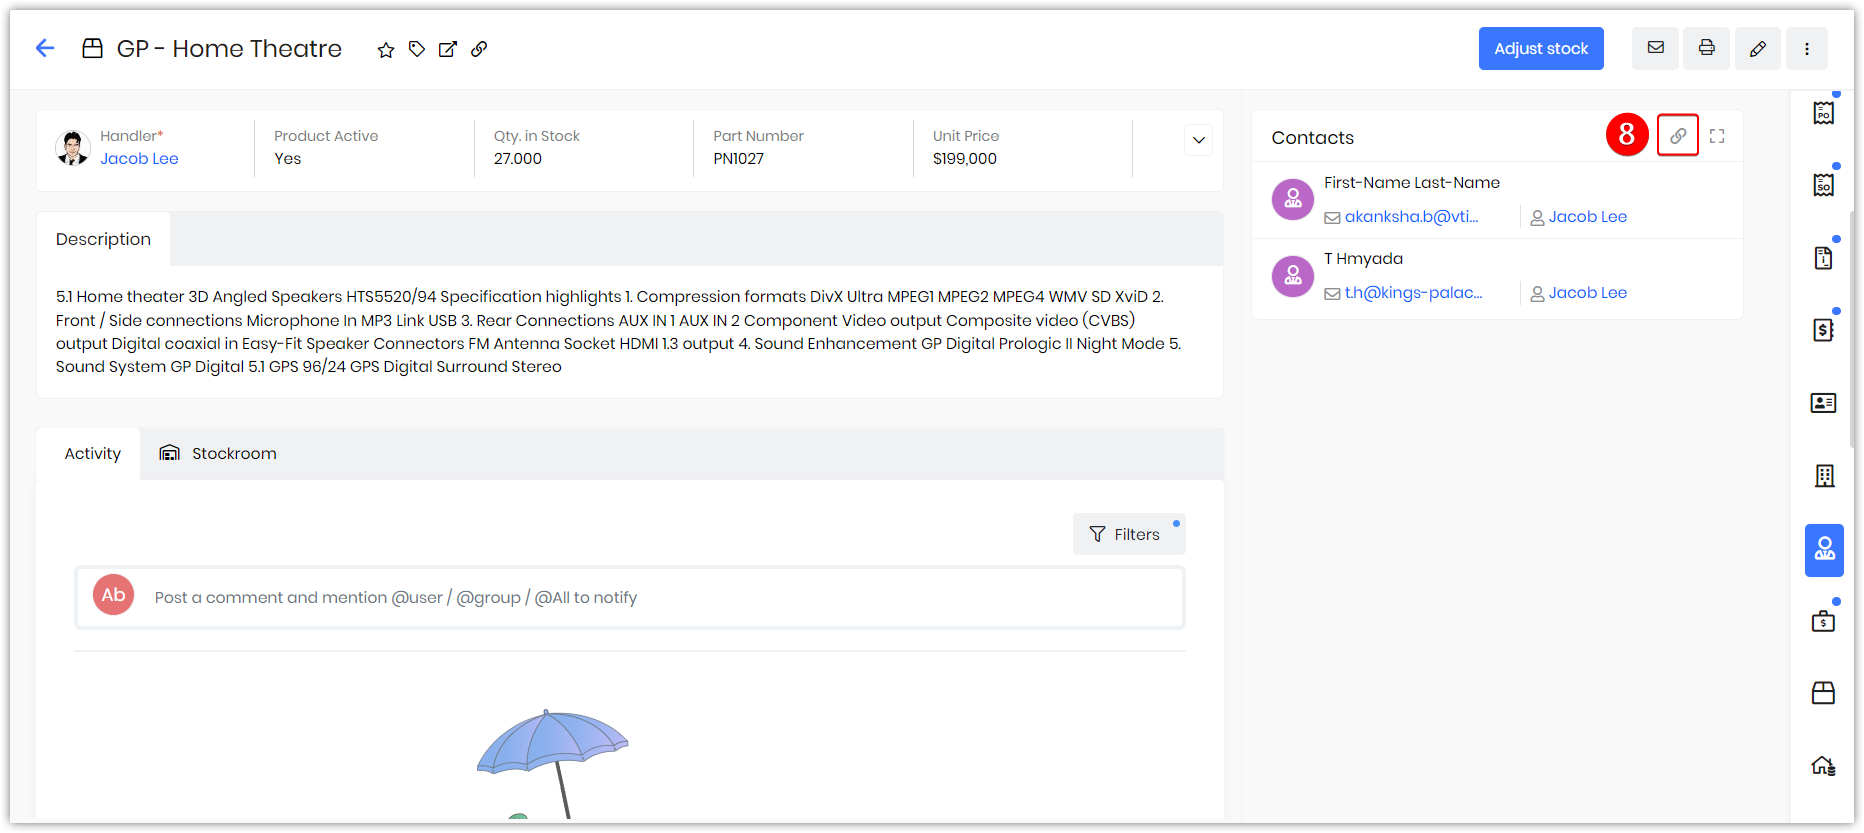
- Click the Link icon.
- Select a contact from the list of all available contacts.
- Click the Add Selected button.
The linked contact will be seen in the Person widget in the Summary View of the products’ record.
Generate a Deal
A deal is a sales opportunity that you are pursuing with a person or an organization.
Follow these steps to generate a deal:
- Log in to your CRM account.
- Click the Menu Menu.
- Go to Inventory.
- Select Products.
- Open the required product record.
- Click the Related tab in the Summary View.
- Select Deals.
- Click the Link icon.
- Select a deal from the list of all available deals.
- Click the Add Selected button.
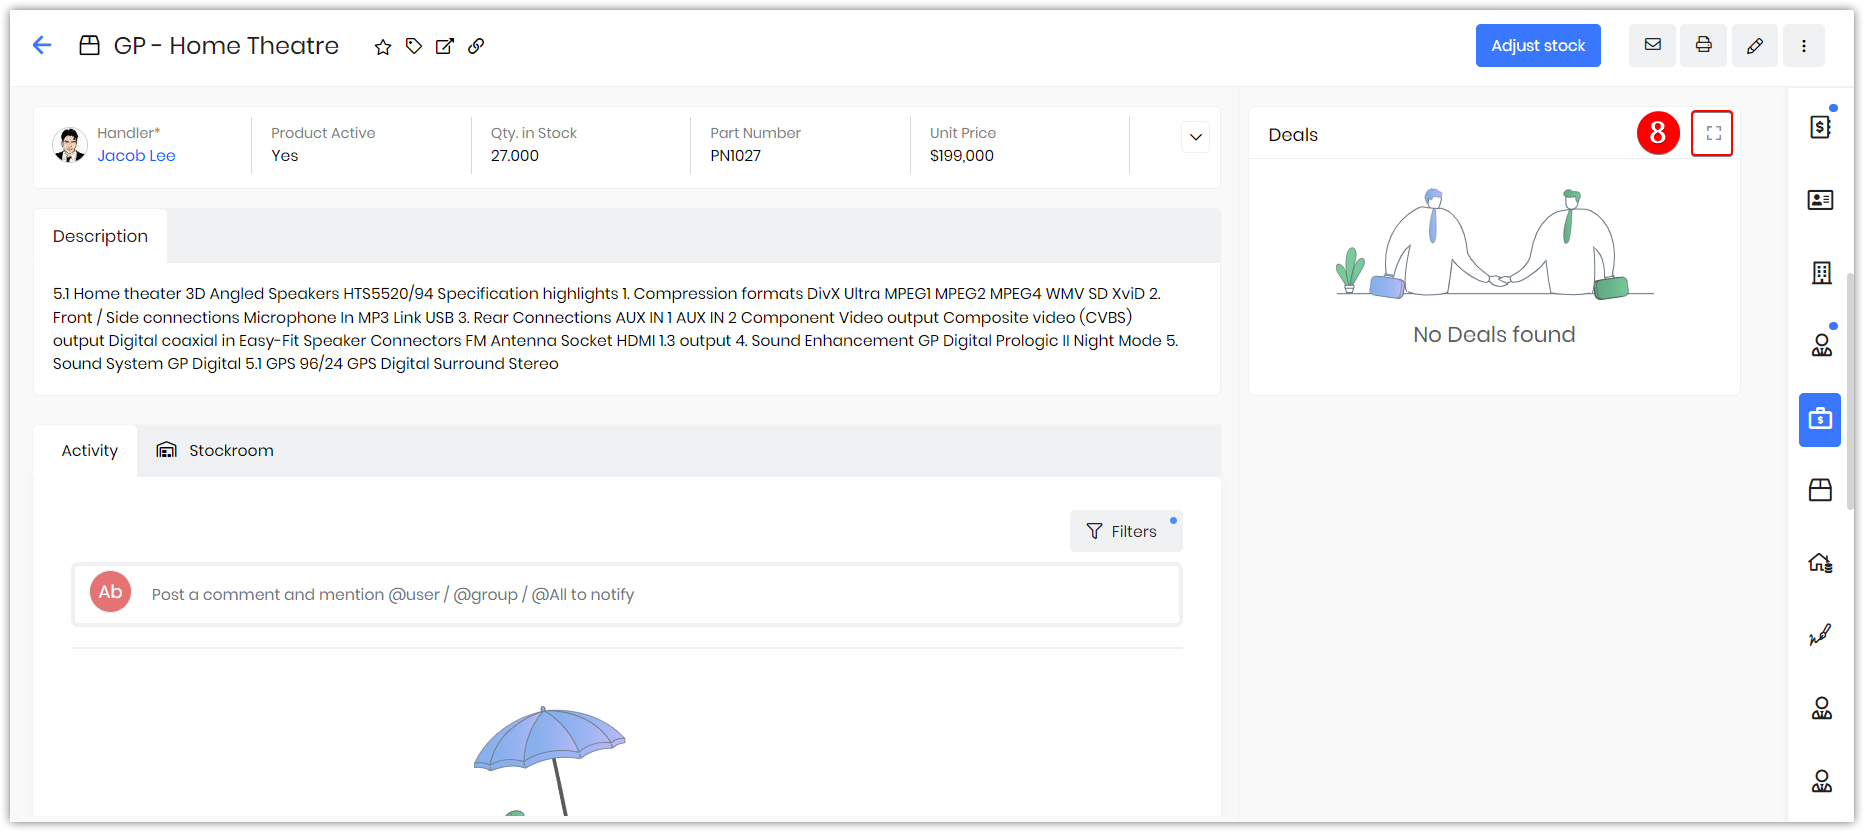
The linked deal will be seen in the Deals widget in the Summary View of the products’ record.
Add Product Bundles
A product bundle is nothing but a set of all products.
Follow these steps to generate a product bundle:
- Log in to your CRM account.
- Click the Menu Menu.
- Go to Inventory.
- Select Products.
- Open the required product record.
- Click the Products Bundle tab in the Summary View.
- Here, you see two options:
- Link Products - If you want to link an existing product, select this option.
- Click the Link Products tab. The Products window opens up.
- Click the radio button on the left side of the products to select the products.
- Click the Add button to link the selected products.
- Add Products - If you want to add a new product, select this option.
- Click the +Add Products tab. The Quick Create/View full-form Product window opens up.
- Fill in all the necessary details.
- Click Save to add the new product.
- Link Products - If you want to link an existing product, select this option.
Whenever the product bundle is chosen as a product for any Inventory record, the linked or added products' names and quantities are displayed under the Item Name in the Item Details section of the records.
Reports generated for the product bundle display the names and quantities of the linked or added products.
You can add sub-products while creating a Purchase Order (PO). A separate checkbox is available for Purchase Orders in the Bundle section.
Note: If the checkbox is not selected for a PO, and if the related PO of the Parent product is created and marked as Fully Received, then the Qty in stock will get updated only in the Parent product, and the Qty in stock for the sub-products will not change.
Generate an Asset
Assets are tangible or intangible resources that are rendered to your customers.
Follow these steps to generate an asset:
- Log in to your CRM account.
- Click the Menu Menu.
- Go to Inventory.
- Select Products.
- Open the required product record.
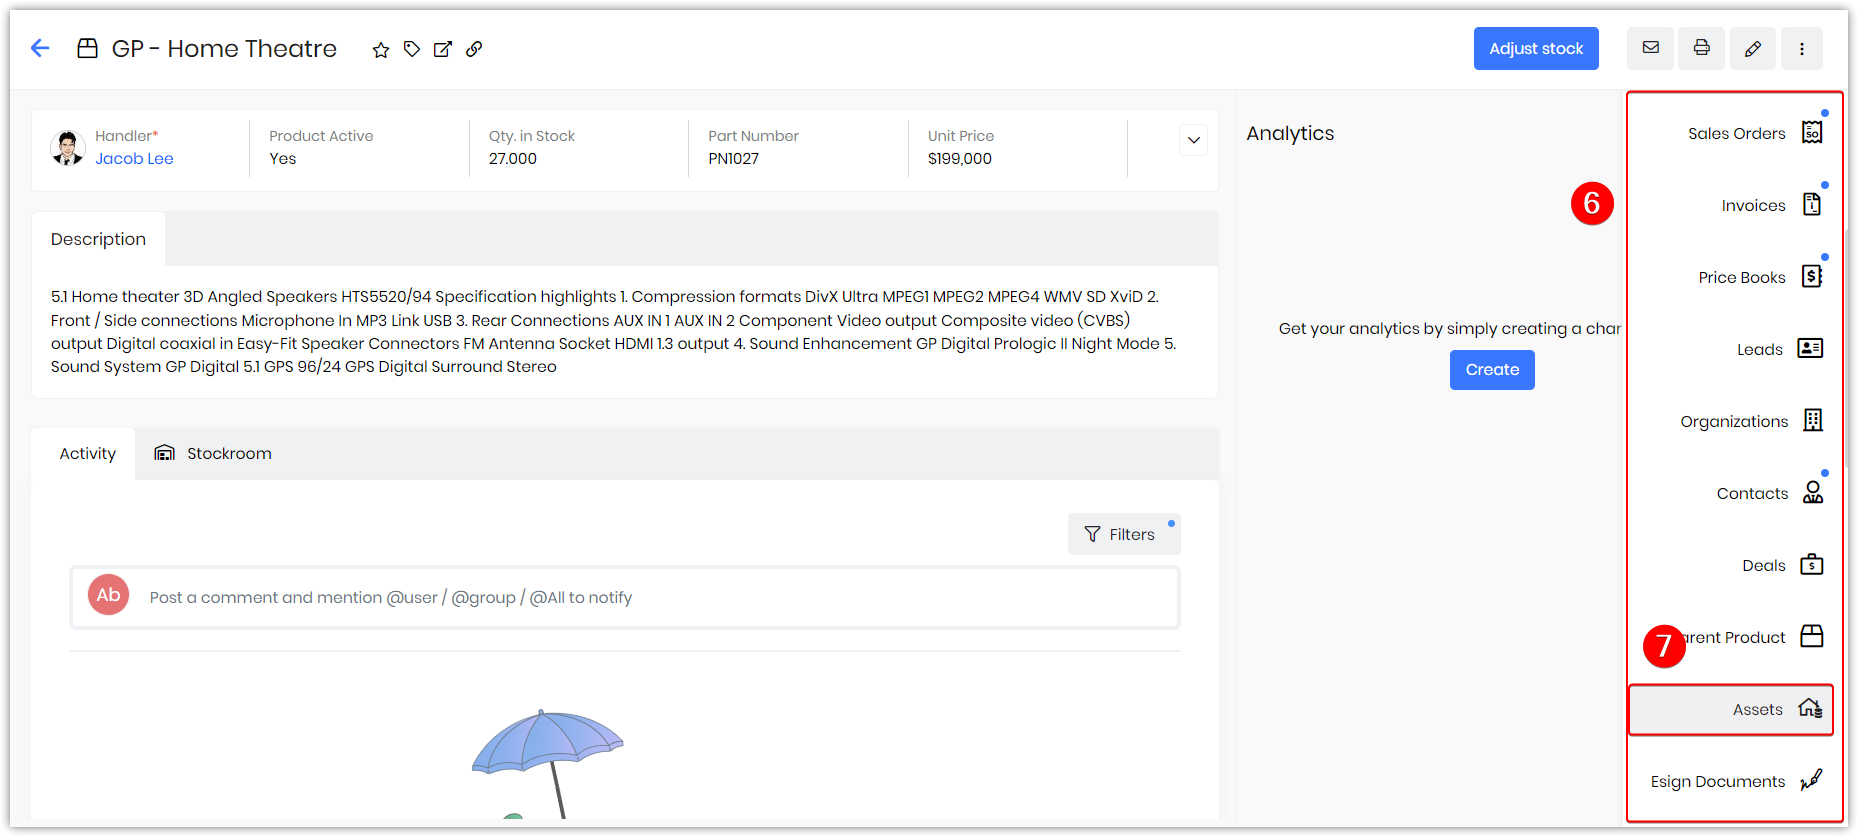
- Click the Related tab in the Summary View.
- Select Assets
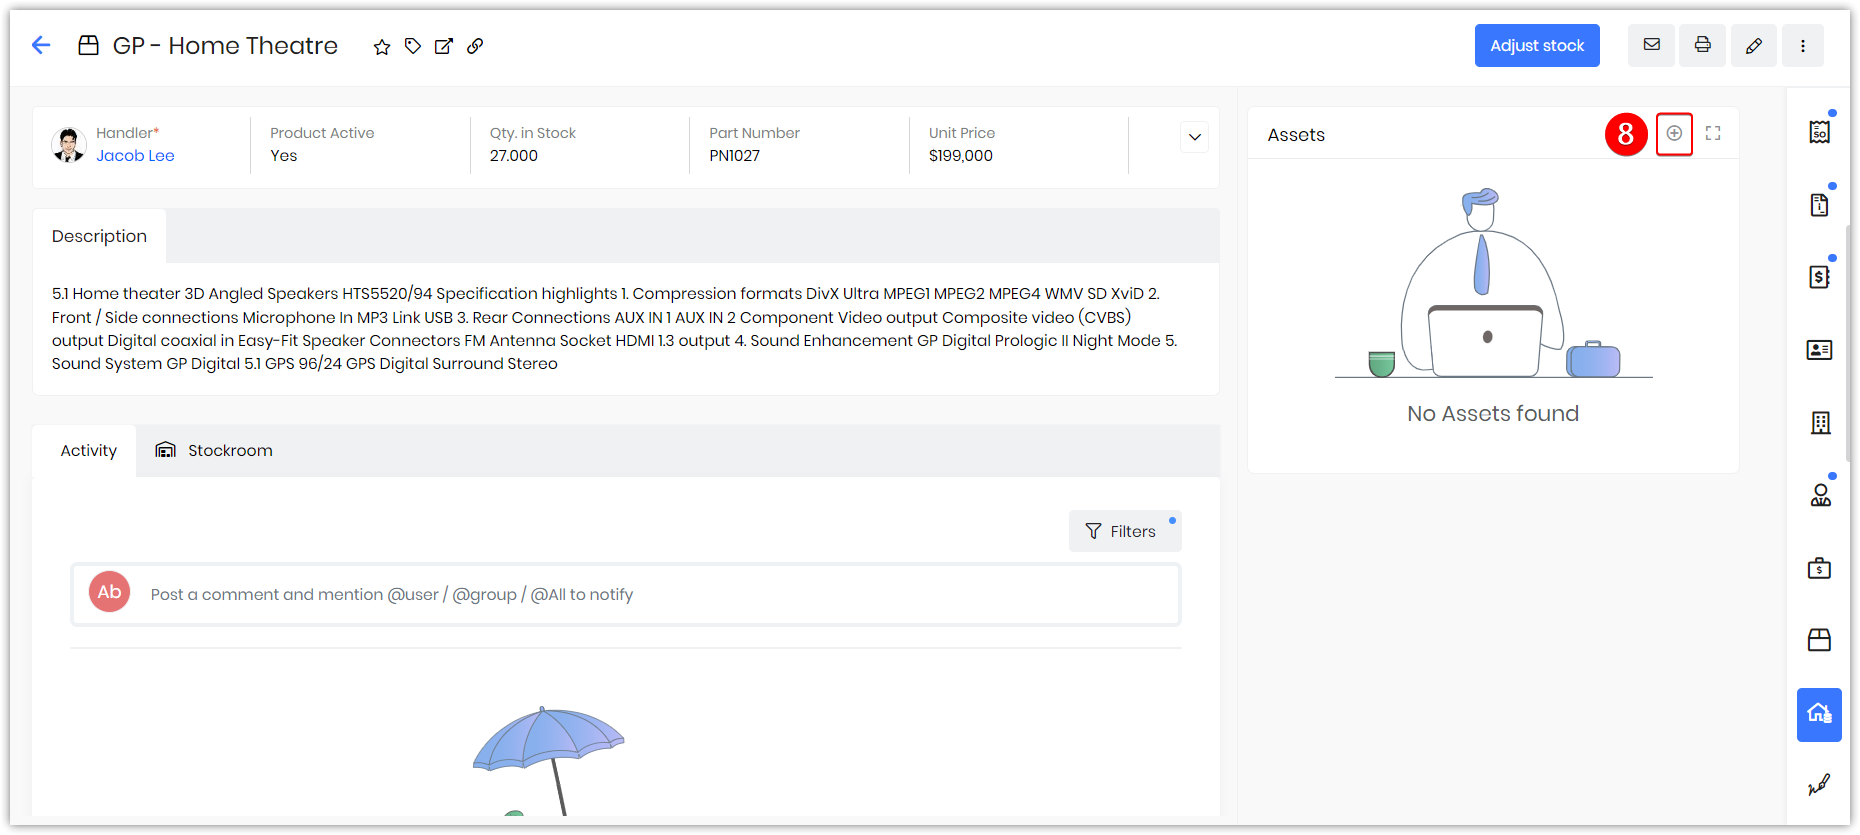
- Click the Add icon.
- Enter all the necessary details.
- Click Save to create an asset.
The linked asset will be seen in the Items widget in the Summary View of the products’ record
Exporting a Product Record
Follow these steps to export a product:
- Log in to your CRM account.
- Click the Menu Menu.
- Go to Inventory.
- Select Products.
- In the List View, hover over any product record to display the radio button on the left side.
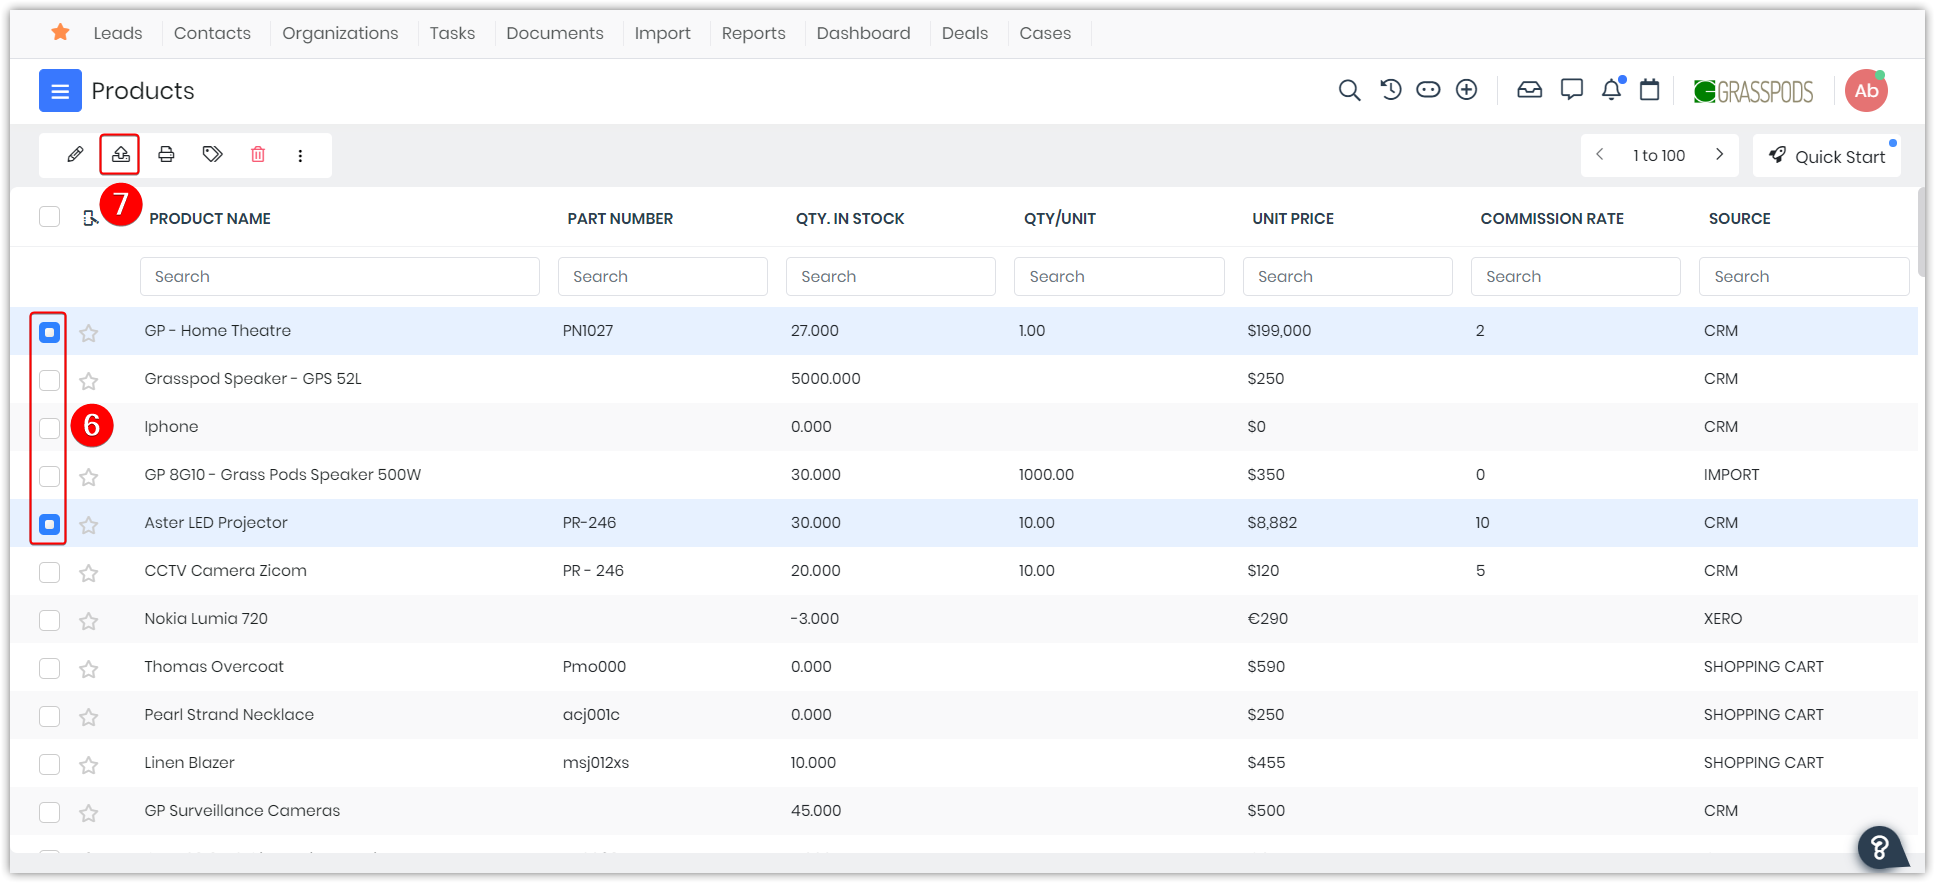
- Click the radio button.
- Click the Export button.
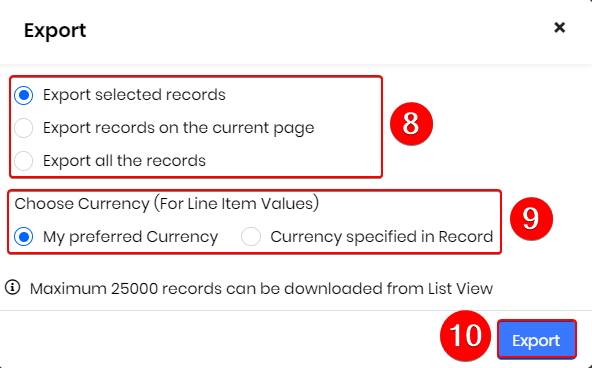
- Select any one of the following options:
- Export Selected Records - This option will export only the selected record.
- Export data in current page - This option will export the records to the current page.
- Export all data - This option will export all the data in all the pages of the SO module.
- Choose the required Currency.
- Click Export.
The exported record will be saved on your local system.
Printing a Product Record
Follow these steps to print a product :
- Log in to your CRM account.
- Click the Menu Menu.
- Go to Inventory.
- Select Products.
- Open the required product record.
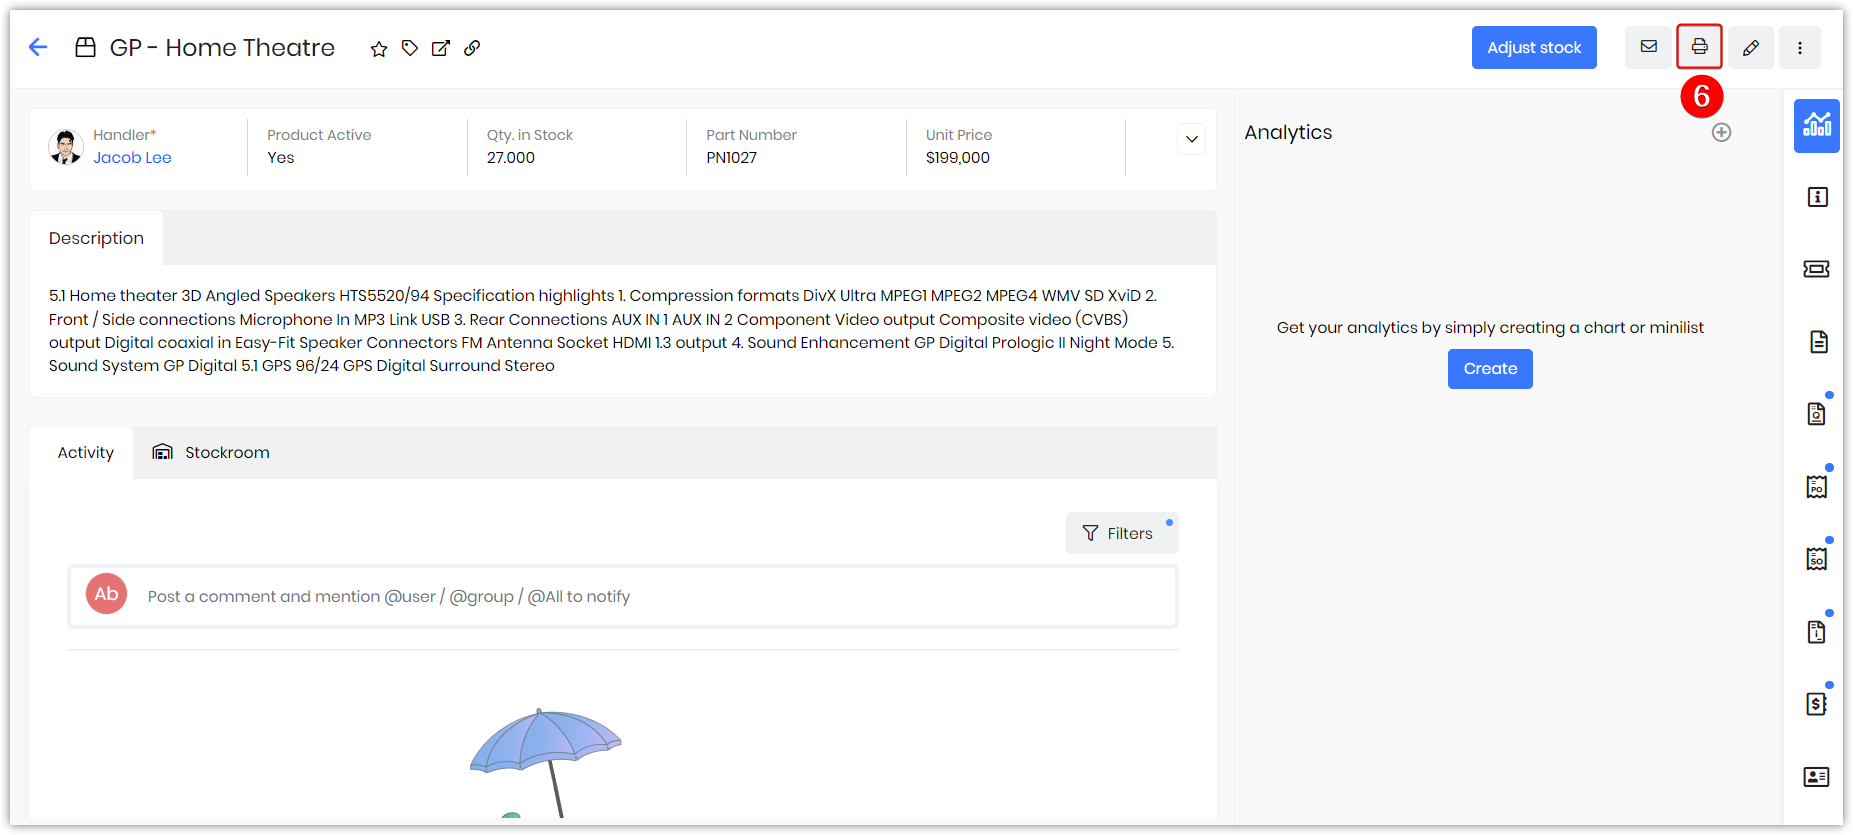
- Click the Print icon.
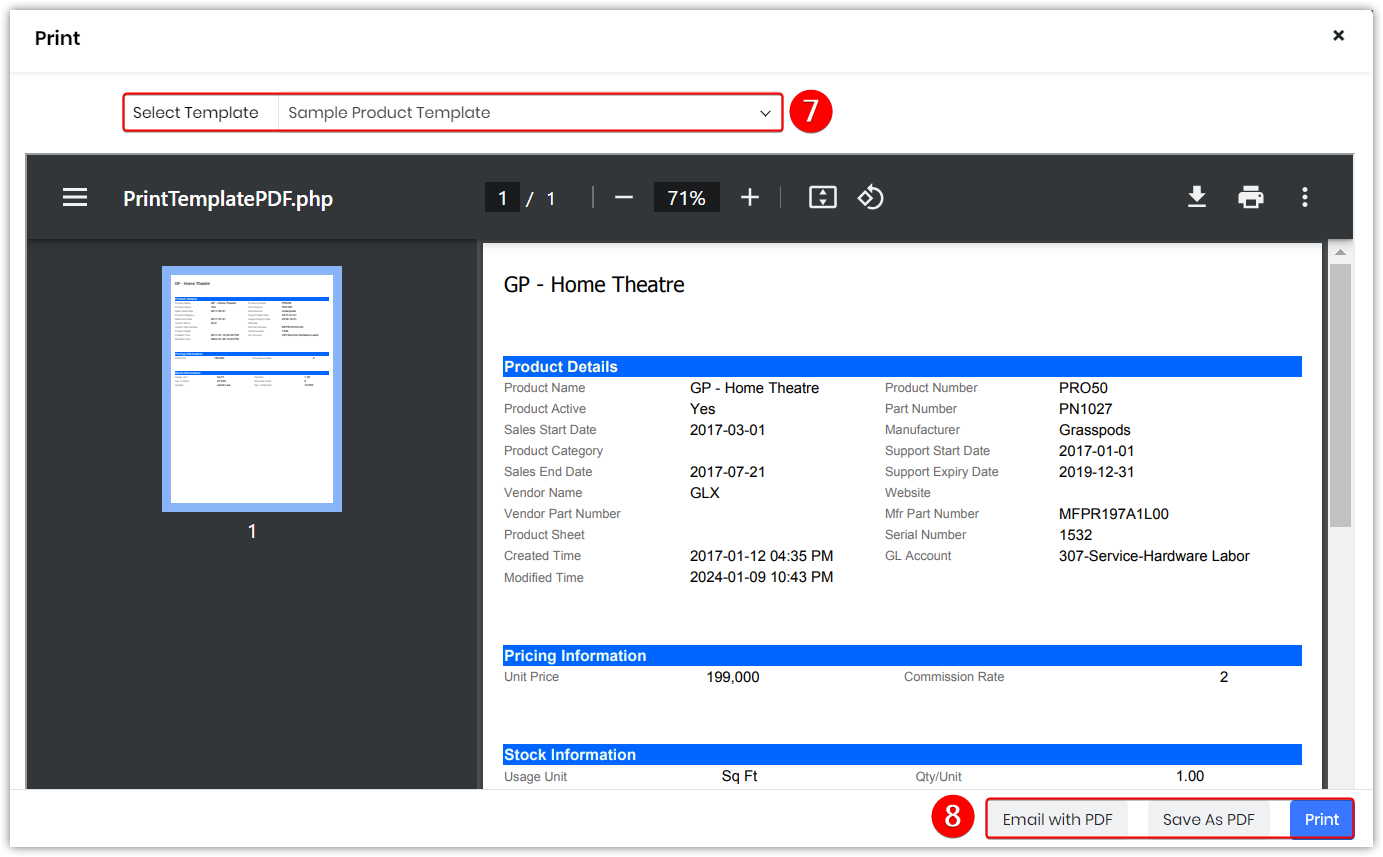
- Select the required Print Template.
- You can perform any of the below options:
- Email with PDF - You can email the product record as a PDF to the contact.
- Save as PDF - You can save the product as a PDF on your local system.
- Print - You can print the product and keep a hard copy.
| here. |
Product Stock Update Workflow
The Quantity in Stock of a product gets updated in accordance with the status of the invoice or purchase order created for the product. This is done via the workflow Update Inventory Products On Every Save that is set up and active by default in Vtiger. The benefit of this workflow is that it reduces manual effort and avoids human errors, as every change is recorded automatically. You can also create other workflows to run on Products by going to Settings> Automation> Workflows.
To learn more about Workflows in Vtiger CRM, click here.
Here are the scenarios under which Invoices impact Quantity in Stock:
- When an invoice is created, the quantity in stock will decrease.
- When an invoice is canceled or deleted, the quantity in stock will increase.
- When the purchase order status is changed to ‘received shipment’, the quantity in stock will increase.
- When the purchase order is canceled, the quantity in stock will decrease.