Articles in this section
Managing Vendors
Feature Availability
Vtiger Editions: One Growth | One Professional | One Enterprise | One AI
Introduction to Vendors
A vendor is a person or an organization that supplies Products or Services to your company. A vendor can also be a manufacturer or a reseller.
When the customer agrees to a quote, the seller generates the Sales Order (SO) to confirm the sale. In return, the customer generates a Purchase Order (PO) and sends it to the seller.
The seller will now send the PO to the Vendor, who will provide the required products or services.
Key Features
- Centralized Vendor Management – Create, view, and manage all vendor records in one place.
- Quick & Flexible Creation – Add vendors via List View or Quick Create, with mandatory fields such as Vendor Name and Assigned To.
- Integration with Inventory – Link vendors to products, purchase orders, and contacts directly from the vendor record.
- Document & Communication Management – Generate, export, print, or email vendor-related documents; schedule calls, emails, or tasks via the Do button.
- Customizable Views – Summary View, List View, and Deep Dive View provide layered visibility and editing of vendor information.
- Analytics & Widgets – Track metrics, POs, items, and contacts via dedicated widgets for actionable insights.
- Template & Printing Options – Change print templates and save or send vendor records as PDFs.
Benefits
The benefits of using the Vendors module are:
- Streamlined Procurement Process – Easily manage purchase orders and vendor interactions to ensure timely procurement.
- Improved Data Accuracy – Mandatory fields and structured record creation reduce errors and missing information.
- Enhanced Collaboration – Assign vendors to users or teams, track activities, and follow updates efficiently.
- Time-Saving Automation – Quick creation, document generation, and communication features reduce manual workload.
- Complete Visibility – Summary and Deep Dive views ensure all vendor-related data is easily accessible.
Key Terminology
|
|
|
|
|
|
|
|
|
|
|
|
|
|
|
In this article, you will learn about:
- Creating and managing Vendors.
- Actions possible in the Vendors module.
- Views in the Vendors module.
Creating a Vendor record
You can create a Vendor record from the List View of the Vendors module and the Quick Create feature.
From Vendors' List View
Follow the steps below to create a Vendor:
- Log in to the CRM.
- Go to the Main Menu.
- Go to the Inventory app.
- Select the Vendors module.
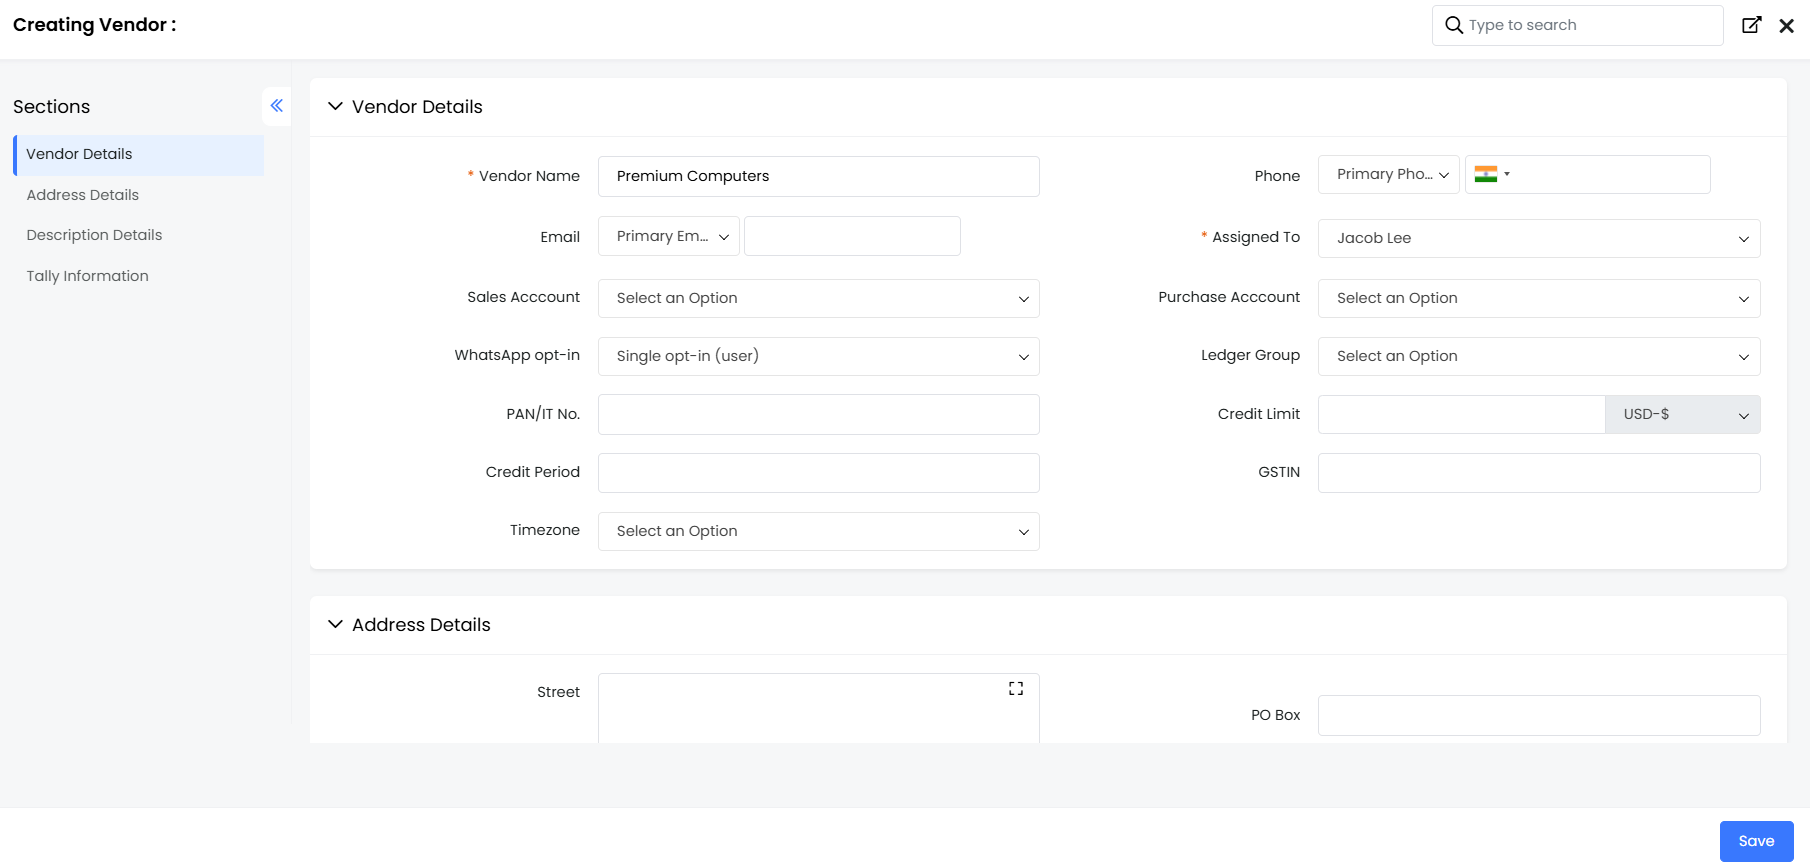
- Click +Add Vendor.
- Fill in all the necessary details.
- Click Save to create a vendor record.
- Click Save and Continue to fill in more information.
From Quick Create
Vendors can also be created by clicking the + button present on the top right-hand corner of the screen.
Follow these steps to create a vendor using Quick Create:
- Log in to the CRM.
- Click the + icon displayed on the top right side of your screen. It displays all the modules in which you can create records using Quick Create.
- Select Vendor from Order fulfillment.
- Enter all the mandatory details.
- Click Save to save the record.
- Click View Full Form to enter more information.
To know more about Quick Create, click here.
Actions Possible in the Vendors module
You can perform the following actions on the vendors:
Generate related documents
Add Product
Products represent a stock of goods in your inventory. Products can be either procured from suppliers or rendered to customers, depending on the nature of your organization.
Follow these steps to add a product:
- Log in to the CRM
- Go to the Main Menu.
- Select the Vendors module under the Inventory app.
- Open any vendor record.
- Click More.
- Select Products under the Add or Link section.
- Here, you see two options on your screen:
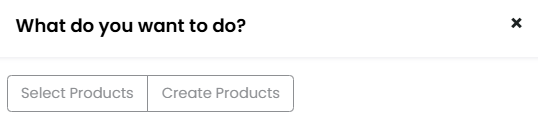
- Select Products: To add an existing product, select this option.
- Select desired products from the list of all existing products.
- Click Add to link the selected items.
- Create Products: To add a new product, choose this option.
- Fill in all the necessary details.
- Click Save to create the product.
Add a Purchase Order
A Purchase Order (PO) is a legal document handed over to a Vendor to purchase Products or Services. PO offers you a channel to explain your requirements and intentions clearly.
Follow these steps to add a PO:
- Log in to the CRM.
- Go to the Main Menu.
- Go to the Inventory tab.
- Select the Vendors module.
- Open any Vendor's record.
- Click More.
- Select Purchase Orders under the Add or Link section.
- Provide all the necessary details.
- Click Save.
Add a Contact
A contact is a person with whom you are conducting business, typically a prospect or customer.
Follow these steps to add a contact:
- Log in to the CRM.
- Go to the Main Menu.
- Go to the Inventory tab.
- Select the Vendors module.
- Open any Vendor's record.
- Click More.
- Select Contacts under the Add or Link section.
- Here you can select or add a new contact.
Export
Follow these steps to export a vendor:
- Log in to the CRM.
- Go to the Main Menu
- Select the Vendors module under the Inventory app.
- In the List View, select the records you want to export.
- Click the Export icon.
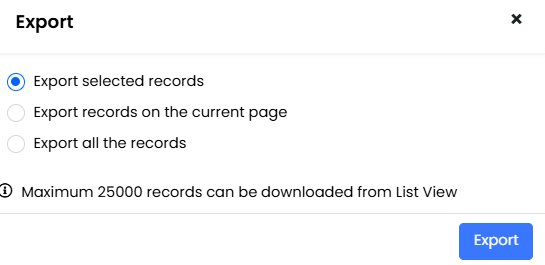
- Select any one of the following options:
- Export Selected Records: This option will export only the selected record.
- Export data in the current page: This option will export the records on the current page.
- Export All Data: This option exports all data from all pages.
The exported record will be saved on your local system.
Follow these steps to print a vendor:
- Log in to the CRM.
- Go to the Main Menu
- Select the Vendors module under the Inventory app.
- Open any record.
- Click More.
- Click Print.
- You can perform any of the following options:
- Email with PDF- You can email the vendor record as a PDF to the contact.
- Save as PDF - You can save the vendor record as a PDF file on your local system.
- Print - You can print the vendor record and keep a hard copy for future reference.
Change Template
Follow these steps to change the template of a vendor:
- Log in to the CRM.
- Go to the Main Menu
- Select the Vendors module under the Inventory app.
- Open any record.
- Click More.
- Click Print.
- Select a template from the drop-down before printing.
Viewing Vendors
List View in Vendors
List View sorts and lists all Vendors based on the last-modified vendor record.
Columns in List View
The columns that are visible by default in the List View are :
- Vendor Name: Displays the name of the Vendor who provides the products or services to the customer.
- Phone Number: Displays the Vendor's contact number.
- Email: Displays the Email ID of the Vendor.
- Category: Displays the category of the products/services that the Vendor offers.
- Assigned To: Displays the user to whom the Vendors are assigned.
Actions in the List View
You can perform many quick actions, such as Edit, Delete, Email, Follow, etc., on the Vendors' records in the List View.
To learn more about List View actions in Vtiger CRM, click here.
Summary View
Summary View is the view that appears when you click a particular record from the List View. The Summary View displays a collection of all the key information of the record.
The Summary View can be divided into four sections. Each section has a particular functionality.
Actions in the Summary View
- Follow: You can follow any vendor record to get updates on all the activities performed on that record.
- Tags: You can add tag names to the record to identify the record easily.
- Print: You can print the vendors or save them as a PDF for future reference.
- Duplicate: You can duplicate the current record and have all the details reflected in a new record.
- Delete: You can delete a record by clicking this button.
- Comment: You can add comments mentioning other CRM users or groups under the Activity section.
- Filter: You can filter activities under the Activity section.
- Connections: Click to view connections with your Vendor. Click here to learn more.
- Email: Click to send an email to your Vendor.
- Call: Click to call your Vendor.
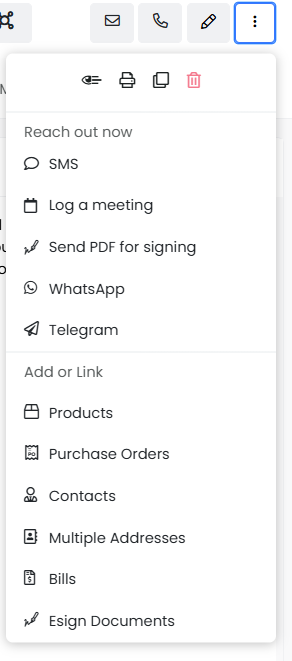
- More:
- Reach out now: Click to contact the Vendor using the following methods.
- SMS
- Log a meeting
- Send PDF for signing
- Telegram
- Add or Link: Add or link other related module records.
- Products
- Purchase Orders
- Contacts
- Multiple Addresses
- Bills
- Esign Documents
- Reach out now: Click to contact the Vendor using the following methods.