Articles in this section
Vtiger Services Module
Feature Availability
Vtiger Editions: One Growth | One Pilot | One Professional | One EnterpriseIntroduction to Services
Services refer to free or paid assistance you offer to your customers. In general, Services are non-stockable items rendered to your customers. Services do not have bundles like Products. Services are included in Invoices, Sales Orders, Purchase Orders, and Quotes.
Benefits
The benefits of using the Services module are:
- Efficient Service Management: You can manage your benefits from efficient management of service-related activities, from ticket creation to resolution, ensuring a systematic approach.
- Tracking SLAs: You can track SLAs, ensuring timely responses and resolutions to customer queries or issues.
- Enhanced Customer Experience: You can outline terms related to warranties, liabilities, and service level agreements (SLAs), reducing the risk of services not meeting agreed-upon standards.
In this article, you will learn about:
- Creating a Service record
- Actions in a Service record
- Viewing a Service record
Key Terminology
| | |
|
| Di |
|
|
|
|
|
|
|
|
|
|
|
|
|
|
|
|
|
|
Creating a Service
You can create a service record from the following screens in the CRM:
- From the Services - List View
- From Quick Create
From Services List View
You can use the +Add Service button to create a new service. You can find it in the top right corner of the Services’ List View.
Follow these steps to create a service:
- Log in to the CRM.
- Click the main Menu.
- Go to Inventory.
- Go to Catalog > Services. The Services page opens.
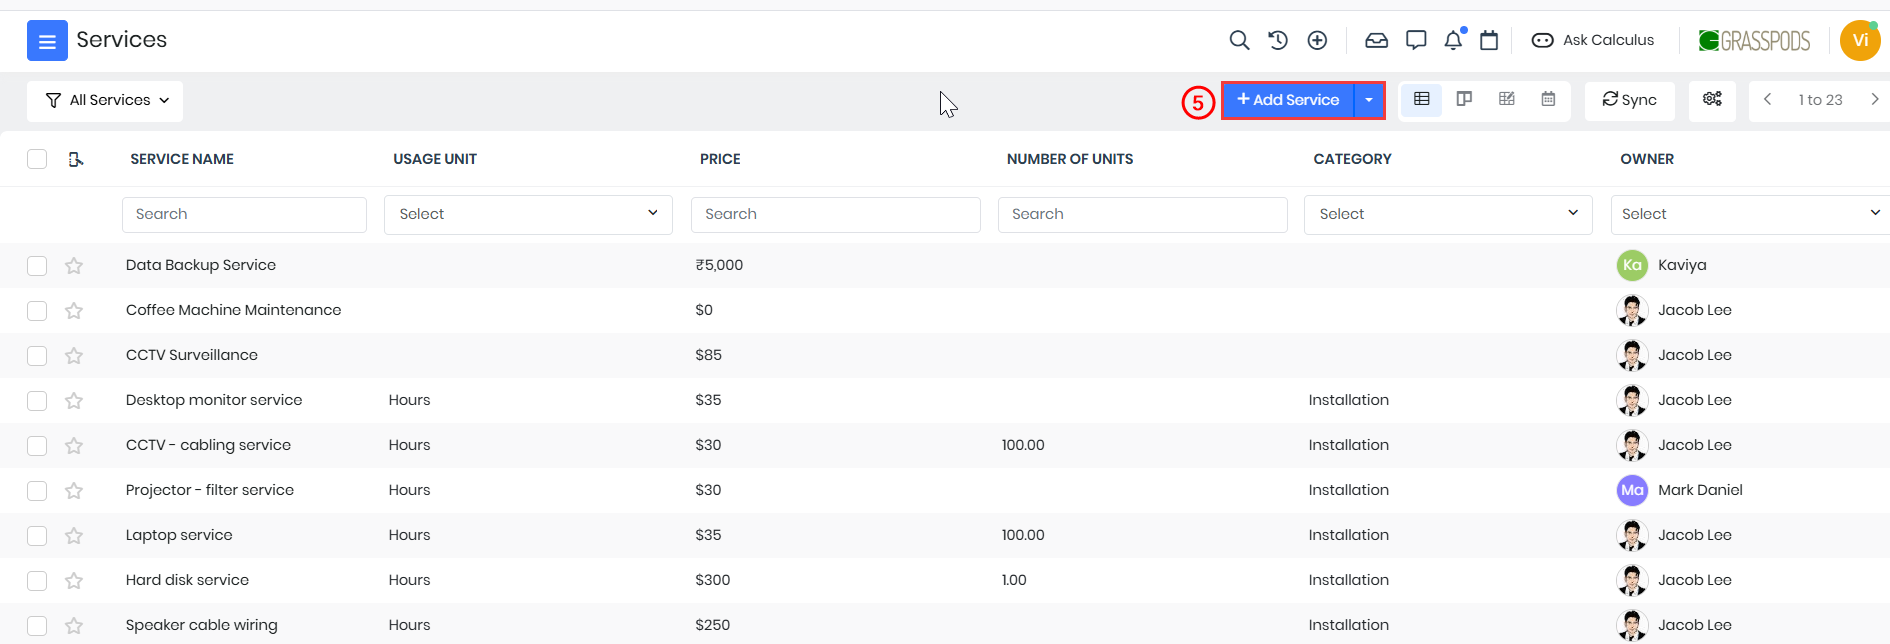
- Click +Add Service. The Add Service window opens.
- Click View full form. The Creating Service window opens.
- Enter or select information for the following sections.
- Service Details
- Pricing Information
- Description Details
- Revenue Schedule Information
- Click Save.
From Quick Create
You can also create a Service record by clicking the + icon (Quick Create) button present on the right-hand top corner of your CRM screen.
Follow these steps to create a service using Quick Create:
- Log in to the CRM.
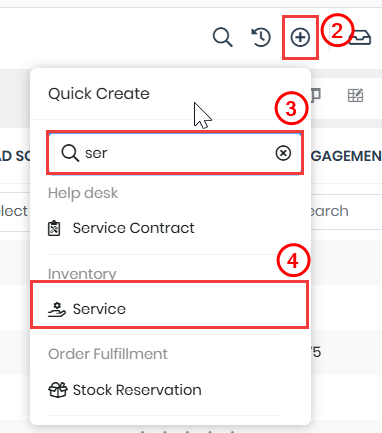
- Click the + icon displayed on the top right side of your screen.
- Type Service in the search bar.
- Select Inventory > Service. The Add Service window opens.
- Click View full form. The Creating Service window opens.
- Enter or select information for the following sections.
- Service Details
- Pricing Information
- Description Details
- Revenue Schedule Information
- Click Save.
- Click Cancel to discard all the information you entered.
You can view the newly created Service record in the List View or other views on the Services page.
To learn more about Quick Create, click here.
Adding Service Details in Other Modules
You can service details to Invoices, Sales Orders, Purchase Orders, and Quotes.
Note: In the Item Details block, you can add any number of services by clicking the +Add row Products or Services Rows.
For your understanding, we will add a Service to a Sales Order. You can add a Service to other documents using similar steps.
Follow these steps to add a Service to a Sales Order:
- Log in to the CRM.
- Click the main Menu.
- Go to Inventory.
- Click Order Fulfillment > Sales Order. The Sales Order page opens.
- Open a Sales Order record.
- Click Edit.
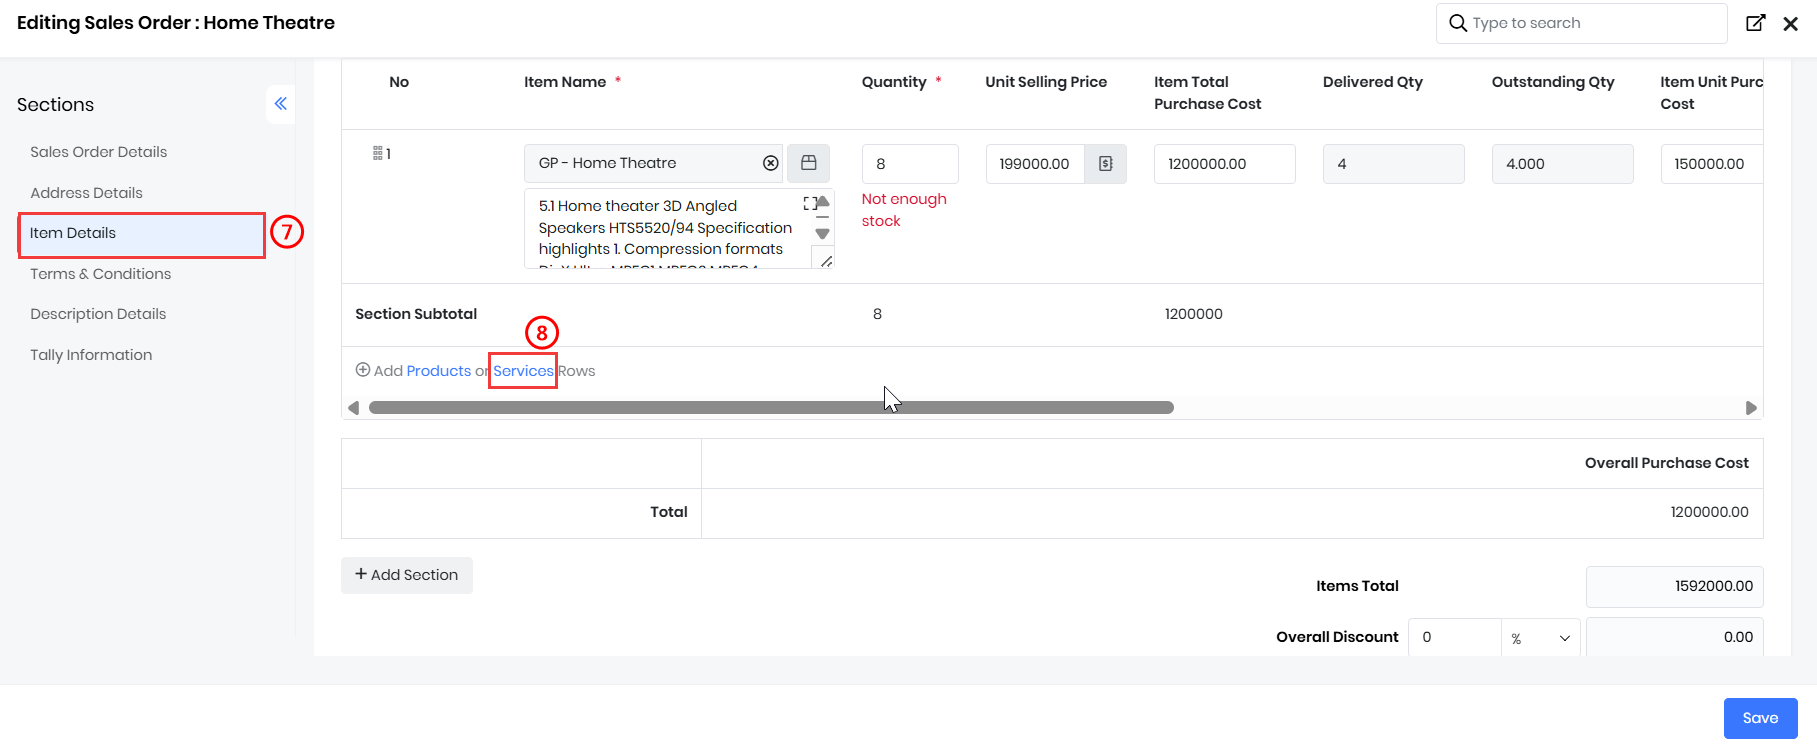
- Go to Item Details
- Click Service. The Services window opens.
- Click Service.
- Select the Service to which you want to add an SO.
- Click the Preview Selected Services. The Selected Services window opens.
- Enter or select the following information in the Preview:
- Disable - Click the check box to remove the selected service.
- Quantity - Add the Quantity of the service.
- Click Add Services.
Duplicating a Service Record
You can create a new service by duplicating information from an existing service.Follow these steps to duplicate a service record:
- Log in to the CRM.
- Click the main Menu.
- Go to Inventory.
- Select Services. The Services page opens
- Select and click to open a Service record to duplicate it. The Summary View opens.
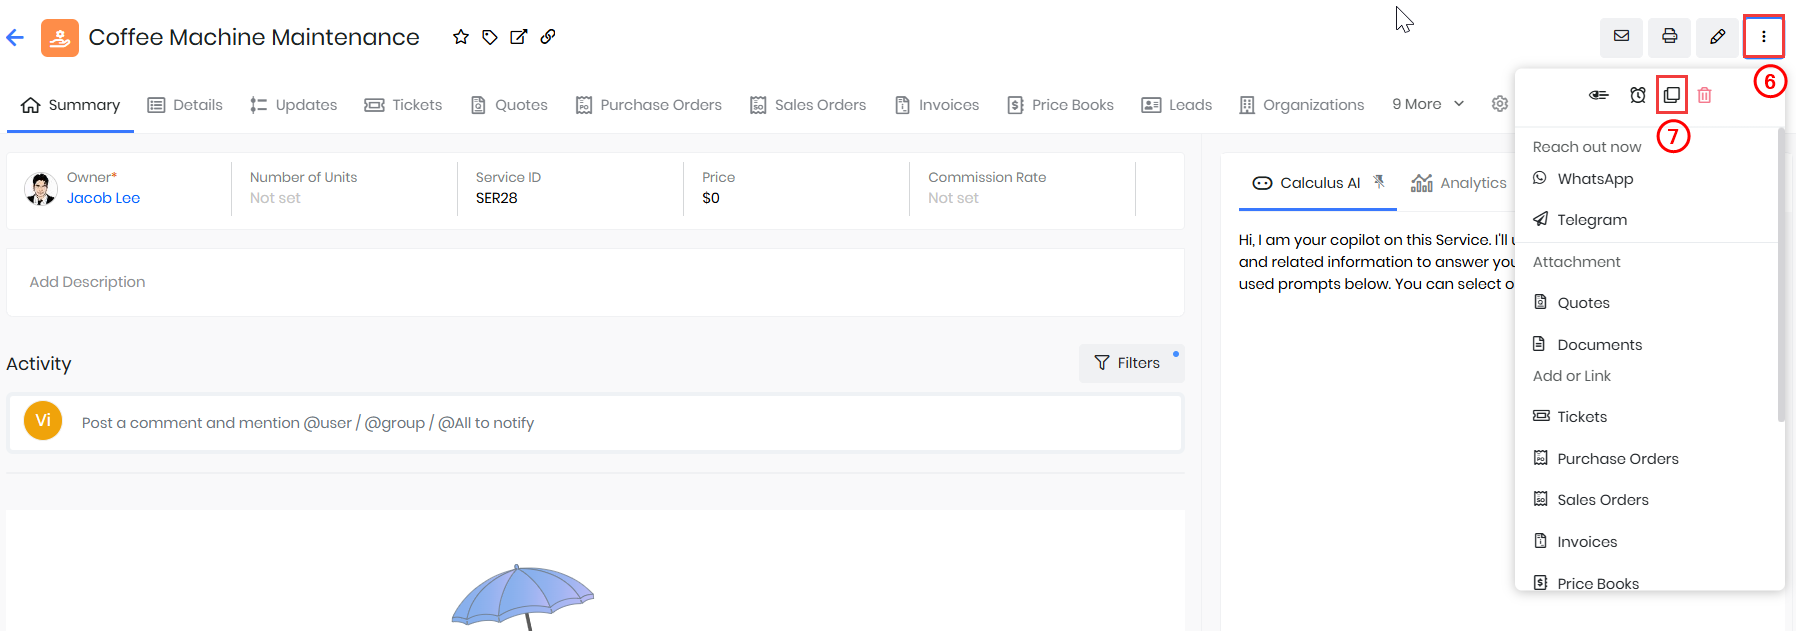
- Click More.
- Click the Duplicate icon. The Duplicating Service window opens (mentions the name of the record).
- Enter or select information for the sections below:
- Service Details
- Pricing Information
- Description Details
- Revenue Schedule
- Click Save.
Adding or Linking a Quote to a Service Record
You can add Service records to Tickets, Purchase Orders, Sales Orders, Invoices, Price Books, Leads, etc. You can also link existing records from other modules.
Follow these steps to attach a Quote to a Service record:
- Log in to the CRM.
- Click the main Menu.
- Go to Inventory.
- Select Services. The Services page opens
- Select and click to open a Service record to attach the Quote. The Summary View opens.
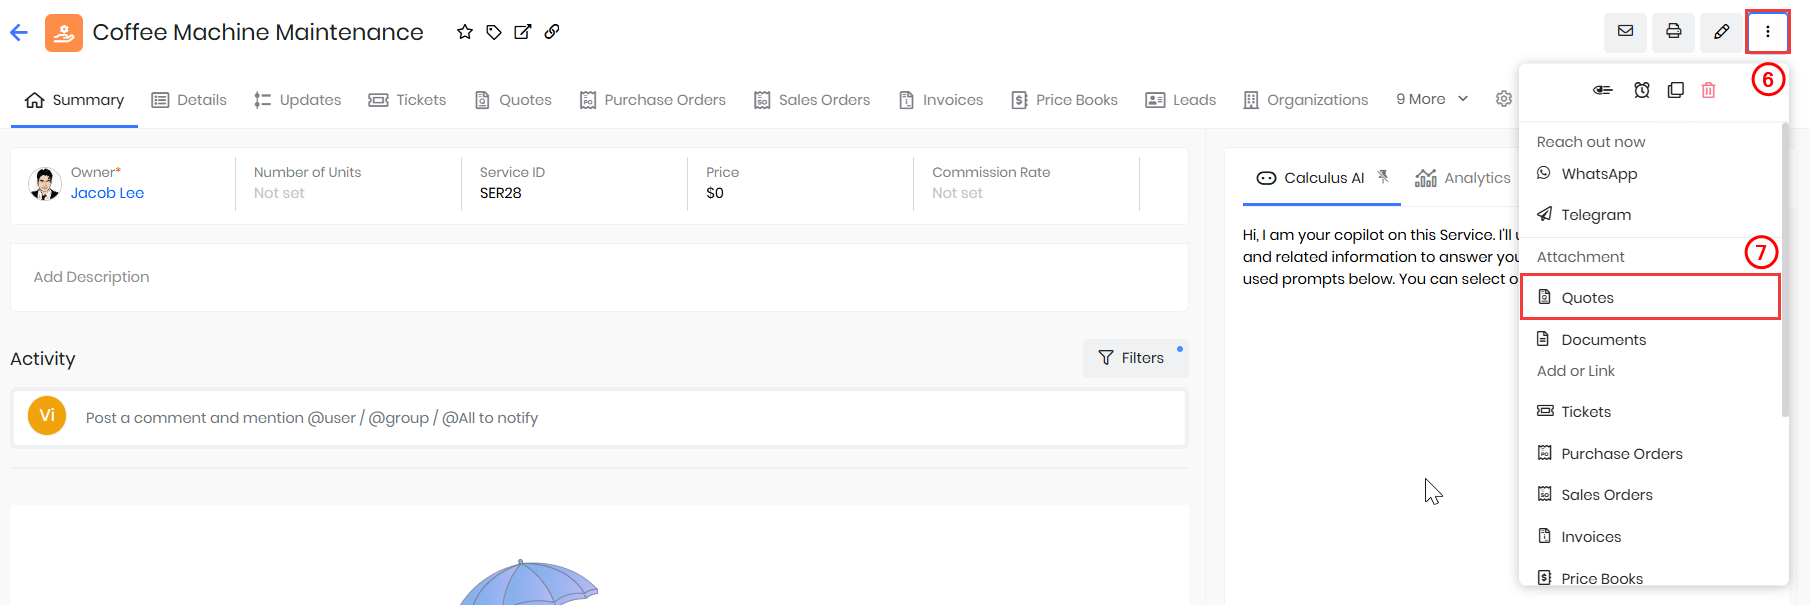
- Click More.
- Select Quotes under Attachment. The Creating Quote window opens.
- Enter or select information for the sections below.
- Quote Details
- Add-on Services
- Custom Information
- Item Details
- Implementation Details
- Customization Details
- Training Details
- Address Details
- Terms & Conditions
- Description Details
- Click Save.
Adding or Linking a Document to a Service Record
Follow these steps to attach a Document to a Service record:
- Log in to the CRM.
- Click the main Menu.
- Go to Inventory.
- Select Services. The Services page opens
- Select and click to open a Service record to attach the Document. The Summary View opens.
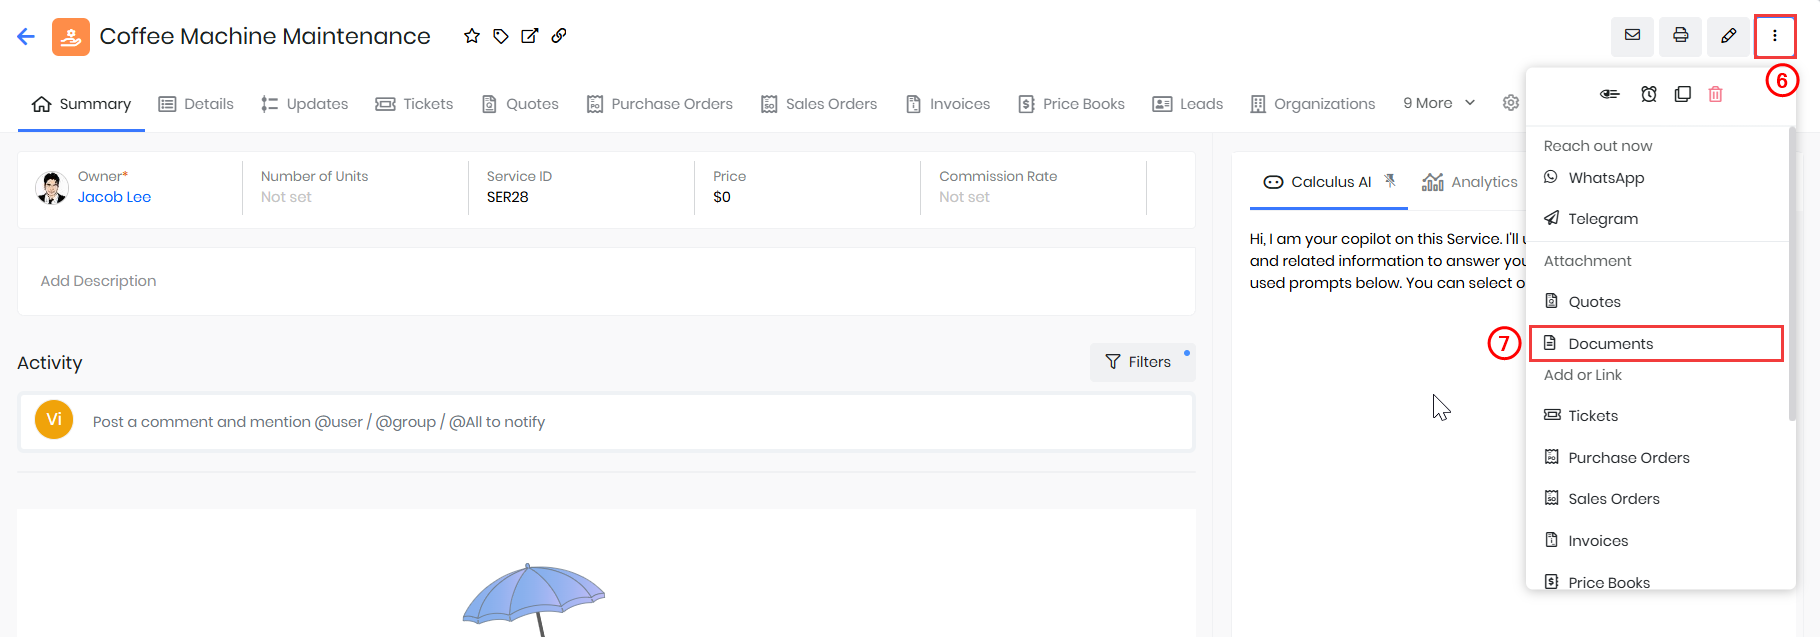
- Click More.
- Select Documents under Attachment. The ‘What do you want to do?’ window opens.
- The widow displays the following options:
- Select Documents
- Create Documents
- File Upload
- Link External Documents
- Custom Actions > Upload Multiple Files
- Choose one of the following two options:
- Click Select Documents to add an existing document:
- Hover over a record in the list of all existing documents to display the radio buttons.
- Click the radio button on the left side of the record to select the record.
- Click Add in the top right corner of the window
- Click Create Documents. to create a new document.
- Fill in all the necessary details.
- Click Save.
- Click Select Documents to add an existing document:
The linked document will be visible in the Documents widget of the Summary View of the Service record.
Generating Related Documents
Generating a Purchase Order
A Purchase order (PO) is the first official offer issued by a customer to the company’s sales team, indicating types, quantities, and agreed prices for a service.
Follow these steps to generate a PO from a Service record:
- Log in to the CRM.
- Click the main Menu.
- Go to Inventory.
- Select Services module. The Services page opens.
- Hover and click to open the service record for which you want to generate a PO.
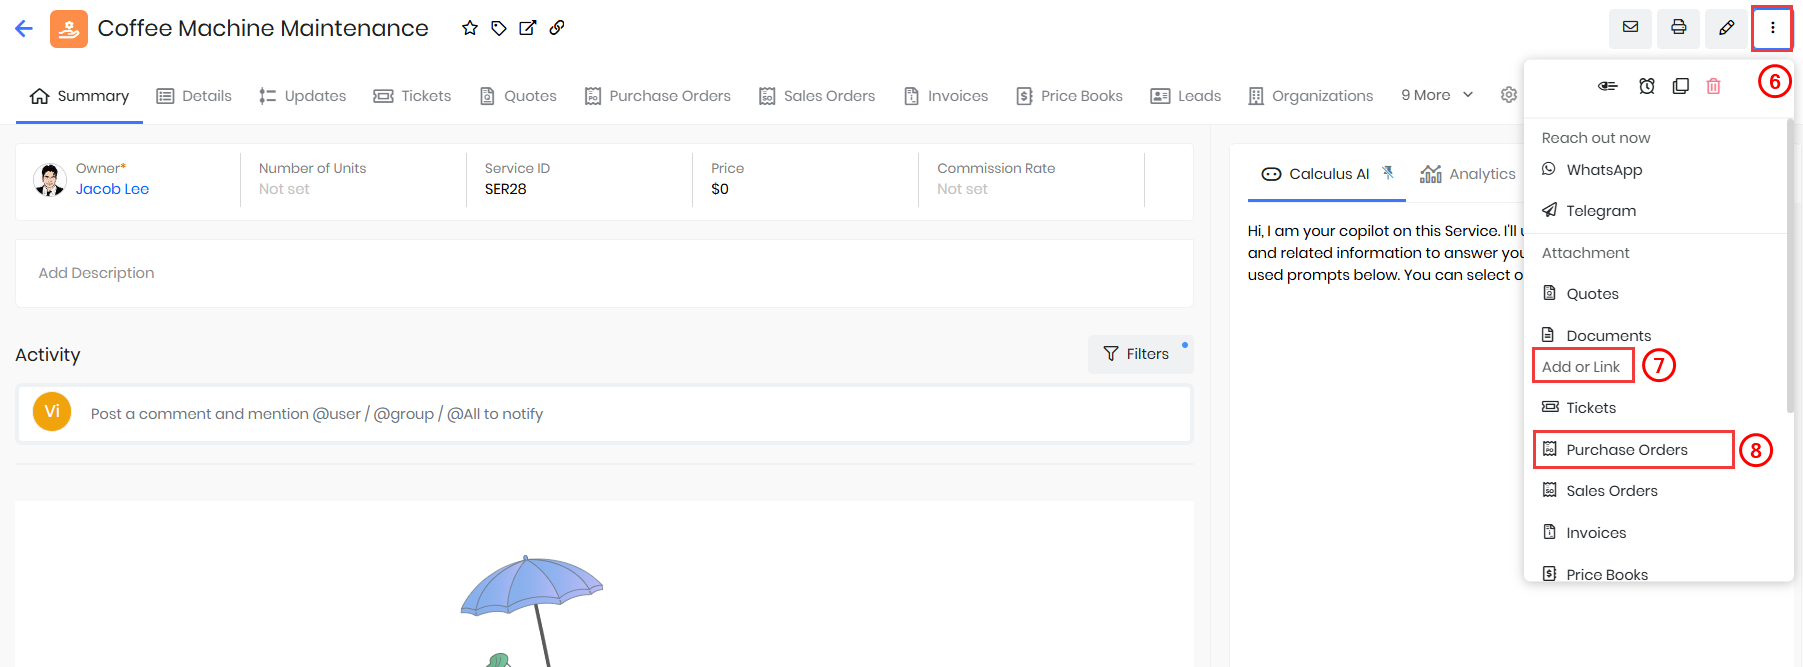
- Click More.
- Go to the Add or Link section.
- Click Purchase Orders. The Creating Purchase Order page opens.
- Enter or select information for the following sections:
- Item Details
- Purchase Order Details
- Address Details
- Terms & Conditions
- Description Details
- Click Save.
The linked PO will be seen in the Sales Ops widget in the Summary View of the services’ record.
Generating a Sales Order
You can generate a Sales Order for a service directly from the Service record.
Follow these steps to generate an SO for a Service record.
- Log in to the CRM.
- Click the main Menu.
- Go to Inventory.
- Select Services. The Services page opens.
- Hover and click to open the Service record for which you want to generate an SO.

- Click More on the top right corner of the Summary View.
- Go to the Add or Link section.
- Select Sales Orders. The Creating Sales Order window opens.
- Enter or select information for the following sections:
- Sales Order Details
- Address Details
- Item Details
- Terms & Conditions
- Description Details
- Click Save.
The linked SO will be seen in the Sales Ops widget in the Summary View of the services’ record.
Generating an Invoice
An Invoice or bill is a non-negotiable, itemized statement issued for the services or goods rendered to the customer.
Follow these steps to generate an invoice:
- Log in to the CRM.
- Click the main Menu.
- Go to Inventory.
- Select Services. The Services page opens.
- Hover and click to open the Service record for which you want to generate an invoice.
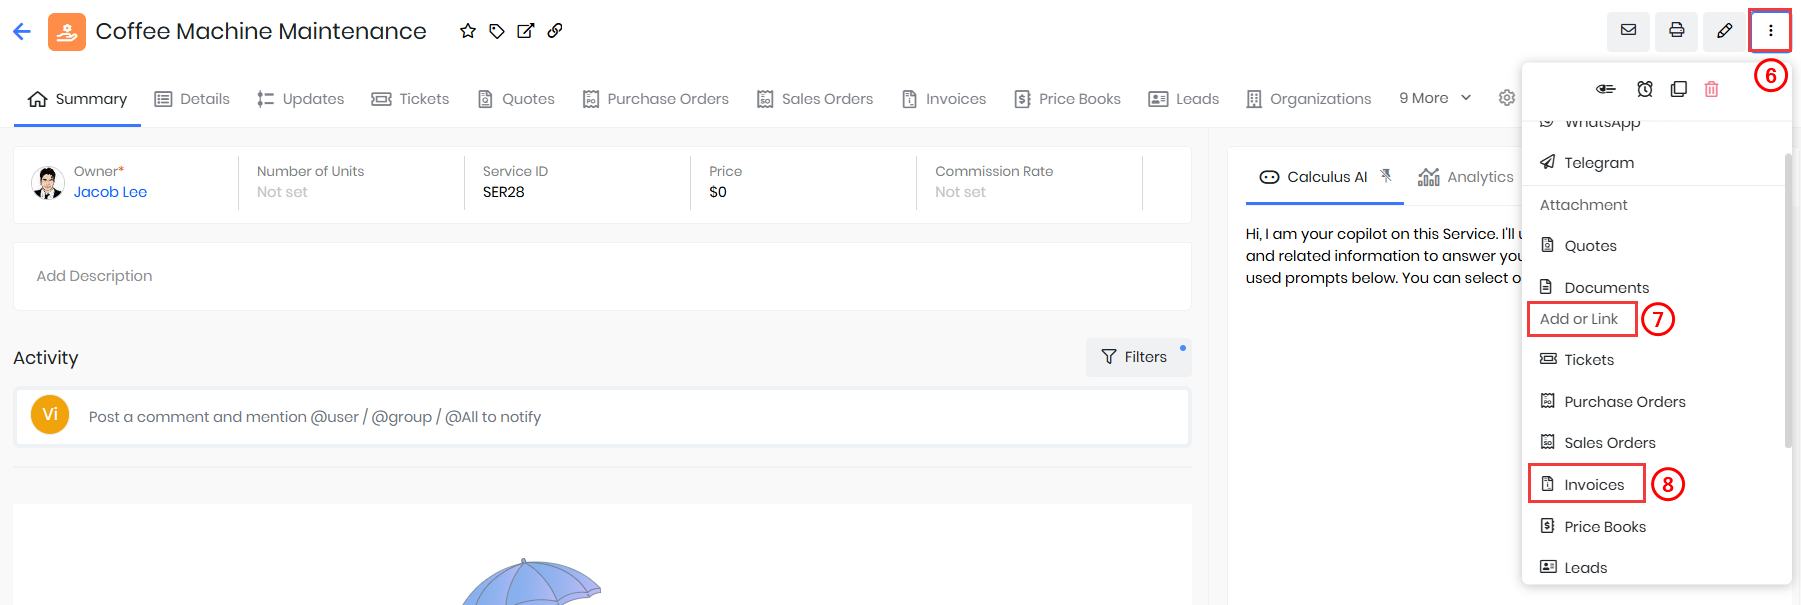
- Click the More icon on the top right corner of the Summary View.
- Go to the Add or Link section.
- Select Invoices. The Creating Invoice window opens.
- Enter or select information for the following sections:
- Item Details
- Address Details
- Terms & Conditions
- Description Details
- Click Save.
The linked invoice will be seen in the Sales Ops widget in the Summary View of the Service record.
Generating a Price Book
Price Books allows you to define different prices for a service provided. The item prices can sometimes vary depending on customer needs.
Follow these steps to generate a Price Book:
- Log in to the CRM.
- Click the main Menu.
- Go to Inventory.
- Select Services. The Services page opens.
- Hover and click to open the Service record for which you want to generate a Price book.
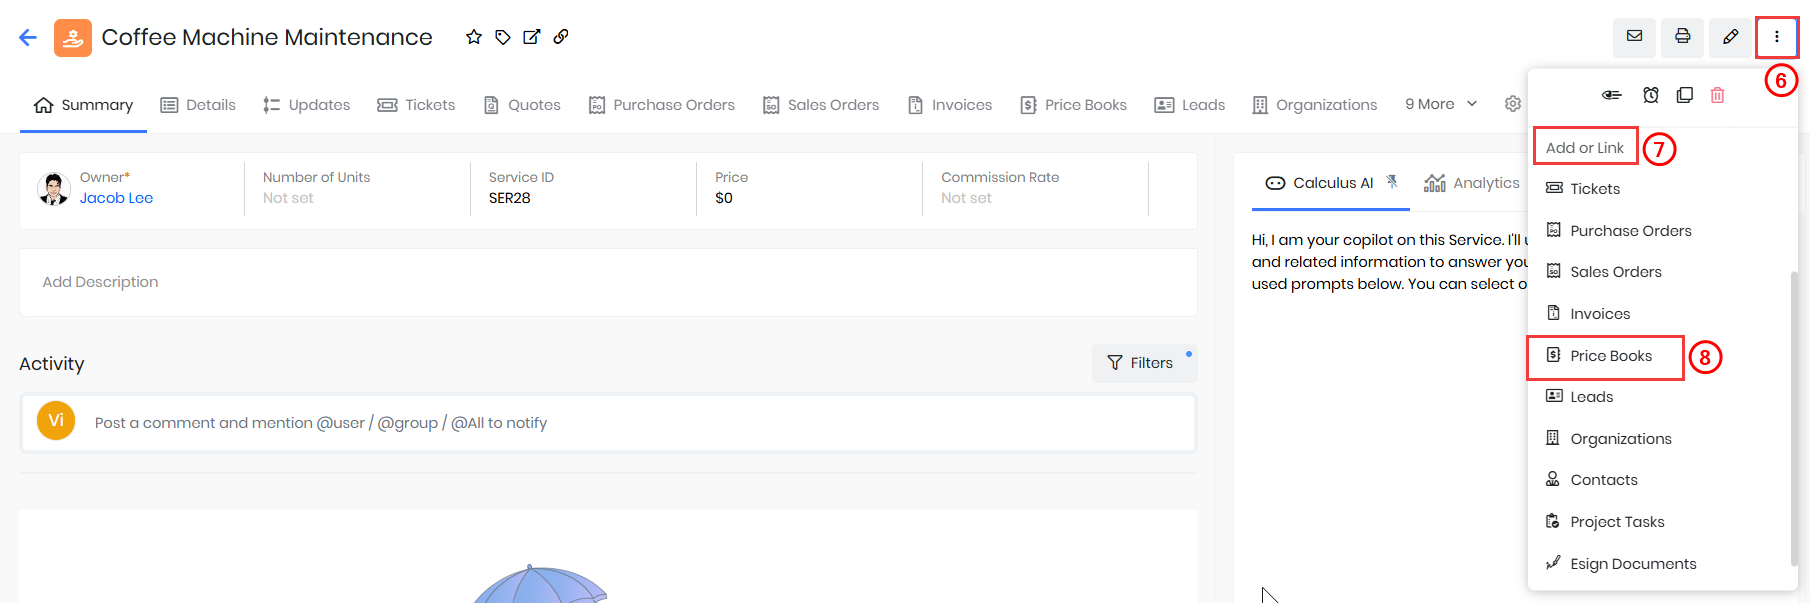
- Click More on the top right corner of the Summary View.
- Go to the Add or Link section.
- Select Price Books. A 'What do you want to do?' window opens with two options - Select Price Books and Create Price Books.
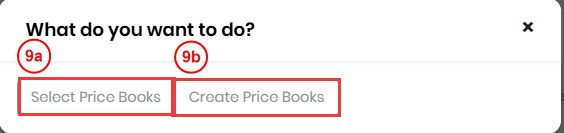
- Enter or select the following information:
- Select and click Select Price Books to add an existing Price Book
- Hover over a record in the list of all existing price books to display the radio buttons.
- Click the radio button on the left side of the record to select the record.
- Click Add in the top right corner of the window.
- Select and click Create Price Books if you want to add a new price book.
- Fill in all the necessary details.
- Click Save.
- Select and click Select Price Books to add an existing Price Book
The linked price book will be seen in the Price Books widget in the Summary View of the services’ record.
Generating an Organization
An organization represents a company you are doing business with. It could have multiple employees and sell multiple products or services.
Follow these steps to generate an organization:
- Log in to the CRM.
- Click the main Menu.
- Go to Inventory.
- Select Services. The Services page opens.
- Hover and click to open the Service record for which you want to generate an Orgaization.
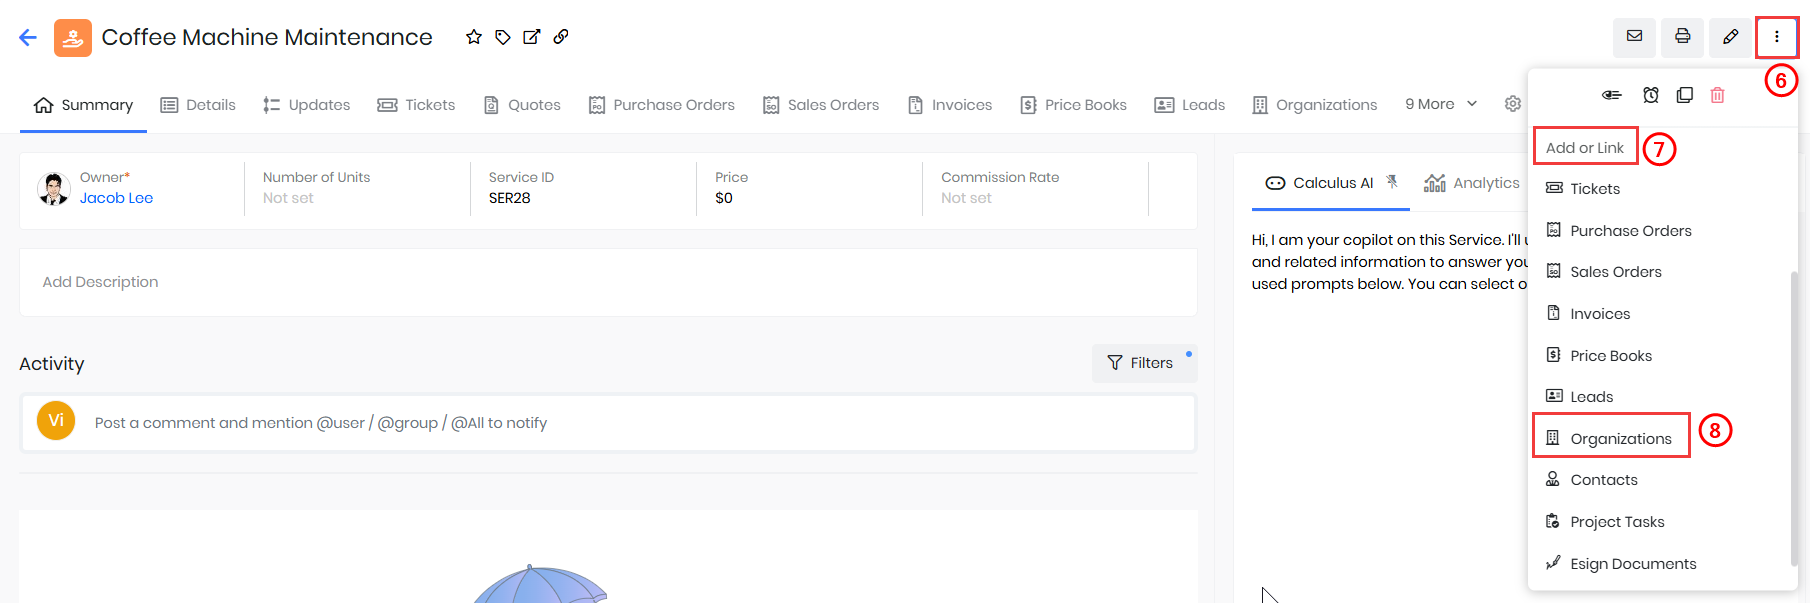
- Click More on the top right corner of the Summary View.
- Go to the Add or Link section.
- Select Organizations.
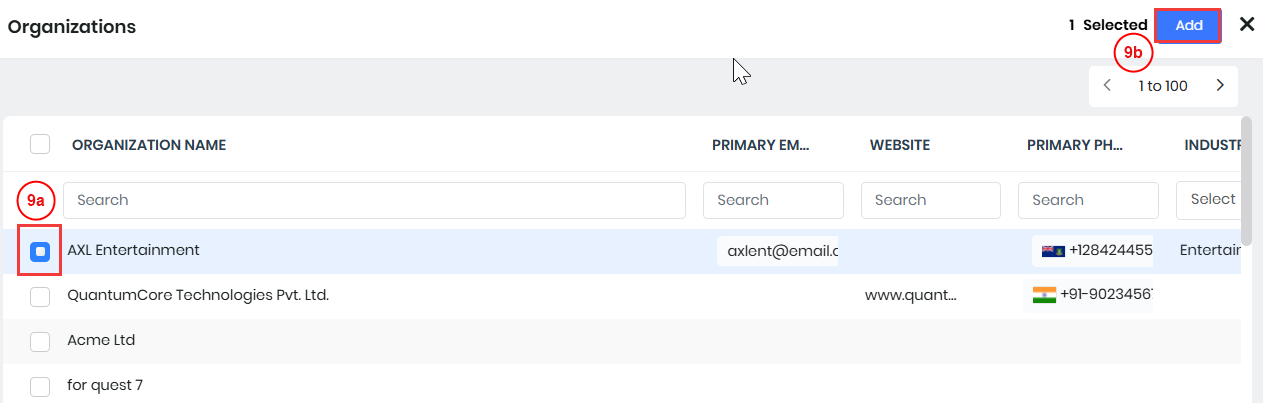
- Enter or select the following information:
- Select an organization from the list of all available organizations.
- Click Add.
The linked organization will be seen in the Organizations widget in the Summary View of the services’ record.
Generating a Contact
A contact is a person with whom you are doing business, likely a prospect or a customer. Contact can be acting in an individual capacity (if your business sells to consumers) or representing a business.
Follow these steps to generate a contact:
- Log in to the CRM.
- Click the main Menu.
- Go to Inventory.
- Select Services. The Services page opens.
- Hover and click to open the Service record for which you want to add a Contact.
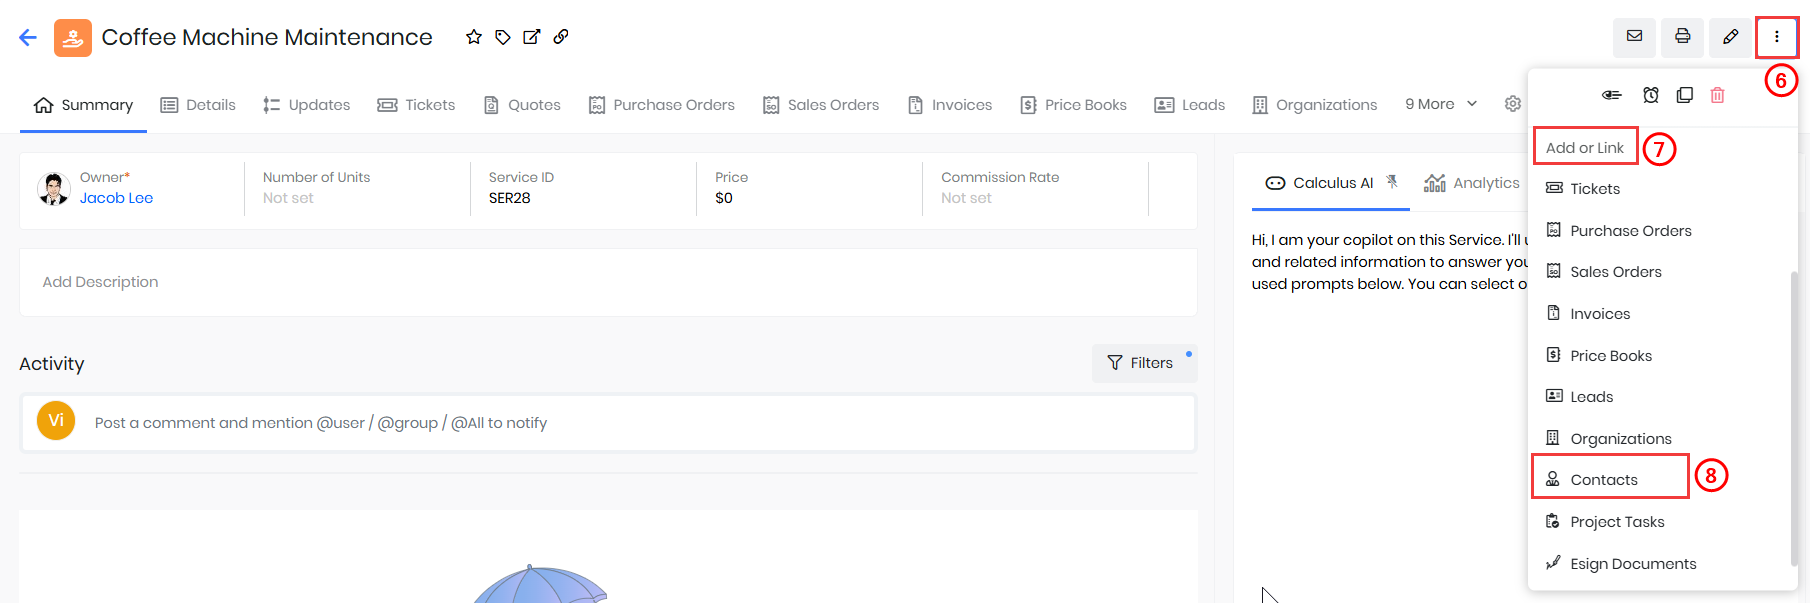
- Click More.
- Go to the Add or Link section.
- Select Contacts. The Contacts window opens.
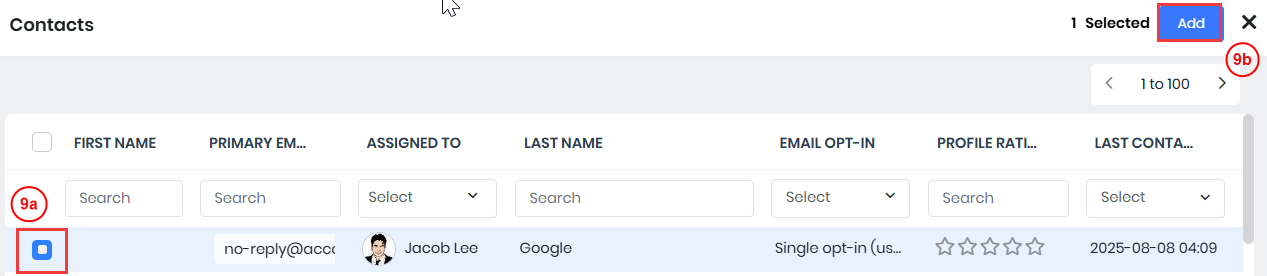
- Select a contact from the list of all available contacts.
- Click Add.
The linked contact will be seen in the Person widget in the Summary View of the services’ record.
Generating a Subscription
The Subscriptions module in Vtiger CRM automates invoice generation and payment processing for subscription-based services.
Follow these steps to generate a subscription:
- Log in to the CRM.
- Click the main Menu.
- Go to Inventory.
- Select Services. The Services page opens.
- Hover and click to open the Service record for which you want to generate a Subscription.
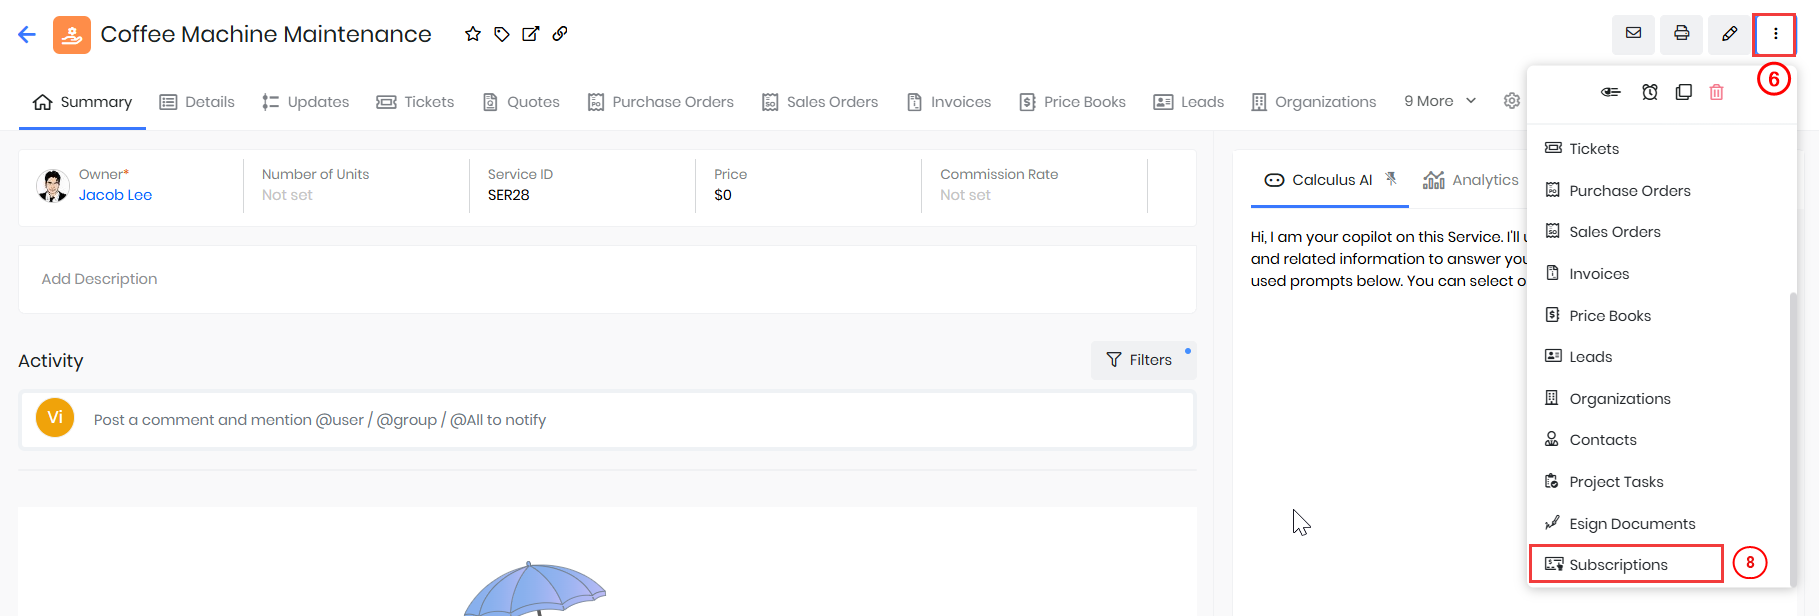
- Click More.
- Go to the Add or Link section.
- Select Subscriptions. The Creating Subscription window opens.
- Enter or select information for the following sections:
- Subscription Information
- Address Details
- Terms & Conditions
- Description Details
- Item Details
- Click Save.
The newly created subscription will be available in the Sales Ops widget of the Summary view in the Service record.
Exporting and Printing a Service Record
Follow these steps to export a service:
- Log in to the CRM.
- Click the main Menu.
- Go to Inventory.
- Select Services. The Services page opens.
- Hover and click to open the Service record you want to export.

- Click the radio button.
- Click the Export icon. The Export window opens and displays multiple options.
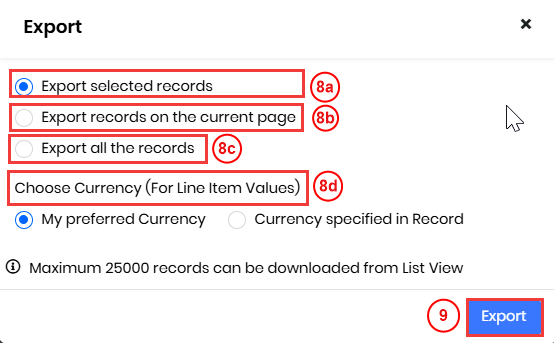
- Select any one of the following options:
- Export Selected Records - Select this option to export the record.
- Export records on the current page - Select this option to export records on the current page.
- Export all the records - Select this option to export all the data in all the pages of the SO module.
- Choose Currency (for Line items)
- Click Export.
The exported record will be saved on your local system.
Printing a Service Record
You can print a record directly from the List View or from the record Summary View.
You can also:
- Change the template before printing a Service record by clicking the Choose Template dropdown in the Print Service screen.
- Customize the template for a specific Service by clicking the Customize button.
To learn more about List View, click here.
Changing the Category of a Service Record
You can change the category of a service record by going to its Details View > Service Details section.
Follow these steps to change a service's category:
- Log in to the CRM.
- Click the main Menu.
- Go to Inventory.
- Click Catalog > Services. The Services page opens.
- Select and click to open the Service record whose category you want to modify. The Summary View opens.
- Click Details in the top menu bar.
- Look for the Service Details section > Category field.
- Select the desired category from the picklist.
- Click Save.
To learn more about Services, click here.
Ways to View a Service Record
In Vtiger CRM, you can view service records in the List View, Kanban View, and Grid View. You can view individual records and their details in the Summary and Details Views.
List View in Services
You can make the List View the default View. By default, this screen will be displayed when you click the Services tab. This view sorts and lists all Service records based on. You view the owner of the record, who or when the record was last modified, etc.Columns in List View
The columns that are visible by default in the List View are :- Service Name- Displays the name of the service.
- Usage Unit- Displays the usage duration of the service.
- Price- Displays the amount chargeable for the service.
- Number of Units- Displays the number of units that have to be serviced.
- Category- Displays the category under which the service is created.
- Owner-Displays the user to whom the service is assigned.
List View Actions
You can perform many quick actions, such as Edit, Delete, Export, Comment, etc., on the Service’s records in the List View. To learn more about List View actions in Vtiger CRM, click here.Note: You can mass-edit the Service Taxes field values from the List View.
Summary View
Summary View is the view that appears when you click a particular record displayed in the List View. The Summary View displays all key information for a selected record.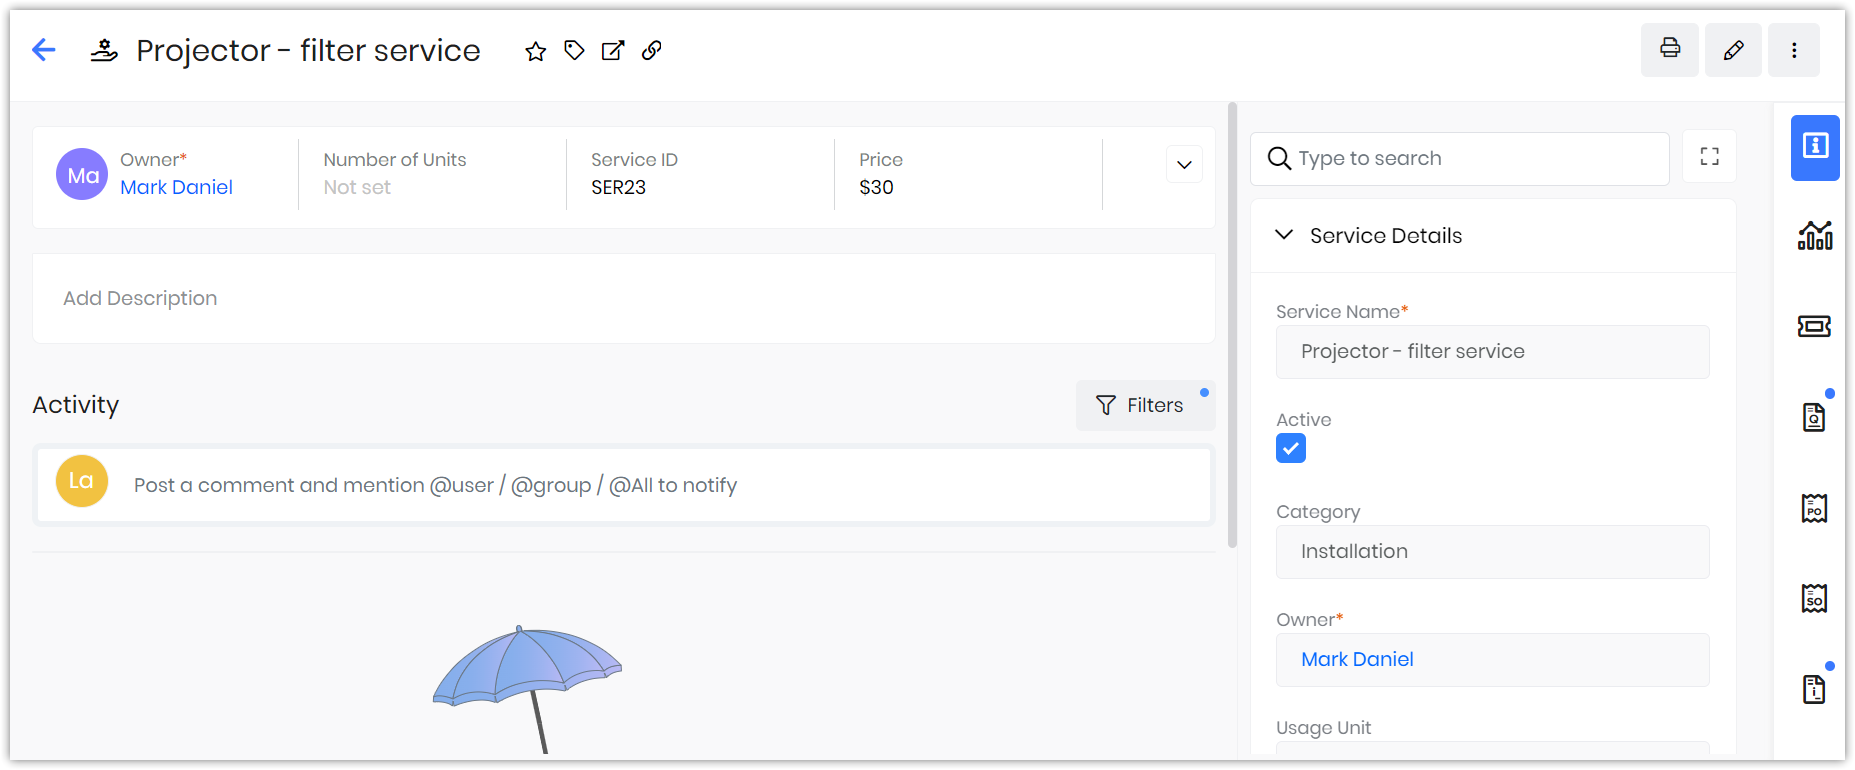
Summary View Actions
- Follow: You can follow any service record to get updates on all the activities performed on that record.
- Tags: You can add tag names to the record to identify the record easily.
- Print: You can print the service record or save it as a PDF for future reference.
- Duplicate: You can duplicate the current record and have all the details reflected in a new record.
- Delete: You can delete a record by clicking this button.
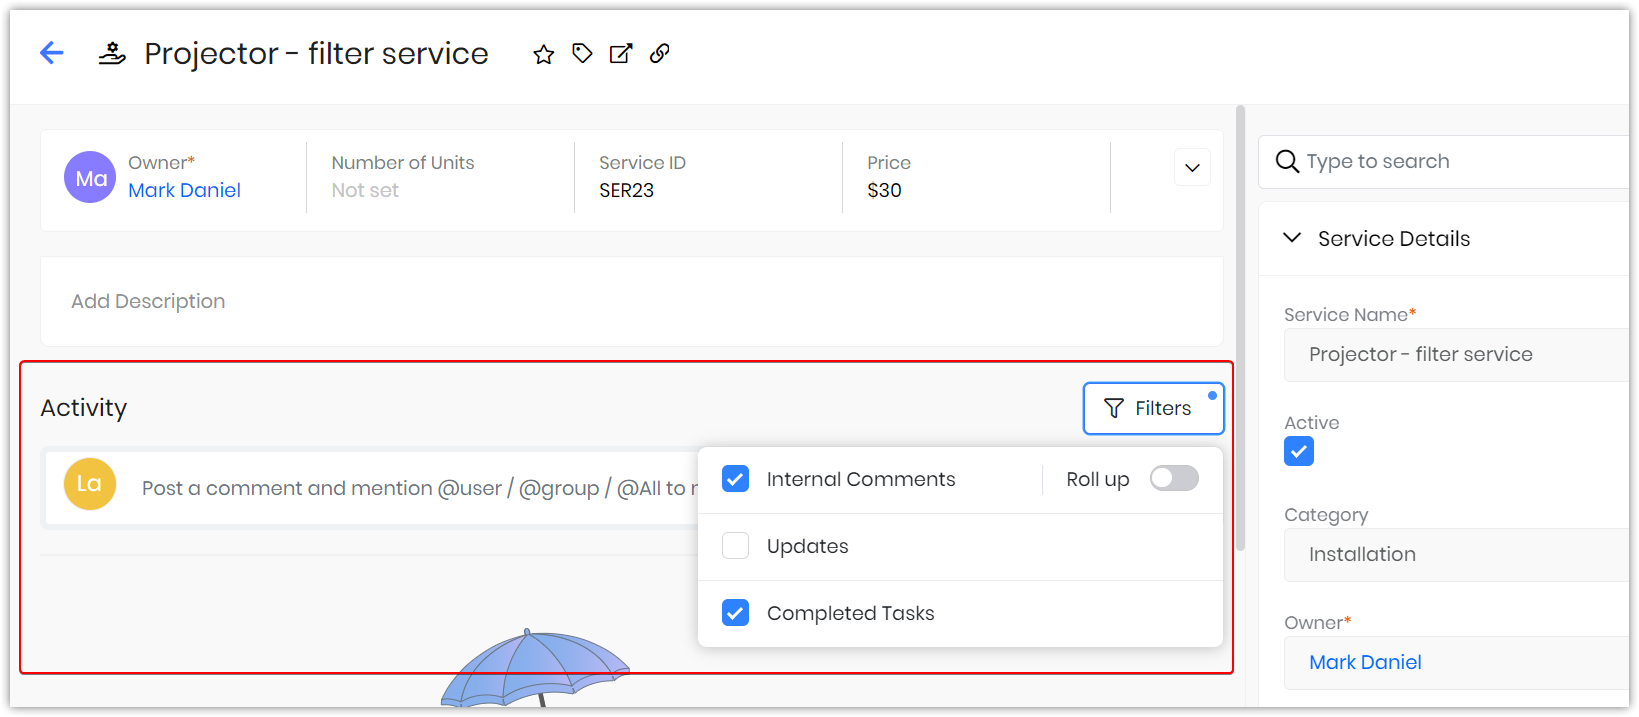
Activity
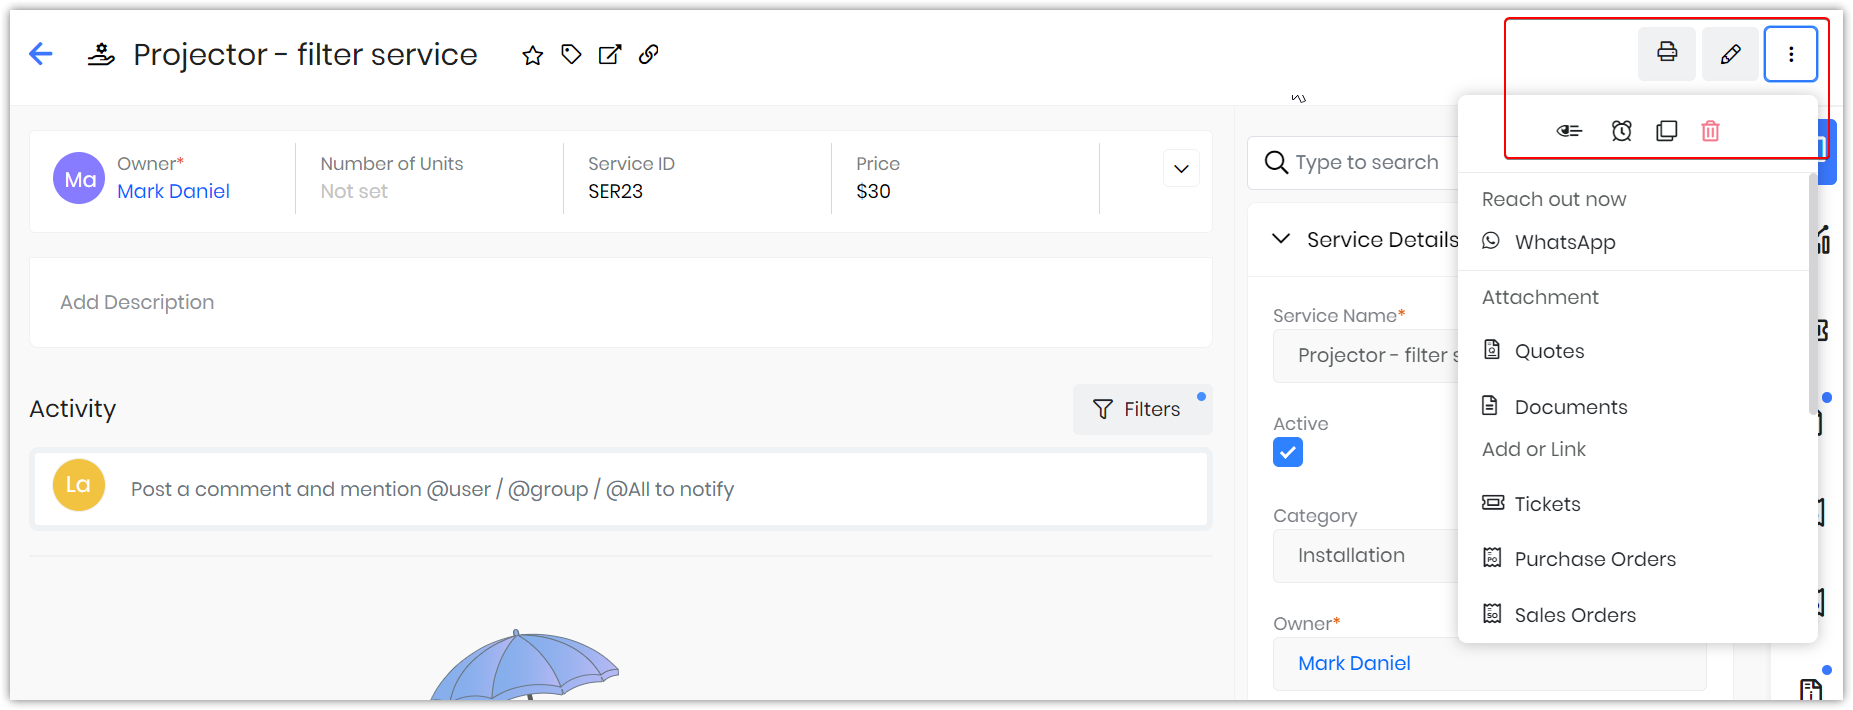
More Icon
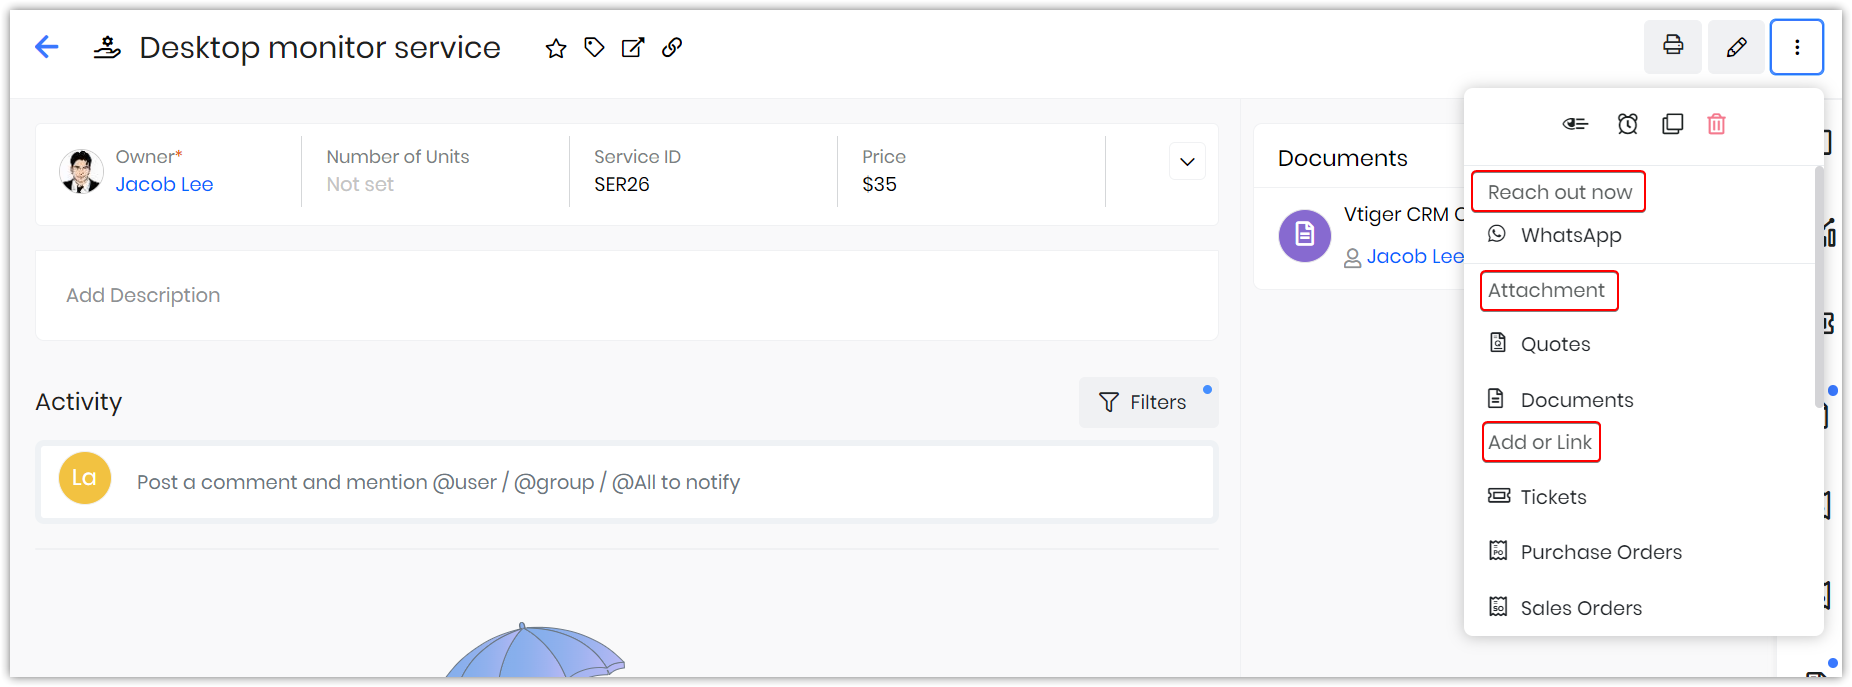
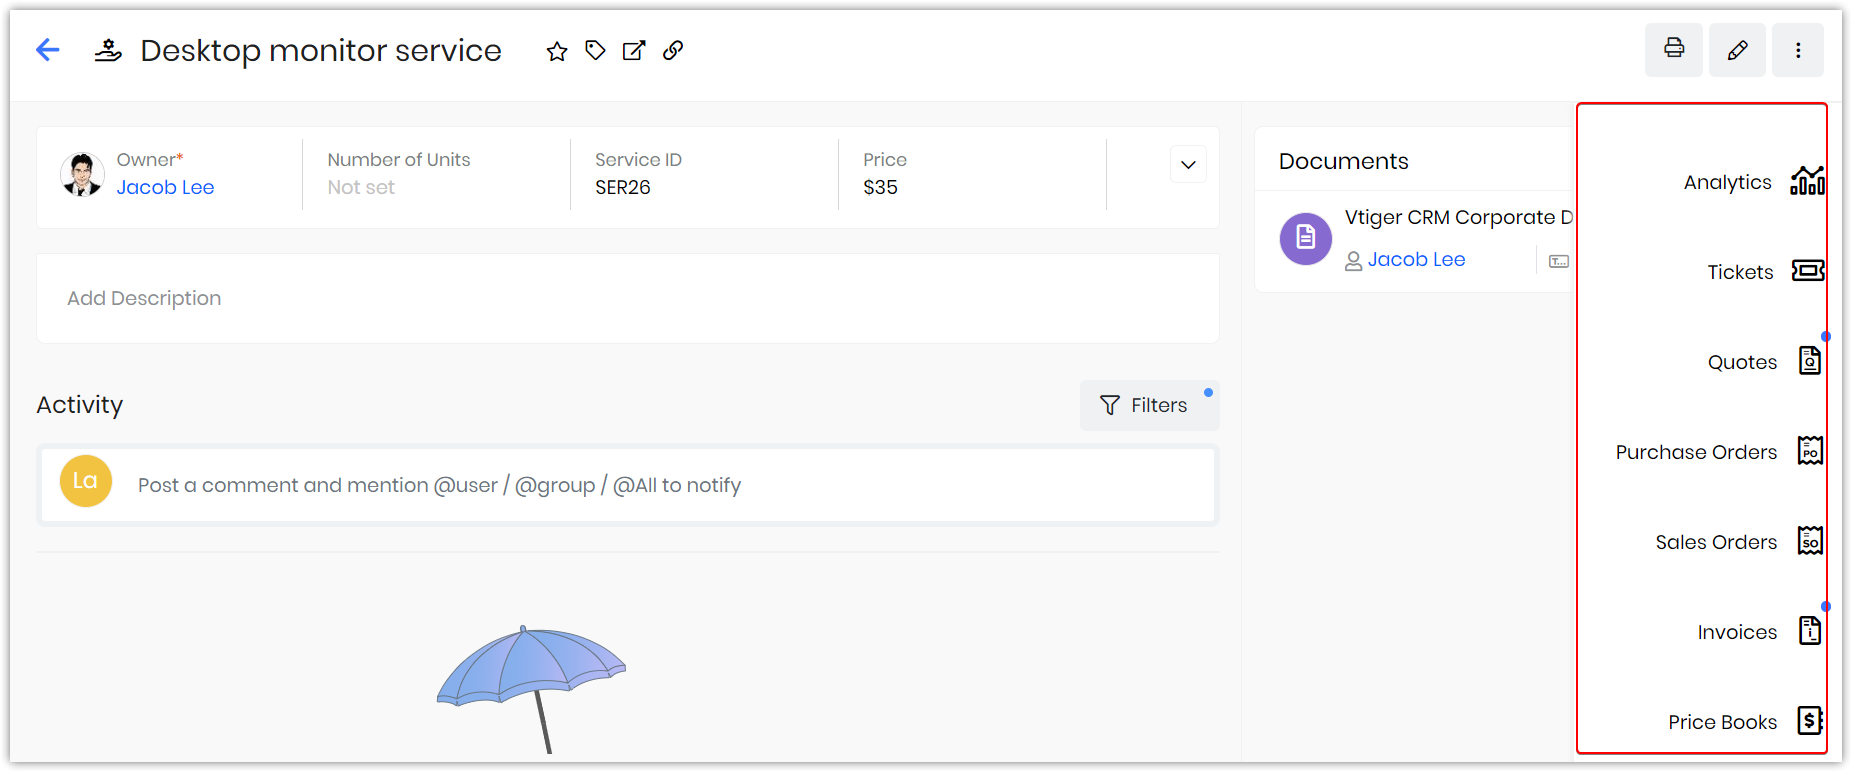
When you click on the More icon on the right-hand top corner of the Summary view, you will see the following:
- Reach out now- You can get in touch with the contact via email, call, or SMS messages.
- Add or Link - You can add or link other modules related to the service.
- Attachment - You can add quotes or documents.
Widgets
- Tasks - All the tasks related to the service are displayed here. You can also add a new task from here by clicking the + button.
- Events - All the events related to the service are displayed here. You can also add a new event from here by clicking the + button.
- Analytics - You can view all the metrics related to the service in the form of charts, mini-lists, etc. You can also create new ones here by clicking the + button.
- Price Books - You can create a new price book or add an existing one. You can also view the details of the related price book here.
- Organizations - You can create a new organization or add an existing organization to the service. All the related organization details are displayed here.
- Contact - You can create a new contact or add an existing contact to the service. All the related contact details are displayed here.
- Deals - You can create a new deal or add an existing deal to the service. All the related deal details are displayed here.
- Documents - You can create a new document or add an existing document to the service. All the related document details are displayed here.
- Issues - You can create a new case or add an existing case to the service. All the related case details are displayed here.
- WhatsApp - You can send WhatsApp messages to the user. All WhatsApp conversations with the user are displayed here.