Articles in this section
Managing Sales Orders
Feature Availability
Vtiger Editions: One Growth | One Professional | One Enterprise | One AI
Introduction to Sales Orders
The Sales Order is a document sent to the customers that confirms the sale of products or services. When the customer accepts the document, the seller is obligated to deliver the specified goods on the stipulated date and at the agreed-upon price. A Sales Order comprises the following elements: Sales Order number, Purchase Order, Recurring Invoice, Billing and Shipping Addresses, Products or Services, Prices, taxes, and other relevant details.
When the customer agrees to the quote, they will send a Purchase Order (PO) that contains all the details related to the deal. The seller generates the Sales Order (SO) and sends it to the customer for further processing.
Sales Order relationship with other modules:
- The Quote is converted directly into the Sales Order.
- The Sales Order is the master document that triggers the creation of both the Delivery Note and the Invoice.
- The status of the Delivery Note is directly updated to reflect the delivery status of the Sales Order.
- The Invoice is the document used to track the financial closure of the order.
What Affects a Sales Order in Vtiger?
Several factors impact the creation and fulfillment of a Sales Order:
- Products and Services: Defines the line items, total value, and the physical goods to be delivered.
- Quantity in Stock: Reflects the available inventory and updates the Quantity in Demand, which in turn affects future stock levels and forecasting.
- Prices: Determines the unit cost from the Price Book and sets the base financial value of the Sales Order.
- Discounts: Applies agreed-upon reductions at the group level (entire order) or individually (per line item).
- Taxes: Calculates applicable taxes based on Tax Regions and the selected Tax Mode (Group or Individual).
- Delivery Notes and Shipments: Specifies the agreed-upon due date and any shipping charges.
Key Features
The key features of Vtiger's Sales Order module are- Quote to Sales Order Conversion: Seamlessly convert an approved Quote into a Sales Order with a single click, carrying over all relevant details.
- Line Item Management: Add products, services, quantities, prices, discounts, and taxes to each order using the intuitive line item editor.
- Module Integration: Linked with Quotes, Invoices, Products, Contacts, Organizations, and Purchase Orders for end-to-end visibility.
- Tax and Discount Configurations: Select between group-level and item-level taxes or discounts to align with local and international pricing regulations.
- Delivery and Payment Terms: Specify shipping methods, due dates, payment terms, and carrier information.
- Send Orders via Email or PDF: Share Sales Orders directly with customers via email or download them as PDFs using templates.
- Workflow Automation: Automate order creation, approvals, and status updates using workflows or blueprints.
Benefits
The benefits of using Vtiger’s Sales Order module are:- Clear Obligation: Formalizes the sale, ensuring that both the buyer and seller agree on the products, prices, and delivery terms.
- Accurate Inventory Control: Updates demand quantities to ensure accurate tracking of stock levels.
- Faster Fulfillment: Quick conversion from Quote to Sales Order speeds up the sales cycle.
- Error-Free Processing: Reduces mistakes in pricing, discounts, taxes, and product details.
- End-to-End Visibility: Links related records, such as Quotes, Invoices, and Deliveries, for easy tracking.
- Simplified Auditing: Keeps all order details in one place for transparent review.
- Compliance Ready: Aligns with tax rules, company policies, and approvals.
In this article, you will learn about:
- Prerequisites for Sales Order creation
- Creating a Sales Order
- Actions in the Sales Order module
- Viewing Sales Order
- Status Dependencies between a Sales Order and a Delivery Note
Key Terminology
| Key Term | Description |
| Sales Order | The Sales Order (SO) is an order issued by a company’s sales team to the customer. A Sales Order may be for products and/or services. |
| Quote | A formal document presented by the company’s sales team to a potential customer, upon request for a quotation. It contains a detailed list of products and services, prices, taxes, terms, and discounts. |
| Invoice | An Invoice, or a bill, is a non-negotiable itemized statement issued for the Products and Services rendered to the customer. |
| Subscriptions | A Subscription is the amount of money that you pay regularly to receive a product or a service. |
| Purchase Order | The first official offer issued by a customer to the company’s sales team. It lists types, quantities, and agreed-upon prices for products or services. |
| Quantity in Stock | Quantity in Stock indicates the number of available products in stock. |
| Quantity in Demand | Quantity in Demand refers to the number of products that customers request. |
| Quantity Ordered | Quantity Ordered indicates the quantity of the product that has been ordered. |
| Shipping Charges | An additional shipping charge is applied for delivering the product to the customer. |
| Price Books | Lets you define different prices for products. The prices of the items can be updated at any time, depending on customer needs. |
| Contact Name | The name of the contact from the organization related to the SO. |
| Organization Name | The organization with which the SO is associated. |
| Status | Displays the present state of the SO.
|
| Billing Address | The address where bills are sent and connected to a credit or debit card. By default, the billing address lists the company address associated with the related deal. |
| Shipping Address | The address where the customer would like the SO to be delivered. By default, the shipping address will be the same as the billing address. |
| Item Name | The name of the product or service that has to be delivered to the customer. |
| Quantity | The count of the products or services that are promised to the customer. |
Configuring Taxes, Charges, and Terms & Conditions
Details such as Taxes, Tax regions, Shipping Charges (if any), and Terms and Conditions are available as picklist values while creating a Sales Order. You need to first configure these in the Settings > Inventory Management section.Note:
- These actions are limited to the Admin role.
- Refer to the Tax management article to learn how to set up Taxes and other Settings.
- Tax regions: Taxes can be set based on a region. Regions are set up in the Tax Settings screen.
- Currency: It is the same as the currency defined in the Deal. The SO Line item currency is the same as the record-level currency.
- Tax mode:
- Group Taxes: If there are multiple products/services in the inventory, group taxes help in populating tax rates according to specific tax calculations.
- Individual Taxes: You can enable this option while creating an SO. You can apply taxes for individual items in an SO by clicking the Configure button in the SO.
- Note: The default Tax mode is set based on the option set in the Tax Management page by the administrator. This can be overridden on an SO level from the SO Configuration pop-up.
- Price Books: Price Books allow you to define different prices for Products and Services. The prices of the items can vary at any time depending on the customers and their needs.
- When a Price Book is selected or changed, the system updates the unit prices of all line items based on the selected Price Book. To know more about Price Books, click here.
- Discounts
- Group Discounts: Similar to Group Taxes, Group Discounts are applied to Products (or) Services on the SO level.
- Individual Discounts: Unlike group discounts, Vtiger CRM offers the option to apply Discounts on an individual item based on its List Price.
- Shipping Charges: Shipping Charges are the additional amount charged by the company’s sales team for shipping the product to the customer.
- Adjustments: This option allows you to round the total amount to the next or previous value based on the decimal number.
Creating a Sales Order
In Vtiger CRM, you can create a Sales Order from the following screens:
- The Sales Orders List View
- A Deal record Summary View
- + Quick Create option (available on all screens on the CRM)
From Sales Orders List View
You can use the +Add Sales Order button to create a new SO. You can find it in the top right corner of the Sales Orders List View.
Follow the steps below to create an SO:
- Log in to the CRM.
- Go to the Main Menu.
- Go to the Inventory tab.
- Select the Sales Orders module.
- Click the +Add Sales Order button. The Creating Sales Order window opens.
- Enter or select the details for the following sections.
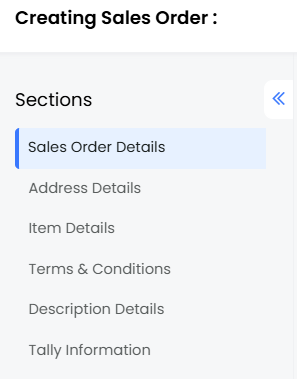
- Step 1: Sales Order Details
- Step 2: Address Details
- Step 3: Item Details
- Step 4: Terms & Conditions
- Step 5: Description Details
- Step 6: Tally Information
Step 1: Sales Order Details (All fields marked with an Asterisk are mandatory.)
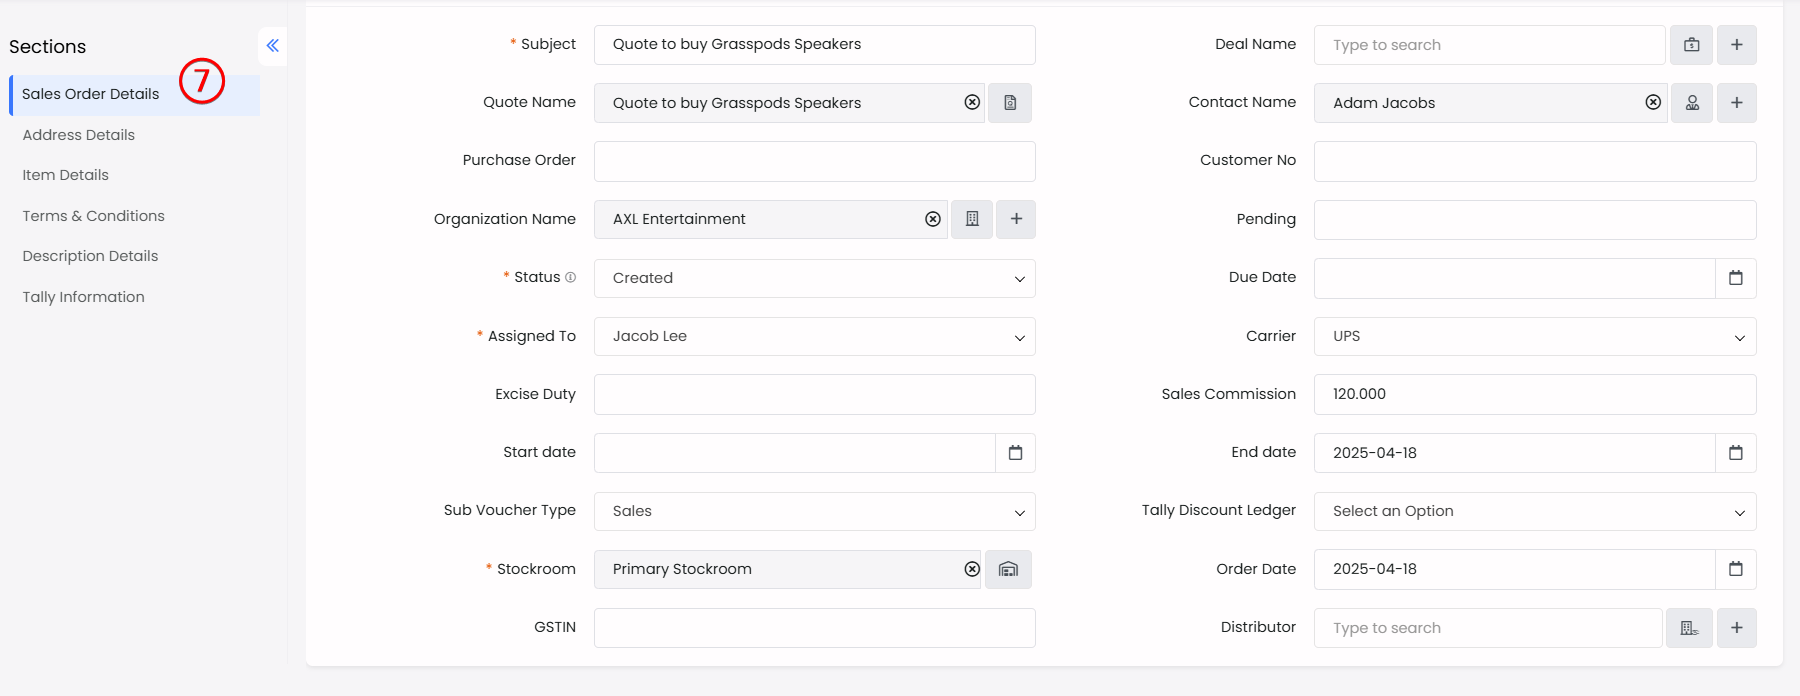
- Enter or select the following information -
- Subject
- Deal Name
- Quote Name
- Contact Name
- Purchase Order
- Customer No
- Organization Name
- Pending
- Status
- Due Date
- Assigned To
- Carrier
- Excise Duty
- Sales Commission
- Start date
- End date
- Sub Voucher Type
- Tally Discount Ledger
- Stockroom
- Order Date
- GSTIN
- Distributor
Step 2: Address Details (All those fields marked with an Asterisk are mandatory fields.)
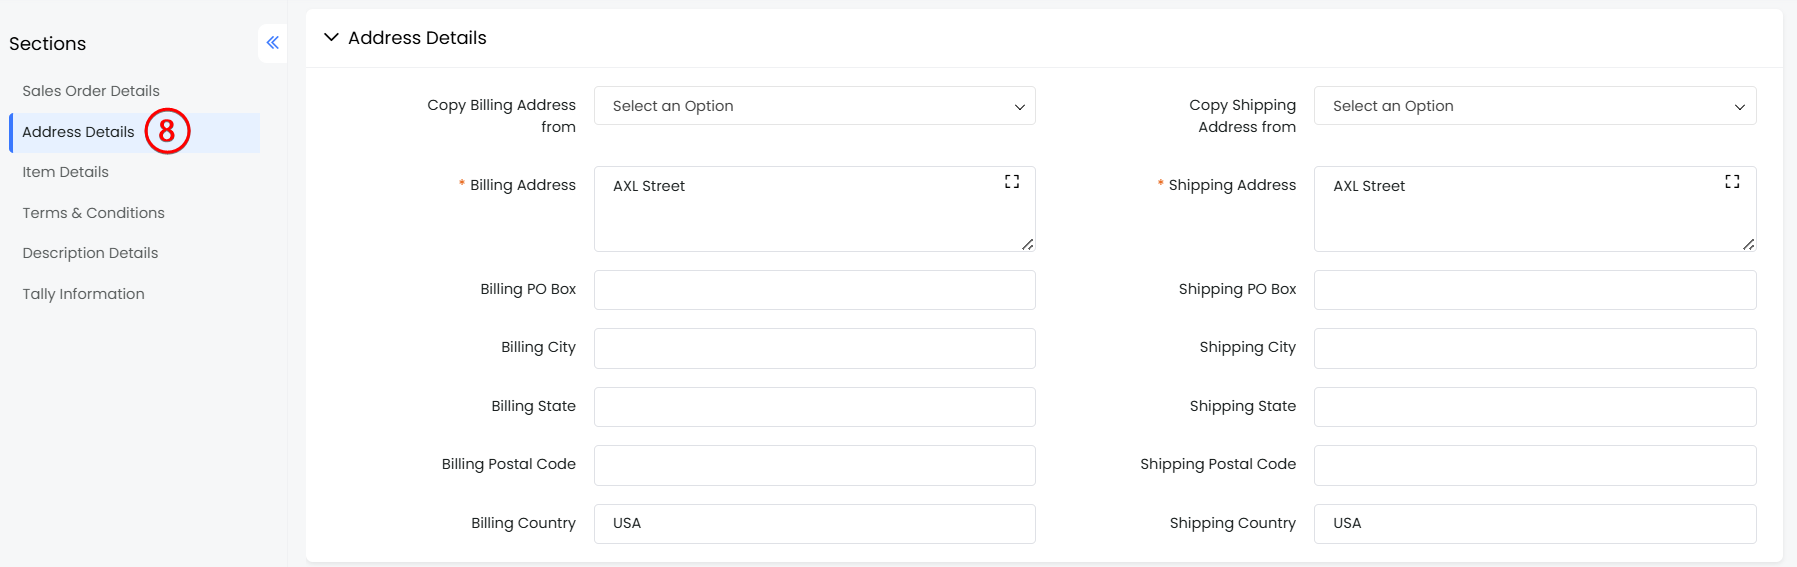
- Enter or select the following information -
- Copy Billing Address from
- Copy Shipping Address from
- Billing Address
- Shipping Address
- Billing PO Box
- Shipping PO Box
- Billing City
- Shipping City
- Billing State
- Shipping State
- Billing Postal Code
- Shipping Postal Code
- Billing Country
- Shipping Country
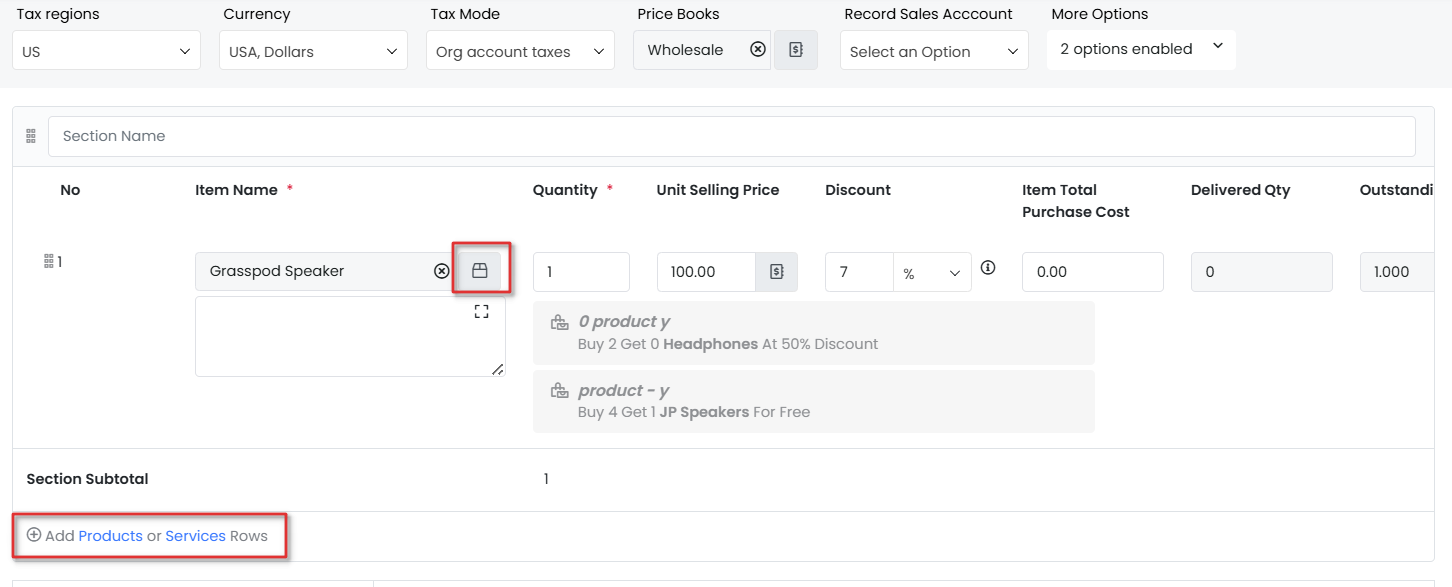
Step 3: Item Details (All those fields marked with an Asterisk are mandatory fields.)
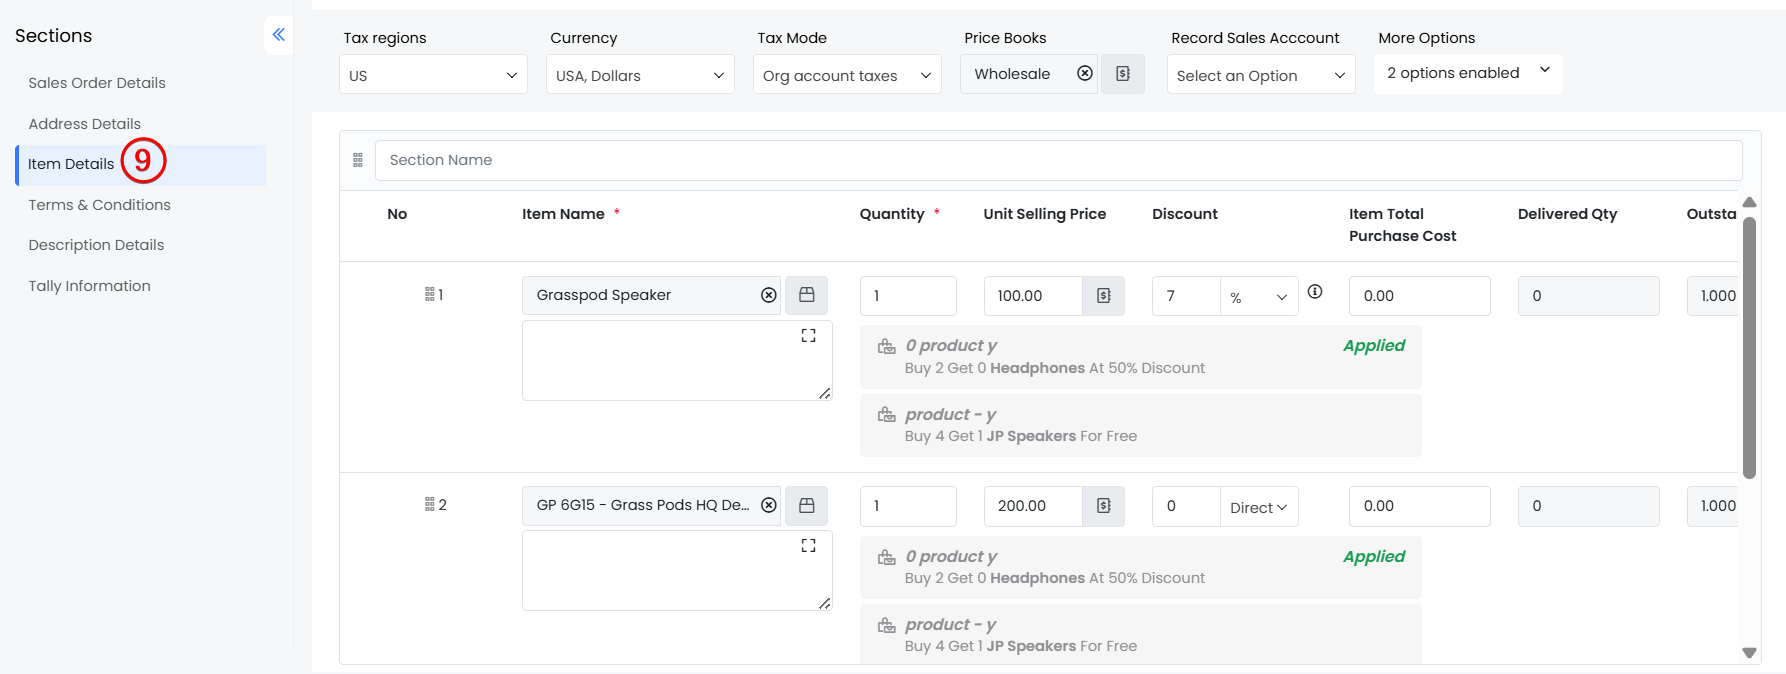
- Enter or select the following information -
- Items Details
- Tax regions: Select the tax region.
- Currency: Select the currency.
- Tax Mode: Select the tax mode.
- Price Books: Select the Price Book.
- Record Sales Account: Select the Sales Account.
- More Options: Select the options listed.
- Note: The More option becomes visible only when more than one line item is added.
- Section Name: Enter a name for the section. This section will display Product or Service details.
- Enter details related to the selected product or service.
- No.
- Item Name
- Quantity
- Unit Selling Price
- Item Total Purchase Cost
- Delivered Quantity
- Outstanding Quantity
- Item Unit Purchase Cost
- Sales Account
- Retuned Quantity
- Date
- Tally Pre Closure Quantity
- Total
- Tax
- Net Price
- Click to + Add Products or Services Rows to add a new row for a product or service.
- Enter details related to the selected product or service.
- Click + Add section to add a new section
- Click - Add Charges to minimize or maximize the list of charges applied.
- Click (+) Taxes on Charges to minimize or maximize the list of taxes applied.
- Items Details
Apply Tax to All Line Items
When using the Individual Tax mode, taxes are calculated separately for each line item in an inventory record. To simplify tax updates across multiple items, the Apply for all items option lets you apply the same tax percentage to all applicable line items at once.
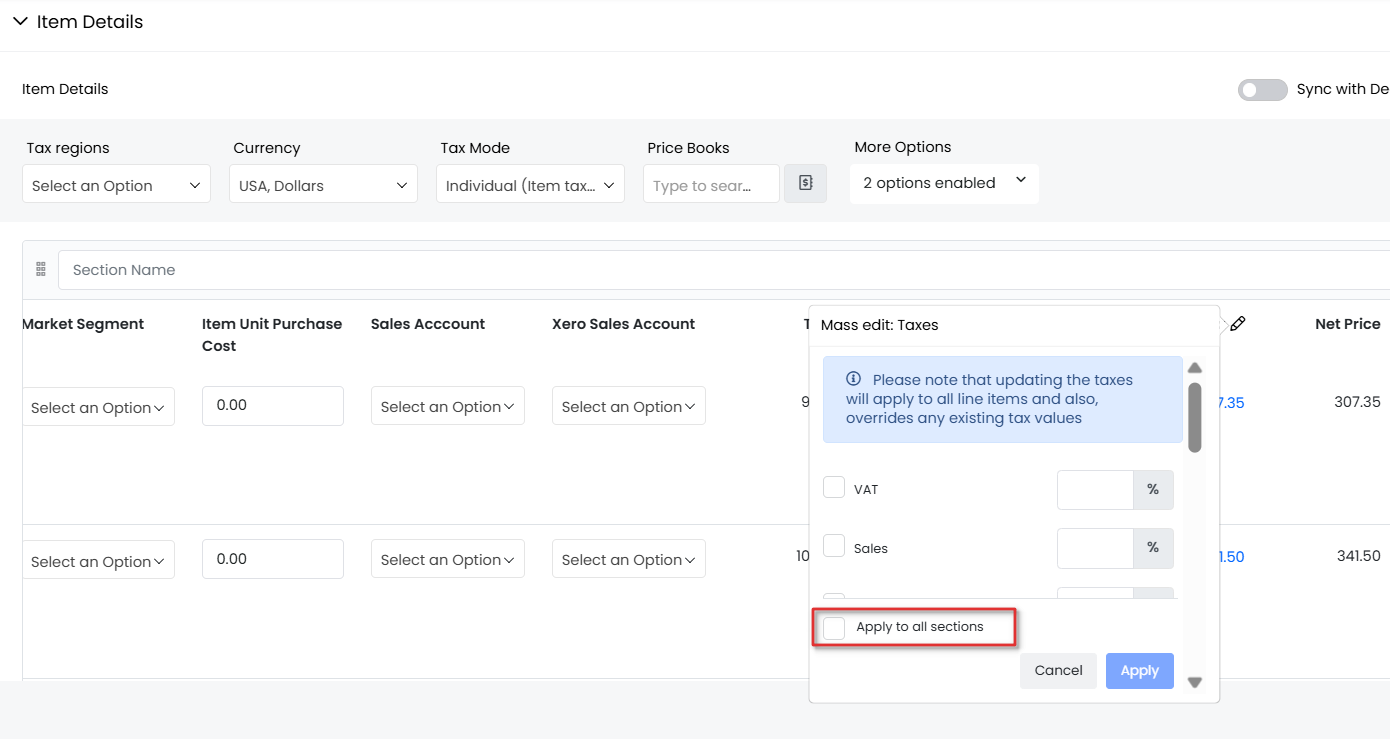
For example, when the Individual Tax mode is enabled, the CRM applies the selected tax to each product individually. If you modify the tax percentage for a specific line item, the Apply to all sections option appears. By selecting this option, the updated tax percentage is applied to all line items for which that tax is enabled.
This feature helps maintain consistency and reduces the need to manually update tax values for every item in the record.
Step 4: Terms & Conditions (All those fields marked with an Asterisk are mandatory fields.)
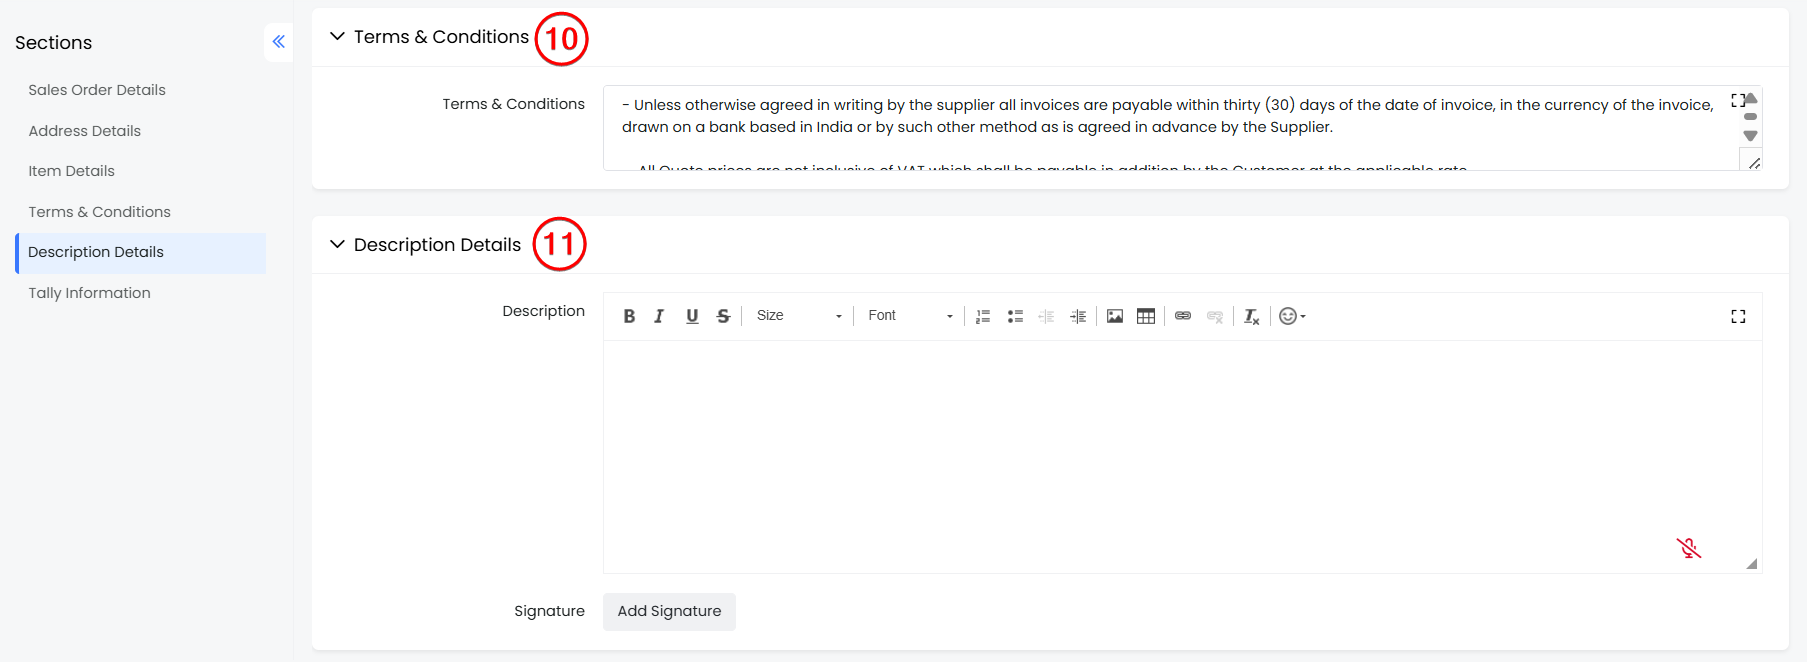
- Enter or select the following information -
- Terms & Conditions: Add your terms and conditions in the textbox.
Step 5: Description Details
- Enter or select the following information -
- Description: Add a description for your sales order.
- Signature: Click Add Signature to add your signature.
Step 6: Tally Information
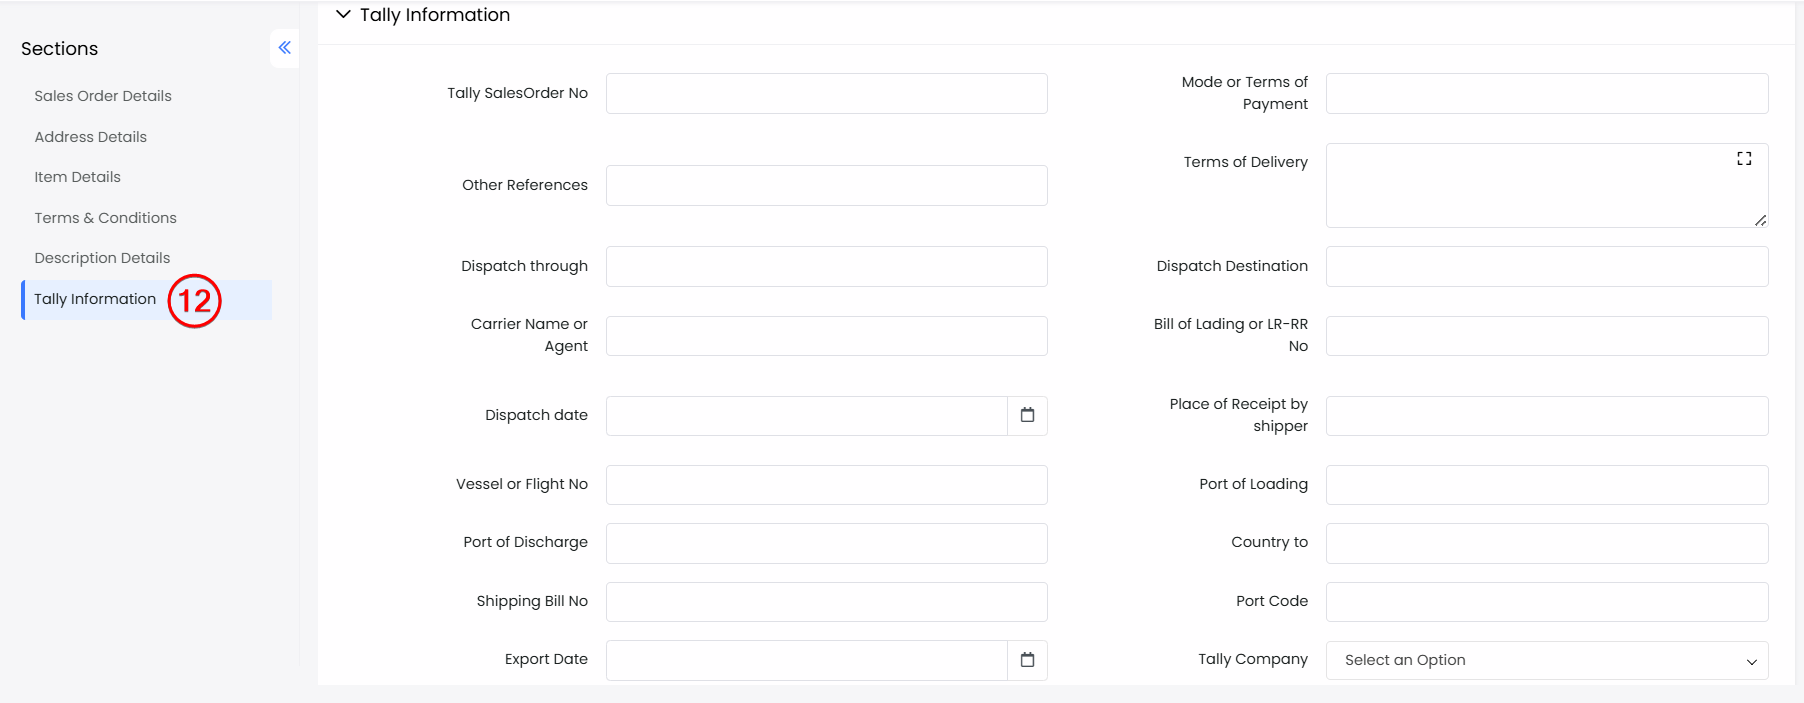
- Enter or select information related to Tally in this section.
- Click Save.
From the Deals Module
You can create an SO from a deal's Summary View by adding a new SO or linking an existing one. This SO will be linked to the Deal record.
Follow these steps to add an SO from a Deal Summary View:
- Log in to the CRM.
- Go to the Main Menu.
- Select the Deals module. The Deals page opens
- Open the deal record for which you want to create an SO. The Summary View opens.
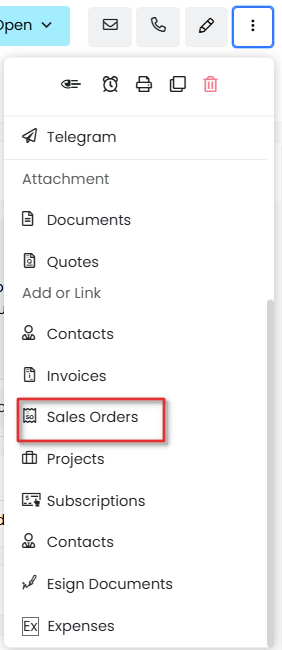
- Click More (Ellipse - three dots) on the top right-hand corner of the screen.
- Scroll down to Add or Link > Sales Orders.
- Click on Sales Orders. The Creating Sales Order window opens.
- Enter or select the details for the following sections.
- Sales Order Details
- Address Details
- Item Details
- Terms & Conditions
- Description Details
- Tally Information
- Click Save.
This newly created SO would be linked to the deal.
From Quick Create
You can use the + Quick Create button to create a new SO. This button is available on all CRM screens.
Follow the steps below to create an SO:
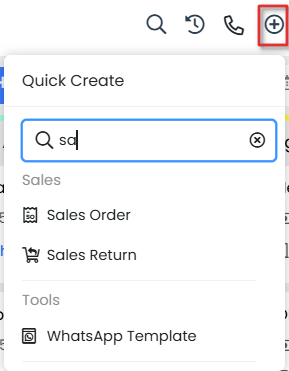
- Log in to the CRM.
- Click + Quick Create.
- Type Sales Orders in the Search field.
- Select Sales > Sales Order. The Creating Sales Order window opens.
- Enter or select the details for the following sections.
- Sales Order Details
- Address Details
- Item Details
- Terms & Conditions
- Description Details
- Tally Information
- Click Save.
Editing the Item Details Block
You can add new line items like a new product or service, or a new section in an existing SO, by editing the Item Details block.
Follow the steps mentioned below to add Line item records:
Adding a Product or Service
Follow the steps below to add a product or service:
- Log in to the CRM.
- Go to the Main Menu.
- Go to the Inventory tab.
- Select the Sales Orders module
- Select and open the record to which you want to add line items. The Summary View opens.
- Click Edit. The Edit page opens.
- Go to the Line Items section.
- Enter or select the following information to add the Line Items:
- Add Product or Service row: Click to add the product or service to the Deal record.
- More: Click More next to the line item number.
- Add Product Row: Add a new product line next to an existing line item.
- Add Service Row: Add a new service line next to an existing line item.
- Add Section: Add a new section to group related line items
- Click Save.
Note: The More option becomes visible only when more than one line item is added.
Adding a new Section
Follow the steps below to add a section:

- Log in to the CRM.
- Go to the Main Menu.
- Go to the Inventory tab.
- Select the Sales Orders module.
- Select any particular SO.
- Click Edit.
- Go to the Item Details block.
- Enter or select the following information to add Sections:
- Add section: Click to add a new Section.
- More: Click More next to the line item number.
- Add Section: Click to add a new section to group related line items.
- Add section: Click to add a new Section.
- Click Save.
Note: The More option becomes visible only when more than one line item is added.
Updating the Quantity in Demand value
Quantity in Demand is a value that describes the number of products that customers request on a regular basis. The value of the Quantity in Demand is dependent on the sales orders and changes based on the conditions listed below:- The quantity in demand increases when a sales order is created.
- The quantity in demand decreases when a sales order is delivered or canceled.
- The quantity in demand also decreases when a sales order is converted to an invoice.
Actions Possible on a Sales Order
You can perform the following actions on a Sales Order:
- Share a Sales Order
- Generate related documents
- Export
- Change the template of a sales order
Sharing a Sales Order
You can share an SO with a customer by sending a link to the SO or by attaching the SO itself.
As a link
Follow these steps to share an SO as a link:
- Log in to the CRM.
- Go to the Main Menu.
- Select the Sales Orders module.
- Open any Sales Order record.
- Click the Do button in the Summary View.
- Select Share.
- Click Share as link. A mail compose window opens with the SO link.
- Enter the recipient's details.
- Click Send.
As an attachment
Follow these steps to share an SO as an attachment:
- Log in to the CRM.
- Go to the Main Menu.
- Select the Sales Orders module.
- Open any Sales Order record.
- Click the Do button in the Summary View.
- Select Share.
- Click Share as attachment. A mail compose window opens with the SO attachment.
- Enter the recipient's details.
- Click Send.
Generate related documents
Add a Document
Use Vtiger’s Documents module to solve the problems of organizing and sharing! It acts as a repository for all the documents that you create or those shared with you by your customers or sales team.
Follow these steps to add a document:
- Log in to the CRM.
- Go to the Main Menu.
- Select the Sales Orders module.
- Open any Sales Order record.
- Click the Do button in the Summary View.
- Click the Add or Create button.
- Select Documents.
- Here, you see two options on your screen:
- Select Documents: To add an existing document, select this option.
- Hover over a record in the list of all existing documents to display the radio buttons.
- Click the radio button on the left side of the record to select the record.
- Click Add Selected located below the list.
- Create Documents: To add a new document, select this option.
- Fill in all the necessary details.
- Click Save.
The linked document will be visible in the Documents widget of the Summary View for the SO record.
Generate an Invoice
An Invoice or bill is a non-negotiable, itemized statement issued for the products or services rendered to a customer.
Follow these steps to generate an Invoice:
- Log in to the CRM.
- Go to the Main Menu.
- Select the Sales Orders module.
- Open any Sales Order record.
- Click the Do button in the Summary View.
- Click Add or Create.
- Select Invoices.
- Enter all the necessary details and click Save.
Generate a Purchase Order
A Purchase order (PO) is the first official offer issued by a customer to the company’s sales team, indicating types, quantities, and agreed prices for products or services.Follow these steps to generate a PO:
- Log in to the CRM.
- Go to the Main Menu.
- Select the Sales Orders module.
- Open any Sales Order record.
- Click the Do button in the Summary View.
- Click Add or Create.
- Select Purchase Orders.
- Enter all the necessary details and click Save.
Generate a Delivery Note
Delivery Notes (DN) are a document accompanying a shipment of goods that lists the description and quantity of the goods delivered.Follow these steps to generate a DN:
- Log in to the CRM.
- Go to the Main Menu.
- Select the Sales Orders module.
- Open any Sales Order record.
- Click the Do button in the Summary View.
- Click Add or Create.
- Select Delivery Notes.
- Enter all the necessary details and click Save.
The newly created DN will be available in the Sales Ops widget of the Summary view in the SO record.
Generate a Subscription
Follow these steps to generate a subscription:
- Log in to the CRM.
- Go to the Main Menu.
- Select the Sales Orders module.
- Open any SO record.
- Click the Do button in the Summary View.
- Click Add or Create.
- Select Subscriptions.
- Enter all the necessary details and click Save.
The newly created subscription will be available in the Sales Ops widget of the Summary view in the SO record.
Export
Follow these steps to export an SO:
- Log in to the CRM.
- Go to the Main Menu.
- Select the Sales Orders module.
- In the List View, hover over any SO record to display the radio button on the left side.
- Click the radio button.
- Click the Export button.
- Select any one of the following options:
- Export Selected Records - This option exports only the selected record.
- Export data in the current page - This option exports the records on the current page.
- Export All Data - This option exports all data from all pages of the SO module.
The exported record will be saved on your local system.
Follow these steps to print an SO:
- Log in to the CRM.
- Go to the Main Menu.
- Select the Sales Orders module.
- Open any SO record.
- Click the More button.
- Click the Print button.
- You can perform any of the following options:
- Edit & Export- You can edit the SO and export it to your local system.
- Email with PDF- You can email the SO record as a PDF to the contact.
- Print- You can print the SO and keep a hard copy.
- Save as PDF - You can save the SO as a PDF file on your local system.
Note: You can also print a record directly from the List View. To learn more about List View, click here.
Changing the template of a Sales Order
There are two ways to change the template of an SO.
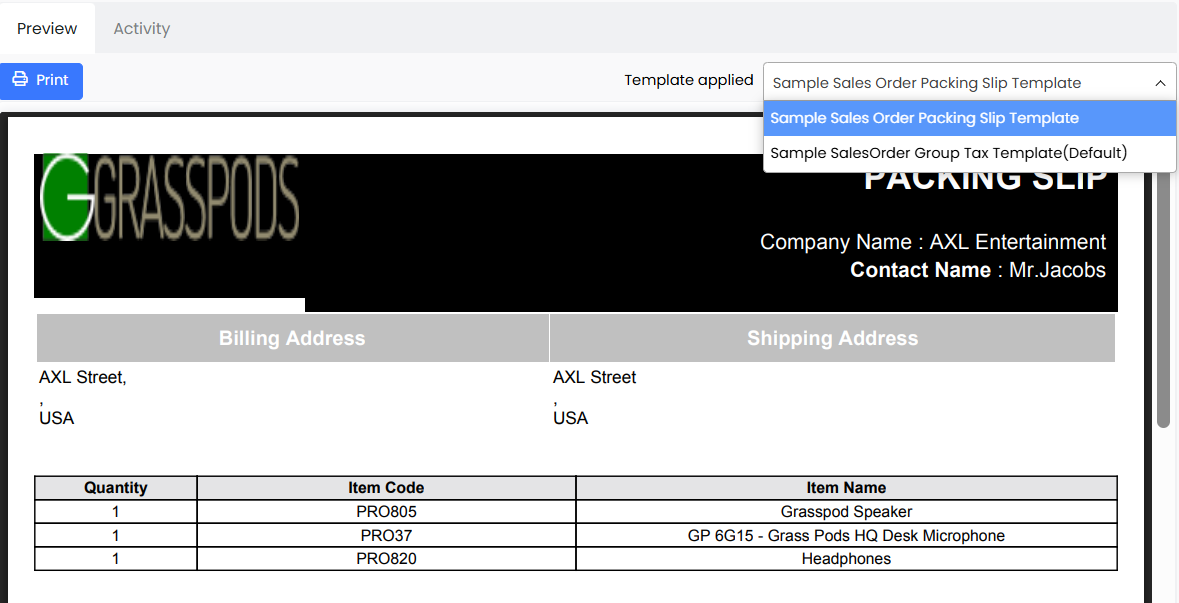
- From the Print Sales Order screen. This is a temporary change only until the SO is printed.
- From the Settings widget. This is a permanent change and will be applied to the SO immediately.
Follow these steps to change the template of an SO from the Print Sales Order screen:
- Log in to the CRM.
- Go to the Main Menu.
- Select the Sales Orders module.
- Open any SO.
- Click the More button.
- Click the Print button.
- Select the template you want from the list of all templates.
- You can perform any of the following options:
- Edit & Export- You can edit the SO and export it to your local system.
- Email with PDF- You can email the SO record as a PDF to the contact.
- Print- You can print the SO and keep a hard copy.
- Save as PDF - You can save the SO as a PDF file on your local system.
Follow these steps to change the template of an SO from the Settings widget:
- Log in to the CRM.
- Go to the Main Menu.
- Select the Sales Orders module.
- Open any SO.
- Go to the Settings Widget.
- Click the Template applied drop-down.
- Select the template of your choice.
The template will be applied to the SO instantly.
Splitting a Sales Order into Different Records
You can split a Sales Order (SO) into different order records, which are:- For delivered products.
- For outstanding (undelivered) products.
- Removing selected items/quantities
- Recalculating totals and subtotals
- You may be able to deliver only 60% of the items listed in a Sales Order.
- The customer may request you to create a new sales order for the undelivered items by transferring them from the older sales order.
- With the new enhancement, you will be able to split the sales order into two: a new sales order to deliver the remaining items, and the original one with the status set to 'fully delivered'.
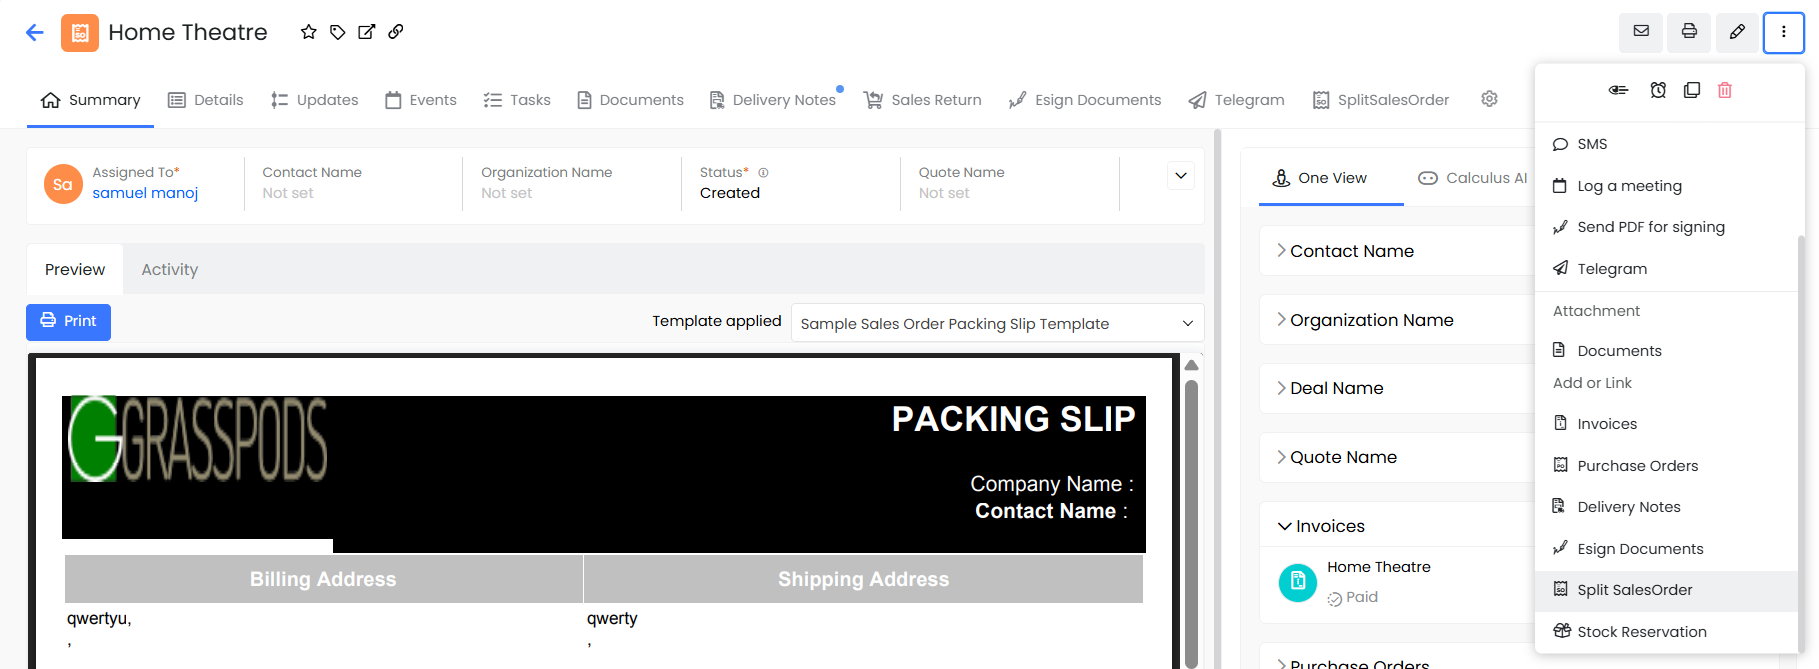
Follow the steps below to split a sales order:
- Log in to the CRM.
- Go to the Main Menu.
- Click Sales Orders in the Inventory app.
- Go to a Sales Order record that is partially delivered.
- Click the More option at the top right.
- Click Split Sales Order in the Summary View of a Sales Order record.
Viewing Sales Order Details
List View in Sales Orders
List View sorts and lists all SOs based on the last modified SO.Columns in List View
The columns that are visible by default in the List View are :- Subject- Displays the name of the SO.
- Organization Name- Displays the name of the organization to which the SO is created.
- Quote Name-Displays the name of the quote to which the SO is related.
- Total-Displays the amount mentioned in the quote.
- Assigned To- Displays the user to whom the SO is assigned.
List Actions
You can perform various quick actions, such as Edit, Delete, Email, and Follow, on SO records in the List View.To learn more about List View actions in Vtiger CRM, click here.
Summary View
Summary View is the view that appears when you click a particular record from the List View. The Summary View displays a collection of all the key information of the record. The Summary View can be divided into four sections. Each section has a particular functionality.Summary View Actions
- Follow: You can follow any SO record to get updates on all the activities performed on that record.
- You can add tag names to the record to easily identify it.
- Print: You can print the SO or save it as a PDF for future reference.
- Duplicate: You can duplicate the current record and have all the details reflected in a new record.
- Delete: You can delete a record by clicking this button.
SO document: The generated Sales Order will be displayed here.
Widgets
- One View - All modules related to the SO are displayed here.
- Tasks - All the tasks related to the SO are displayed here. You can also add a new task from here by clicking the + button.
- Events - All events related to the SO are displayed here. You can also add a new event from here by clicking the + button.
- Activity - All the activities made on the SO are displayed here. Here you can add comments related to the SO.
- Analytics - You can view all metrics related to the SO in various visual representations, including charts and mini-lists. You can also create new ones here.
- Documents - You can create a new document or add an existing document to the SO. All the related document details are displayed here.
- Sales Ops - You can create a new delivery note or add an existing one to the SO. All the related delivery note details are displayed here.
- Settings - You can change the template of the SO here.
Grid View
Grid View is a table-like layout that shows data in rows and columns, similar to a spreadsheet. It allows you to view and edit multiple records simultaneously on the same page. You can edit specific field details in a record, just like editing a cell in a spreadsheet. The view resembles the List View but allows for additional actions, such as editing, rearranging columns, and bulk updates.
One View in Sales Orders
The One View widget is a one-stop destination for viewing all the important modules related to an SO.
The One View widget in the SO module will show the following details:
- Related Contact Details - Parent Contact Details.
- Related Organization details - The parent company, Acme, is displayed in this widget.
- Related Deal data - Parent Deal from which this SO is created.
- Related Invoice - Related Invoice details generated from this SO.
- Related Purchase Order - Related PO details generated from this SO.
To learn more about One View in Vtiger CRM, click here.
Status dependencies between SO and DN
- The status of an SO will change from New to Delivery Initiated when a DN is in the Open state.
- Look out for the Outstanding field. For example, if there is an SO for ten items and you create a DN for six of those items, the value of the Outstanding field will be set to four in both the SO and the DN.
- If the status of a DN is Delivered, then the status of the SO will be:
- Partially delivered - if the outstanding field value is more than zero.
- Fully delivered - if the outstanding field value is zero.
- The status of the SO will be set to New if the DN is cancelled.
To know more about Delivery Notes, click here.