Articles in this section
Creating Delivery Notes
Feature Availability and Limits
Vtiger Editions: One Enterprise
Introduction to Delivery Notes
Delivery Notes (DN) are documents accompanying a shipment of goods that list the description and quantity of the goods delivered.
Sales order management facilitates the creation of a delivery note for a sales order associated with a customer, as well as the generation of an invoice upon order fulfillment.
Key Features of Vtiger Delivery Notes
- Automated Creation: Generate delivery notes directly from Sales Orders or Invoices to ensure accurate order fulfillment.
- Real-time Inventory Updates: Automatically update stock levels when items are dispatched.
- Linked Records: Maintain a complete view by linking delivery notes with related Sales Orders, Invoices, and Products.
- Partial or Full Shipments: Manage complete or partial deliveries based on product availability and customer needs.
- Customizable and Shareable Documents: Create professional, printable delivery notes using templates and share them via email for seamless collaboration.
Benefits of Delivery Notes
The benefits of the Delivery Notes are:
- Keep track of all the items you delivered to your customers.
- Easy creation of an invoice from the sales order.
- Automatic update of the product stock.
In this article, you will learn about:
- Delivery Notes
- Creating a Delivery Note
- Status dependencies between SO and DN
- Actions in the Delivery Notes
- Views in the Delivery Notes module
Note: The modules—Credit Notes, Delivery Notes, Receipt Notes, and Bills —are part of the Inventory Add-On Extension. To use these modules, install this extension by going to Settings > Extension Store.
Important Fields in Delivery Notes
|
|
|
|
|
|
|
|
|
|
|
|
|
|
|
|
|
|
|
|
|
| Unit Purchase Cost | The Unit Purchase Cost field in Delivery Notes will copy the value of the Item Unit Purchase Cost from the related Sales Order.
|
Creating a Delivery Note
Listed below are the ways to create a DN.
From Delivery Notes’ List View
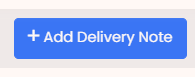
You can use the +Add Delivery Note button to create a new DN. You can find it in the top right corner of the Delivery Notes List view.
Follow the steps below to create a Delivery Note:
- Click the Main Menu icon.
- Go to the Inventory tab.
- Select the Delivery Notes module.
- Click the +Add Delivery Note button.
- Fill in all the necessary details.
- Click Save.
Note:
- While creating a DN, first select the SO and then edit the name of the DN.
- You cannot unlink a DN from an SO.
From Sales Order
You can create a DN through a quote with the Related tab:
Follow these steps to add a DN from the Related tab in SO:
- Click the Main Menu icon.
- Go to the Inventory tab.
- Select the Sales Orders module.
- Open any particular SO.
- Click the More icon.
- Click on Delivery Notes.
- Enter all the details.
- Click Save.
Note: You can customize and add or remove fields by going to the Module Layouts and Fields under Settings.
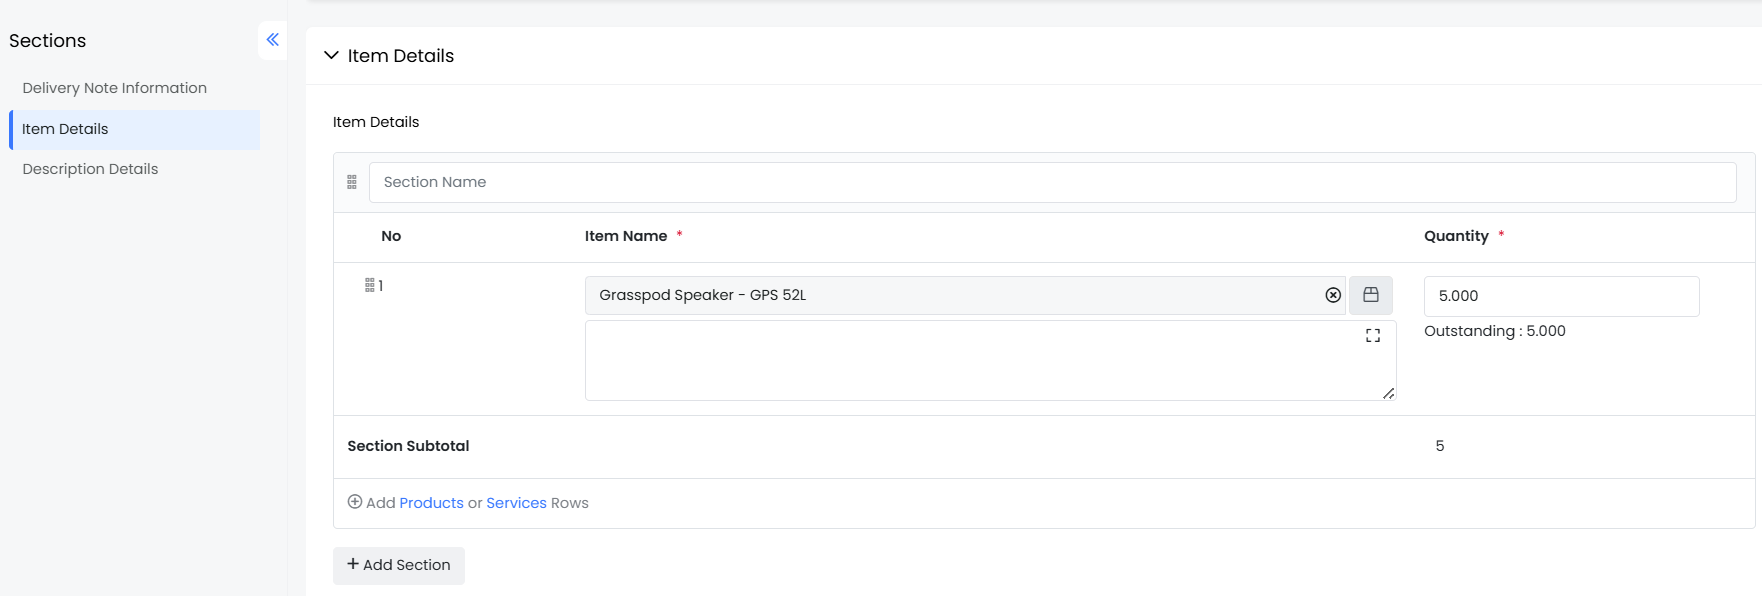
Adding Line Item Records
You can create new Line Item records, like a new product or service, or a new section in the existing DN by editing the Item Details block.
Follow the steps mentioned below to add Line item records:
How to add a new Product or Service
Follow these steps to add a product or service:
- Log in to the CRM.
- Click the Main Menu icon.
- Go to the Inventory tab.
- Select the Delivery Notes module.
- Select and open the record to which you want to add line items. The Summary View opens.
- Click Edit. The Edit page opens.
- Go to the Line Items section.
- Enter or select the following information to add the Line Items:
- Add Product or Service row: Click to add the product or service to the Deal record.
- More: Click More next to the line item number.
- Add Product Row: Add a new product line next to an existing line item.
- Add Service Row: Add a new service line next to an existing line item.
- Add Section: Add a new section to group related line items
- Click Save.
Note: The More option becomes visible only when more than one line item is added.
How to add a new Section
Follow these steps to add a section:- Log in to the CRM.
- Click the Main Menu.
- Go to the Inventory tab.
- Select the Delivery Notes module.
- Select any particular Delivery Notes.
- Click Edit.
- Go to the Item Details block.
- Enter or select the following information to add Sections:
- Add section: Click to add a new Section.
- More: Click More next to the line item number.
- Add Section: Click to add a new section to group related line items.
- Click Save.
Note:
- The More option becomes visible only when more than one line item is added.
- The products or services you select in the DN will depend on the SO that you have chosen.
- You cannot add the same product or service multiple times in a DN.
Product Linking by Name
When creating Delivery Notes, you can add products to line items using just the Product Name.
- If you create an Inventory record with a Product Name for a line item that already exists, the API links that product to the Inventory record without requiring the Product ID.
- If the Product Name you provide in the Line Item block does not exist, the CRM will automatically create a new product with the given name and link it to the Inventory record.
- The CRM allows you to link multiple line items to existing products based on the Product Name (without needing Product IDs).
Key Benefits:
- Eliminates the need to retrieve or manage Product IDs.
- Speeds up record creation and simplifies product management.
- Ideal when Product Names are available but IDs are not.
Status dependencies between SO and DN
- When the DN is created and is in the Open state, the status of SO will be changed to Delivery Initiated.
- Look out for the Outstanding field! For example, if there is an SO for ten items and you create a DN for six of those items, the value of the outstanding field will be set to four in both the SO and the DN.
- If the status of a DN is Delivered, then the status of the SO will be
- Partially delivered - if the outstanding field value is more than zero.
- Fully delivered - if the outstanding field value is zero.
- If the DN is cancelled, the status of the SO will be set to 'New'.
To know more about Sales Orders, click here.
Note:- You can re-open a Delivered DN.
- You cannot delete or unlink a Delivered or Cancelled DN.
- You can add additional products that are not listed in the original Sales Order. This will help you deliver multiple products from different Sales Orders in the same Delivery Note.
- Current Case: When delivering a product along with its Delivery Note, you may also want to include products that are not listed in the original Sales Order. This will require you to update the Sales Order and make the other Product a part of the Sales Order and add it to the Delivery Note.
- As per Stock Management settings, if you need to reduce the Quantity in stock in the Delivery Notes, the CRM will reduce the quantity for the additional product that you select.
- The Unit price and Purchase cost from the product are auto-copied to the delivery notes' list price fields.
Actions Possible on a Delivery Note
You can perform the following actions on a DN:
Share a Delivery Note
As link
- Click the Main Menu icon.
- Go to the Inventory tab.
- Select the Delivery Notes module.
- Open any Delivery Notes record.
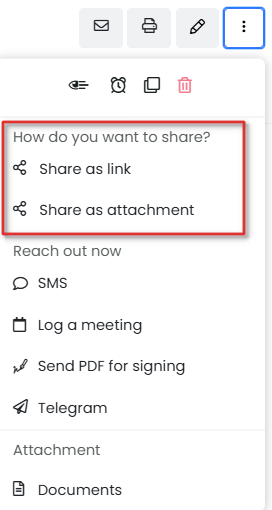
- Click the More icon in the Summary View.
- Select Share.
- Click Share as link.
- A mail compose window opens with the DN’s link.
- Enter the recipient's details and click Send.
As attachment
- Click the Main Menu icon.
- Go to the Inventory tab.
- Select the Delivery Notes module.
- Open any Delivery Notes record.
- Click the More icon in the Summary View.
- Select Share.
- Click Share as attachment.
- A mail compose window opens with the DN’s attachment.
- Enter the recipient's details and click Send.
Generate related documents
Add a Document
Use Vtiger’s Documents module to solve the problems of organizing and sharing! It acts as a repository for all the documents that you create or that are shared with you by your customers or sales team.
Follow these steps to add a document:
- Click the Main Menu icon.
- Go to the Inventory tab.
- Select the Delivery Notes module.
- Open any Delivery Notes record.
- Click the More icon in the Summary View.
- Click the Add or Create button.
- Select Documents.
- Here, you see two options on your screen:
- Select Documents
- To add an existing document, select this option.
- Hover over a record in the list of all existing documents to display the radio buttons.
- Click the radio button on the left side of the record to select the record.
- Click the Add Selected button present below the list.
- Create Documents
- To add a new document, select this option.
- Fill in all the necessary details.
- Select Documents
- Click Save.
- The linked document will be seen in the Documents widget in the Summary View of the DN record.
Export
Follow these steps to export a DN:
- Click the Main Menu icon.
- Go to the Inventory tab.
- Select the Delivery Notes module.
- In the List View, hover over any project task record to display the radio button on the left side.
- Click the radio button.
- Click the Export button.
- Select any one of the following options:
- Export Selected Records - This option exports only the selected record.
- Export data in the current page - This option exports the records on the current page.
- Export All Data - This option exports all data from all pages of the Exports module.
The exported record will be saved on your local system.
Follow these steps to print a DN :
- Click the Main Menu icon.
- Go to the Inventory tab.
- Select the Delivery Notes module.
- Open any DN record.
- Click the More icon.
- Click the Print button.
- You can perform any of the following options:
- Edit & Export - You can edit the project task and export it to your local system.
- Email with PDF - You can email the project task record as a PDF to the contact.
- Print - You can print the project task and keep a hard copy.
- Save as PDF - You can save the project task as a PDF on your local system.
How to change the template of a Delivery Note
You can customize the template for a specific DN from the following:- The Settings widget
- The Print Delivery Note screen
From the Settings widget in the Summary View.
Follow these steps to change the template:
-
Click the Main Menu icon.
- Go to the Inventory tab.
- Select the Delivery Notes module.
- Open any DN record.
- In the Summary View, click the Settings widget.
- Click the Template Applied dropdown.
- Choose the template. The new template will be applied to the DN document in the Summary View.
From the Print Purchase Order screen
Follow these steps to change the template of a DN:
- Click the Main Menu icon.
- Go to the Inventory tab.
- Select the Delivery Notes module.
- Open any DN record.
- Click the More icon.
- Click the Print icon.
- Select any template from the list of all available templates.
- You can perform any of the following options to view the applied template on the DN document:
- Edit & Export- You can edit the document and export the DN to your local system.
- Email with PDF- You can email the DN as a PDF to the contact.
- Print- You can print the DN and keep a hard copy.
Save as PDF - You can save the DN as a PDF file on your local system.
List View in Delivery Notes
List view sorts and lists all DNs based on the date of last modification.Columns in List View
The columns that are visible by default in the List View are :- Name - Displays the name of the DN.
- Delivery Date - Displays the date the product is scheduled to be delivered.
- Status - Displays the status of the order.
- Sales Order - Displays the name of the SO linked to the DN.
- Delivery Note No - Displays the DN number.
List actions
You can perform various quick actions, such as Edit, Delete, Email, and Follow, on the Delivery Notes’ records in the list view.To learn more about List view actions in Vtiger CRM, click here.
Ways of viewing the Delivery Notes’ records
Summary View
Summary view is the view that appears when you click a particular record from the list view. The Summary view displays a collection of all the key information of the record.The Summary view can be divided into four sections. Each section has a particular functionality.
Summary View Actions
- Follow: You can follow any DN to get updates on all the activities performed on that record.
- Tags: You can add tag names to the record to identify the record easily.
- Print: You can print the DN or save it as a PDF for future reference.
- Duplicate: You can duplicate the current record and have all the details reflected in a new record.
- Delete: You can delete a record by clicking this button.
Delivery Notes document
- The generated Delivery Note, along with the template, will be displayed here.
Widgets

- Tasks -All the tasks related to the DN are displayed here. You can also add a new task from here by clicking the + button.
- Events - All the events related to the DN are displayed here. You can also add a new event from here by clicking the + button.
- Activity -All the activities made on the DN are displayed here. Here you can add comments related to the DN.
- Analytics -You can view all the metrics related to the DN in the form of charts, mini-lists, etc. You can also create new ones here.
- Documents - You can create a new document or add an existing document to the DN. All the related document details are displayed here.
- Settings - You can change the template of the DN here.
Grid View
Grid View is a table-like layout that shows data in rows and columns, similar to a spreadsheet. It allows you to view and edit multiple records simultaneously on the same page. You can edit specific field details in a record, just like editing a cell in a spreadsheet. The view resembles the List View but allows for additional actions, such as editing, rearranging columns, and bulk updates.