Articles in this section
Products in Vtiger CRM
Feature Availability
Vtiger Editions: One Pilot | One Growth | One Professional | One Enterprise | One AI
Introduction to Products
The Products module helps businesses manage and track all the items they sell, purchase, or use internally. It acts as a central repository where you can store detailed information about each product, including its name, description, pricing, stock levels, tax details, and associated documents.
With the Products module, you can:
- Maintain a product catalog for quick reference during sales and purchase processes.
- Link products to other records such as Quotes, Sales Orders, Invoices, and Purchase Orders.
- Track stock availability and pricing to ensure accurate inventory management.
- Organize products with categories, images, and part numbers for easy identification.
- Integrate with services, vendors, and price books for smooth sales operations.
For example, Products include items like laptops, clothing, or services, managed with pricing, stock, and attributes.
Key Features
The following are the features of the Products module in Vtiger CRM:
- Product Type: Vtiger lets you choose between Solo, Fixed Bundle, and Flexible Bundle types, giving you the flexibility to package products as per your sales requirements.
- Product Bundles: Product Bundles let you combine several products or services and sell them as one package.
- Item Details block: The Item Details block appears in modules like Quotes, Sales Orders, and Invoices. It allows you to select products, specify quantities, apply discounts, and view pricing details directly while creating these records
- Example: If a product’s Part Number is A12345 and its name is Wireless Mouse, entering A12345 in the Item Name field will automatically display Wireless Mouse as the product name.
- Product Stock Update: The Stock Update option allows you to manually update product quantities in your inventory. To learn more Product Stock, click here.
- Product Discount: Discounts in Vtiger CPQ are price reductions used to attract customers and drive sales. To learn more Product Discount, click here.
- Product Options: Product Options in Vtiger CRM let businesses offer product variations like size, color, features, and pricing. To learn more about Product Options, click here.
- Product Rules: Set rules to control product options and pricing, ensuring correct and consistent configurations in the CPQ Add-on. To learn more about Product Rules, click here.
Benefits
The benefits of managing Products in Vtiger’s Inventory module are:- Centralized Management – Store all product details in one place for easy access.
- Accurate Stock Tracking – Real time updates reduce errors and mismatches.
- Sales and Purchase Integration – Link products with quotes, orders, and invoices.
- Support for Bundles and Assets – Manage product bundles and post-sale assets.
- Price Management – Handle multiple pricing options using price books.
In this article, you will learn about:
- Creating a Product
- Using Products in other Modules
- Actions Possible on a Product Record
- Viewing a Product
- Managing Stock
Key Terminology
|
|
|
|
|
|
|
|
|
|
|
|
|
|
|
|
| A Purchase Order (PO) is the first official offer issued by a customer to the company’s sales team, indicating types, quantities, and agreed-upon prices for products or services. |
|
|
|
|
|
|
|
|
|
|
| An additional amount is charged by the sales team of the company for shipping the product to the customer. |
|
|
|
Creating a Product
You can add products in the following ways:
- From Products List View
- From Quick Create
From Products List View
Follow the steps below to create a product:
- Log in to the CRM.
- Click the Main Menu.
- Go to the Inventory.
- Select the Products. The Products page opens.
- Click the +Add Product button. The Add Product window opens.
- Enter or select the following mandatory information:
- Product Name: Enter the product name.
- Product Type: Select the type of product.
- Product Active: Enable if the product is currently in use.
- Handler: Select the handler name from the drop-down list
- Click View full form to enter details for the following sections:
- Pricing Information: Enter the product’s cost, selling price, and tax details.
- Stock Information: Specify stock levels, reorder points, and warehouse details.
- Product Image Information: Upload an image to visually identify the product.
- Description Details: Add a brief description or specifications of the product.
- MYOB Information: Enter MYOB integration details for accounting purposes.
- Revenue Schedule Information: Enter details on how the product’s revenue is recorded over time.
- Tally Information: Enter Tally accounting details for financial tracking.
- Click Save.
Note: You can mass-edit the Product Taxes field values in the List View.
From Quick Create
Products can also be created by clicking the + Quick Create button present in the top right-hand corner of the screen.
Follow these steps to create a product using Quick Create:
- Log in to the CRM.
- Click the + icon displayed on the top right side of your screen.
- Scroll down to the Inventory section.
- Select Product. The Add Product window opens.
- Enter or select the following mandatory information:
- Product Name: Enter the product name.
- Product Type: Select the type of product.
- Product Active: Enable if the product is currently in use.
- Handler: Select the handler name from the drop-down list.
- Click View full form to enter details for the following sections:
- Pricing Information: Enter the product’s cost, selling price, and tax details.
- Stock Information: Specify stock levels, reorder points, and warehouse details.
- Product Image Information: Upload an image to visually identify the product.
- Description Details: Add a brief description or specifications of the product.
- MYOB Information: Enter MYOB integration details for accounting purposes.
- Revenue Schedule Information: Enter details on how the product’s revenue is recorded over time.
- Tally Information: Enter Tally accounting details for financial tracking.
- Click Save.
- Click Cancel to discard the information you entered.
To learn more about Quick Create, click here.
Note:
- You can add a product as a line item when creating an Inventory or Deal record from the Product workflow.
- You can create an Inventory record (SO, PO, Invoice, and Quote) from the Products or Services workflow or process.
- When you create a Deal (PS Line items enabled) from Products workflows, a product can be added as a line item in the Deal using the Add Product as item option.
Adding Summary Variable
Summary Variables let you define quick computations, including sum, average, count, minimum, and maximum, for items in Quotes.
You can configure them by navigating to Products > Configure Settings > Summary Variables. This dynamic feature is exclusive to the Products and Services modules and can also be accessed through Module Layouts and Fields.
These are placed under Product settings to keep all configurations related to products unified and simple to access.
Follow these steps to add summary variable:
- Log in to the CRM.
- Click the Main Menu.
- Go to Inventory > Products. The Products page opens.
- Click Settings from the top-right corner of the screen.
- Select Summary Variables.
- Click +Add Summary Variable. The Add Summary Variable page opens.
- Enter or select the following information:
- Summary Variable Name: Enter a name to identify the Summary Variable.
- Conditions: Set the conditions that must be met for the summary variable calculation. You can set two types of conditions:
- All Conditions: The summary variable will apply only if all specified conditions are met.
- Any Conditions: The summary variable will apply if at least one of the specified conditions is met.
- Value: Select the type of calculation you want to perform, such as sum, average, count, minimum, or maximum.
- Active: Enable this option to activate the summary variable and make it available for use.
- Click Save.
The Summary Variable is added to the list once you save it.
Note: Once Summary Variables are configured, they can be used as a source condition within Product Rules. To learn more about Product Rules, click here.
Adding Product Families
In Vtiger CRM, you can organize products into families to group similar items and manage them more efficiently.The Product Families module becomes available after installing the paid CPQ Add‑on. To learn more about CPQ Add-on, click here.
Adding an Attribute
Attributes in product families define specific details, such as color, size, or model that distinguish one product variant from another.To create a product family, you must first set up one attribute for the product.
Follow these steps to add an attribute for a product:
- Log in to the CRM.
- Click the Main Menu.
- Go to the Inventory tab.
- Select the Products module. The Products page opens.
- Click Settings from the top-right corner of the screen.
- Select Attribute Settings from the list of Customize options. An Attribute List View opens.
- Click +Add Attribute. An Add Attribute pop-up opens.
- Enter or select the following information:
- Attribute Name: Enter a name to identify the attribute for the product
- Classifications: Enter the classification values or options for the attribute
- Click Save.
An Attribute record will be created.
Once an attribute is created, you can proceed to add a product family to organize related products.
Follow these steps to add a Product Family:
- Log in to the CRM.
- Click the Main Menu.
- Go to the Inventory tab.
- Select the Products module. The Products page opens.
- Click Product Families. The list view of the Product family opens.
- Click +Add Product Family. A Create Product Family page opens.
- Enter or select the following information to Select Variants for a Product family:
- Product Family Name: Enter the name of the product family to which the variant belongs.
- Assigned To: Select the user or team responsible for managing this product family.
- Attributes: Enter specific features or properties (e.g., color, size) for the variant
- Category: Select the main category under which this product family falls.
- Subcategory: Select a more specific subcategory related to the product family.
- Product Family Image: Upload an image representing the product family.
- Click Next.
- Enter the quantity in stock and the unit price in the Generate Products tab.
- Click Choose file to upload an image representing the product family.
- Click Generate and Save.
Adding Product Options
Product Options in Vtiger CRM let you create variations of a product, such as color, size, or warranty, to match customer preferences. This helps manage inventory efficiently and enhances the buying experience.The Product Options module becomes available after installing the paid CPQ Add‑on. To learn more about CPQ Add-on, click here.
Follow these steps to add a Product option:
- Log in to the CRM.
- Click the Main Menu.
- Go to Inventory > Catalog.
- Select Products. The Product module opens.
- Click Product Options. A Product Option List View opens.
- Click +Add Product Option. The Add Product Option window opens.
- Enter or select the following information:
- Product Option Name: Enter the Product Option Name.
- Group Type: Select the Group Type from the drop-down.
- Group Minimum: Enter the Group Minimum.
- Group Maximum: Enter the Group Maximum.
- Assigned To: Select the user you want to assign to from the drop‑down.
- Click Save.
You have now successfully added a Product Option. You will find the added record in Product Options List View. To learn more about Product Options, click here.
Adding Product Bundles
A group of multiple products or services packaged together and sold as a single unit.Follow these steps to generate a product bundle:
- Log in to the CRM.
- Click the main Menu.
- Go to Inventory.
- Select Products. The Products List View opens.
- Click +Add Product. The Add Product window opens.
- Enter or select the following mandatory information:
- Product Name: Enter the product name.
- Product Type: Select the product type as Fixed Bundle.
- Note: Product Bundles can only be created for the Fixed Bundle product type.
- Handler: Select the user or team for handling the product from the drop-down.
- Click Save. The Products Bundle tab will now appear in the Summary View.
- Click the Products Bundle tab in the Summary View.
- Here, you see two options:
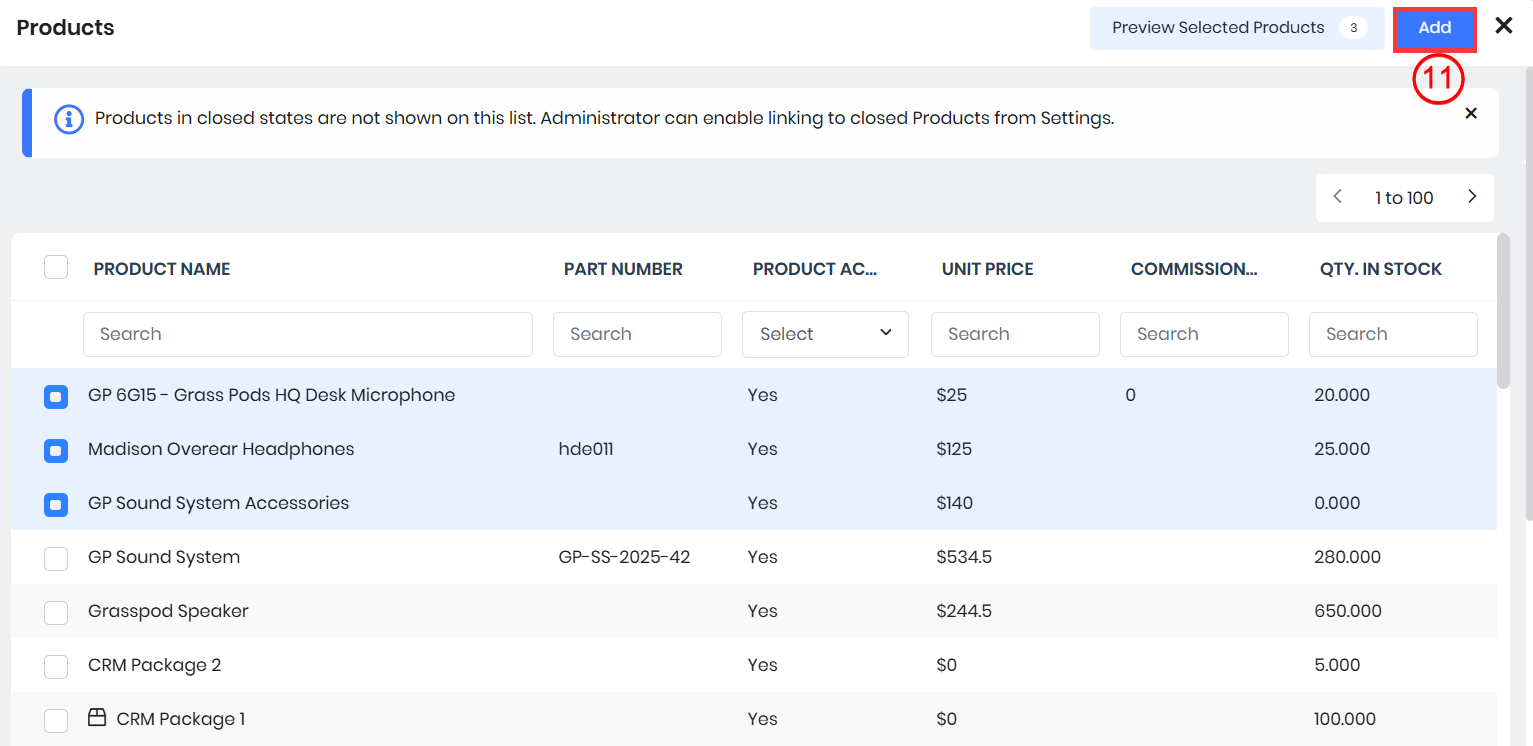
- Link Products - If you want to link an existing product, select this option.
- Click the Link Products tab. The Products window opens up.
- Click the radio button on the left side of the products to select the products.
- Click the Add button to link the selected products.
- Add Products - If you want to add a new product, select this option.
- Click the +Add Products tab. The Quick Create or View full-form Product window opens up.
- Fill in all the necessary details.
- Click Save to add the new product.
- Link Products - If you want to link an existing product, select this option.
Reports generated for the product bundle display the names and quantities of the linked or added products.
You can add sub-products while creating a Purchase Order (PO). A separate checkbox is available for Purchase Orders in the Bundle section. By default, this checkbox is enabled.
- If the checkbox is enabled for a PO, you can create a PO and add the Parent product and the child products along with it.
- If the checkbox is not enabled for a PO, you can create a PO, and you can add any of the child products without adding the Parent product.
For example, ABC Enterprise often does not receive Products in a Bundle from its vendors. They buy products individually but sell them to their customers in bundles.
Note: If the checkbox is unchecked, stock quantity updates apply only to the parent product, not to its sub-products.
Selecting Products and Mapping for Flexible Bundles
You can save and reuse product selections within these bundles, improving efficiency and promoting upselling opportunities.
When configuring a Flexible Bundle, you can now:
- Save your product selections using the Save Selection option.
- Later, load those saved selections using the Load Saved Selection option.
This allows you to quickly apply the same product choices across multiple bundles without manually reselecting items each time.
Tracking Changes to GST/Tax Fields in the Products Module
All modifications made to GST/Tax fields, such as CGST (%), SGST (%), and IGST (%), in the Products module are automatically tracked at the individual record level. Whenever a tax value is updated, the change is captured and displayed in the Updates tab of the corresponding product record. This provides a clear audit trail of all historical modifications made to tax percentages.
Using Products in Other Modules
Products are used while creating invoices, sales orders, purchase orders, and quotes. You can add multiple products in the Item Details block. The Item Name field allows you to search for a product using either its Product Name or Part Number, making it especially useful if you recognize the product by its Part Number rather than its name.
Example: If a product has the Part Number A12345 and the Product Name Wireless Mouse, you can type A12345 in the Item Name field, and the system will show Wireless Mouse as the product name.
For your understanding, we will add Products to a Sales Order.
Follow these steps to add products in sales order:
- Log in to the CRM.
- Click the main Menu.
- Go to Inventory.
- Click Order Fulfillment > Sales Order. The Sales Order page opens.
- Open a Sales Order record.

- Go to Item Details in the Details section.
- Click the Edit icon.
- Click Add Products. A Line Item field will appear.
- Click the Product icon to add the product. A Products List View opens.
- Select the required products.
- Click Add. The selected products will be added to the Item Details.
- Click Save.
The Item Details will now be updated with the Products for the particular Sales Order.
Actions Possible on a Product Record
- Duplicating a Product record
- Deleting a Product
- Follow a Product record
- Printing a Product record
- Reach Out now
- Sharing the Product record as an Attachment
- Adding or Linking a Ticket
- Adding or Linking a Purchase Order
- Adding or Linking a Sales Order
- Adding or Linking an Invoice
- Adding or Linking Price Books
- Linking a Lead to a Product
- Linking an Organization to a Product
- Linking a Contact to a Product
- Linking an Asset to a Product
- Adding or Linking an Esign Document to a Product
- Link a Stock Adjustment record
- Linking a Subscription Record to Product
- Exporting a Product Record
Duplicating a Product record
You can create a new product by duplicating information from an existing product.
Follow these steps to duplicate a product record:
- Log in to the CRM.
- Click the main Menu.
- Go to the Inventory.
- Select Products. The Products List View opens.
- Click to open the required product record. The Summary View opens.
- Click More.
- Click Duplicate in the top right corner. The Duplicating Product window opens.
- You can retain information from the selected product or make changes as required.
- Click Save.
A new product record will be created upon saving.
Deleting a Product
You can delete a record by clicking the Delete icon. When you delete a product record, you will lose all the related data.Note:
- Deleted records will be available in the Recycle Bin for 30 days, from which you can retrieve them.
- The related data remains available in the Recycle Bin for restoration.
- Log in to the CRM.
- Click the main Menu.
- Go to Inventory.
- Select Products. The Products page opens.
- Select and click to open the Product record. The Summary View opens.
- Click More.
- Click Delete. The Delete record? window appears.
- A message Records will be moved to recycle bin and cleared after 30 days? is displayed.
- Click Yes, Delete to delete the record.
- Click Cancel if you want to cancel deletion.
Following a Product
You can follow a product by clicking on Follow. You can add followers to the product by clicking Add Followers.
Follow these steps to follow and Add Followers to a Product record:
- Log in to the CRM.
- Click the main Menu.
- Go to the Inventory.
- Click Products. The Products List View opens
- Select and click to open a record. The record Summary View opens.
- Click More.
- Click the Followers icon. A Followers window opens.
- Click Follow. You will now be following the record.
- Click Add Followers.
- Select users from the drop-down who you want to add as followers to the record.
- Click Save.
You have now added a follower to this record as well as following the record.
Printing Product Details
Follow these steps to print a product record:- Log in to the CRM.
- Click the main Menu.
- Go to Inventory.
- Select Products. The Products page opens.
- Select and click to open the Product record. The Summary View opens.
- Click Print from the top-right corner of the screen.
- You can perform any of the following actions:
- Select Template: Select sample product template from the drop-down.
- Email with PDF: You can email the product record as a PDF to the contact.
- Save as PDF: You can save the product as a PDF on your local system.
- Print: You can print the product and keep a hard copy.
Note: You can also print a record directly from the List View. To know more about List view, click here.
Reach Out now
Note: You need to integrate your WhatsApp business account and a WhatsApp Service provider to use this feature.
Follow these steps to send a WhatsApp message from a Product record:
- Log in to the CRM.
- Click the main Menu.
- Go to Inventory.
- Select Products. The Products page opens.
- Select and click to open the Product record. The Summary View opens.
- Click More.
- Go to Reach out now section.
- Select WhatsApp. A Send WhatsApp message window opens.
- Enter or select the following information:
- Phone Number: Enter the recipient’s phone number for sending messages.
- WhatsApp Gateway: Select the configured WhatsApp gateway.
- Print Template: Select the template for formatting your WhatsApp message.
- Message: Enter the message content to be sent.
- Click Send.
Sharing the Product record as an Attachment
Adding a Document
Use Vtiger’s Documents module to solve the problems of organizing and sharing. It acts as a repository for all the documents that you create or that are shared with you by your customers or sales team.
Follow these steps to add a document:
- Log in to the CRM.
- Click the main Menu.
- Go to Inventory.
- Select Products. The Products List View opens.
- Select and click to open the Product record. The Summary View opens.
- Click More.
- Go to the Attachment section.
- Select Documents. A What do you want to do? window opens.
- Here, you will see five options on your screen:
- Select Documents
- Create Documents
- File Upload
- Link External Document
- Upload Multiple Files.
- Select Documents - Select this option if you want to add an existing document.
- Click Select Documents. The Documents page opens.
- Hover over a record in the list of all existing documents to display the radio button.
- Click the radio button on the left side of the record to select the record.
- Click Add upon selecting the required documents.
- Create Documents - Select this option if you want to add a new document.
- Click Create Documents. An Untitled Doc page opens.
- Enter or select the following details:
- Title: Enter the title of the document.
- Content: Enter the content of the document.
- Click Save.
- File Upload
- Click File Upload. The Upload Document page opens.
- Select your document to be uploaded from the displayed options - Vtiger, GoogleDrive, Dropbox, OneDrive.
- Choose File: You can use the drag and drop option here or click Browse.
- Enter or select the following information:
- Title - Enter the title of the document.
- Assigned To - Enter the name of the CRM user or group you want to assign it to (only those with access will appear).
- Folder Name - Enter the name of the folder.
- Note: Enter a note, if required.
- Select Upload.
- Link External Document - A Link Document page opens.
- Select the link from the available options - File URL, GoogleDrive, Dropbox, OneDrive.
- Enter or select the following information:
- Title: Enter the title of the document.
- Assigned To.: Select the user or group assigned to from the drop-down.
- Folder Name: Select the folder name from the drop-down.
- File URL: Click Paste to add the file URL.
- Click Create. The linked document will be seen in the Documents widget in the Summary View of the Product record.
- Upload Multiple Files
- Click Upload Multiple Files. The Upload Multiple Files window opens.
- Select the Folder Name from the drop-down.
- Choose File: You can use the drag and drop option here or click Browse.
- Assigned To: Select the user or team the record is assigned to from the drop‑down.
- Add Notes if required in the Notes field.
- Click Upload.
- Here, you will see five options on your screen:
Generating a Quote
A Quote is a formal document presented by the company’s sales team to a potential customer, upon request for a quotation. It contains a detailed list of products and services, prices, taxes, terms, and discounts.
Follow these steps to generate a quote:
- Log in to the CRM.
- Click the main Menu.
- Go to Inventory.
- Click Products. The Products page opens.
- Select and click to open a record. The record Summary View opens.
- Click More.
- Go to the Attachment section.
- Select Quotes. A Creating Quote window opens.
- Enter or select the following information:
- Quote Details: Enter general information about the quote, such as quote number, date, and status.
- Item Details: Enter products or services being quoted, along with quantities and prices.
- Address Details: Enter the billing and shipping addresses for the quote.
- Terms & Conditions: Define payment terms, validity, and other conditions related to the quote.
- Description Details: Enter any additional notes or descriptions relevant to the quote.
- Click Save.
The quote linked to the product can be seen in the Sales Ops widget in the Summary View of the products record.
Adding or Linking a Ticket
The Internal Tickets feature helps the employees of your organization raise their issues and requests quickly.Follow these steps to add a Ticket:
- Log in to the CRM.
- Click the main Menu.
- Go to Inventory.
- Click Products. The Products page opens.
- Select and click to open a record. The record Summary View opens.
- Click More.
- Go to the Add or Link section.
- Click Tickets. A Quick Create > Ticket window opens.
- Enter or select the following information:
- Ticket Information: Enter basic details about the ticket, such as title source, status, and priority.
- Title: Enter the subject of the ticket.
- Assigned To: Select the user or team the record is assigned to from the drop‑down.
- Status: Select the current progress stage of the ticket.
- Priority: Select the urgency level of the ticket.
- Ticket Source: Specify how or where the ticket originated.
- Description Details: Enter detailed information about the issue.
- Ticket Resolution: Enter the final solution or action taken to close the ticket.
- Click Save.
The linked Tickets will be seen in the Ticket widget in the Summary View of the Product record.
Adding or Linking a Purchase Order
A Purchase Order (PO) is the first official offer issued by a customer to the company’s sales team, indicating the types, quantities, and agreed-upon prices for products or services.Follow these steps to generate a PO:
- Log in to the CRM.
- Click the Main Menu.
- Go to the Inventory.
- Click Products. The Products page opens.
- Select and click to open a record. The record Summary View opens.
- Click More.
- Go to the Add or Link section
- Select Purchase Orders. A Creating Purchase Order window opens.
- Enter or select the following information:
- Item Details: Enter general information about the item, such as item number, date, and status.
- Purchase Order Details: Enter information about the purchase order, including vendor, items, and order status.
- Address Details: Enter the billing and shipping addresses for the quote.
- Terms & Conditions: Define payment terms, validity, and other conditions related to the quote.
- Description Details: Enter any additional notes or descriptions relevant to the quote.
- Tally Information: Enter accounting details synced with Tally.
- Click Save.
Adding or Linking a Sales Order
The Sales Order (SO) is issued by the company’s sales team to the customer. You can generate a sales order for products and/or services. Vtiger CRM allows generating Sales orders from within the Product.
Follow these steps to generate an SO:
- Log in to the CRM.
- Click the main Menu.
- Go to Inventory.
- Click Products. The Products page opens.
- Select and click to open a record. The record Summary View opens.
- Click More.
- Go to the Add or Link section.
- Select Sales Orders. A Creating Sales Order window opens.
- Enter or select the following information:
- Sales Order Details: Enter general information about the quote, such as quote number, date, and status.
- Address Details: Enter the billing and shipping addresses for the quote.
- Item Details: Enter products or services being quoted, along with quantities and prices.
- Terms & Conditions: Define payment terms, validity, and other conditions related to the quote.
- Description Details: Enter any additional notes or descriptions relevant to the quote.
- Tally Information: Enter accounting details synced with Tally.
- Click Save.
The linked Sales Order will be seen in the Sales Ops widget in the Summary View of the Product record.
Adding or Linking an Invoice
An Invoice or a Bill is a non-negotiable itemized statement issued for the products or services rendered to the customer.
Follow these steps to generate an invoice:
- Log in to the CRM.
- Click the main Menu.
- Go to the Inventory.
- Click Products. The Products page opens.
- Select and click to open a record. The record Summary View opens.
- Click More.
- Go to the Add or Link section.
- Select Invoices. A Creating Invoice window opens.
- Enter or select the following information:
- Invoice Details: Enter general information about the quote, such as quote number, date, and status.
- Item Details: Enter products or services being quoted, along with quantities and prices.
- Address Details: Enter the billing and shipping addresses for the quote.
- Terms & Conditions: Define payment terms, validity, and other conditions related to the quote.
- Description Details: Enter any additional notes or descriptions relevant to the quote.
- Tally Information: Enter accounting details synced with Tally.
- e-Invoice Details: Enter information related to the electronic invoice generated for compliance.
- e-WayBill Details: Enter information about the e-Way Bill required for goods transportation.
- Click Save.
The linked invoice will be seen in the Sales Ops widget in the Summary View of the Product record.
Adding or Linking Price Books
The Price Books let you set different prices for products and services. The prices of the items can vary at times depending on the customers and their needs.
Follow these steps to generate a price book:
- Log in to the CRM.
- Click the main Menu.
- Go to Inventory.
- Click Products. The Products page opens.
- Select and click to open a record. The record Summary View opens.
- Click More.
- Go to the Add or Link section.
- Select Price Books.
- Here, you see two options on your screen:
- Select Price Books
- If you want to add an existing price book, select this option.
- Hover over a record in the list of all existing documents to display the radio button.
- Click the radio button on the left side of the record to select the record.
- Click Add button present on the top right-hand corner of the list.
- Create Price Books
- If you want to add a new price book, select this option. A Quick Create Price Book window opens.
- Enter or select the following information:
- Price Book Name: Enter a name to identify the price book.
- Active: Enable to specify if the price book is in use.
- Currency: Select the currency in which the prices will be listed.
- Assigned To: Select the user or team the record is assigned to from the drop‑down.
- Description: Enter details about the purpose or usage of the Price Book.
- Click Save.
- Select Price Books
- Here, you see two options on your screen:
The linked price book will appear in the Price Books widget in the Product record's Summary View.
When you update a product’s selling price in the Price Books module, the revised price automatically appears in the Item Details section when adding that product to a Sales Order using the selected Price Book.
Follow these steps to update the Selling Price of a Product:
- Log in to the CRM.
- Click the main Menu.
- Go to Inventory > Price Books. A List View of Price Books opens.
- Hover over the price book in the list for the product whose price you want to change.
- In the Summary View, hover over the product and click the edit icon. An Edit Selling Price dialog box appears.
- Enter the Selling Price for the Product.
- Click Save.
- Log in to the CRM.
- Click the main Menu.
- Go to Inventory > Order Fulfillment > Sales Orders.
- Select the Sales Order for that Product.
- Go to the Line Item Details section in the Details View.
- Click the Price Books icon to view the list of available price books.
- Select the price book where the product’s selling price was updated.
- Click Yes on the pop‑up that appears. The product will be added to the Line Items with the updated selling price.
- Click Save.
The product will now appear in the Sales Order with the revised selling price from the selected price book.
Linking an Organization to a Product
An organization represents a company you are doing business with. It could have multiple employees and sell multiple products or services.
Follow these steps to generate an organization:
- Log in to the CRM.
- Click the main Menu.
- Go to Inventory.
- Click Products. The Products page opens.
- Select and click to open a record. The record Summary View opens.
- Click More.
- Go to the Add or Link section.
- Select Organizations. The organization page opens.
- Hover over a record in the list of all existing Organizations to display the radio button.
- Click the radio button on the left side of the record to select the record.
- Click the Add button present in the top right-hand corner of the list. The Organization will be linked.
The linked organization will be seen in the Organizations widget in the Summary View of the Product record.
Linking a Contact to a Product
A contact is a person with whom you are doing business, likely a prospect or a customer. Contact can be acting in an individual capacity (if your business sells to consumers) or representing a business.
Follow these steps to generate a contact:
- Log in to the CRM.
- Click the main Menu.
- Go to Inventory.
- Click Products. The Products page opens.
- Select and click to open a record. The record Summary View opens.
- Click More.
- Go to the Add or Link section.
- Select Contacts. The Contacts page opens.
- Hover over a record in the list of all existing Contacts to display the radio button.
- Click the radio button on the left side of the record to select the record.
- Click the Add button present in the top right-hand corner of the list. The Contact will be linked.
The linked contact will be seen in the Person widget in the Summary View of the Product record.
Linking an Asset to a Product
Assets are tangible or intangible resources that are rendered to your customers.
Follow these steps to generate an asset:
- Log in to the CRM.
- Click the main Menu.
- Go to the Inventory.
- Click Products. The Products page opens.
- Select and click to open a record. The record Summary View opens.
- Click More.
- Go to the Add or Link section.
- Select Assets. A Quick Create > Asset window opens.
- Enter or select the following information:
- Asset Name: Enter the name of the Asset.
- Serial Number: Enter the asset’s serial number.
- Product Name: Select the related product name.
- Status: Select the asset status from the drop-down.
- Assigned To: Select the user assigned to this asset from the drop‑down.
- Date in Service: Select date in service using the Calendar icon.
- Date Sold: Select the date sold using the Calendar icon.
- Organization Name: Select the organization name related to the assets.
- Click Save.
The linked asset will be seen in the Items widget in the Summary View of the Product record.
Adding or Linking an Esign Document to a Product
The Esign Documents module lets you send documents to your customers or vendors for signatures and track the updates.Follow these steps to create an Esign Document:
- Log in to the CRM.
- Click the main Menu.
- Go to Inventory.
- Click Products. The Products page opens.
- Select and click to open a record. The record Summary View opens.
- Click More.
- Go to the Add or Link section.
- Select Esign Documents. A What do you want to do? window opens.
- Here, you see two options on your screen:
- Select Esign Documents
- If you want to add an existing Esign document, select this option.
- Hover over a record in the list of all existing documents to display the radio buttons.
- Click the radio button on the left side of the record to select the record.
- Click Add present on top right-side corner.
- Create Esign Documents. A Create Esign Document window opens.
- If you want to add a new Esign Document, select this option.
- Enter or select the following information:
- Select the document from What document should be signed? section.
- Email Subject: Enter a subject line for the email.
- Email Note: Enter any additional details for the email.
- Enter or select the following information:
- Click Save as Draft.
- If you want to add a new Esign Document, select this option.
- Select Esign Documents
- Here, you see two options on your screen:
- Select Esign Documents. A What do you want to do? window opens.
The linked Esign Document will be seen in the Esign Document widget in the Summary View of the product record.
Link a Stock Adjustment record
Stock Adjustments is a module in Vtiger CRM that helps you adjust product stock in the CRM. Stock Adjustments lets you adjust a product's stock, i.e., increases or decreases the quantity in stock (Qty. in Stock) or the Defective Stock value for a product.Follow these steps to link a Stock:
- Log in to the CRM.
- Click the main Menu.
- Go to Inventory.
- Click Products. The Products page opens.
- Hover over a record that you want to link. The record Summary View opens.
- Click More.
- Go to the Add or Link section.
- Select Stock Adjustment. A Quick Create > Stock Adjustment window opens.
- Enter or select the following information:
- Product: Select the product for which the stock adjustment is being made
- Value to Adjust: Select the quantity or value to be adjusted in stock.
- Adjustment: Specify whether the adjustment is an increase or decrease in stock.
- Status: Select the current status of the stock adjustment.
- Assigned To: Select the user or team the record is assigned to from the drop‑down.
- Reason: Select the reason for making the stock adjustment.
- Click Save to create a Stock Adjustment.
- Enter or select the following information:
- Select Stock Adjustment. A Quick Create > Stock Adjustment window opens.
The linked Stock Adjustment will be seen in the Stock Adjustment widget in the Summary View of the product record.
To learn more about Stock Adjustment, click here.
Linking a Subscriptions record to a Product
The Subscriptions module in Vtiger CRM is used to automate invoice generation and payment processing for subscription-based services.Follow these steps to generate a subscription:
- Log in to the CRM.
- Click the main Menu.
- Go to Inventory.
- Click Products. The Products page opens.
- Hover over a record that you want to link. The record Summary View opens.
- Click More.
- Go to the Add or Link section.
- Select Subscriptions. A Creating Subscription window opens.
- Enter or select the following information:
- Subscription Information: Enter general details about the subscription, such as name and duration.
- Address Details: Enter the billing and shipping addresses related to the subscription.
- Terms & Conditions: Enter the terms, conditions, and policies applicable to the subscription.
- Description Details: Enter notes or extra information relevant to the subscription.
- Item Details: Enter the products or services covered under the subscription.
- Click Save.
- Go to the Add or Link section.
The newly created subscription will be available in the Subscription widget of the Summary view in the product record.
Exporting a Product Record
Follow these steps to export a product:
- Log in to the CRM.
- Click the main Menu.
- Go to Inventory.
- Click Products. The Products page opens.
- Hover over any product record to display the radio button on the left side.
- Click the radio button.
- Click Export. An Export window opens.
- Select any one of the following options:
- Export Selected Records: This option will export only the selected record.
- Export data in current page: This option will export the records on the current page.
- Export all data: This option will export all the data in all the pages of the SO module.
- Click Export.
- Select any one of the following options:
The exported record will be saved on your local system.
Viewing a Product
List View in Products
In Vtiger CRM, you can look at all the products in List View. By default, List View is the screen that is visible when you click the Products tab. This view sorts and lists all products based on the last modified product.Columns in the List View
The columns that are visible by default in the List View are:- Product Name - Displays the name of the product.
- Plan - Displays if the plan is for Monthly, Quarterly, Half Yearly, Annual.
- Product Active - Displays if a product is active or not.
- Part Number - Displays the part number of the product.
- Commission Rate - Displays the commission rate of the product.
- Qty. in Stock - Displays the quantity available in stock.
- Qty/Unit - Displays the number of units.
- Unit Price - Displays the price of each unit.
- Product Image - Displays the image of the product.
List View actions
You can perform many quick actions, such as Edit, Delete, Export, Comment, etc, on product records in the List View. To learn more about List View actions in Vtiger CRM, click here.
Summary View
Summary View is the view that appears when you click a particular record from the List View. The Summary View:- Displays a collection of all the key information of the record.
- Can be divided into four sections. Each section has a particular functionality.
Summary View Actions
- Follow: You can follow any product record to get updates on all the activities performed on that record.
- Tags: You can add tag names to the record to identify the record easily.
- Open in new tab: You can open a product record in a new tab.
- Click to copy direct link: You can copy the direct link of the Product record.
Activity Section
This section lists all the activities performed on that particular record. You can also add filters and view specific activities.The Activity section displays the following for a Product:
- Product Bundles: Shows grouped products linked together and sold as a single unit.
- Stockroom: Displays the available quantities for the product.
More
When you click on the do button on the right-hand top corner of the Summary view, you will see the following:- Followers - When you click on the Followers icon, you can follow a product record or add followers to the record.
- Print - You can print a product record.
- Duplicate - You can create a duplicate product record.
- Delete - You can delete a product record.
- Documents - You can share documents as an attachment. You can add new documents or link from a list of existing documents.
- Organizations - You can add or link from the existing list of Organizations.
- Contacts - You can add or link from the existing list of Contacts.
- Cases - You can add a new case to the product record.
Widgets
- Analytics - You can view all the metrics related to the product in the form of charts, mini-lists, etc. You can also create new ones here by clicking the + button.
- Details - You will get Product Details, Pricing Information, Stock Information, Product Image Information, Description Details, and Revenue Schedule Information.
- Documents - You can create a new document or add an existing document to the product. All the related document details are displayed here.
- Quotes - You can find out if there are any quotes linked to the product.
- Purchase Orders - You can find out if there are any Purchase Orders linked to the product.
- Organizations - You can create a new organization or add an existing organization to the product. All the related organization details are displayed here.
- Contacts - You can create a new contact or add an existing contact to the product. All the related contact details are displayed here.
- Deals - You can create a new Deal or add an existing Deal to the product. All related Deal details will be displayed here.
- Parent Product - You can add new parent products to the product.
- Cases - You can add a new case or from the existing list of Cases. All the related Case details are displayed here.
- Credit Notes - You can link Credit Notes from the existing list of Credit Notes.
- Receipt Notes - You can link Receipt Notes from the existing list of Receipt Notes.
- Delivery Notes - You can link Delivery Notes from the existing list of Delivery Notes.
- Bills - You can add new Bills or link bills from the existing list of Bills.
- Purchase Return - You can add a new Purchase Return or link from the existing Purchase Return list.
Managing Stock
The Stock Management settings in Vtiger CRM provide a centralized way to track and control product inventory.Instead of configuring workflows, these settings use predefined picklists to manage how stock is added or reduced, ensuring consistency across sales and purchase processes.
The following fields in the product record reflect stock movement:
- Available Stock: Quantity available for sale after deducting committed stock.
- Committed Stock: Quantity reserved for open sales orders.
- Incoming Stock: Quantity ordered from vendors but not yet added to inventory.
To learn more about Stock Management, click here.
Updation of Products in Stock
The quantity in stock for a product gets updated as per the status of the invoice or purchase order created for the product.This is done via the workflow - UpdateInventoryProducts On Every Save that is set up and active by default in Vtiger. The benefit of this workflow is that it reduces manual effort and avoids human errors as every change is recorded automatically.
You can also create other workflows to run on Products by going to Settings> Automation> Workflows. To learn more about Workflows in Vtiger CRM, click here.
Here are the scenarios under which Quantity in Stock is impacted by Invoices:
- When an invoice is created, the quantity in stock will decrease.
- When an invoice is canceled or deleted, the quantity in stock will increase.
- When the purchase order status is changed to ‘received shipment’, the quantity in stock will increase.
To learn more about Product Stock Update, click here.