Articles in this section
Configuring the Employee Portal
Feature Availability
Vtiger Editions: One Professional | One Enterprise | One AI
Introduction
The Employee Portal in Vtiger CRM is designed to streamline internal support, allowing employees to easily raise and track internal issues. From reporting IT problems to requesting facility or payroll assistance, the portal serves as a centralized support system. It eliminates the need for back-and-forth emails and allows employees to get real-time updates about their internal requests.
Benefits of the Employee Portal
The following are the benefits of the Employee Portal:
- Centralized Issue Reporting: Employees can raise and track Internal Tickets from a single platform, making issue management more organized and efficient.
- Real-Time Ticket Visibility: Employees receive instant updates on ticket progress, reducing the need to follow up via emails or calls.
- Enhanced Transparency: Provides employees with a clear history of their requests and responses, building trust and accountability.
In this article, you will learn about:
- Workflow for Sending Employee Portal Credentials
- Ensuring Email Delivery
- Selecting Fields to Show in the Employee Portal
- Giving Employees Access to the Employee Portal
Workflow for Sending Employee Portal Credentials
Before enabling portal access for employees, make sure the workflow that sends portal credentials is active. This ensures that employees receive their login details via email as soon as portal access is enabled.
Follow these steps to activate the workflow:
- Log in to your CRM account.
- Click the User Menu on the top right corner of the screen.
- Click Settings. The Settings page opens.
- Look for the Automation section.
- Select Workflows. The Workflows page opens.
- Click the Standard tab.
- Select Employees from the drop-down beside the tab.

- Set the Status to Active.
Note: You can modify the trigger and entry conditions, but the email action (sending credentials) cannot be edited. You can, however, add additional actions if needed.
Ensuring Email Delivery
Once the workflow is confirmed, the next step is to make sure the CRM is allowed to send portal-related emails.
Follow these steps to ensure email delivery:
- Log in to the CRM.
- Click the User Menu in the top right corner of the CRM screen.
- Click Settings. The Settings page opens.
- Go to Configuration > Email Settings. The Email Settings page opens.
- Click the Edit icon.
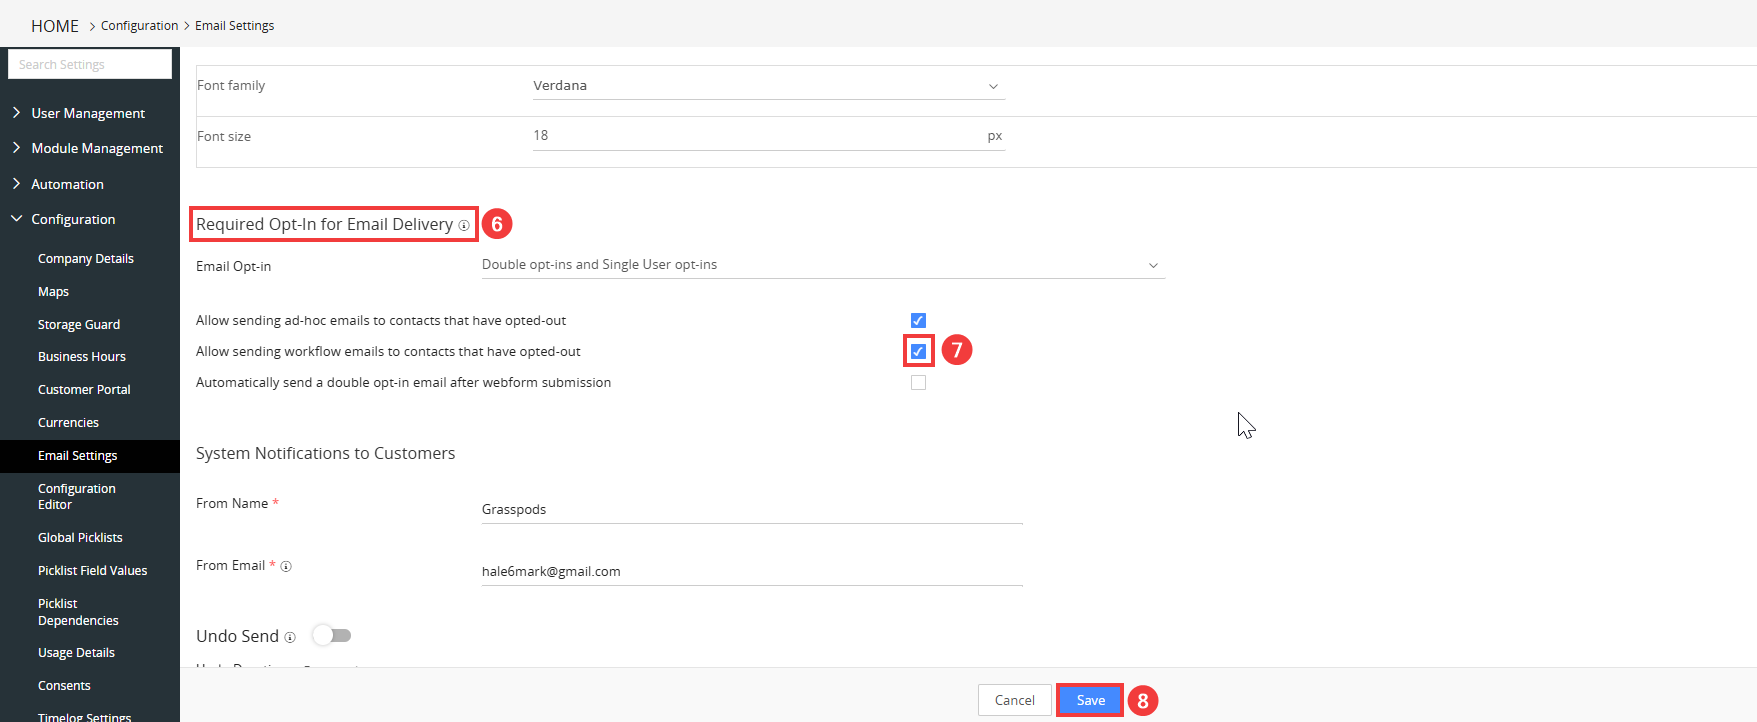
- Go to the Required Opt-in for Email Delivery section.
- Enable the checkbox for Allow sending workflow emails to contacts that have opted-out.
- Click Save.
This ensures that emails are not blocked and credentials reach the employee’s inbox.
Selecting Fields to Show in the Employee Portal
The Employee Portal shows a set of default fields. However, if you need to collect additional information from employees when they raise internal tickets, you can customize the fields displayed.
Follow these steps to display selected fields in the employee portal:
- Log in to the CRM.
- Click the User Menu on the top right corner of the screen.
- Click Settings. The Settings page opens.
- Go to Module Management.
- Select Module Layouts & Fields. The Module Layouts & Fields opens.
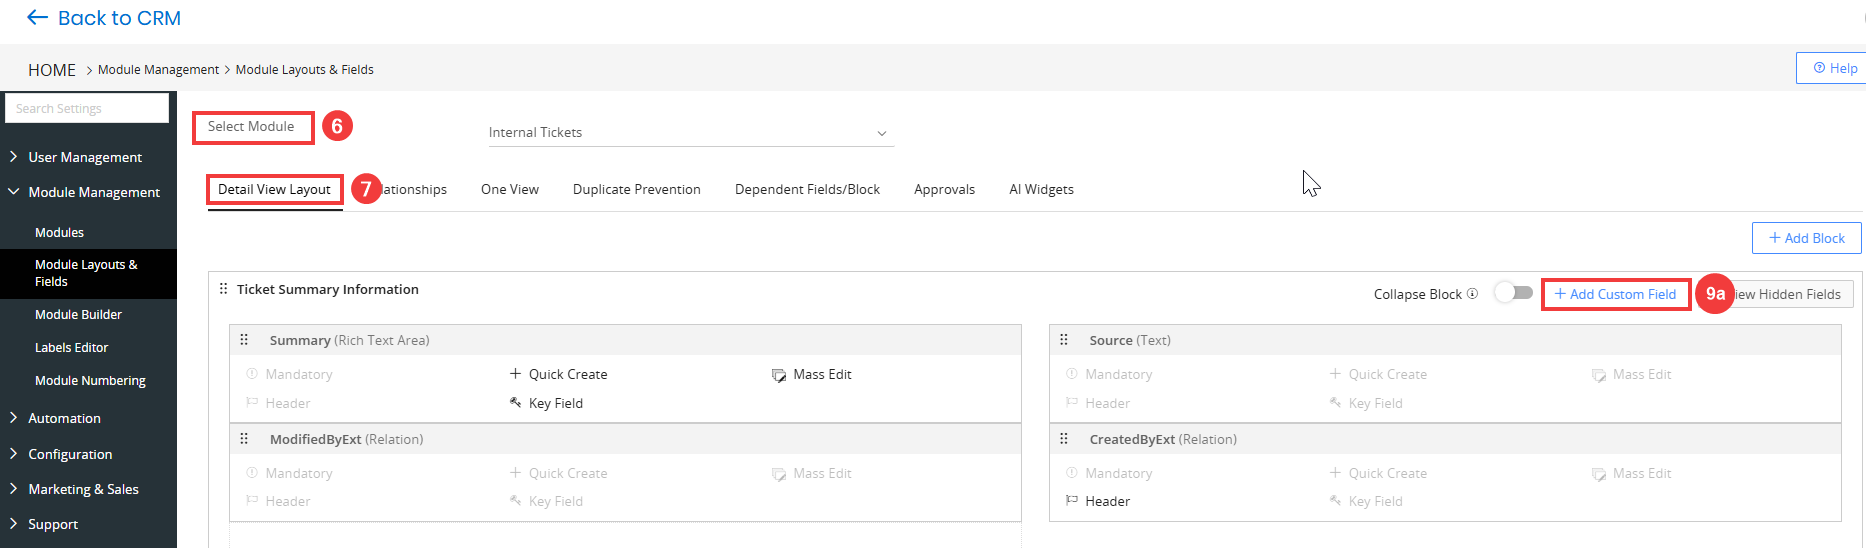
- Click the Select Module drop-down.
- Select Internal Tickets.
- Click the Detail View Layout tab.
- Enter or select the following information to show a field in the employee portal:
- Create a new custom field and enable Quick Create or Mandatory field.
- Select an existing field and enable Quick Create or Mandatory field.
Note: Disable the Quick Create or Mandatory options for the fields you do not want to display in the Employee Portal.
Enabling Portal Access for Employees
To give portal access to an employee, enable the Portal Employee checkbox in the employee record.
Follow these steps to give an employee access to the employee portal:
- Log in to the CRM.
- Click the Main Menu.
- Go to Service Desk > Agent Enablement.
- Click Employees. The Employees List View opens.
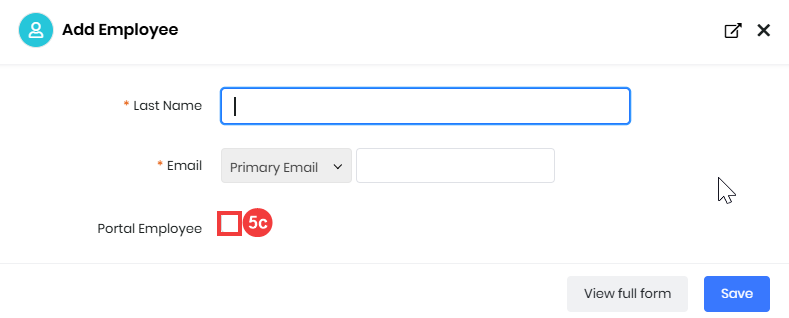
- Add a New Employee:
- Click on + Add Employee.
- Enter the mandatory details such as Last Name and Email Address.
- Enable the Portal Employee checkbox.
- Click Save.
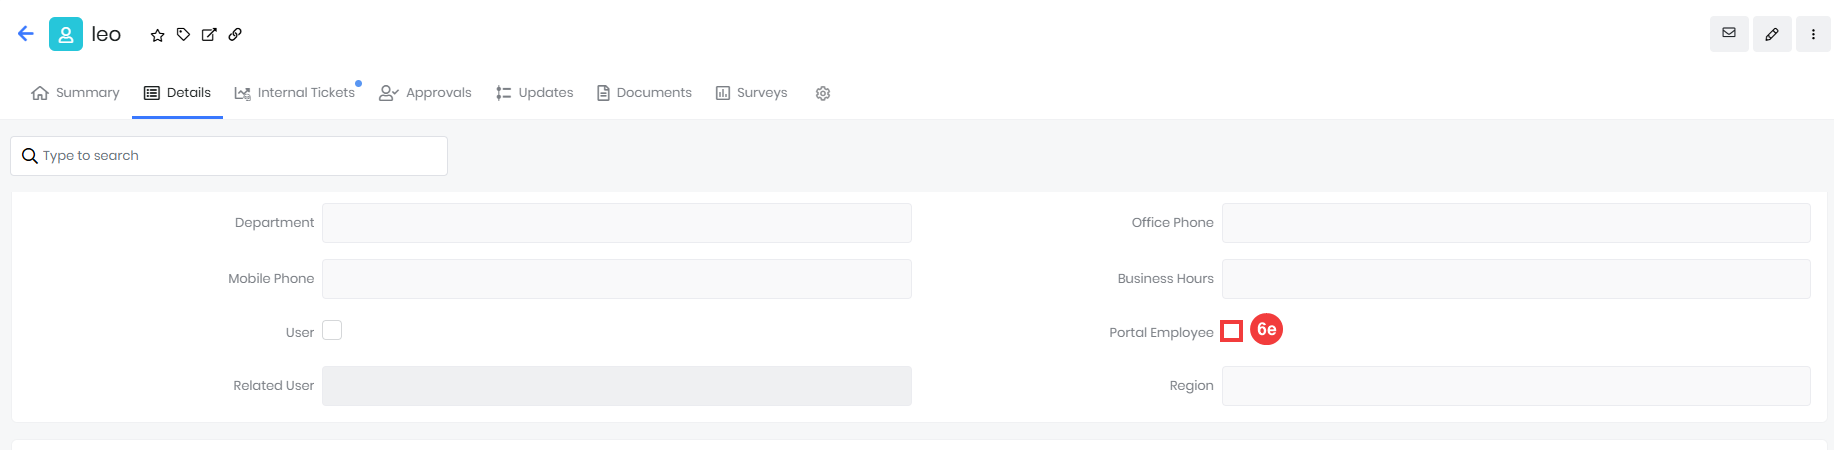
- Enable Portal Access for an Existing Employee:
- Open the existing Employee record.
- Click Edit. The Edit Employee opens.
- Go to the Details tab.
- Search Portal Employee.
- Enable the Portal Employee checkbox.
- Click Save.
The employee will automatically receive login details via the email address saved in their Employee record.
Reference
Logging Employee Details
Creating a Workflow
Module Management - Module Layouts & Fields