Articles in this section
Chatbot
Feature Availability
Vtiger Editions: One Growth | One Professional | One Enterprise | One AI
Introduction
Engaging with website visitors in real time is essential for providing quick support, converting leads, and improving customer satisfaction. Vtiger CRM’s Chat Widget allows businesses to embed a live chat interface directly on their website.
To enhance this experience, you can integrate the AI-powered Chatbot into the Chat Widget. The chatbot can respond instantly using configured prompts, knowledge base articles, FAQs, and custom chatflows. When needed, it can seamlessly hand over the conversation to human support agents.
Use Case
FloristaHub, an online flower delivery business, receives hundreds of website visitors daily. Many customers ask similar questions such as delivery availability, order tracking, bouquet customisation, and pricing. Before using Chatbot, these queries were manually handled by support agents, leading to slower response times and increased workload.
To streamline support and offer faster assistance, FloristaHub enabled the Chat Widget on its website and configured a Chatbot using Chatflow in the Generative AI Designer.
Benefits of Chat Widget with Chatbot
The Benefits of using the Chat widget with Chatbot are:
- Instant Responses - Customers receive prompt answers without waiting for an available agent.
- Reduced Workload for Support Teams - Chatbot handles repetitive queries, freeing agents for complex issues.
- 24/7 Availability - The chatbot stays active even after business hours.
- Consistent and Accurate Answers - Uses knowledge base articles, FAQs, and AI prompts to provide reliable information.
- Improved Customer Experience - Helps visitors navigate issues quickly and routes conversations to the right agents.
- Improved Lead Conversion - Chatbot can capture visitor details and qualify leads before handing them off to the team.
In this article, you will learn about:
- Creating a Tracker
- Setting Up Chatflow in Generative AI Designer
- Activating the Chatflow
- Configuring the Chat Widget
- Embedding the Chat Widget in a Website
Key Terminology
|
|
|
|
|
|
|
|
|
|
|
|
|
|
|
|
|
|
Creating a Tracker
To begin setting up the chat widget, you must first create or select a tracker. A tracker generates the script you will embed on your website.
- Log in to the CRM.
- Click the User Profile on the top-right corner.
- Click Settings. The Settings page opens.
- Go to Websense > Trackers. The Tracker page opens.
- Click + Create Tracker. The Create Tracker window opens.
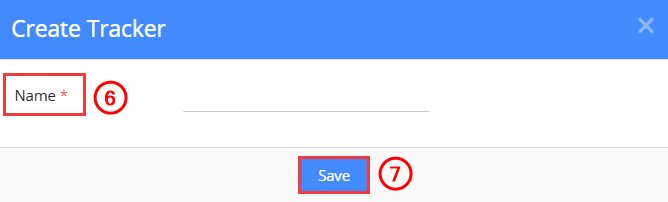
- Enter the name of the Tracker.
- Click save.
Note: Ensure that the Tracker status is set to Active.
Once the tracker is created, Vtiger automatically generates an HTML script. This script will later be added to your website to display the chat widget.
Setting up Chatflow in Generative AI Designer
Your Chatflow defines how the Chatbot in the Chat Widget will respond, where it gets its information from, and when it should hand off the chat to agents.
To learn more about Chatflow, click here.
Follow these steps to set up Chatflow:
- Log in to the CRM.
- Click the main Menu.
- Go to Platforms.
- Click Designers > Generative AI Designer. The Generative AI Designer page opens.
- Click Chatflow.
- Select + Add Chatflow. The Chatflow window opens.
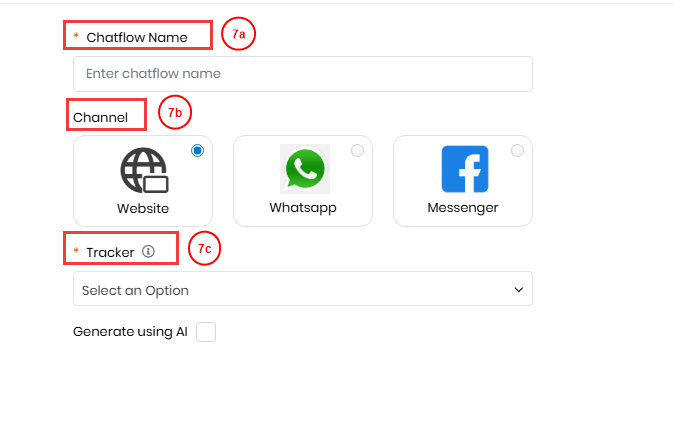
- Enter or select the following information:
- Chatflow Name - Enter a name for the Flowchat.
- Channel - Select the Website as the channel.
- Tracker - Select the Tracker from the drop-down that you have created. The Chatlfow setup model window opens.
- Click Save and continue.
- Drag and drop the required Blocks into the chatbot window and create the chatflow according to your needs.
- Click Save.
Note:
- If you include a Prompt in the Chatflow, ensure that its mode is set to Chatbot. To learn more about Prompts, click here.
- If your Chatflow involves Agents, make sure the Customer Facing Agent option is enabled when creating the agent. To learn more about the Agents, click here
Activating the Chatflow
Once your Chatflow is built, you must activate it so the chat widget can use it.
- Log in to the CRM.
- Click the main Menu.
- Go to Platforms.
- Click Designers > Generative AI Designer. The Generative AI Designer page opens.
- Click Chatflow.
- Select the Chatflow you created.
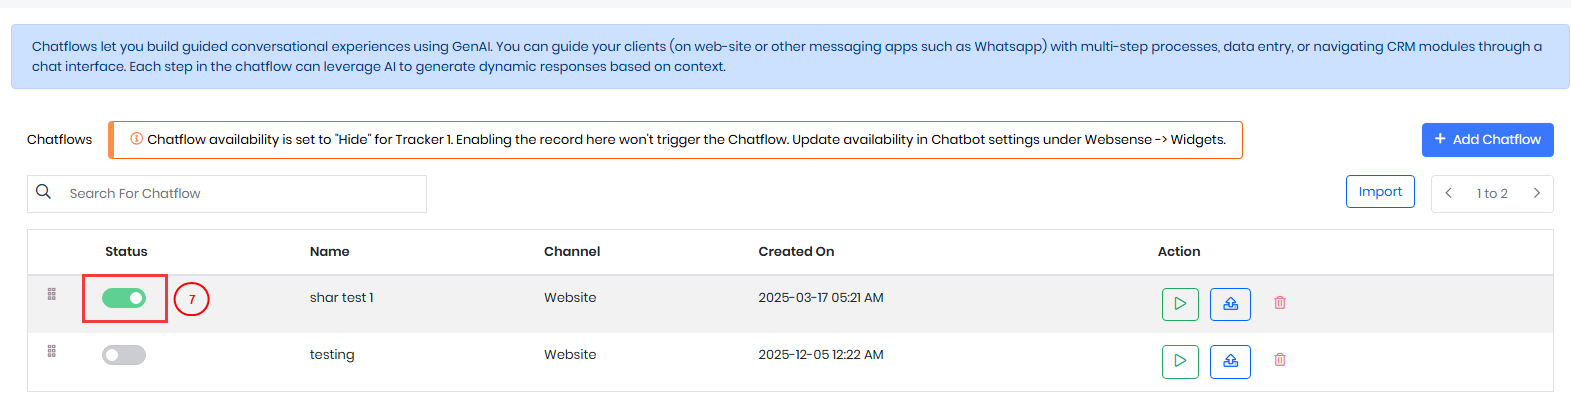
- Turn on the Active toggle under Status.
Note: Only activated Chatflows will work in the Chat widget.
Configuring the Chat Widget
With the activated Chatflow ready, you can now configure the Chat Widget that will appear on your website.
- Log in to the CRM.
- Click the User Profile on the top-right corner.
- Click Settings. The Settings page opens.
- Go to Websense > Widgets. The Widgets page opens.

- Select the Tracker that you have created.
- Click Chatbot.
- Enter or select the following information:
- Chatflow Availability - Controls when the chatbot appears on your website.
- Never Show - The chatbot will not be displayed.
- Show Always - The chatbot will always appear on the website.
- Chatbot Name - The name displayed to users when the chatbot starts the conversation.
- Welcome Message - The first message the chatbot sends when a visitor opens the chat widget for the first time.
- Returning Welcome - A greeting shown to visitors who have previously interacted with the chatbot.
- Transfer to Agent Message - The message shown when the chatbot transfers the conversation to a live agent.
- No Agent Available Message - The message displayed when a visitor requests an agent, but no agents are available.
- Chatbot Image - The avatar or display image shown for the chatbot in the widget.
- Chatflow Availability - Controls when the chatbot appears on your website.
- Click Save.
Your chat widget is now linked to the chatbot, and the Chatflow you configured determines how the chatbot interacts with website visitors.
Embedding the Chat Widget in a Website
The final step is to embed the widget on your website so visitors can interact with your chatbot.
- Log in to the CRM.
- Click the User Profile on the top-right corner.
- Click Settings. The Settings page opens.
- Go to Websense > Trackers. The Tracker page opens.
- Hover over the Tracker that you used while creating the Chatflow.

- Click Copy this to copy the HTML snippet.
- Inject the copied HTML snippet into your required site.
- Before the closing tag.
- Save and publish your website changes.
The chat widget now appears on your website, and it will work according to the configured chatflow.
Troubleshooting Tips
- Widget not showing
- Cause: Tracker script is missing or placed incorrectly.
- Fix: Re-paste the tracker script near the closing tag of your website.
- Chatbot not responding
- Cause: The Chatflow is not active.
- Fix: Go to Chatflows and activate the chatflow.
- Bot is not answering correctly
- Cause: FAQs or Knowledge Base articles are missing or incomplete.
- Fix: Update or add relevant FAQs and KB articles so the chatbot can reference them.