Articles in this section
Using the Customer Portal
Introduction
The Vtiger customer portal is a platform to view Vtiger-specific information for your business.
It is a self-service portal and your one-stop destination for all your questions. Whether you want to know the status of an issue you reported or an answer to a query, log in and look up relevant information.
Logging in to the Customer Portal
You will receive your login credentials via email sent by Vtiger CRM.
Follow these steps to log in to the portal:
- Go to your email registered with Vtiger CRM.
- Open your email from Vtiger CRM.
- Click the Login Here link. The Customer Portal opens.
- Enter the username and password mentioned in the email.
- Click Sign In.
Changing your Portal Password
It is recommended to change the password after the first login.
Follow these steps to change your password:
- Log in to Vtiger Customer Portal.
- Click the Person icon on the top right corner of the screen.
- Select Change Password.
- Enter your current and new passwords.
- Confirm your new password.
- Click Save.
Editing your Profile Details
Your profile details replicate the information stored in the contact record in the CRM. The changes are reflected in the CRM record whenever you change your details from the portal profile.
Follow these steps to edit your profile details:
- Log in to the portal.
- Click the Person icon on the top right corner of the portal.
- Select Profile.
- Click Edit to change the profile details.
Creating a Case from the Customer Portal
As a Vtiger user, if you are facing a problem using Vtiger, you can report it as a case. You can also view all your open cases in the portal.
Similarly, customers can report an issue with your product or service using the customer portal.
From Cases in the Menu
Follow these steps to create a case:
- Log in to the portal.
- Select Cases from the menu.
- Click the New Case button on the Cases page.
- Enter the following details mandatorily:
- Case Title: State the issue briefly in this field.
- Priority: Set the priority of the issue – Urgent, High, Medium, or Low.
- Summary: Explain the issue in this field.
- Click Save.
From the Homepage Shortcut
Follow these steps to create a case from the portal homepage:
- Log in to the portal.
- Click the Create a Case button under What would you like to do?.
- Enter the following details mandatorily:
- Case Title: State the issue briefly in this field.
- Priority: Set the priority of the issue – Urgent, High, Medium, or Low.
- Summary: Explain the issue in this field.
- Click Save.
Uploading a Document to the Customer Portal
There are two ways to upload a document.
From Documents in the Menu
Follow these steps to upload a document to the portal:
- Log in to the portal.
- Select Documents from the menu.
- Click the New Document button on the Documents page.
- Click Browse to find your document.
- Click Save to upload the document.
From the Homepage Shortcut
Follow these steps to upload a document from the portal homepage:
- Log in to the portal.
- Click the Upload a document button under What would you like to do?
- Click Browse to find your document.
- Click Save to upload the document.
|
|
Viewing FAQ in the Customer Portal
The customer portal can be accessed using the login credentials received by email.
Follow these steps to view FAQs in the customer portal:
- Log in to the portal.
- Select FAQ from the menu.
- Use the search bar to look for an answer.
Click more… to view other FAQs.
|
|
Actions Possible on the Records in the Customer Portal
Here are the actions that you can perform on the records in the customer portal:
Download a record
Follow these steps to download a record from the Customer portal.
- Log in to the portal.
- Click on Cases, Quotes, Invoices, or another module mentioned above on the portal menu.
- To download a record, choose one of the following options:
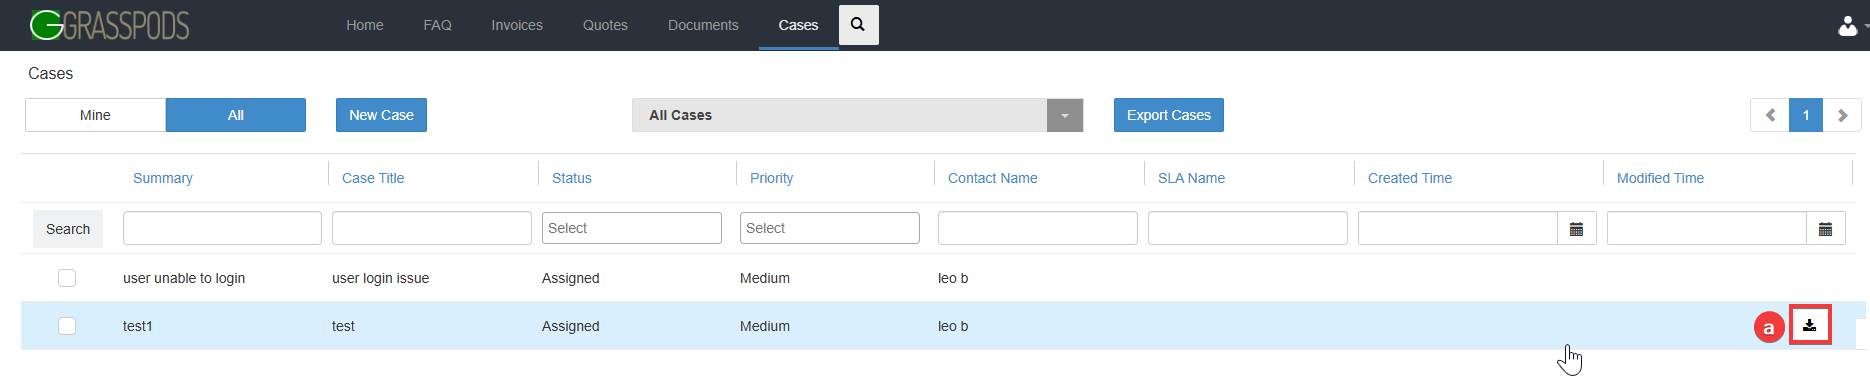
- Hover over the record and click the Download button.
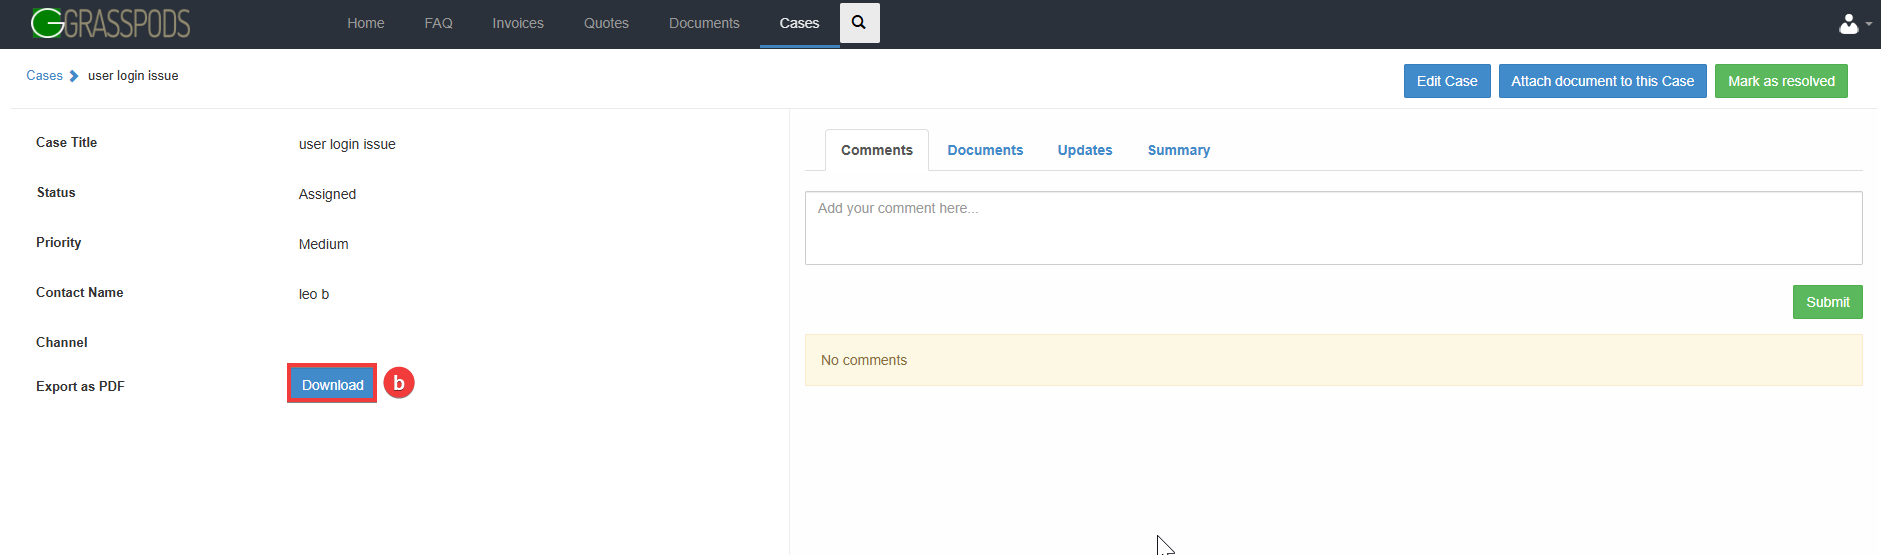
- Open the record and click the Download button.
- Hover over the record and click the Download button.
The PDF of the record will be downloaded using the predefined print template for that module. If no active template is available, an error message will be displayed stating: There is no active template to download this.
Download a Document
Follow these steps to download a document:
- Log in to the portal.
- Click on Documents, Quotes, Invoices, or another module mentioned above on the portal menu.
- Click the Download button displayed beside the record details.
|
|
Sort Records
Follow these steps to sort a list of records:
- Log in to the portal.
- Click on a module on the menu. You will see the list of records in the module.
- Click on the File Name or Subject column to sort the records in ascending or descending order.
Filter and Export Cases
You can filter cases by status and export them.
Follow these steps to filter and export cases:
- Log in to the portal.
- Click Cases on the menu.
- Click the drop-down at the top of the case list to filter cases based on their status.
- Click the Export button to export the cases from the current list.
Cases are exported in a file in .csv format.
View your or your Organization’s Records
This option lets you toggle between the records related to you and anybody in your organization.
Follow these steps to view a record:
- Log in to the portal.
- Click on a module on the menu. You will see the list of records in the module.
- Click Mine or All displayed on top of the column names.
- Mine shows only your records.
- All shows the entire organization’s records.