Articles in this section
Managing Bills
Feature Availability
Vtiger Editions: One ProfessionalTo learn more about Vtiger editions and feature limits, click here.
Introduction to Bills
Bills in Vtiger CRM are generated from Purchase Orders (POs) to initiate payments to vendors upon receipt of the ordered items. They act as essential records that track and manage vendor payments, ensuring accurate financial documentation and smooth purchasing workflows.
Bills form a crucial part of Vtiger’s Inventory Management Add-on, which also includes modules like Credit Notes, Delivery Notes, and Receipt Notes. Together, they enable businesses to manage procurement, billing, and vendor payments seamlessly.
Relationships Between Bills and Other Modules
- With Purchase Orders
- When a billing record is created, it is linked to a PO. Hence, bills are highly dependent on the PO. Before you edit products or services in a billing record, please read below:
- You must add a product or a service related to the PO. This PO must be linked to the bill record.
- The quantity of a product or a service defined in the PO is the final number. You cannot exceed its quantity in the bill record.
- If you wish to make changes to the product or the service, you must first edit the related PO.
- To learn more about Purchase Orders, click here.
- With Payments
- A bill is cleared only when payments are made. Hence, changes in the payment record will affect the bill. Here are a few instances that show the dependency of bills on payments:
- When a payment is made, the Paid and Balance fields are updated in the bill record.
- If the status of a payment record is changed to paid, the bill's status is also set to paid.
- To learn more about Payments, click here.
Note:
- The modules, Credit Notes, Delivery Notes, Receipt Notes, and Bills are a part of the Inventory Add-On Extension. You have to install these extensions by going to Settings > Extension Store.
- You can link multiple purchase orders (POs) to a Bill.
Key Features
- Generate bills directly from the Bills module or from an existing Purchase Order.
- View, filter, and manage all bills with quick access to edit, delete, or email actions.
- Perform quick actions like sharing bills, adding documents, creating payments, or scheduling follow-ups.
- Print or email bills using customizable templates to maintain brand consistency.
- Seamlessly link Bills to related modules such as Purchase Orders, Vendors, and Payments for end-to-end visibility.
- Configure taxes, discounts, shipping charges, and price books to match your organization’s billing policies.
Benefits
- Streamlined Vendor Payments: Easily generate and track bills linked to purchase orders to ensure timely payments.
- Enhanced Financial Accuracy: Maintain precise records of billed amounts, taxes, and discounts to minimize accounting errors.
- Improved Visibility: The One View widget provides a consolidated snapshot of all related modules—Purchase Orders, Vendors, Payments, and Documents.
- Customization Flexibility: Adapt bill layouts, templates, and field configurations to suit your organization’s processes.
- Time Savings through Automation: Reduce manual effort by automatically linking payments, tracking bill status, and sharing bills in one click.
- Better Audit & Compliance Management: Maintain a transparent record trail for internal audits and financial compliance.
Key Terminology
|
|
|
|
|
|
|
|
|
|
|
|
|
|
|
|
|
|
|
|
|
|
|
|
In this article, you will learn about:
- Bills module
- Creating a Bill
- Adding line items to a bill
- Configurations you can make to a bill
Creating a Bill
Listed below are the ways to create a bill.
- From Bills’ List View
- From Purchase Orders
From Bills’ List View
Follow the steps below to create a bill:
- Log in to the CRM.
- Go to the Main Menu.
- Go to Inventory.
- Select Bills.
- Click +Add Bill.
- Fill in all the mandatory details.
- Click Save.
From Purchase Orders
Follow these steps to create a bill from a PO:
- Log in to the CRM.
- Go to the Main Menu.
- Go to Inventory.
- Select the Purchase Orders module.
- Open any particular PO.
- In the Summary View, click the Do button in the top-right corner of the screen.
- Click Add or Create.
- Click on Bills.
- Enter all the details.
- Click Save.
Configurations in Bills
You can configure Taxes, Tax regions, Shipping Charges (if any), and Terms and Conditions from the Settings > Inventory Management section.
Note: Only those with the Admin role can configure these fields.
- Tax regions: Taxes can be set by region. Regions are configured on the Tax Settings screen.
- Currency: It is the same as the currency defined in the Deal. The bill line item currency matches the record-level currency.
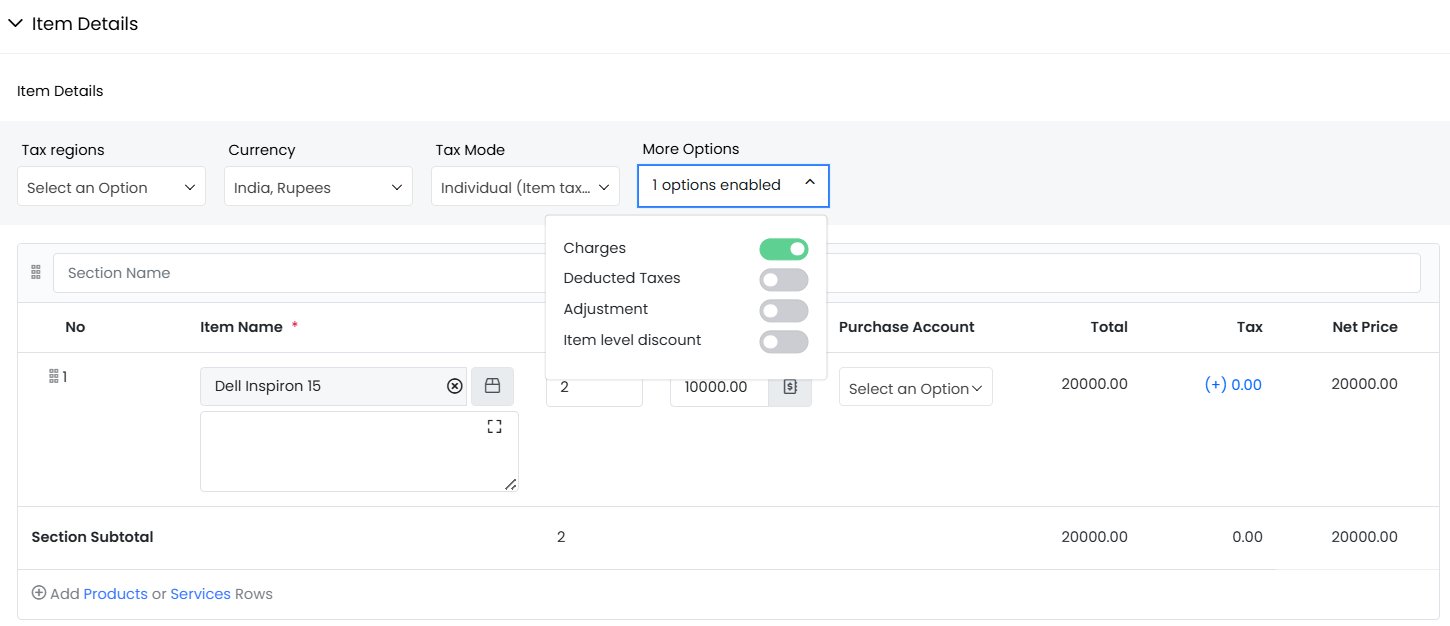
- Tax mode:
- Group Taxes: If there are multiple products/services in the inventory, group taxes help populate tax rates based on specific tax calculations.
- Individual Taxes: You can enable this option while creating a Bill. You can apply taxes for individual items in a bill by clicking the Configure button on the bill.
- Note: The default Tax mode is set to the option selected by the administrator on the Tax Management page. This can be overridden at the bill level in the Bill Configuration pop-up.
- Discounts:
- Group Discounts: Similar to Group Taxes, Group Discounts are applied to products (or) services on the bill level.
- Individual Discounts: Unlike group discounts, Vtiger CRM allows you to apply discounts to individual items based on their List Price.
- Shipping Charges: Shipping Charges are the additional amounts charged by the company’s sales team for shipping the product to a customer.
- Adjustments: This option rounds the total amount to the next or previous value, depending on the number of decimal places.
Note:
- You can customize and add or remove fields by going to the Module Layouts and Fields under Settings.
- Refer to the Tax Management article to learn how to set up taxes and other configurations.
Adding Line Items to an Existing Bill
You can add new Line Items, like a new product/service or a new section in the existing bill, by editing the Item Details block.Adding a product or service
Follow these steps to add a product/service: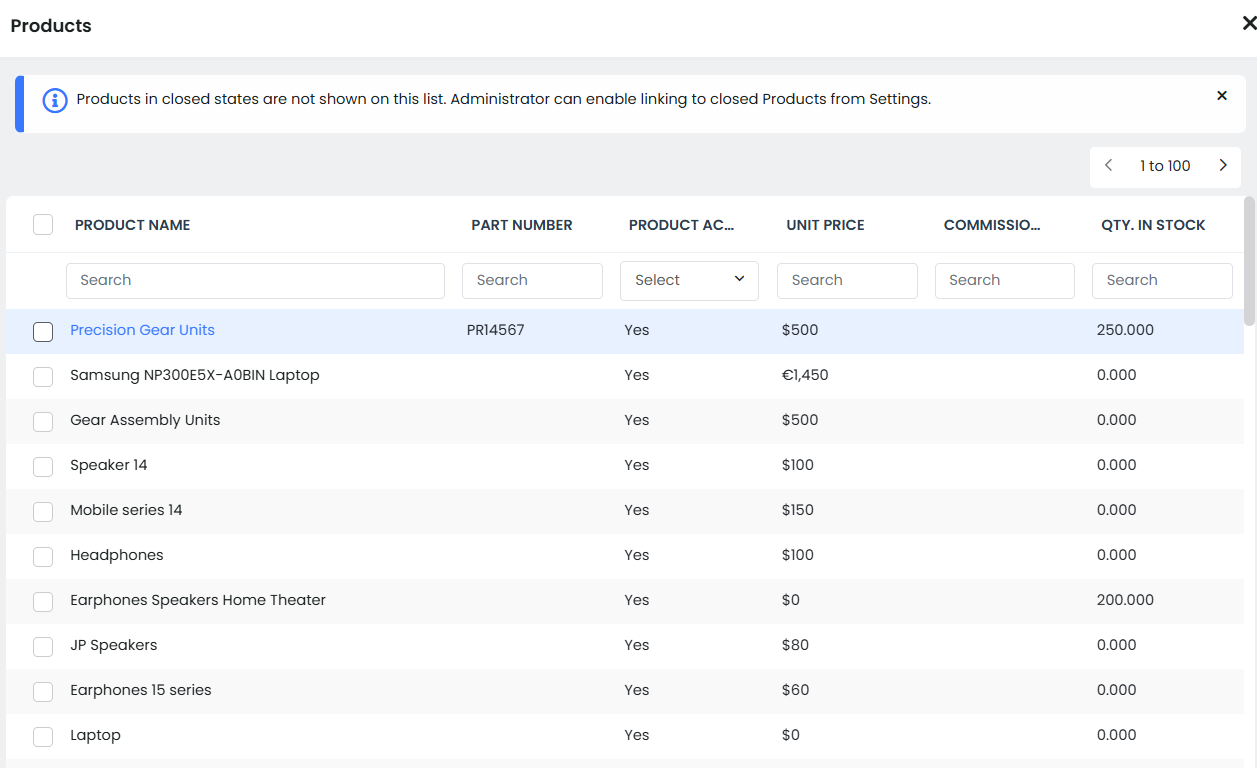
- Log in to the CRM.
- Go to the Main Menu.
- Go to Inventory.
- Select the Bills module.
- Click +Add Bill.
- Fill in all the necessary details.
- Click Save. The newly created bill is available in the Bills List View.
- Go to Bills > List View.
- Hover over the newly created bill and click Edit.
- Go to the Item Details block.
- Select Products or Services. The system displays a list of all products or services linked to the PO.
- Select an item from the list of all items related to the linked PO.
- Click Add Selected.
Adding a new section
Follow these steps to add a section: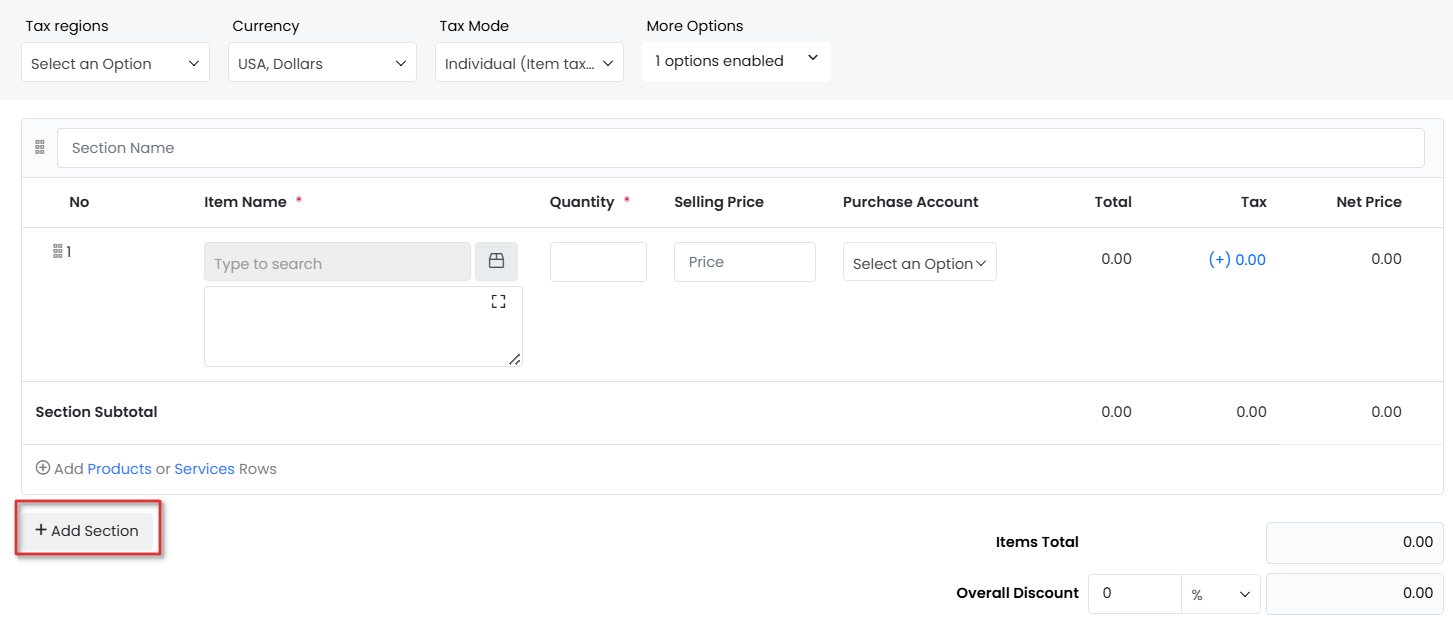
- Log in to the CRM.
- Go to the Main Menu.
- Go to the Inventory app.
- Select the Bills module.
- Select any particular bill.
- Click Edit.
- Go to the Item Details block.
- Click Add Section.
Viewing Bills
List View in Bills
Columns in List View
The columns that are visible by default in the List View are :- Name - Displays the name of the Bill.
- Bill Date - Displays the date on which the bill was generated.
- Status - Displays the status of the bill.
- Purchase Order - Displays the PO related to the bill.
- Bill No - Displays the bill number.
List View actions
You can perform many quick actions, such as Edit, Delete, Email, Follow, etc., on the Bill records displayed in the List View.To learn more about List View actions in Vtiger CRM, click here.
Summary View
Summary View is the view that appears when you click a particular record from the List View. The Summary View displays the key information for a record. The Summary View can be divided into four sections. Each section has a particular functionality.- Summary View actions
- Follow: You can follow any bill record to get updates on all the activities performed on that record.
- Tags: You can add tag names to the record to identify the record easily.
- Print: You can print the bill or save it as a PDF for future reference.
- Duplicate: You can duplicate the current record and have all the details reflected in a new record.
- Delete: You can delete a record by clicking this button.
- Add or Link
- Documents: Generated bills are displayed here.
- Payments: Add or link Payment records.
- Esign Documents: Add or link Esign documents.
- More:
- Share as Link.
- Share as an Attachment.
- Reach out now.
- SMS
- Log a meeting
- Send PDF for signing
- Telegram and more
- Add or Create - You can add or create other modules related to the bill.
- Widgets
- One View - All the modules related to a bill are displayed here.
- Tasks -All the tasks related to a bill are displayed here. You can also add a new task from here by clicking the + button.
- Events - All the events related to a bill are displayed here. You can also add a new event from here by clicking the + button.
- Activity -All the activities made on a bill are displayed here. You can also add comments related to a bill in this section.
- Analytics -You can view all the metrics related to a bill in the form of charts, mini-lists, etc. You can also create new ones here.
- Payments -You can create a new payment or add an existing payment to a bill. All the payment-related details are displayed here.
- Documents - You can create a new document or add an existing document to the bill using this widget. All the document-related details are displayed here.
- Settings - You can change the bill template here.
Details View
- You can view and edit all the information for a billing record by clicking the Details View tab in the Summary View of the record.
Actions Possible on a Bill
Share a bill
You can share a bill with a customer by sending a link to the bill or by sending the bill itself as an attachment
As a link: Follow these steps to share the bill as a link:
- Log in to the CRM.
- Click the Menu icon.
- Go to the Inventory tab.
- Select the Bills module.
- Open any bill.
- Click the Do button in the Summary View.
- Select Share.
- Click Share as link.
- A mail compose window opens with Bill's link.
- Enter the recipient's details and click Send.
As an attachment: Follow these steps to share the bill as an attachment:
- Log in to the CRM.
- Click the Menu icon.
- Go to the Inventory tab.
- Select the Bills module.
- Open any bill.
- Click the Do button in the Summary View.
- Select Share.
- Click Share as an attachment.
- A mail compose window opens with the bill attached to it.
- Enter the recipient's details and click Send.
Generate related documents
Add a document
Use Vtiger’s Documents module to solve the problems of organizing and sharing! It acts as a repository for all the documents that you have created or those shared with you by your customers or the sales team.
Follow these steps to add a document:
- Log in to the CRM.
- Click the main Menu.
- Go to Inventory.
- Select the Bills module.
- Open any bill.
- Click Add or Create button.
- Select Documents.
- Here, you will see the following two options on your screen:
- Select Documents. If you want to add an existing document, select this option.
- Hover over a record in the list of all existing documents to display the radio buttons.
- Click the radio button on the left side of the record to select the record.
- Click Add Selected button present below of the list.
- Create Documents
- If you want to add a new document, select this option.
- Fill all the necessary details.
- Select Documents. If you want to add an existing document, select this option.
- Click Save.
- Here, you will see the following two options on your screen:
Generate a payment
The Payments module enables you to accept payments for the goods sold to your customers. Your customers can pay you online through a secure gateway thereby ensuring that the payments are faster and safer.
Follow these steps to generate a payment:
- Log in to the CRM.
- Click the Menu icon.
- Go to the Inventory tab.
- Select the Bills module.
- Open any Bill record.
- Click the Do button in the Summary View.
- Click the Add or Create button.
- Select Payments.
- Enter all the necessary details.
- Click Save to create the payment record.
- Click Save and Continue to fill in more information.
The newly created payment record will be available in the Payments widget on the Summary View of the bill.
Exporting a bill
Follow these steps to export a bill:- Log in to the CRM.
- Click the Menu icon.
- Go to the Inventory tab.
- Select the Bills module.
- In the List View, hover over any bill record to display the radio button on the left side.
- Click the radio button.
- Click the Export button.
- Select any one of the following options:
- Export Selected Records - This option will export only the selected record.
- Export data in current page - This option will export the records on the current page.
- Export all data - This option will export all the data in all the pages of the bill module.
Printing a bill
Follow these steps to print a Bill:
- Log in to the CRM.
- Click the Menu icon.
- Go to the Inventory tab.
- Select the Bills module.
- Open any bill.
- Click the More button.
- Click the Print button.
- You can perform any of the below options:
- Edit & Export - You can edit the bill and export it to your local system.
- Email with PDF - You can email the bill record as a PDF to the contact.
- Print - You can print the bill and keep a hard copy.
- Save as PDF - You can save the bill as a PDF on your local system.
Changing the Template of a Bill
There are two ways to change the template of a bill.
- From the Print Bill screen
- From the Settings widget
From the Print Bill screen
Follow these steps to change the template for a bill on the Print Bill screen: (This is a temporary change until the bill is printed.)
- Log in to the CRM.
- Go to the Main Menu.
- Go to the Inventory tab.
- Select the Bills module.
- Open any bill.
- Click the More button.
- Click the Print button.
- Select the template you want from the list of all templates.
- You can choose any of the following options:
- Edit & Export - You can edit the bill and export it to your local system.
- Email with PDF - You can email the bill record as a PDF to the contact.
- Print - You can print the bill and keep a hard copy.
- Save as PDF - You can save the bill as a PDF on your local system.
From the Settings widget
Follow these steps to change the bill template in the Settings widget: (This is a permanent change that will be applied to the bill immediately.)
- Log in to the CRM.
- Go to the Main Menu.
- Go to the Inventory tab.
- Select the Bills module.
- Open any bill.
- Go to the Settings Widget.
- Click the Template applied drop-down.
- Select the template of your choice.
The template will be applied to the bill instantly.
Creating Invoices for Billable Tasks
Those of you in the service industry (such as Beauty and Wellness, Travel, etc.) can easily create invoices using Billable Tasks. The More option in Tasks, Projects, and Contacts lists Invoices. You can generate invoices on a Project for completed tasks and for a customer from the Contacts page.
How does this work:- You can create an invoice for tasks with status Completed and marked as Billable. Clicking Generate Invoices from Projects will let you select the billable task to add to the new invoice. In this Billable Tasks list, only Tasks with the status of Completed and marked as Billable are displayed.
- You can create an invoice from Contacts by adding billable tasks created for the Contact. Clicking the invoice displays the Choose Line Items pop-up, where you can select the task radio button to add a billable task to an invoice, or the product/services radio button to select products/services for an invoice.
- When you create an invoice, the invoice record title is copied from the task title. The Invoice subject will be copied from the task title if the invoice is created for a task or project. If the invoice is created from a project or contact, the contact's last name is used for the Invoice.
- The services linked in the Item Details block for a Billable task are automatically added as line items in the new invoice. The task title will be copied into the Invoice line item description. Other details captured include the service rate (Unit Selling price), billable time spent on the task (Quantity), Currency, Tax mode, Charges, Taxes, etc. (as per the configuration in the CRM).
- You can also use task timelogs to record the hours required to complete a task. Once the invoice is generated, the task is marked as Invoiced.
- To generate an invoice, the following conditions must be met: the task stage must be completed, and the Is Billable field must be enabled. Only then are the Service and Rate fields displayed.
- If you have enabled a task as Billable, the Service lookup field will become mandatory, and you must select the service for the task.
- When you select a service, a pop-up will appear asking you to confirm if you want to update the Task's Rate field with the Rate field value of the selected service. Upon confirmation, the Rate value is selected for the billable Task. The Rate field is editable.
Time Logs for a Billable Task
For each billable Task created, you can add Timelogs either manually or by clicking on the Start timer in the Task Summary View. if the time log is not added, the quantity of the line item is displayed as 0. You can mark Timelogs as Billable or non-Billable by enabling the check box in Timelogs.
All the Timelogs you add will appear in the related tab of the Task record with Time spent details in Days/Hours/Minutes.