Articles in this section
Email Sequences in Vtiger
Feature Availability
Vtiger Editions: One Pilot | One Growth | One Professional | One Enterprise | One AI

Introduction
Email Sequences are commonly used for:
- Lead nurturing: Automatically sending follow-up emails after a lead is captured.
- Customer onboarding: Guiding new customers through steps or resources.
- Sales engagement: Sending timely messages to move prospects through the sales funnel.
- Retention campaigns: Keeping existing customers engaged with tips, updates, or offers.
You can create and assign an email sequence to yourself or another CRM user who is responsible for this email sequence.
Features
The following are the key features of Email Sequences in Vtiger:
- Step-by-Step Email Flows: Build multi-step sequences with timed or action-based triggers.
- Personalized Email Content: Use CRM fields (merge tags) to personalize each email sent to a contact.
- Behavior-Based Branching: Create different paths depending on whether contacts open, click, or reply.
- Smart Sending Windows: Schedule emails to send only during specific days or hours.
- Automatic Stop Conditions: Stop a sequence when a contact replies, converts, or meets defined criteria.
- Sequence Performance Analytics: Track open rates, click rates, progression through steps, and drop-offs.
- Workflow Integration: Enroll contacts automatically based on CRM triggers (e.g., stage updates, new leads).
Benefits
The benefits of using an email sequence are:
- Save Time: Automates repetitive follow-up emails, freeing up sales and marketing teams.
- Engage Leads Consistently: Keeps prospects engaged without manual effort.
- Increase Conversions: Timely and relevant emails guide leads through the sales funnel.
- Improve Customer Experience: Provides relevant information and guidance at the right time.
- Better Insights: Analytics help optimize content and sequence performance.
In this article, you will learn about:
- Accessing an email sequence
- Three stages of creating an email sequence
- Creating an email sequence
- Viewing email sequence records
- Viewing sequence metrics
Key Terminology
|
|
|
|
|
|
|
|
|
|
|
|
|
|
|
|
|
|
Accessing Email Sequences
You can access email sequences from the Sales module. Follow these steps to access the Email Sequences module:
- Log in to the CRM.
- Click the main Menu.
- Go to Sales > Sales Enablement.
- Select Email Sequences.
The List View of Email Sequences is displayed.
Three Stages of Creating an Email Sequence
Creating an email sequence involves going through the following three phases. Here’s a closer look at each stage.
Step 1a: Configuring Stages
The configure stage includes the following:
- Subject: You can provide a subject that describes what the email contains.
- Insert Links: You can attach appointment links, survey links, or document links by clicking the Insert Links drop-down.
- Select Email Template: You can select an existing template and embed it into your sequence by clicking on Select Email Template.
- Body: The field in which the actual content is written.
- Schedule: You can send email sequences at the time of creation or schedule them for later. This can be done by clicking the Schedule drop-down. You can select any of these timings:
- Now
- Later Today, 9 AM
- Tomorrow 9 AM
- 2 days later, 9 AM
- 3 days later, 9 AM
- Preview: By clicking on Preview, you can view the email as a recipient and check if it is delivered properly to the contacts.
- Send test mail: You can send a test mail to yourself by clicking on Send test mail to check if the email template is rendered correctly.
- Stage conditions: Stage 1 in an email sequence is mandatory and executed without any conditions. In contrast, Stage 2 to Stage 5 in the sequence will be triggered based on the previous mail status.
- Setting up the conditions: If the previous stage email is/is not, replied/opened in a number of hours/days/weeks, then
- Setting up the actions: Send Email/Create task.
Note:
- You can send the follow-up emails as a reply email by enabling the Send as Reply toggle button.
- To create an email sequence, your mailbox must be configured. To learn how to configure your mailbox, click here.
- Deleting a stage
- You can delete a stage by clicking the Delete Stage button at the bottom right corner of the page.
- Consider a sequence with four stages. If you delete Stage 2, then Stage 3 conditions that were previously dependent on Stage 2 will now depend on Stage 1.
Step 1b: Selecting the Recipient module for Email Sequences
You can create sequences where the recipient type is either Leads or Contacts.
- Once you select Leads or Contacts, the system shows templates related to that module. For example, if you select Contacts, only Contact-related templates will appear, and if you select Leads, only Lead-related templates will appear.
- You can click on Stage 2 (Add Recipients) and Other Settings only after selecting Leads or Contacts. If no module is selected, these options remain locked.
- In the Add Recipients window, the records and lists displayed depend on the module selected:
- If you choose Leads, you will see Lead records and Lead lists.
- If you choose Contacts, you will see Contact records and Contact lists.
- When editing, you can toggle between Leads and Contacts, but once saved, the recipient type becomes fixed.
- If a Lead is deleted or converted into a Contact, the system will handle it through validation rules.
- In the Detail View, you can see a field called Select Recipient Type that clearly shows whether the sequence is linked to Leads or Contacts
Step 2: Adding the Recipients
You can add up to 150 recipients each time you set up an Email Sequence. You can search and select individual Contacts or Leads and add them directly as recipients.
Alternatively, you can choose one or more Tags to include a group of records automatically. Selecting recipients based on Tags allows you to target specific segments for prospecting or marketing without manually building separate recipient lists.
When you select a Tag, all Contacts or Leads associated with that Tag are added to the sequence, making the process faster and more organized.
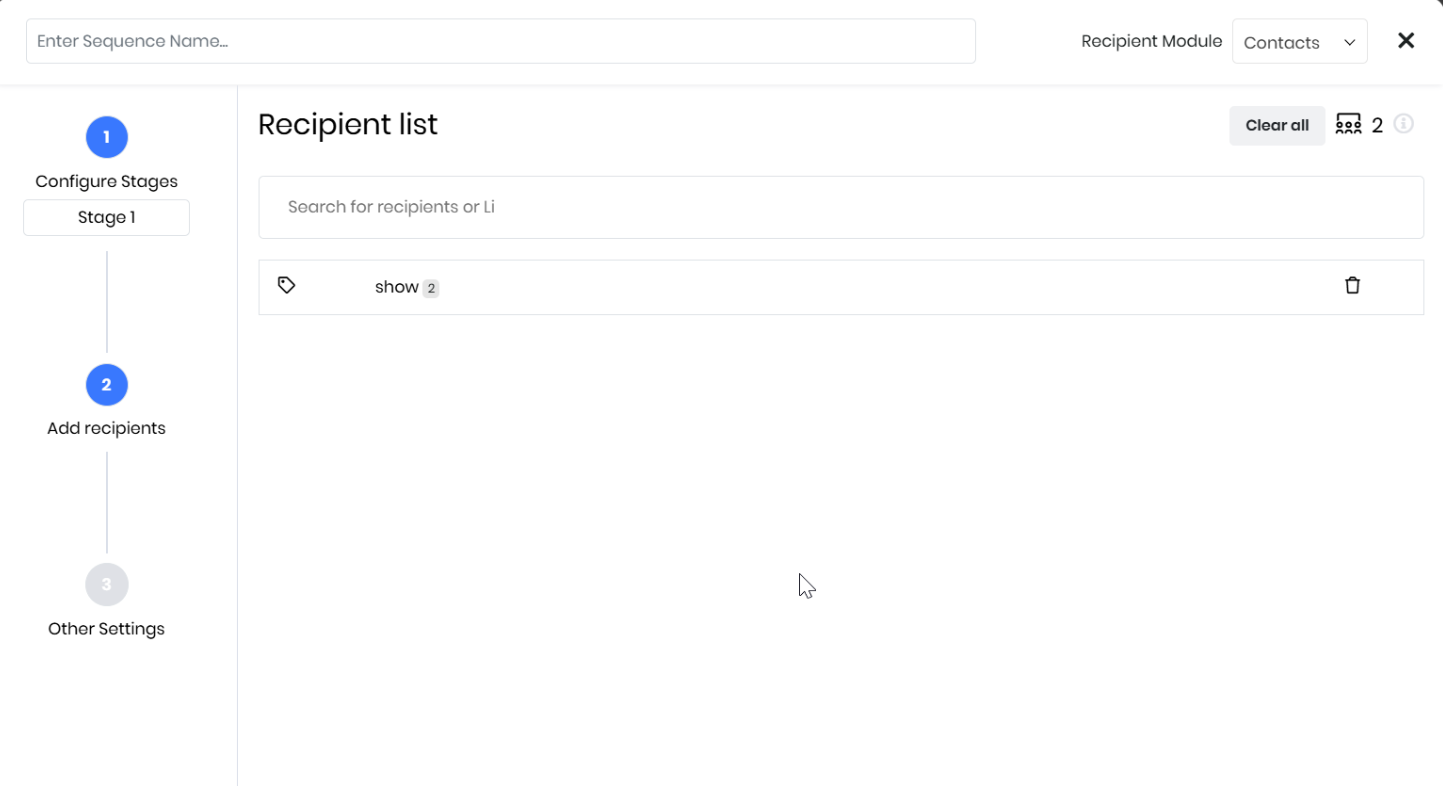
Note: You can either delete a recipient while creating the sequence by clicking the Delete icon or stop the sequence for that particular recipient in the Summary View of the sequence.
Stage 3: Other Settings
The Other Settings section allows you to view the people associated with the sequence. Other Settings has two fields:
- Assigned to: This is a mandatory field that displays the user to whom the sequence is assigned. The default value of this field is the creator of the sequence.
- Shared Users: This is an optional field that will be empty by default. You can add other users, roles, and groups and share with them.
Once you fill in all the necessary information, you can do the following:
- Click on Save and save the email sequence as a draft, or
- Click on Confirm and Activate to start the email sequence at the scheduled time.
Creating an Email Sequence
In Email Sequences, emails are assigned to the sequence owner. When you create and assign an email sequence to a user, all emails sent through that sequence will be assigned to the user who triggers the sequence, instead of the account owner.
For example, if you create an email sequence and assign it to a CRM user, any emails sent through that sequence will appear under that user’s name in the contact record.
Follow these steps to create an email sequence:
- Log in to the CRM.
- Click the main Menu.
- Go to Sales > Sales Enablement.
- Select Email Sequences.
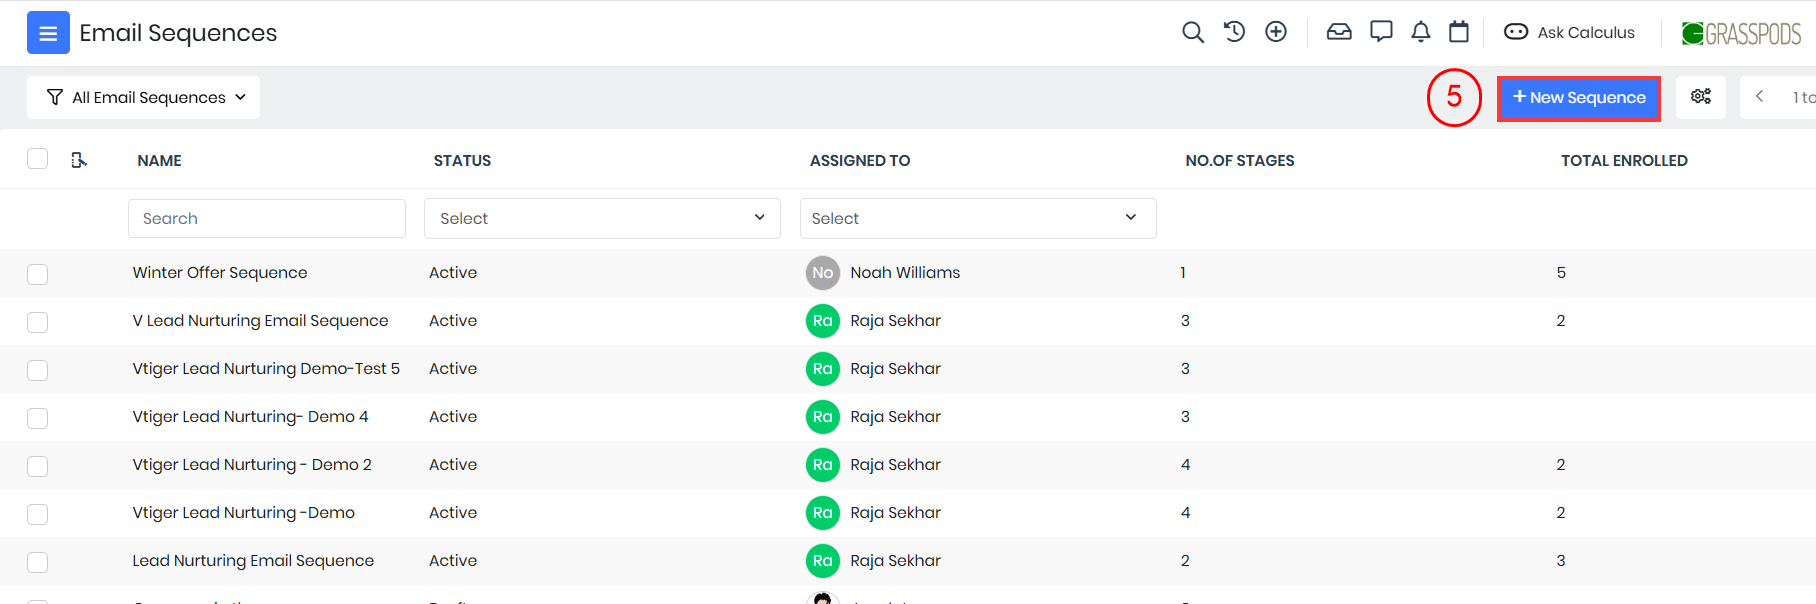
-
Click +New Sequence. A window opens to create a new email sequence.
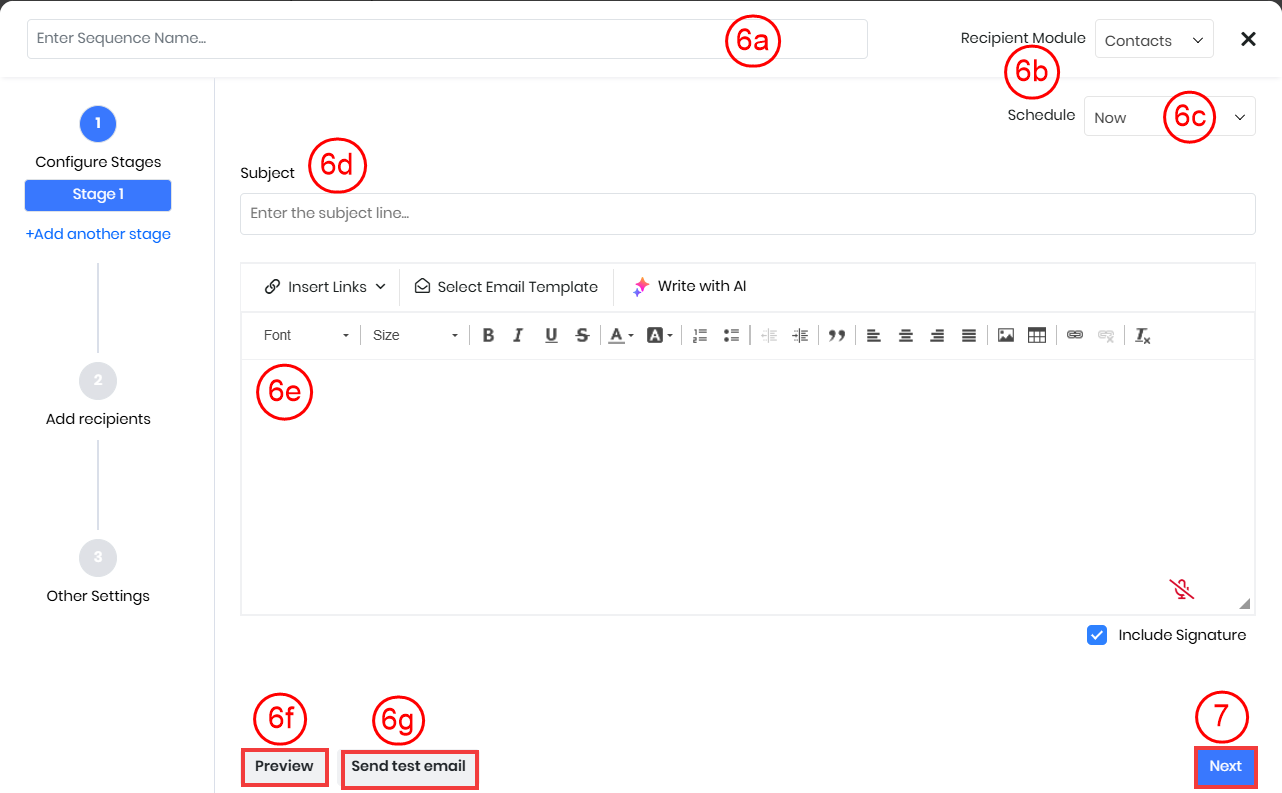
- Enter or select the following information:
- Sequence Name: Enter a name for the email sequence.
- Recipient Module: Select the module for which you want the email to be sent. Selects Contacts.
- Schedule: Select the days when you want the email to be sent.
- Subject: Enter the subject line for the email.
- Email body: Enter the content of the email you want to send.
- Preview: Click to view the email and ensure it appears correctly before sending.
- Send test email: Send a test email to yourself to check if the email renders correctly.
- Click Next. The screen displays the Recipient list.

- Enter names in the search bar to select recipients in the Add recipients window.
- You can search for a Tag to send the sequence to a grouped set of recipients.
- Click Next. The screen displays the Other Settings section.
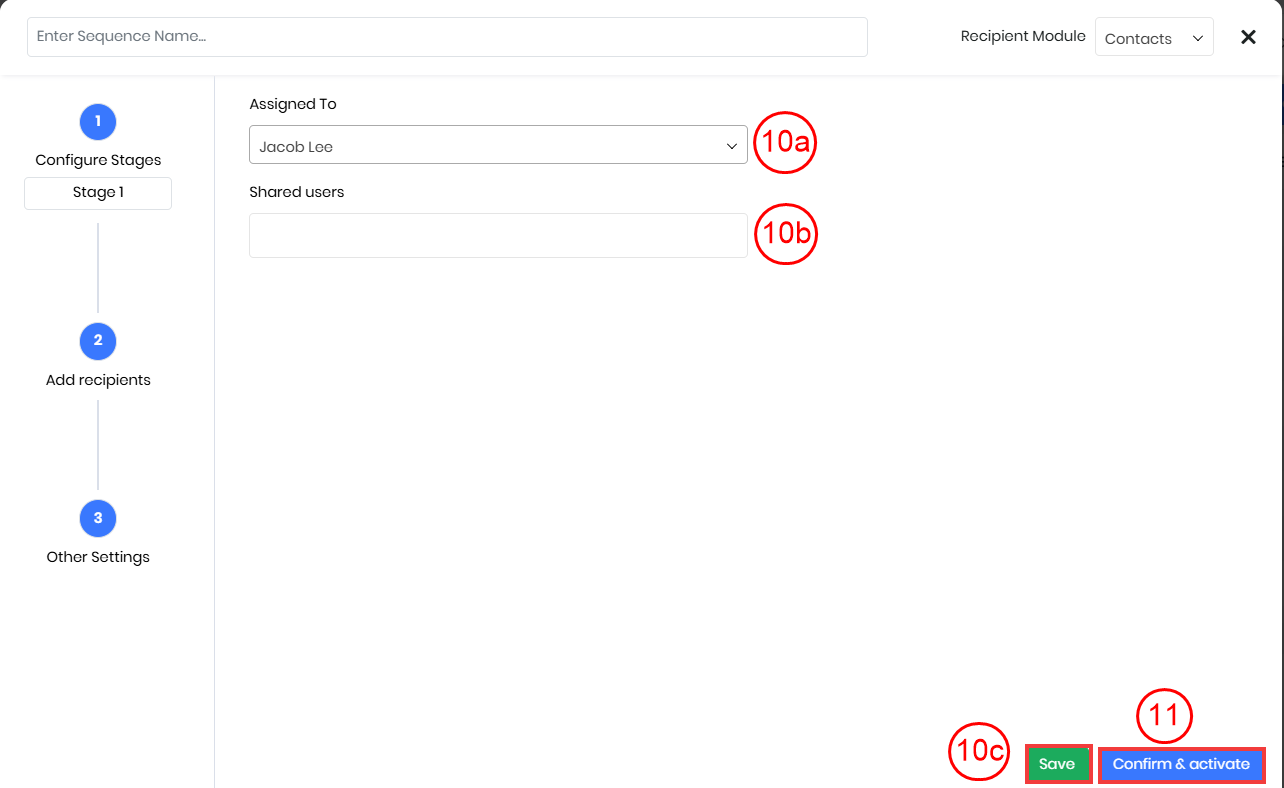
- Enter or select the following information in Other Settings:
- Assigned To: Select the user responsible for this email sequence.
- Shared Users: Select other users who should have access to view or manage this sequence.
- Click Confirm & activate.
A confirmation message will appear once the email sequence is successfully created.
List View in Email Sequences
The List View is the screen that appears when you click on the Email Sequences module. This view sorts and lists all email sequences by their last modified Date.
Columns in List View
The columns that are visible by default in the List View are:
- Name: Displays the name of the sequence.
- Status: Displays the following:
- Active: The sequence is running, and the recipients will receive the emails.
- Inactive: The sequence is stopped temporarily. It also displays the time at which the record was created.
- Assigned to: Displays the user who created the sequence.
- Number of Stages: Displays the number of stages that a particular sequence is made of.
- Total Enrolled: Displays the number of recipients to whom the email sequence is sent.
Note: You can add more columns and customize your List View by clicking the Manage Columns icon on the top row.
List View Actions
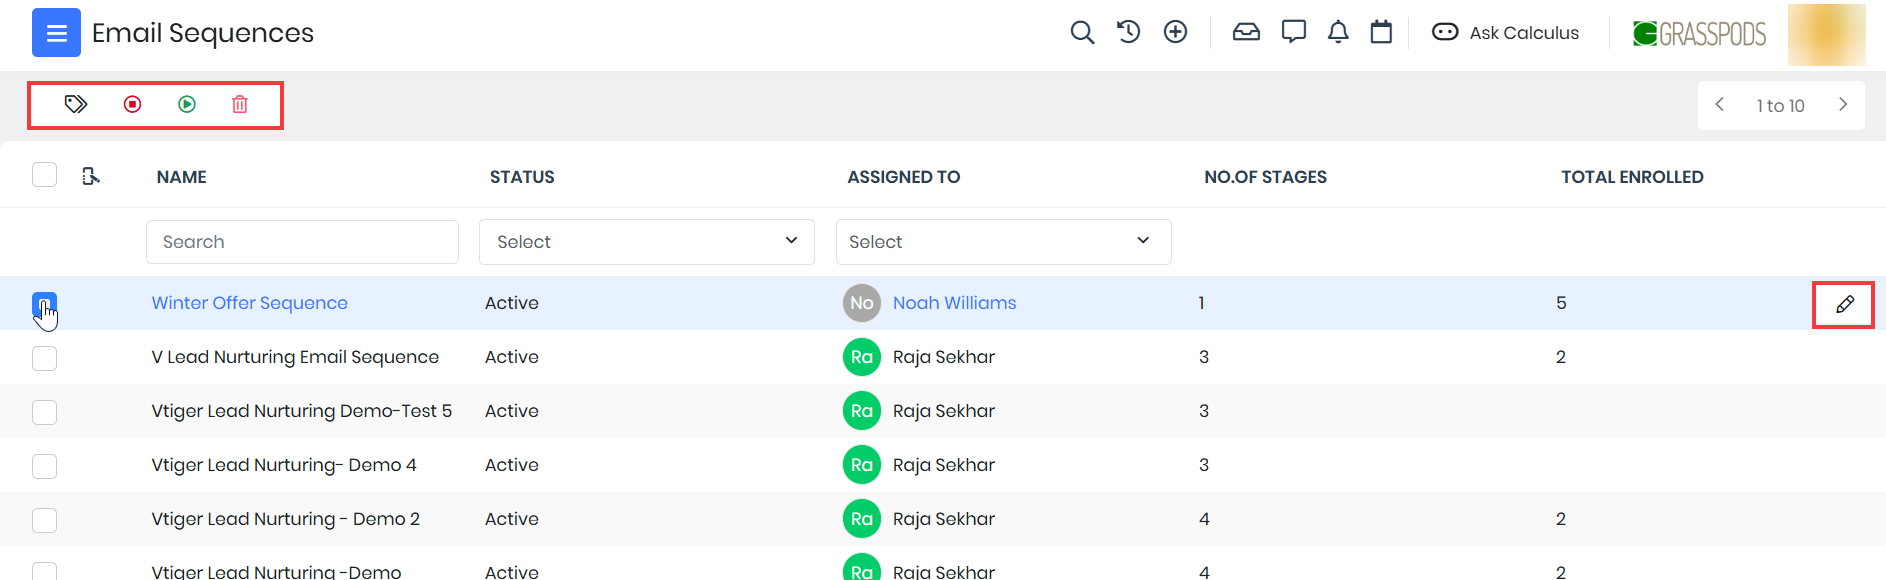
You can perform the following actions by hovering over an active email sequence record in the List View:
- Edit: You can edit the details of the email sequence record.
- Delete: You can altogether remove the sequence, and it will not store any previously executed sequence data.
- Add Tags: You can add tags to categorize and organize the email sequence record.
- Stop Sequence: Stop Sequence will stop an active sequence, and emails will not be sent out to the recipients.
- Start Sequence: You can activate the sequence to begin sending emails to recipients.
- Search: You can search for specific email sequences using keywords.
To learn more about List View actions in Vtiger CRM, click here.
Note: You can allow a recipient to be active in more than one sequence by enabling it under Settings in the List View
Summary View of an Email Sequence Record
The Summary View opens when you click a record from the List View and displays the key information for that record.
You can perform the following actions from the Summary View of a record:
- Tags: You can add tags to the record to identify the record quickly.
- Open in new tab: You can open the email sequence on a new tab in your browser.
- Link: You can copy the URL of the record directly.
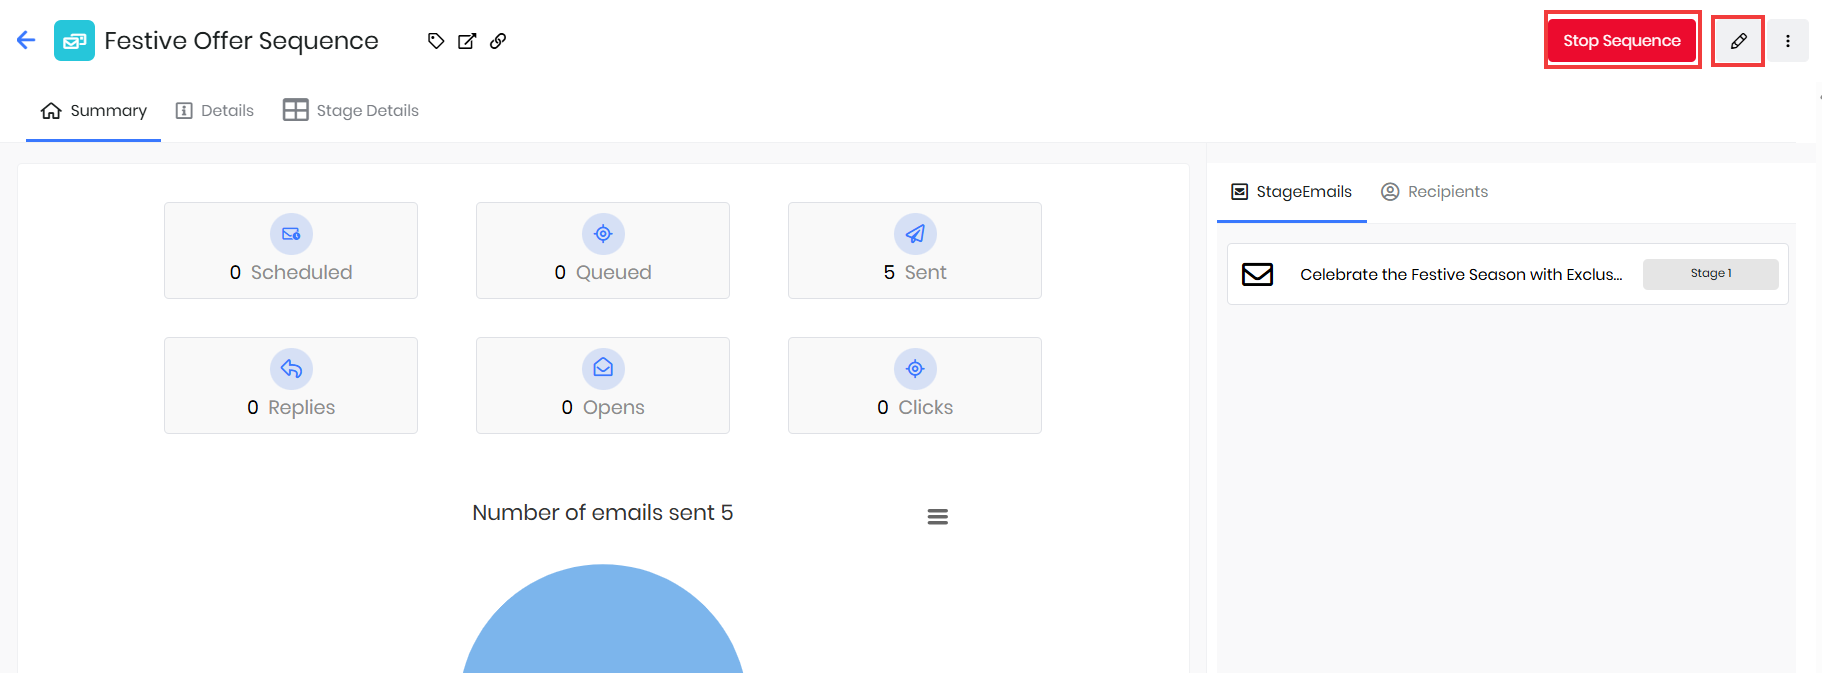
- If your sequence is in Active status, then you can see these two icons on the top right of the record:
- Stop Sequence: Stop Sequence will stop an active sequence, and emails will not be sent out to the recipients. The sequence’s status will change to Inactive.
- Edit: You can edit the details of the email sequence record.
- You can stop an email sequence by any of these two methods:
- Clicking the Stop icon in the List View
- Clicking the Stop Sequence button in the Summary View

- You can do the following from the More icon:
- Duplicate: You can duplicate the current email sequence and have all the details reflected in a new email sequence.
- Delete: You can altogether remove the sequence, and it will not store any previously executed sequence data. You can delete an email sequence by any of these two methods:
- Click the Delete icon in the List View.
- Click the More icon in the Summary View and click the Delete icon.
Note:
- If you stop a sequence midway, say at Stage 3, then the emails that are set up from Stage 4 onwards will not be sent to the recipient.
- To restart a stopped sequence, click the Start icon in the List View or click the Start Sequence button in the Summary View.
- All deleted sequences will be stored in the recycle bin, and you can permanently delete the sequence or restore it.
- Restored sequences will be in Active status.
Widgets

- Recipients: This is the list of contacts to whom the email sequence is targeted.
- Enrolled: Displays the number of recipients who are registered for the sequence.
- Completed: Displays the number of recipients to whom the sequence is sent successfully.
- Stopped: Displays the number of recipients to whom the sequence will not be sent anymore.
- Emails: You can see the emails delivered and the recipients, stage-wise.
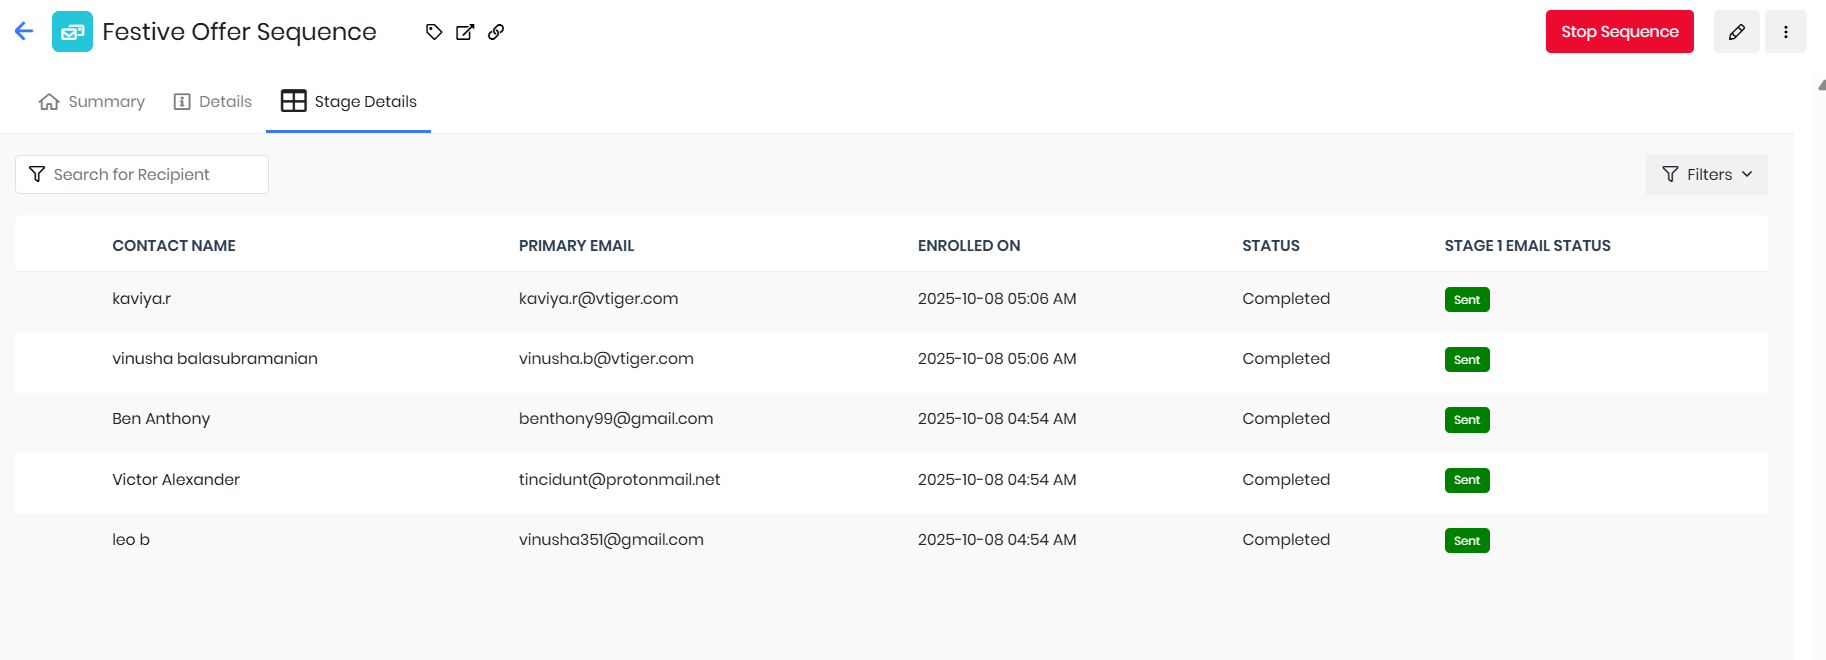
- Stage Details: You can see the status of each stage’s email, recipient-wise. You can also apply Filters and change the view.
- Details: Displays all the details related to the email sequence.
Viewing Sequence Metrics
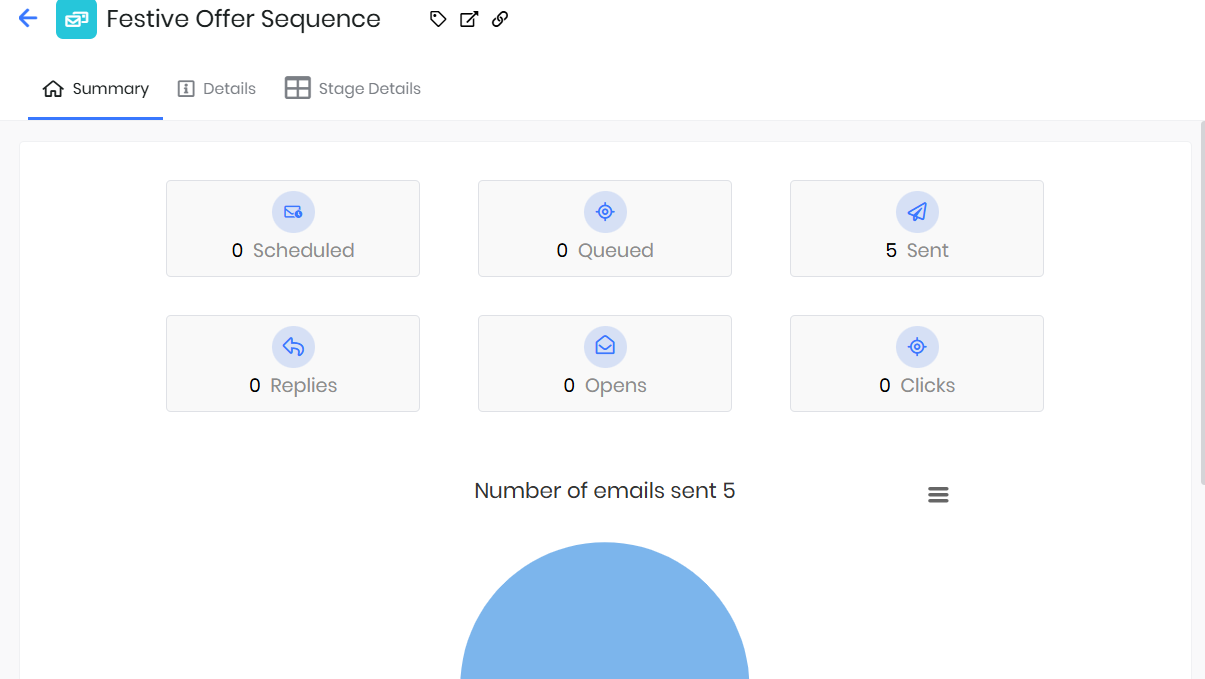
Sequence performance can be tracked via the sequence’s Summary View so that the sales team can nurture the prospect further. The sequence initiator can track the following metrics:
- Scheduled: Displays the number of emails that are scheduled in sequence.
- Queued: Displays the number of emails that are ready to be sent to the recipient.
- Sent: Displays the number of emails sent to the recipients.
- Replies: Displays the number of replies by the recipients.
- Opens: Displays the number of emails that are opened by the recipients.
- Clicks: Displays the number of clicks done on the email by the recipients.