Articles in this section
Adding the Confetti Feature
Introduction
The Vtiger’s Confetti feature lets you add confetti to the screen to celebrate the professional achievements of your employees whenever they accomplish set goals or targets. The Confetti feature is available in all the modules in Vtiger CRM.
 Watch the video to learn about Confetti in detail.
|
|
Benefits of Confetti
- Helps recognize and announce the work accomplishments of employees.
- Serves as an excellent way to appreciate achievements and enhance employee morale.
|
|
Feature Availability
|
|
|
|
| |
|
| ||||
|
|
|
|
|
|
Let us now learn how to install and use the Confetti feature.
Installing the Confetti Feature
The feature is not available by default in the CRM, and you will have to add it from the Extension Store.
Follow these steps to install the feature:
- Log in to your CRM account.
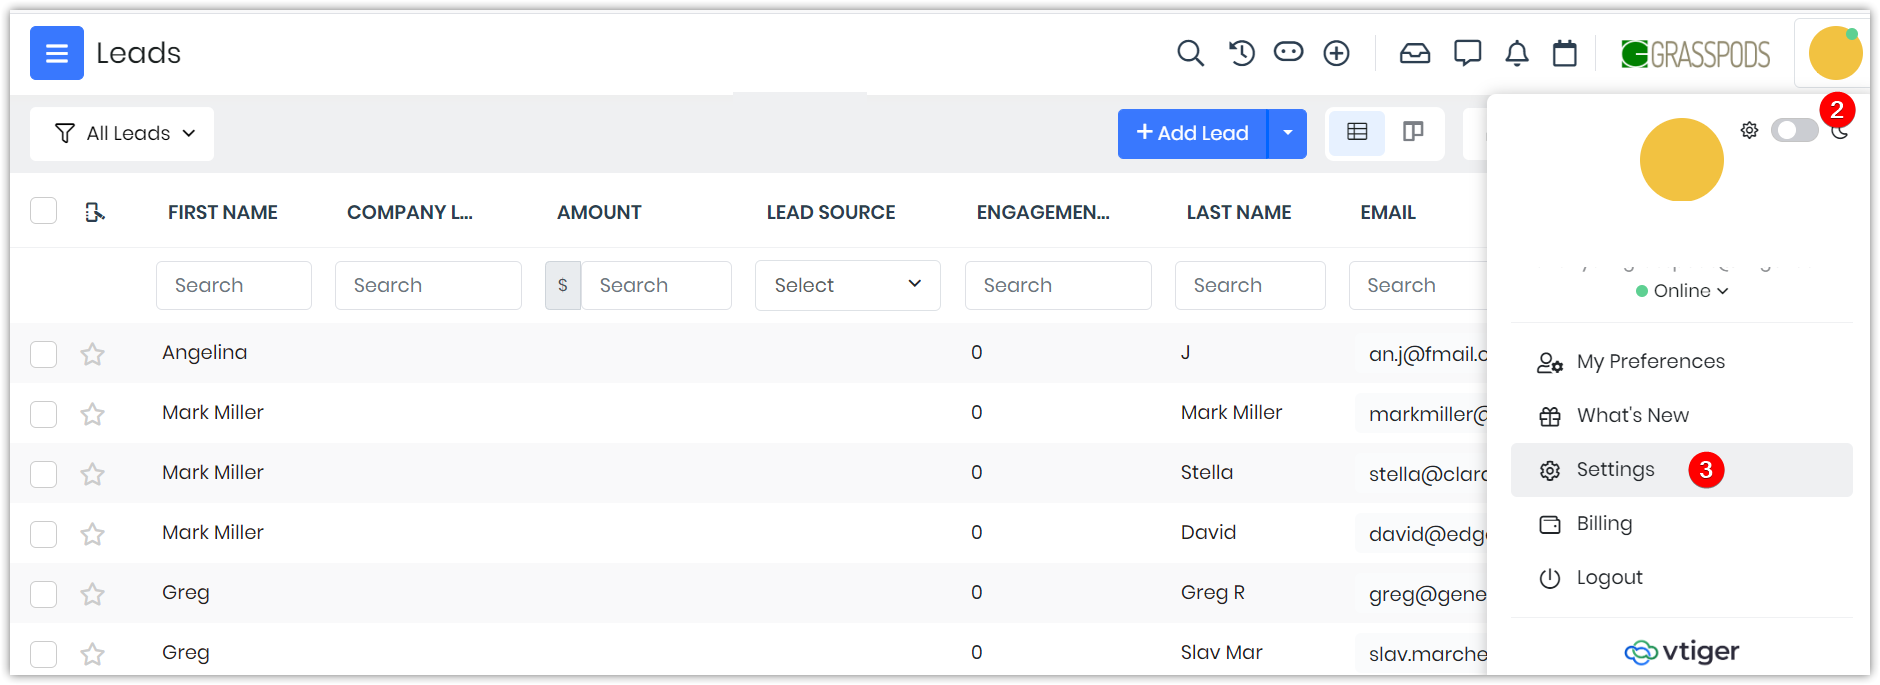
- Click the User Profile icon on the top right corner of the screen.
- Click Settings.
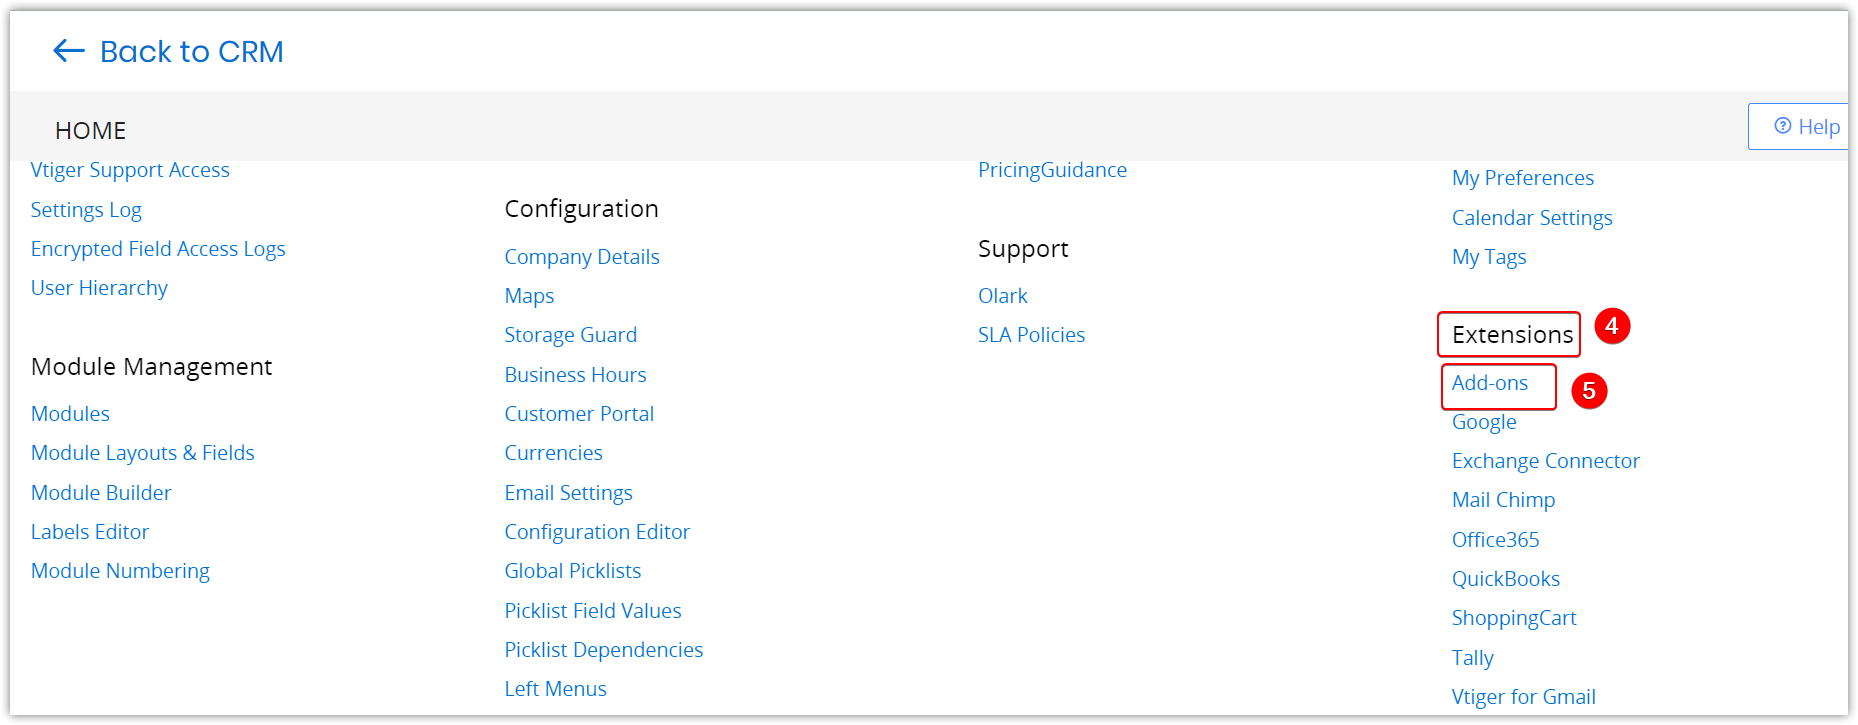
- Go to Extensions.
- Click Add-ons.
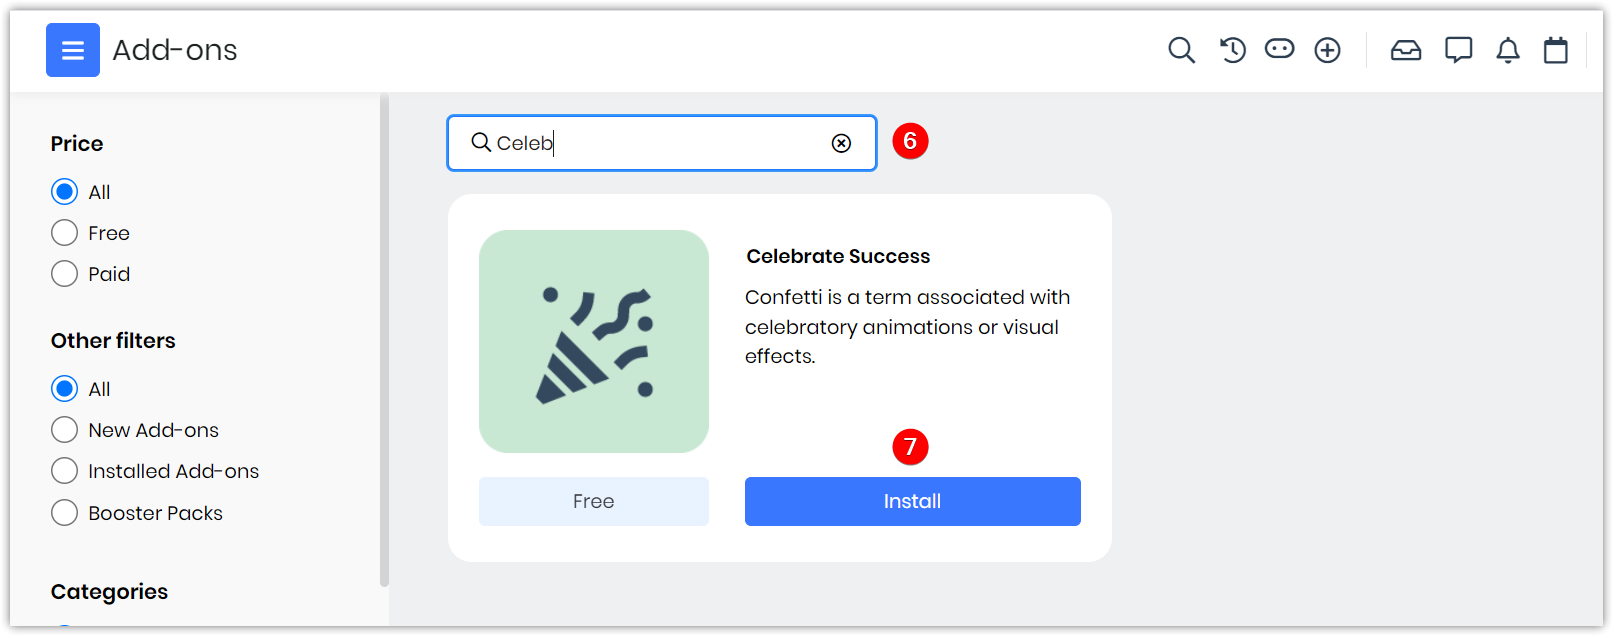
- Type Celebrate Success in the search bar.
- Click Install.
Once the Celebrate Success extension is installed, the Confetti settings button will appear in various modules (like Tasks, Contacts, etc.).
Celebrate Success List View
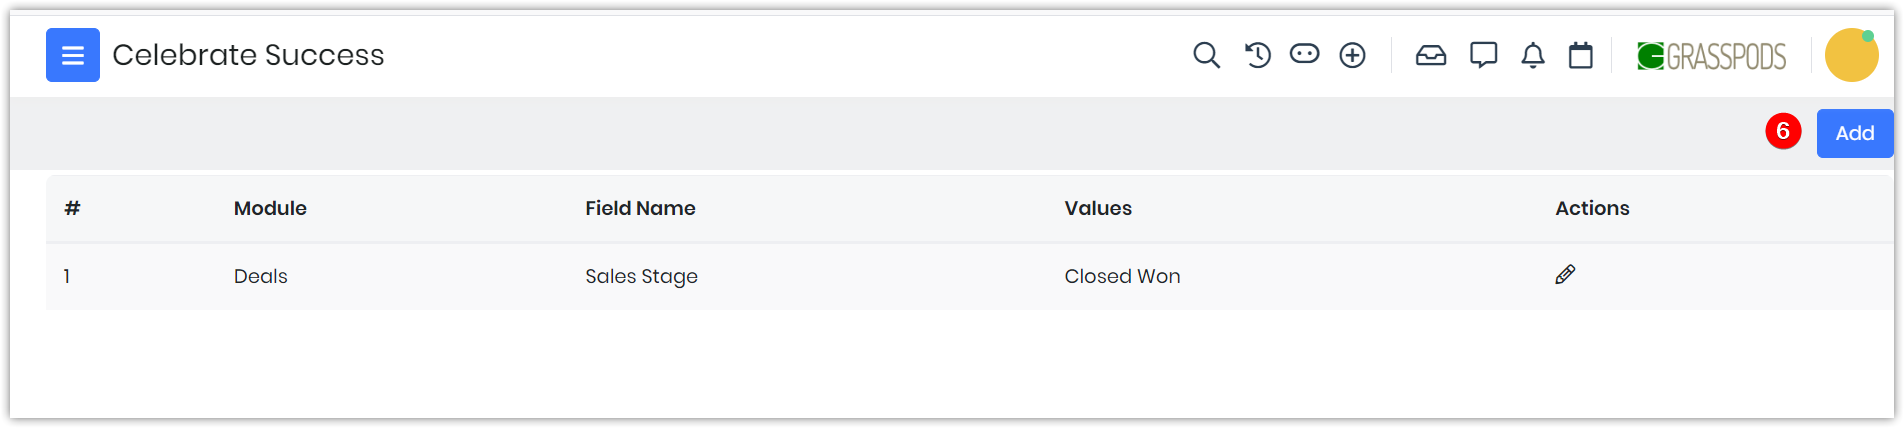
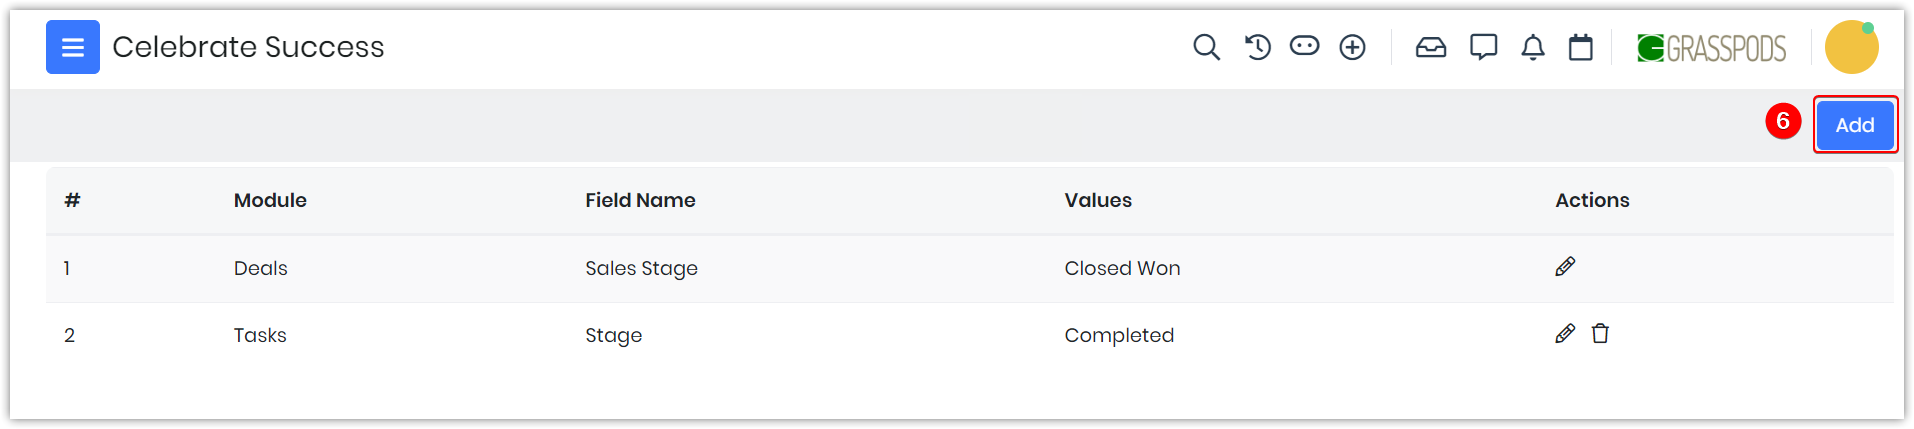
The Celebrate Success List View displays the list of Confetti settings added to the respective module.
|
|
Follow these steps to display the Celebrate Success List View:
- Log in to your CRM account.
- Click the Main menu on the top left corner of the screen.
- Click on any Module.
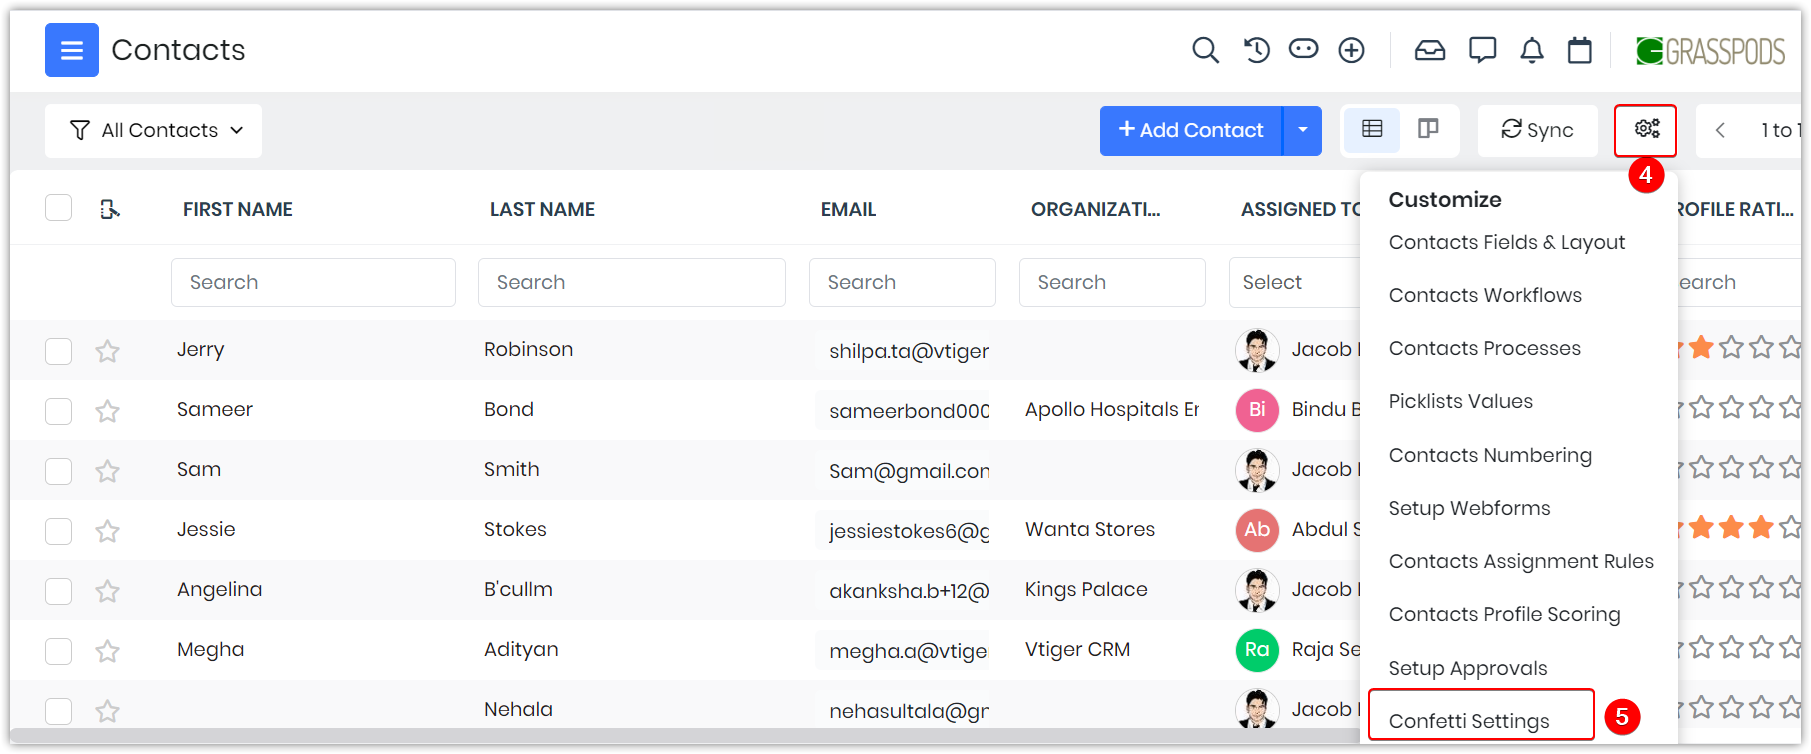
- Click the Confetti Settings icon.
- Click Confetti Settings. The Celebrate Success window opens.
- Add: Clicking the Add button will navigate you to the Add pop-up window where you can add the Confetti settings.
- Edit: The edit icon lets you make changes to the Confetti settings added.
- Delete: Delete button helps you delete the Confetti settings you have added.
|
|
Adding Confetti to the Selected Modules
Admin users can add Confetti settings to the desired modules.
Follow these steps to add confetti to the selected modules:
- Log in to your CRM account.
- Click the Main Menu icon on the top left corner of the screen.
- Click on the desired Module. For example, consider the Task module.
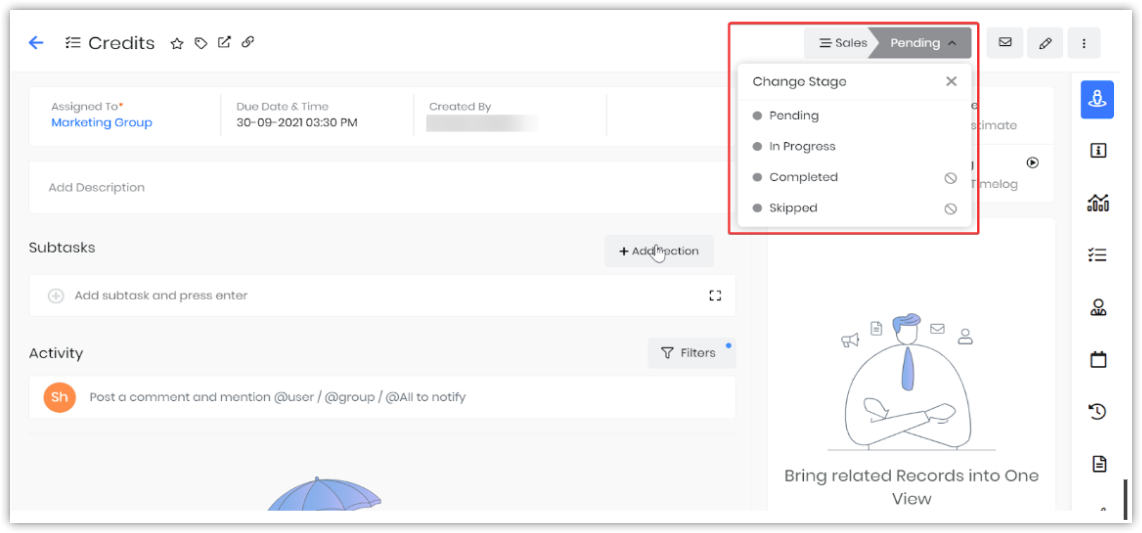
- Click the Confetti icon visible at the top right corner of the screen.
- Click the Confetti Settings to display the Celebrate Success window.
- Click Add. An Add window opens.
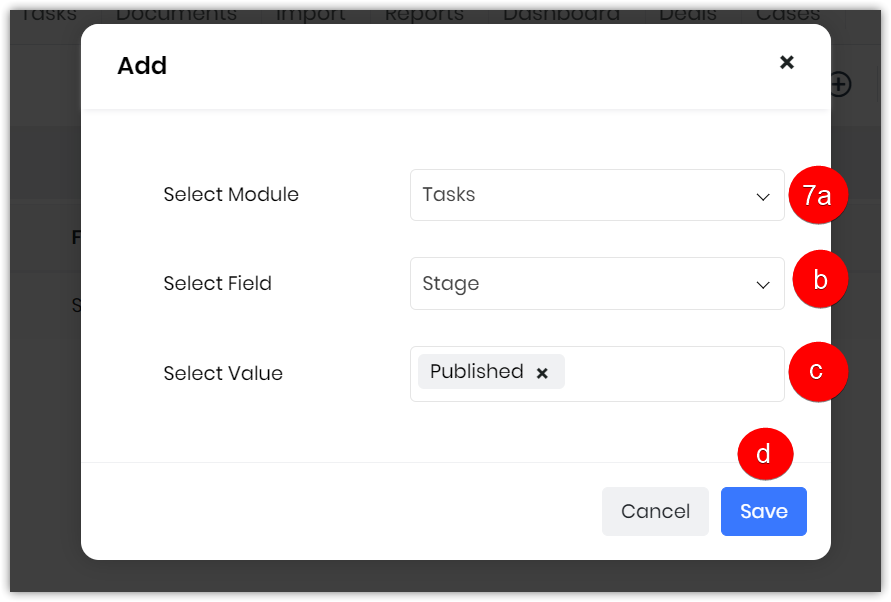
- In the Add pop-up window, add the following information:
- Select Module: Select the module you want to add Confetti. For example, consider the Task module.
- Select Field: Select the field you want to add Confetti.
- Select Value: Select the value you want to add Confetti.
- Click Save.
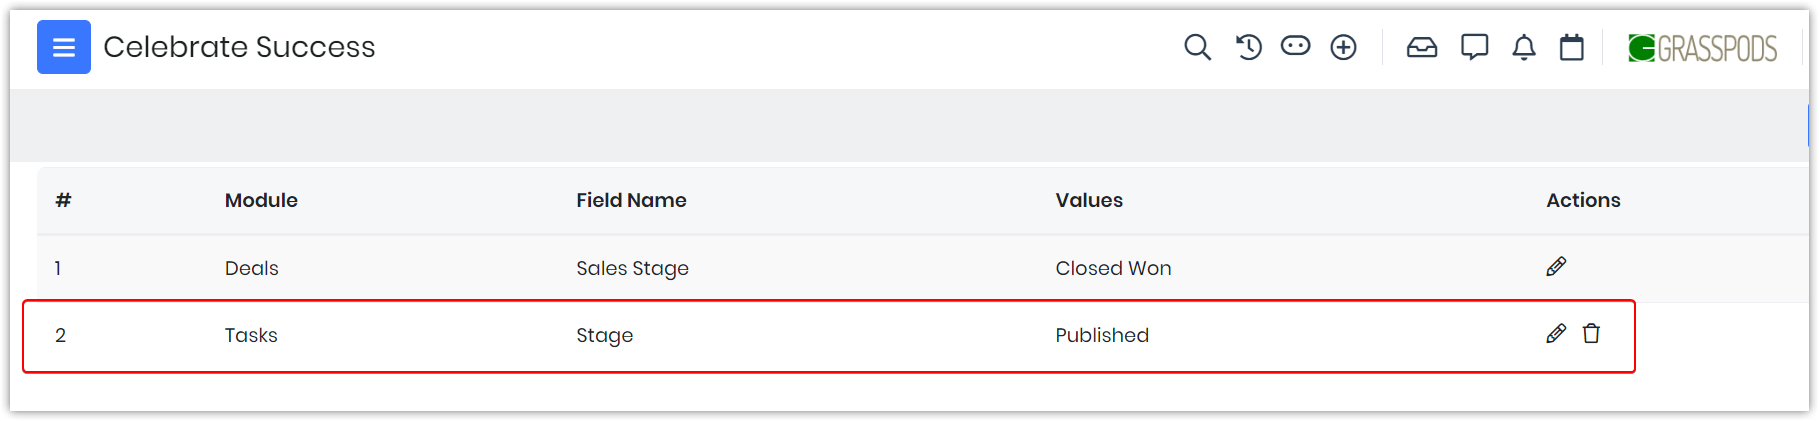
You have now added Confetti to the desired (for example, Task) module.
The Celebrate Success List View contains the module, field name, values, and actions. The module will display the name of the module to which the Confetti Settings are added.
The Field name will display the field name to which the Confetti Settings is added. The values indicate the time when the confetti should appear on the screen.
The Actions column allows you to edit or delete a Confetti record.
|
|
Example: Confetti Settings for Task module
Let us understand the process of adding Confetti settings for the Task module.
Follow these steps to add confetti to the Tasks module.
- Log in to the CRM.
- Click the Main menu on the top left corner of the screen.
- Click on the Tasks module.
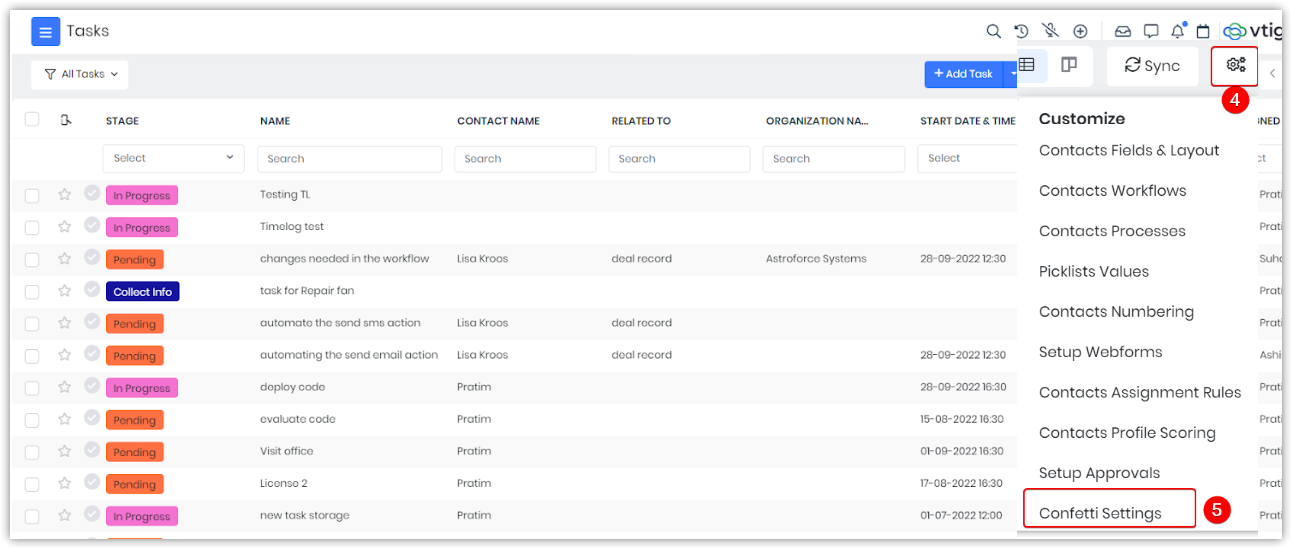
- Click the Settings icon.
- Click Confetti Settings. The Celebrate Success window opens.
- Click Add to add confetti to the Tasks module.

- Enter or select the following information:
- Select Module
- Select Field
- Select Value
- Click Save

Disabling the Confetti Feature
Admin users can disable the Confetti feature by disabling the Celebrate Success extension.
Follow these steps to disable the Confetti feature:
- Log in to CRM.
- Click on the User Profile icon on the top right corner of the screen.
- Click Settings.
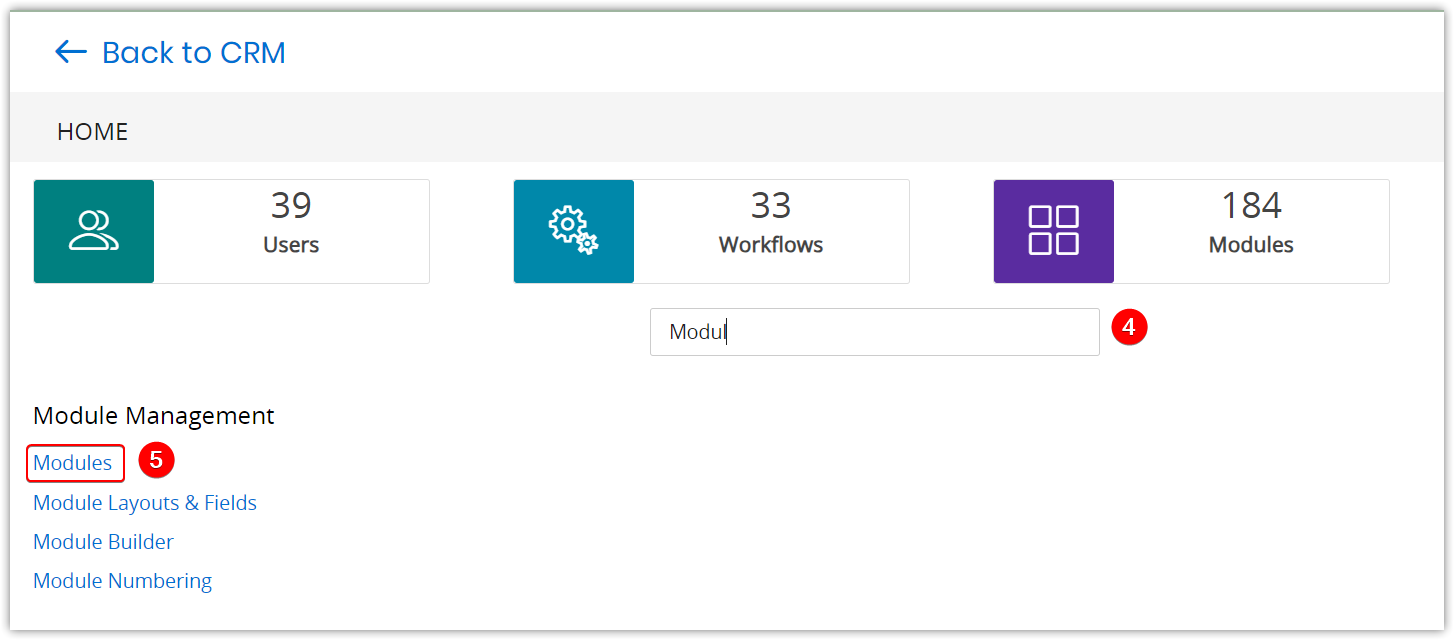
- Type Module in the search bar.
- Click Modules under Module Management.
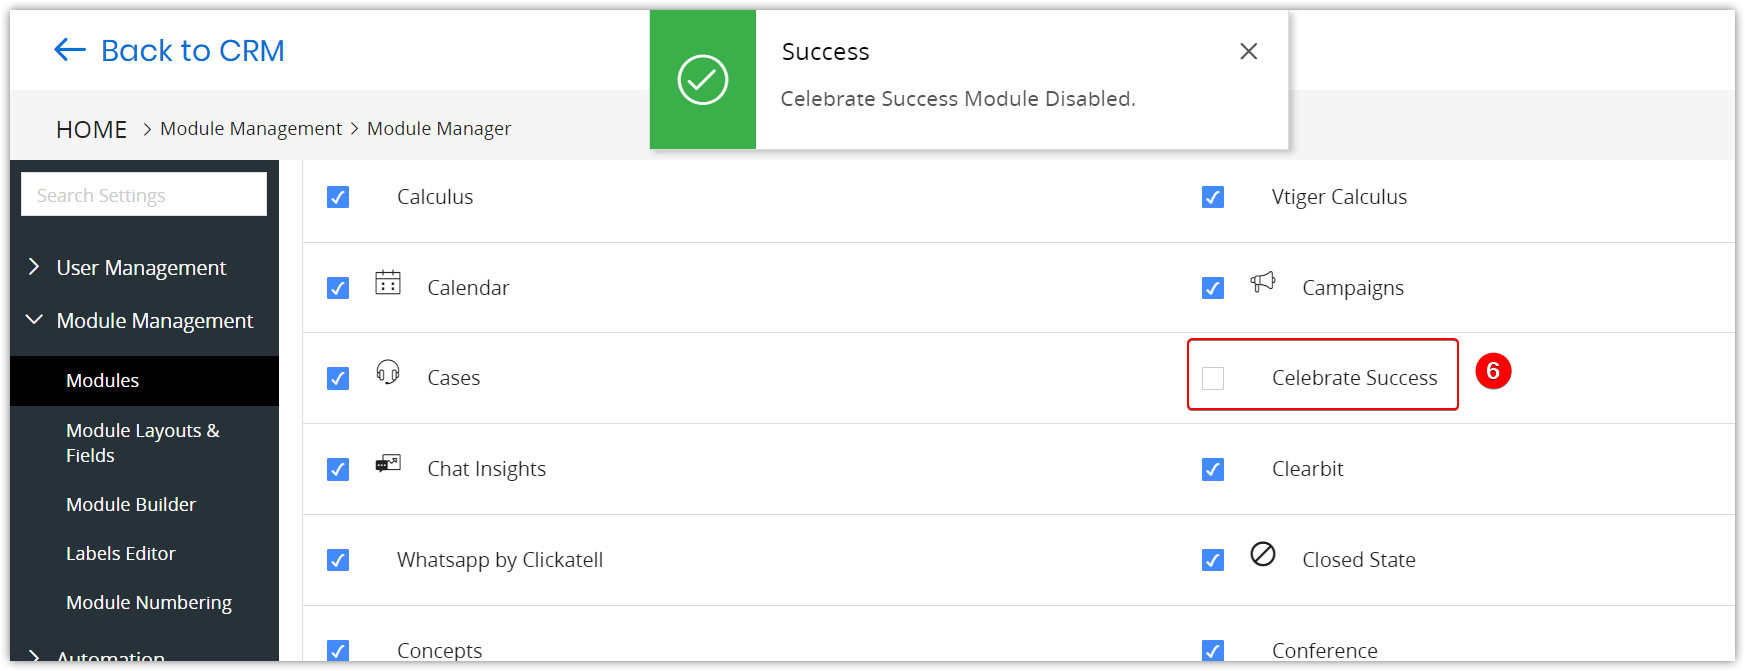
- Uncheck the Celebrate Success extension.
A disabled success message is displayed. Once the Celebrate Success extension is disabled, the Confetti feature is disabled.
|
|
Index
|
|
|
|
|
|
|
|
|
|
|
|