Articles in this section
CSAT Surveys in Vtiger CRM
Feature Availability
Vtiger Editions: One Pilot | One Growth | One Professional | One Enterprise | One AI
Introduction
Customer Satisfaction(CSAT) surveys are essential for businesses to measure customer satisfaction with their products, services, or overall experiences. CSAT surveys help you to gather quick, actionable feedback using simple, easy-to-understand formats, such as emojis or rating scales.
The CSAT Survey module in Vtiger CRM lets you configure surveys for any module that supports Email, SMS, and WhatsApp, and send automatically when the defined conditions are met, but only if the survey Status is Active.
Key Components
The CSAT Survey feature comes with the following components, making it easy for you to create and send a survey:
- Question Variants: Offers different types of survey questions such as multiple choice, rating scales, or open-ended responses.
- Branching and Logic Flows: Allows you to create dynamic surveys that adjust based on previous answers, improving relevance.
- Trigger: Lets you specify the conditions under which the survey is sent, such as Case closure or ticket resolution.
- Preview: Enables you to view the survey as the customer would see it before sending it out.
- Scheduling: Lets you set a specific time or day to send the survey.
- Automation: Helps you automate the process of sending surveys based on predefined triggers and schedules.
- Multiple Channel Support: Allows you to send surveys t via email, SMS, or WhatsApp, reaching customers through their preferred communication channels.
Benefits of CSAT Surveys
The following are the benefits of CSAT Surveys in Vtiger CRM:
- Actionable Insights: Helps you gain insights on products, services, and processes, and how they can be improved, etc.
- Customer Retention: Demonstrates that customer opinions matter, building long-term loyalty.
- Performance Tracking: Monitor satisfaction trends and make data-driven decisions.
- Flexible Channel Support: Collect feedback via Email, SMS, or WhatsApp.
- Customizable Experience: Tailor surveys to specific modules and business requirements.
- Quick Feedback: Easily completed in a few seconds by customers.
- Simple for Customers: Designed for quick responses using visual scales.
In this article, you will learn about:
- Creating a CSAT Survey
- Sending a CSAT Survey
- Viewing the CSAT Survey response
- Editing an Existing CSAT Survey
- Deactivating a CSAT Survey
- Deleting a CSAT Survey
Creating a CSAT Survey
Follow these steps to create a CSAT Survey:
- Log in to the CRM.
- Click the User Menu in the top right corner of the CRM screen.
- Click Settings. The Settings page opens.
- Go to Automation.
- Click CSAT Survey. The CSAT Survey page opens.

- Click +Add CSAT Survey. The Creating CSAT Survey page opens.
- Enter or select the information for the following sections to create a CSAT Survey:
- Step 1: Details
- Step 2: Primary Questions
- Step 3: Thank you page
- Step 4: Survey Trigger
Step 1: Details
In the Details section, start by filling in the basic information needed for your CSAT survey.
- Enter or select the following information in the Details section:
- CSAT Survey Name: Enter a name for your survey.
- Module: Select the CRM module the survey is related to (e.g., Cases, Tickets, Orders).
- CSS file URL: Provide a URL to a custom CSS file for styling the survey.
- Survey logo: Upload an image or logo for branding.
- Allow Multiple Submissions: Enable the check box if you want to allow customers to submit the survey more than once.
- Click Next.
Note: The maximum upload size for the Survey Logo is 2 MB.
Step 2: Primary Questions
In the Primary Questions section, define your survey's core question, choose a rating scale, and configure how and where the survey will be sent to recipients across various channels.
- Enter or select the following information in the Primary Questions section:
- Configure primary question: Enter the primary question.
- Rating Scale: Choose how customers will rate their experience from the following options:
- Star Rating
- Emotion Rating: Modify emojis or descriptive words to suit your tone/branding.
- Channels and Recipients: Define how the survey will be delivered and to whom.
- Email: Enable the check box to send the survey via email.
- SMS: Enable the check box to send the survey via SMS.
- WhatsApp: Enable the check box to send the survey via WhatsApp.
- Once enabled, click Select Template. Only templates that include the Customer Satisfaction Survey (Merge tag) and are linked to the same module will appear.
- Recipients: Select the recipient field from the dropdown list based on the enabled channel.
- For example, if Email is selected, available email options like Primary Email, Secondary Email ID, etc., are displayed.
- Preview: View how the survey will appear to recipients before sending it.
- Click Next.
Note: Only those templates that include the Customer Satisfaction Survey (Merge Tag) and are linked to the same module will appear. For SMS and WhatsApp, only templates that have been approved can be chosen.
To learn more about Email templates, click here.
To learn more about SMS templates, click here.
Step 3: Thank You page
In the Thank You page section, you can set up follow-up questions based on the customer's answer to make the feedback more personal and useful.
For example, let us say you have configured the primary question using an Emotion Rating with options like Happy, Neutral, and Sad. If a customer selects the Sad Emoticon, you can configure a dependent question, such as Why did you choose this rating? to appear. This question can be set as mandatory, and the input type can be a text area or a dropdown based on your preference. You can then add another follow-up question, like What can we improve? which will be shown based on the logic you define—for instance, when the answer to the first dependent question contains or is equal to the keyword improvement.
- Enter or select the following information in the Thank you page section:
- Thank you message: Add a personalized appreciation message (E.g., Thank you for your valuable feedback!).
- Enable Feedback comment: Enable the checkbox to allow users to leave additional comments along with their rating.
- Questions: Add the Dependent Questions and the logic if needed.
- Question section:
- Enter the question text in the Question field.
- Select the Input Type (e.g., Text, Text Area, Radio Buttons).
- Enable the Mandatory toggle to make the question required.
- Click Delete to remove the question.
- Logic section:
- For the If the answer is option, select the Condition (e.g., Contains, Equals, Not Equals).
- Enter or select the Text to match based on the condition.
- For the Then show this question option, choose the dependent question to display.
- Click Delete to remove the logic.
- Click Next.
Note: You can select the question by enabling the Then show this question option only when more than one dependent question is added.
Step 4: Survey Trigger
In the Survey Trigger section, you can set the conditions and timing for when the survey will be sent to customers, ensuring it’s triggered at the right moment.
- Enter or select the following information in the Survey Trigger section:
- Conditions: Define the rules that must be met to trigger the survey.
- All Conditions: All selected conditions must be met (AND logic).
- Example:
- Case Status = Closed
- Case Type = Feedback Request
- Example:
- Any Conditions: At least one condition must be met (OR logic).
- Example:
- Case Status = Closed
- Ticket Priority = High
- Example:
- All Conditions: All selected conditions must be met (AND logic).
- Trigger: Choose how the survey is triggered.
- Immediate: The survey is sent as soon as the defined condition(s) are met.
- Schedule: Set a delay or a specific time frame (e.g., 1 hour after case closure).
- Conditions: Define the rules that must be met to trigger the survey.
- Click Save.
Once saved, the CSAT survey is sent automatically when the defined conditions are met, but only if the survey Status is Active.
Sending a CSAT Survey
Once the CSAT survey is created, it is automatically sent to customers when the defined conditions are met. The survey is triggered based on your setup, and you don't need to send it manually.
In the following example, we will create and send a CSAT Survey for a Case.
Follow these steps to automatically send a CSAT survey after a Case is closed:
- Log in to the CRM.
- Click the User Menu in the top right corner of the CRM screen.
- Click Settings. The Settings page opens.
- Go to Automation.
- Click CSAT Survey. The CSAT Survey page opens.
- Click +Add CSAT Survey. The Creating CSAT Survey page opens.
- Enter or select the information to create a CSAT Survey to automatically send the CSAT Survey after a Case is closed:
- Details: Enter survey name, select the related module, upload a logo, and allow multiple submissions if needed.
- Primary Questions: Set the main survey question, choose a rating scale, and select the channels.
- Thank You Page: Add a thank-you message and any follow-up questions.
- Survey Trigger: Set conditions (e.g., Case Status = Closed) and when to trigger the survey (immediately or after a delay).
Note: The survey will only be sent if its status is set to Active.
Once saved, the CSAT survey will be automatically triggered when the Case is closed. The survey will be sent through the selected channel (Email, SMS, or WhatsApp). The customer will provide feedback, and the response will be saved.
Viewing CSAT Survey Responses
You can view the CSAT survey response in the following ways:
- From the CSAT Survey records
- From the module and the particular record from which the survey was sent
Viewing CSAT Survey Records
Follow these steps to view CSAT Survey records:
- Log in to the CRM.
- Click the User Menu in the top right corner of the CRM screen.
- Click Settings. The Settings page opens.
- Go to Automation.
- Click CSAT Survey. The CSAT Survey List View opens.
- Click the CSAT Survey record. The Summary View of the record opens.
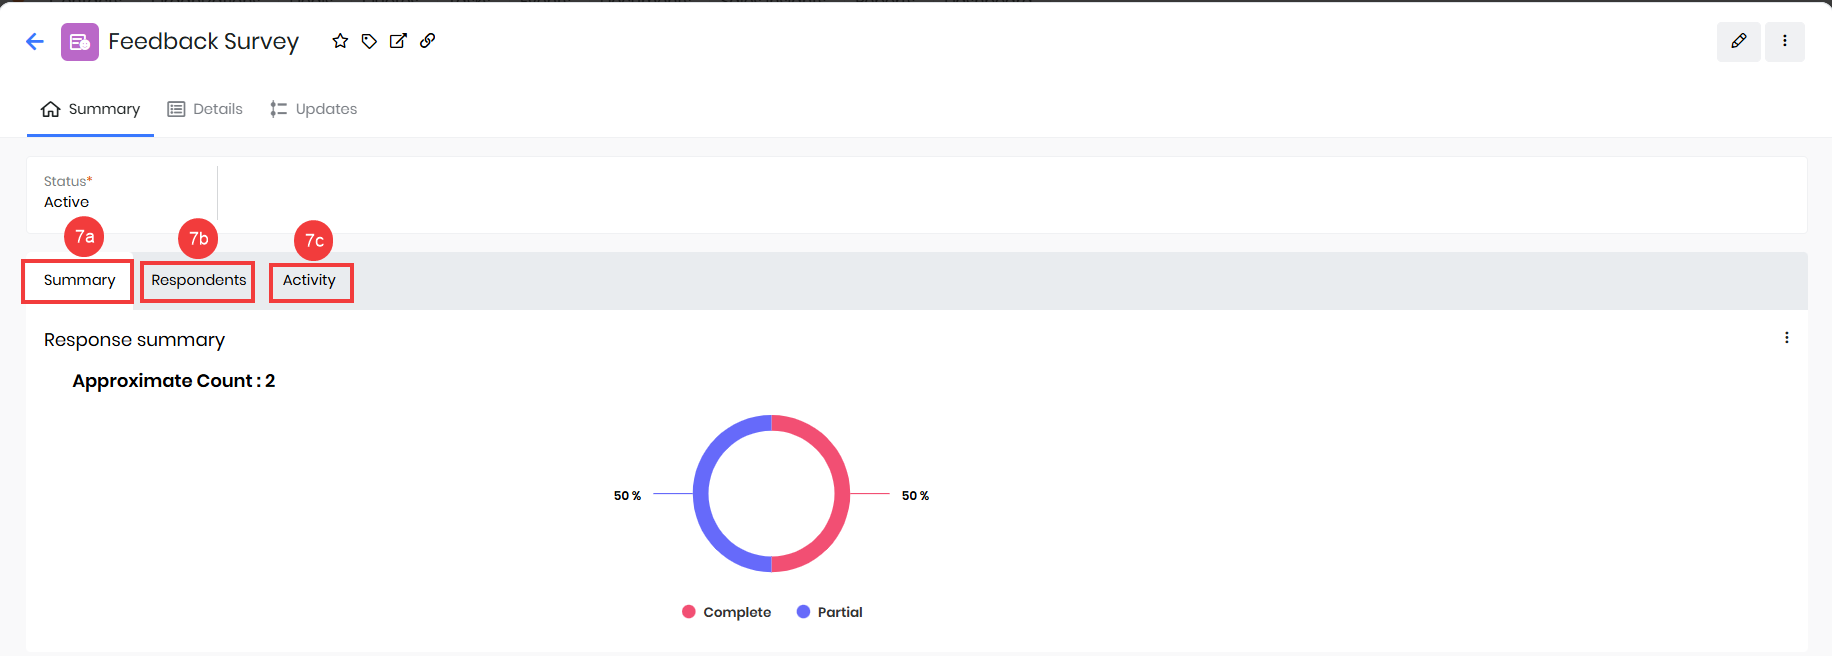
- View the following details of the record:
- Summary
- Response summary: Shows a breakdown of the types of responses received.
- Responses Volume: Indicates the total number of responses submitted.
- Respondents: Lists the participants who submitted responses, along with the time and their responses.
- Activity: Displays all activity related to the survey record, including updates and interactions.
- Summary
Viewing Survey Response from a Related Record
You can view survey responses directly from the module and record the survey you sent. For example, if you sent a CSAT Survey to a Lead, open the Leads module, find the Lead record, and check the CSAT Survey section in the Details View for the response.
Follow these steps to view the CSAT Survey response:
- Log in to the CRM.
- Open the module to which the survey was sent (e.g., Leads, Contacts, or Tickets).
- Open the specific record associated with the survey.
- Click the Details View.
- Go to the CSAT Rating section.
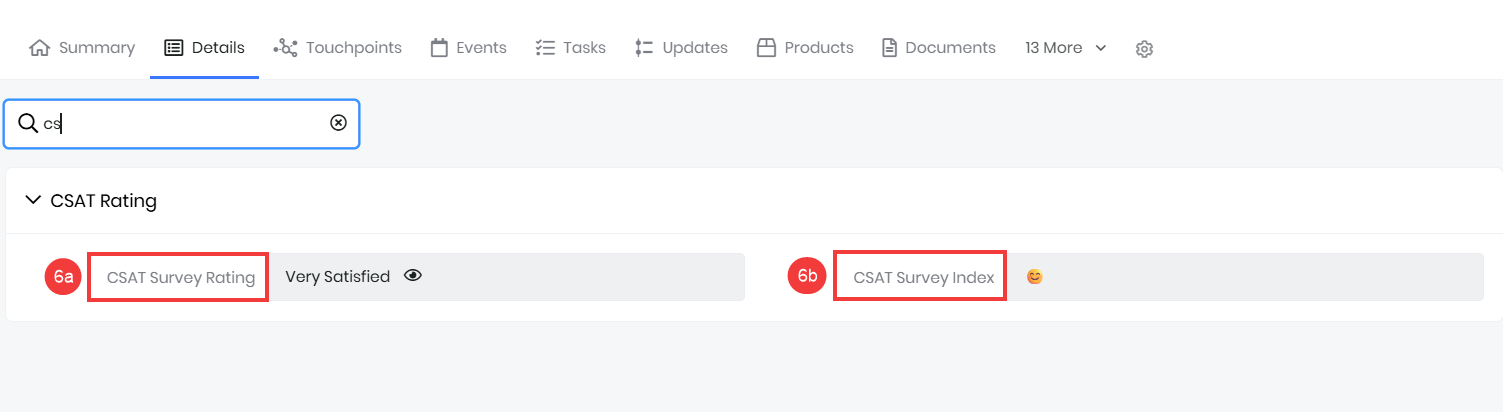
- View the following information in the CSAT Survey section:
- CSAT Survey Rating: View the descriptive word associated with the selected emoji rating.
- CSAT Survey Index: View the emoji selected by the customer as their rating.
Editing a CSAT Survey Record
You can edit a CSAT Survey even after sending it to improve the questions, update settings, or adjust triggers based on feedback or changing needs.
Follow these steps to edit a CSAT Survey:
- Log in to the CRM.
- Click the User Menu in the top right corner of the CRM screen.
- Click Settings. The Settings page opens.
- Go to Automation.
- Click CSAT Survey. The CSAT Survey page opens.

- Editing a Survey from the List View.
- Hover over the CSAT Survey record.
- Click the Edit icon. The Editing CSAT Survey page opens.
- Edit the required information in the following sections for your survey:
- Details
- Primary Questions
- Thank you page
- Survey Trigger
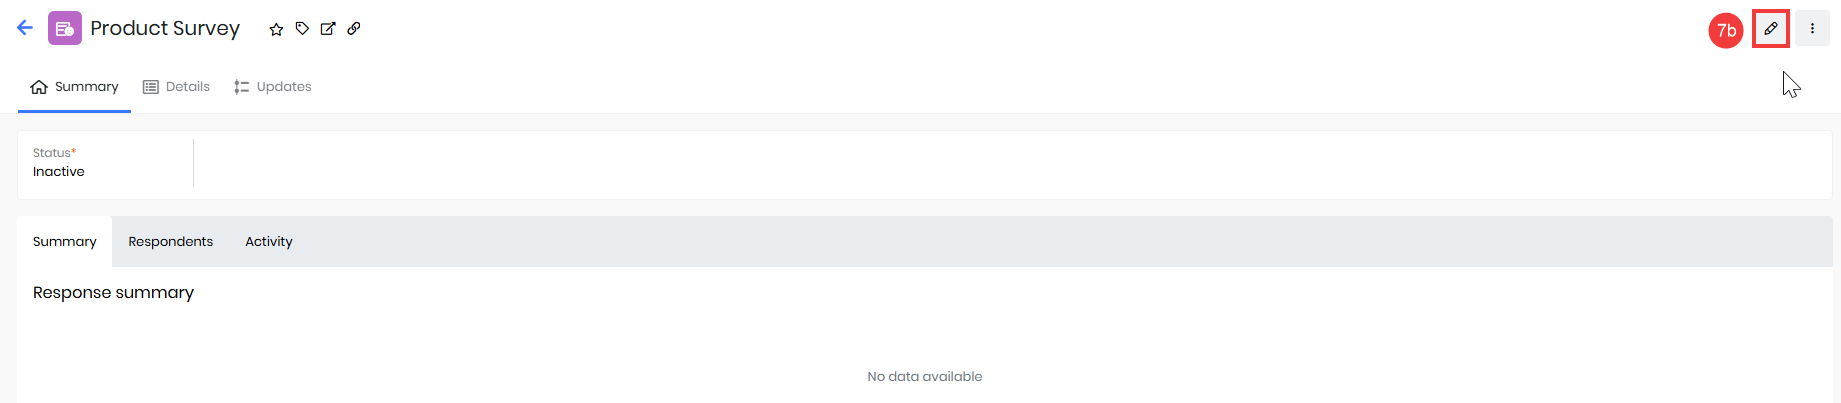
- Editing a Survey from the Summary View.
- Open a CSAT Survey record.
- Click on the Edit icon. The Editing CSAT Survey page opens.
- Edit the required information in the following sections for your survey:
- Details
- Primary Questions
- Thank you page
- Survey Trigger
Deactivating a CSAT Survey
Deactivating a CSAT Survey temporarily disables it, making it inactive. However, you can still activate and modify it when necessary. If a customer clicks a deactivated or deleted survey link, they will see a default message stating that the survey is no longer available.
However, all responses collected before deactivation remain stored in the respective associated record as well as in the CSAT record.
Note: Only admins can deactivate or delete surveys in Vtiger CRM.
Follow these steps to deactivate a CSAT Survey:
- Log in to the CRM.
- Click the User Menu in the top right corner of the CRM screen.
- Click Settings. The Settings page opens.
- Go to Automation.
- Click CSAT Survey. The CSAT Survey page opens.
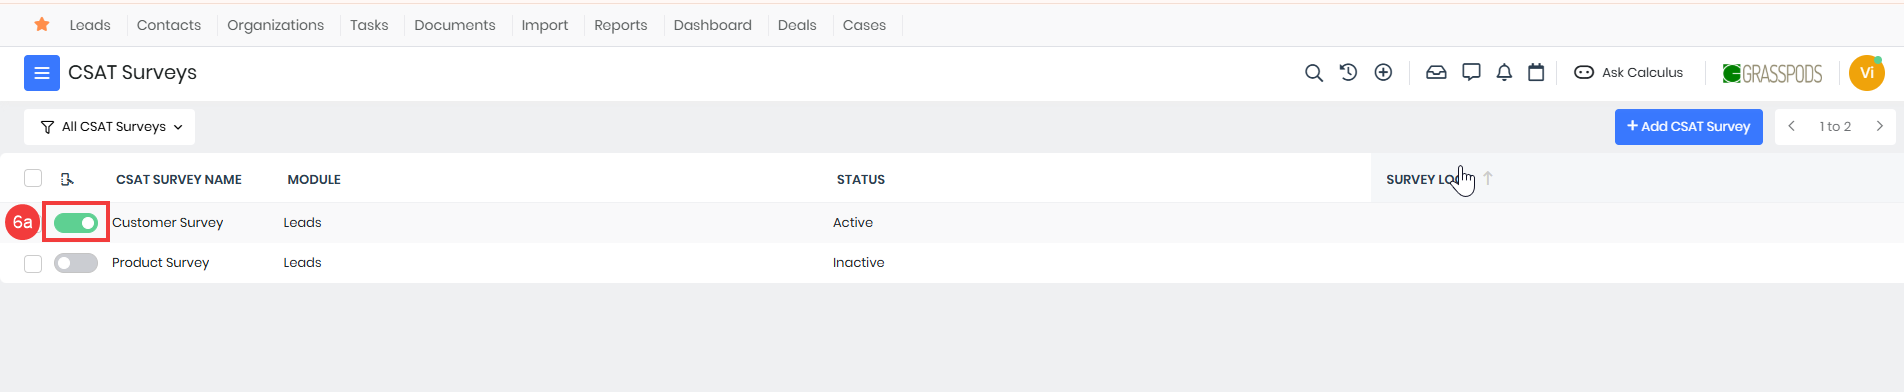
- Deactivating a Survey from the List View.
- Disable the toggle next to the CSAT Survey name.

- Deactivating a Survey from the Summary View.
- Open a CSAT Survey record.
- Click on the Edit icon next to the Status.
- Select Inactive.
Deleting a CSAT Survey Record
Delete a CSAT Survey when it’s outdated, incorrectly configured, or no longer needed. If a customer clicks a deactivated or deleted survey link, they will see a default message stating that the survey is no longer available.
When a CSAT Survey is deleted, the survey is permanently removed from the CRM, and the survey link becomes invalid. Responses captured before deletion are still retained in the associated record.
Note:
- Only admins can deactivate or delete surveys in Vtiger CRM.
- You can delete a survey from the List or the Summary View.
Follow these steps to delete a CSAT Survey:
- Log in to the CRM.
- Click the User Menu in the top right corner of the CRM screen.
- Click Settings. The Settings page opens.
- Go to Automation.
- Click CSAT Survey. The CSAT Survey List View opens.

- Deleting a Survey from the List View:
- Hover over and select the survey you want to delete.
- Click the record.
- Click Delete. The Delete records window opens.
- Click Yes, Delete.

- Deleting a Survey from the Summary View:
- Open a CSAT Survey record from the List View.
- Click More.
- Click Delete. The Delete records window opens.
- Click Yes, Delete.
Troubleshooting Tips
Issue: CSAT Survey not sent via SMS or WhatsApp.
Solution: For SMS and WhatsApp channels, only approved templates can be used. Ensure that the templates selected are approved and linked to the appropriate module.
Issue: Clicking the CSAT Survey link displays the No Longer Available message.
Solution: If a customer clicks on a survey link and sees a message stating it is no longer available, the survey is Inactive or deleted. Only active surveys can be accessed by recipients.
Issue: Unable to edit certain CSAT Survey Fields
Solution: After creating a survey, the Related Module and Rating Scale cannot be changed. To modify these, you would need to create a new survey.