Articles in this section
Marketing and Sales - Deal to Project Mapping
Feature Availability
Vtiger Editions: One Pilot | One Growth | One Professional | One Enterprise | One AI
Introduction
When you convert a Deal into a Project, relevant information from the Deal may need to be carried forward to the Project. Without field mapping, you may have to manually enter the same information again, which can take time and increase the possibility of errors.
Vtiger CRM addresses this with Deal to Project Mapping. This feature automatically transfers information from selected Deal fields to their corresponding Project fields during conversion. The CRM provides default mappings for commonly used fields and also allows you to create custom mappings for additional information.
Default Mapping
Vtiger CRM automatically maps the following Deal fields to Project fields:
|
|
|
|
|
|
|
|
|
|
|
|
|
|
|
|
|
|
|
|
Note: You cannot modify or delete the default field mappings provided by Vtiger CRM.
Benefits of Mapping
The benefits of Deal to Project mapping are:
- Retain deal information when you convert a deal to a project.
- Avoid manually entering field values in the project.
- Ensure that information is transferred to the correct Project fields.
In this article, you will learn about:
- Adding a Custom Field Mapping
- Modifying a field mapping
Adding a Custom Field Mapping
If you want to transfer additional Deal information to Projects, you can create custom field mappings.
Follow these steps to create a custom mapping to map a Deal to a Project:
- Log in to the CRM.
- Click the User Menu in the top-right corner.
- Click Settings. The Settings page opens.
- Go to Marketing & Sales.
- Click Deal to Project Mapping. The Deal to Project Mapping page opens.
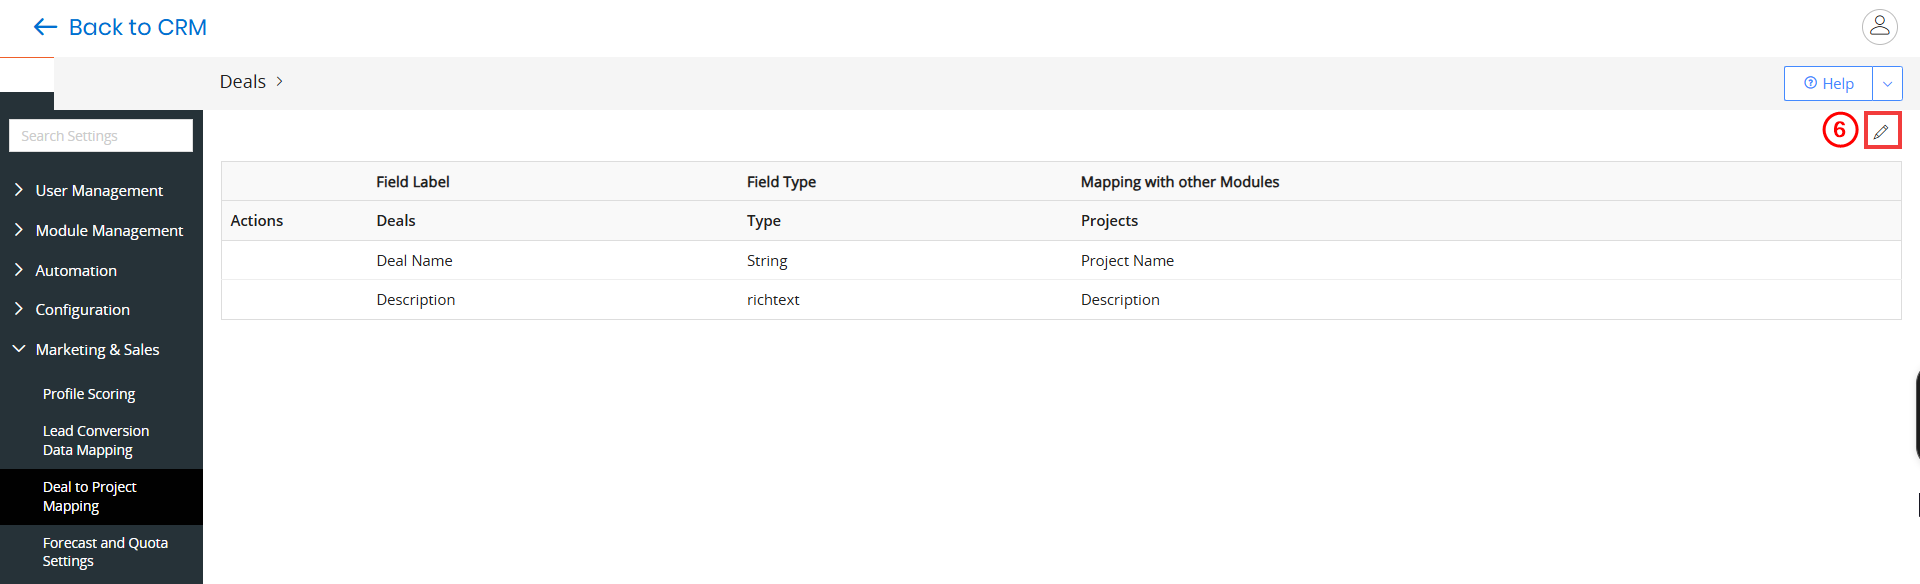
- Click Edit. The Edit page opens.
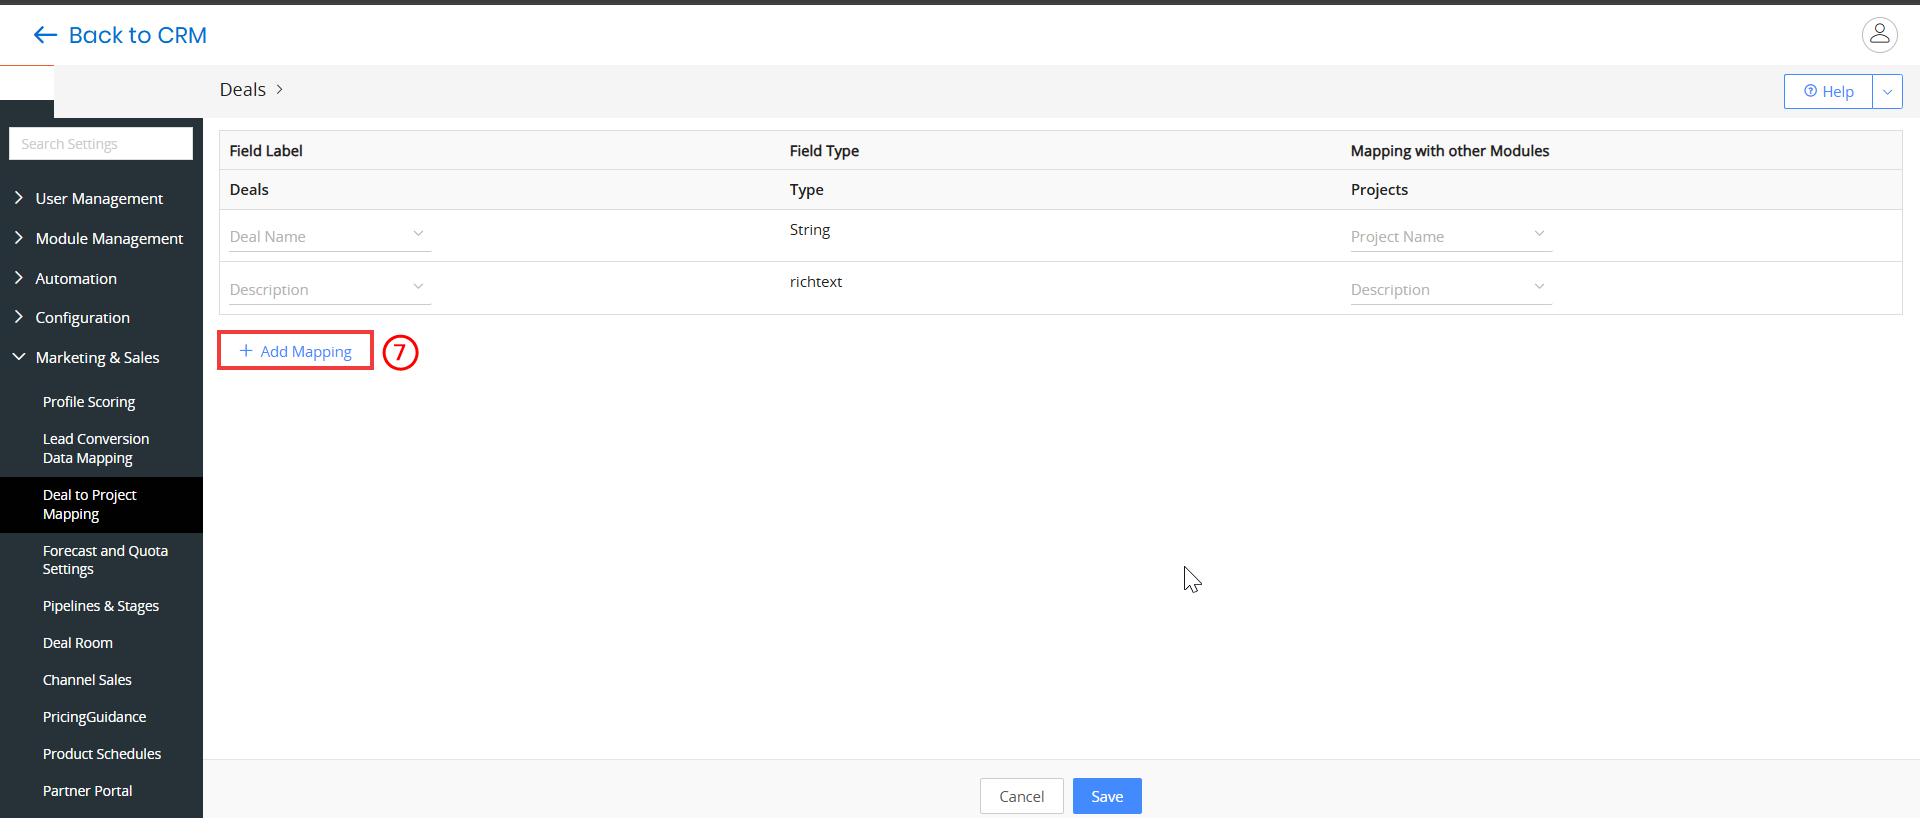
- Click + Add Mapping. The Add Mapping page opens.
- Enter or select the following information:
- Field Label: Enter the Deal name that you want to transfer to the Project.
- Mapping with other fields: Select the corresponding Project field to which the Deal field should be mapped.
- Click Save. A confirmation window opens.
- Type PROCEED in the confirmation window.
- Click Proceed to confirm the changes.
The custom field mapping is added to the mapping list.
Notes:
- You can map a Deal field only when an equivalent target field is available in Projects.
- You cannot map auto-generated fields such as Created Time and Modified Time.
- The Field type is updated automatically based on the Field label you choose.
Modifying a Field Mapping
You can modify a custom mapping when you need to change the Deal field or the corresponding Project field.
Follow these steps to modify a mapping:
- Log in to the CRM.
- Click the User Menu in the top-right corner.
- Click Settings. The Settings page opens.
- Go to Marketing & Sales.
- Click Deal to Project Mapping. The Deal to Project Mapping page opens.
- Click Edit. The Edit page opens.
- Enter or select the following information:
- Field Label: Modify the label or name of the Deal field, if required.
- Mapping with other fields: Select or change the corresponding Project field to which the Deal field should be mapped.
- Change the Source Field or Target Field as required.
- Click Save.
- Click Cancel to discard the changes.
- Type PROCEED and click Proceed to confirm the changes.
The updated mapping is saved and applied when you convert a deal to a project.