Articles in this section
Vtiger Websense Widgets
Introduction
A Websense widget provides users with the ability to control widgets on their target websites. With Websense, you can enhance your websites by displaying information and enabling interactive elements for a seamless user experience. Websense Widgets in Vtiger enable you to customize the Live Chat feature that is installed on your website. You can configure the widget for:
- Online and offline welcome messages,
- Feedback success and failure notifications,
- Assigning agents, etc.
By doing this, you can give a personal touch to the widget and make it look like your own. Customers will also relate to your company and feel welcome to talk to your agents.
To learn about the Live Chats feature, click here.
Note: The Chatbot section in the Websense Widget Settings page appears only if Calculus AI is installed. (Ref)
Using a Websense Widget
To start using Websense widgets in the CRM, you need to perform the following steps:
- Create an account
- Create a tracker
- Enable the Widget
- Deploy the tracker
Other Aspects of Using a Widget
- Tracker Identification
- To differentiate conversations originating from different trackers, Websense displays the tracker name in the conversation chat. This feature helps users identify which tracker the visitor's chat is associated with, ensuring efficient tracking and management.
- Agent Management
- Websense allows users to disable agents within a specific tracker without affecting other trackers. This means that if an agent is disabled in one tracker, they can still handle conversations in other trackers, maintaining uninterrupted customer support.
- Cross-Tracker Agent Assignment
- Users have the ability to add agents from one tracker to other trackers as well. This flexibility enables efficient resource allocation and allows agents to handle conversations across multiple trackers, promoting seamless customer engagement.
- Chat Transfer
- Within a tracker, users can transfer ongoing chats to other agents who exist within that same tracker. This feature ensures smooth collaboration between agents and enables efficient handling of customer inquiries or support requests.
Tracker Limitation
While you can purchase additional trackers using the booster pack, you cannot use more than one tracker by default. The booster pack provides you with the flexibility to expand widget capabilities and manage multiple sections of your website independently.
Benefits of using a Websense Widget
The benefits of using a Websense Widget are:
- Provides a way for website visitors or end users to interact with the system.
- Lets you configure widgets for multiple tasks such as Chat, Promo, or Banners, Agents, Page tracker, etc.
In this article, you will learn about:
- Creating a Websense widget
- Enabling a Websense widget for your website
Customizing the Widget
By customizing the widget, you can set up your own welcome messages, feedback requests, and so much more. To customize a widget, you need to:
- Step 1: Go to the Widgets page
- Step 2: Select the Tracker and the Widget
- Step 3: Define the fields in the tabs
Follow these steps to customize your widget:
Step 1: Go to the Widgets page
- Log in to your account.
- Click the User Menu icon on the top right corner of the screen.
- Click the Settings button.
- Look out for the Websense block.
- Click Widgets.
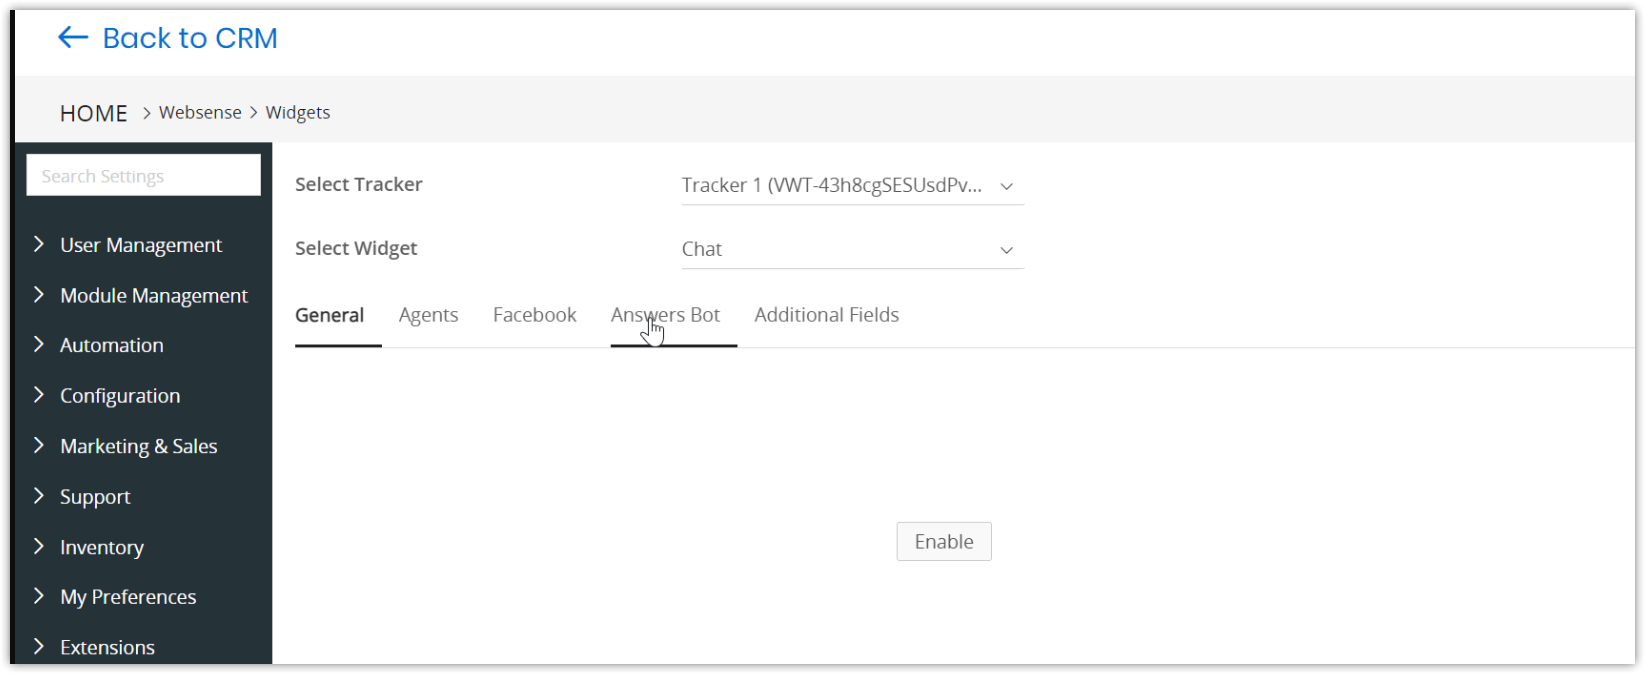
Step 2: Select the Tracker and the Widget
- Select the tracker that is responsible for the widget on your website from the Select Tracker drop-down.
- Select the widget that you want to customize from the Select Widget drop-down.
Step 3: Define the fields in the tabs
All the fields under these tabs are filled with a pre-defined sentence. You can change and customize them to your liking.
Note:
- By enabling or disabling the Status toggle, you can temporarily turn on or turn off the Live Chat widget on your website.
- You can click the tooltip next to the field name to display information about the field.
- Click the General tab.
- Click the Enable button.
- Add your own text to the following fields:
- Status
- Online Welcome Message
- Offline Welcome Message
- Offline Message Success Text
- Conversation Start Button
- Offline Message Submission Button
- Agent Conversation End Message
- Visitor Conversation End Text
- New Conversation Section Label
- New Conversation Placeholder Text
- Reply placeholder text
- Registration Form Header
- Message Form Header
- Rating
- Rating Message
- Feedback Message
- Feedback Success Notification
- Feedback Error Notification
- Click Save.
- Click the Agents tab.
- Type the names of the CRM users you want to add as agents. These users can interact with your customers and resolve their queries.
- Click the +Add Agents button. You can enable or disable an agent by clicking the toggle button next to the agent name.
- Click the Facebook tab.
- Link your Facebook page.
- Click the Enable Facebook Messenger toggle button.
- Click the Page Status toggle button of the page in which you wish to enable Live Chats.
- Click Save.
Adding Additional Fields to the Widget
You can use Checkbox and Picklist fields in the Additional Fields section of Websense Widgets when initiating a conversation via webchat.
Examples:
- Data Protection Compliance: Users explicitly consent to the handling of their personal data under GDPR/LGPD by checking a box before starting a chat.
- Custom Disclaimers or Terms Agreement: Businesses display terms of service or data processing disclaimers that users acknowledge via a checkbox.
- Marketing Consent: Separate checkboxes capture user preferences for email or SMS marketing.
Note: If the field belongs to the Contacts module, the system stores the information in the Contact record.