Articles in this section
Formula Fields
Feature Availability
Vtiger Editions: One Professional | One Enterprise
Introduction
A Formula Field allows you to define a mathematical expression or module-specific rule to automatically calculate values in a module. Once configured, the formula is executed automatically whenever a new record is created or an existing record is edited.
Formula Fields are available for both standard CRM modules and Custom Modules. You can create them from Settings > Module Layouts & Fields.
A formula can be built using:
- Module fields
- Vtiger workflow expressions
- Built-in functions
- Or a combination of the above
Supported Data Types
You can create Formula Fields for the following data types:
- Text
- Decimal
- Integer
- Percent
- Date
- Textarea
- Timez
- DateTime
Key Features
The key features of the Formula Fields are:
- Automatic Calculation: Formula Fields automatically calculate values whenever a new record is created or an existing record is edited.
- Supports Multiple Data Types: Create formulas for Text, Decimal, Integer, Percent, Date, DateTime, Time, and Textarea fields.
- Advanced Expression Support: Use mathematical operators, workflow expressions, and built-in functions (such as roundoff and conditional logic) to create complex formulas.
- Field and Function Combination: Build formulas using module fields, system functions, or a combination of both.
- Available for Standard and Custom Modules: Formula Fields can be created for both default CRM modules and custom modules.
- Report Compatibility: Formula Field values can be used in reports for analysis and insights.
- Line Item and Record-Level Support:
- Line item Formula Fields are calculated at the row level.
- Normal Formula Fields are calculated at the record level.
- No-Code Configuration: Create and manage formulas directly from Settings > Module Layouts & Fields without requiring technical expertise.
- Precision Control: Define the maximum number of digits and decimal precision for accurate calculations.
- Minimal Maintenance: Once configured, the system automatically maintains and updates the formula values without manual intervention.
Note:
- Formula Fields support all mathematical expressions available in workflow expressions.
- You can generate reports using formula field values.
- Formula Fields are not updated during record import or export.
- Once created, Formula Fields apply only to:
- Newly created records.
- Existing records that are edited and saved.
Benefits
The benefits of the Formula Fields are:
- Automatically updates calculated values
- Enables quick mathematical calculations and rule execution
- Reduces manual errors
- Saves user time
- Requires minimal implementation effort
In this article, you will learn about:
- Formula Fields
- Creating and accessing formula fields
Key Terminology
|
|
|
|
|
|
|
|
|
|
|
|
|
|
|
|
|
|
|
|
|
|
|
|
|
|
|
|
|
|
|
|
|
|
|
|
|
|
|
|
|
|
Creating Formula Fields
In this instance, we will create the Price formula field for the Invoices module. You can create a formula for any module.
Follow these steps to create a formula field:
- Log in to your CRM account.
- Go to the main Menu.
- Click Settings
- Click Module Layouts & Fields under the Module Management section.
- Select a module for which you want to create a formula field - Invoices.
- Select a section for which you want to create a formula field - Item Details.
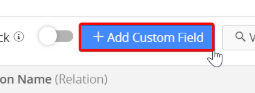
-
Click +Add Custom Field. The Create Line Item Custom Field window opens.

- Enter or select the information below:
- Select Field Type - Select Formula.
- Label Name - Enter a name for the formula Price.
- Max digits allowed - Enter the maximum number of digits you want to allow for the formula field 10.
- Decimals - Enter the number of decimals you want to allow for the formula field 2.
- Value data type - Select a suitable data type for the formula field Decimal. Note: If you choose Text as a data type, the value becomes characters and not digits.
- Expression - Select the fields and functions to be evaluated for the formula:
- Use Field - Select the fields to be evaluated, or
- Use Function - Select the functions to be evaluated. Or both if required.
- Enter the formula to be executed in the Expression box. For instance, we have selected the following:
- Fields - Quantity and Unit Selling Price.
- Function - Roundoff(field, precision). This function rounds a number to the specified precision.
- Formula - Quantity multiplied (*) by Unit Selling Price, rounded off to 2 decimal values. Hence, the Formula is roundoff(Quantity * Unit Selling Price,2).
- Follow these steps to enter the formula roundoff(Quantity * Unit Selling Price,2):
- Select the roundoff(field, precision) function.
- Select Quantity, Unit Selling Price fields as field values.
- Enter 2 as the precision value.
- Enter Quantity * Unit Selling Price.
- Help Info: Add help information for the field.
- Enable / Disable the following field properties:
- Mandatory Field
- Quick Create
- Key Field View
- Header View
- Mass Edit
- Click Save.
Accessing Formula Fields
Follow these steps to access a formula field:
- Log in to the CRM.
- Go to the main Menu.
- Click Invoices in the Inventory app.

- Create an Invoice record with formula field details. For instance, we have created a tender record with a Quantity of 165 and a Unit Selling Price of 850.86.
- Click Save.
- Go to the Item Details section for which you have created the formula.

- View the created formula field Price in the chosen section.
Formula fields created for:
- Line item fields are applied at an individual line item row level.
- Normal (other) fields are applied at the record level.