Articles in this section
Authenticate Emails with SPF, DKIM, and SenderID Auto forward your emails to Vtiger Managing User Profiles Automate Outgoing Emails in Email Settings Automation - Approvals Automation - Assignment Rules Set up Multi-path Workflows Creating a Scheduled Workflow Automation - Scheduler Creating a Workflow Webforms in Vtiger CRM Set up a Workflow Action to Create Event Set up a Workflow Action to Create Records Set up a Workflow Action to Create Task Set up a Workflow Action to Invoke Custom Function Set up a Workflow Action to Create an SMS Task Set up a Workflow Action to Send Mails Set up a Workflow Action to Update Fields Automation - Workflow Action - Webhook Automation - Workflows - Vtiger Expressions Configuration - Business Hours Configuration - Consents Configuration - Customer Portal Maps in Vtiger CRM Configuration - Usage Details Configuring Encrypted Data Fields in Vtiger CRM Configure Picklist Dependencies Considerations for Deactivating Vtiger Users Control Fields and Record Displays using Configuration Editor Create Reminders for Records and Inbox Create a field of a Grid type Dealing with Currencies and Taxes Enable Desktop Notifications on Chrome Web Browsers Vtiger CRM Add-ons IMAP Configuration - 2-way sync between Vtiger and IMAP providers Setting up Autopay & Payment Gateways Inventory - Tax Management Inventory - Terms and Conditions Login to Vtiger on SSO SAML using ADFS Mailroom Functionality for Different Scenarios Manage Multiple Currencies Marketing and Sales - Deal to Project Mapping Marketing and Sales - Lead Conversion Data Mapping Marketing and Sales - Profile Scoring Module Management - Labels Editor Module Management - Module Numbering Configure My Preferences Feature My Preferences - Calendar Settings Tags in Vtiger My Preferences - Notification Preferences SAML Support in Vtiger CRM Vtiger Mailroom Settings - Configure Module Settings Settings - Create Dynamic Fields and Layouts Module Management - Creating a Relationship Between Modules Settings - Customize Records and Fields for your Business Settings - How to set email autoresponder to Webform submission? Settings - Left Menu Settings - Manage Global Picklists in Vtiger Settings - Set up your Support Team Settings - Start Up Page Settings - Working with Picklist Values Module Management - Module Builder Support - SLA Policies Troubleshooting Login Issues Add-Edit Unsubscribe Links in your Email Template User Management - Authentication User Management - Encrypted Field Access Logs User Management - Groups User Management - Login History User Management - Profiles User Management - Roles User Management - Settings Log User Management - Sharing Rules User Management - Users User Management - Vtiger Support Access Vtiger Buzz - Chrome Extension for Notifications Vtiger Implementation wizard Vtiger Language Support Configuring Websense Trackers Websense - Widgets Module Management - Module Layouts & Fields Generate and Manage Third-party App Passwords in Yahoo Configuring App Passwords for Gmail Outgoing Server and Yahoo Mail Configuration - Storage Guard Customizing your Self-Service Portal Theme Using CSS Styles Automation - SMS Reply Actions Adding Hidden Fields to a Webform Configuring Dependent Fields and Blocks for Modules Auto forward Emails from Microsoft Office 365 Adding Custom Module Login Page Customization Settings - Personalize Module Layouts Module Management - Modules Duplicate Prevention in Modules Formula Fields Creating Custom Filters Adding a local DNS Entry

Configuration - Company Details

This article will help you set up your company details and logo in the CRM.
R
Rashmi Kashyap
22 Nov, 2023 - Updated  1 year ago

 Introduction

Do you want to personalize your CRM?

Do you wish to see your company’s logo on the CRM?

Then you are headed in the right direction! Read on...


Vtiger CRM is a highly customizable software because we know that personalizing it will make you feel like it’s your own software. 

Vtiger CRM allows you to enter your company’s details and the logo which will be saved in the CRM. Because of this transparency, you will get a step closer to gain your customer’s trust.

Visibility in the CRM


Do you want to know where your company’s details are available?


Your company’s logo will appear on the top right corner of the CRM. 

Your company’s details are shown in quotes, invoices, sales orders, purchase orders, receipt notes, delivery notes, credit notes, subscriptions, bills, and other inventory-related documents.
You can also see it in the
Customer Portal, the Email Templates, and the Print Templates modules.

To read about these modules, please visit our website.

Adding your Company Details


Follow these steps to enter your company’s details in the CRM:

  1. Log in to your CRM account.

  2. Click the User Menu on the top right corner of the screen.

  3. Click Settings.

  4. Look for the Configuration section.

  5. Select Company Details.

  6. Click the Edit icon on the right side.

  7. To add your company logo:

    1. Click Upload.

    2. Select the image file from your system.

    3. Click Open.

      Note: Click Undo if you want to switch back to the previous image.

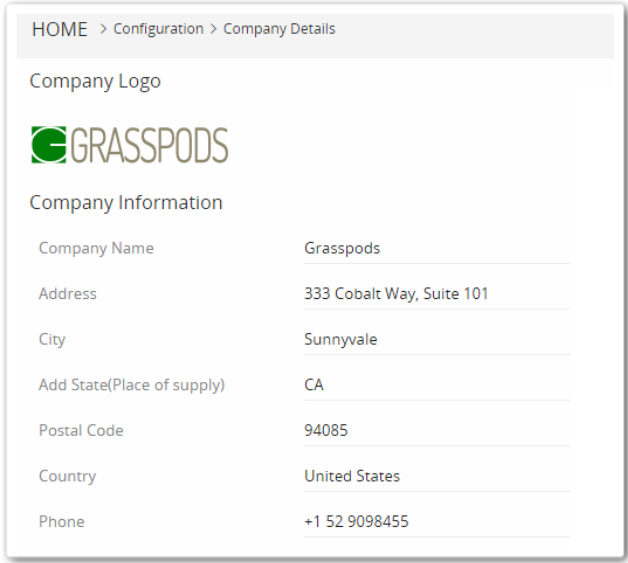
  8. You can add the rest of your company details like the Company’s Name, Address, Website, etc.

  9. Click Save.


Note:  Before, you upload your company’s logo, make sure that the image is within these limits:

  • Recommended formats of the image - jpeg, jpg, png, gif, pjpeg, x-png
  • Recommended size of the image - 150*40 px, 170*60 px
  • Maximum file size allowed - 1MB.
 

Your company details reflect on the modules mentioned here.

It’s time to start personalizing :) 

Related articles
Set up your Company Details One View in Deals One View in Organizations Deals Module in Vtiger Configure My Preferences Feature
Home Privacy Policy Terms of Service Security Center Policy & Legal Center Contact Us
© Copyright 2025 Vtiger. All rights reserved.
Powered by Vtiger
Facebook Twitter Linkedin Youtube