Articles in this section
Facebook Integration with Live Chats
Feature Availability
Vtiger Editions: One Pilot | One Growth | One Professional | One Enterprise
Introduction
Facebook Messenger serves as a powerful platform for business communication. Integrating Facebook with Vtiger CRM via Live Chats enables your team to respond to customer queries quickly and efficiently, while also supporting your social media marketing efforts.
The system allows you to identify and match contacts using the visitor’s name and merge them with existing records for better data management. Agents can handle Facebook conversations in real time directly from the Chat console, eliminating the need to switch between platforms and improving overall productivity
Benefits
The benefits of integrating Facebook with live chats are:
- Manage Facebook messages and live chat conversations from a single platform.
- Real-time chat enables quick replies to customer queries.
- Convert Facebook inquiries directly into leads.
- Access past interactions for a better understanding of customer needs.
- Customers can reach you through their preferred channel
In this article, you will learn about:
- Installing Social module
- Linking your Facebook page to Vtiger CRM.
- Enabling Facebook in Live Chats
Key Terminology
|
|
|
|
|
|
|
|
|
|
|
|
|
|
|
|
|
|
Prerequisites
Before you integrate Facebook with Live Chats, make sure you meet these prerequisites:
- Facebook Business Page - You can create a Facebook Business Page to build your brand and bring your business online. Using the page, you can build your profile, create ads and campaigns, and sell your products and services directly to prospects. To learn more about creating a Facebook Business Page, click here.
- Install Facebook in Vtiger CRM - If you are a Vtiger CRM user, you can install and integrate your Facebook business account with your CRM. This can help you:
- Capture lead data effortlessly
- Promote your business
- Respond to customer queries quickly
- To learn more about installing Facebook in Vtiger CRM, click here.
- Install Live Chats in Vtiger CRM - Live Chats in Vtiger CRM help your clients have real-time conversations with your customer-facing teams. In the background, you can also track your team’s performance, calculate the chat response time, and obtain other useful metrics. To learn more about installing Live Chats in Vtiger CRM, click here.
Configuring Facebook for Live Chats
Once the prerequisites are ready, you can configure Facebook for Live Chats.
The configuration requires you to do the following:
- Step 1: Installing the Social module in Vtiger CRM
- Step 2: Linking the Facebook page to Vtiger CRM
- Step 3: Enabling Facebook in Live Chat
We will now go through each step.
Step 1: Installing the Social module in Vtiger CRM
Follow these steps to install and link your Facebook page to Vtiger CRM:
- Log in to the CRM.
- Click the User Menu in the top right corner of the screen.
- Click the Settings button. The Settings page opens.
- Scroll down to the Extensions section.
- Click Add-Ons.
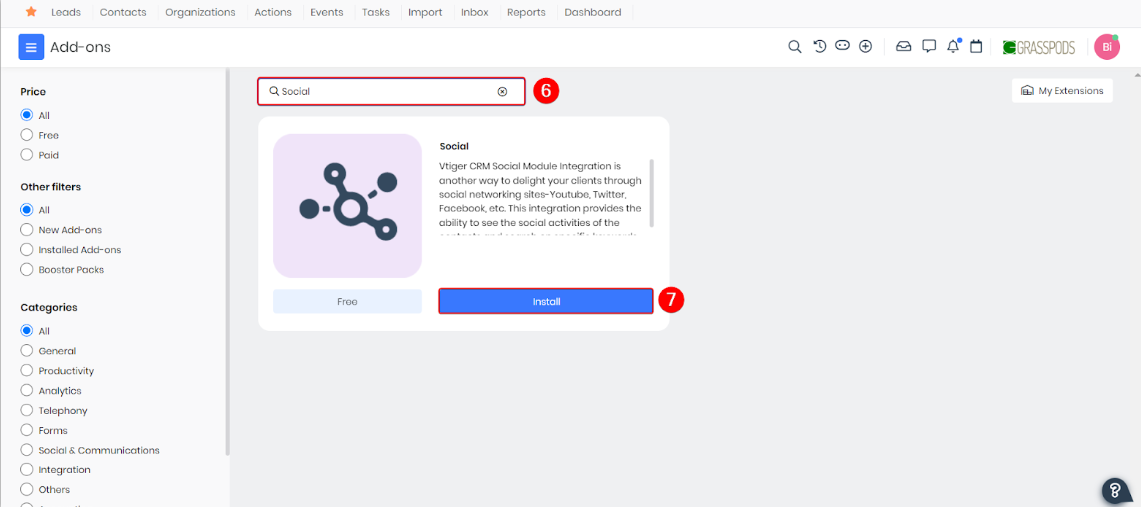
- Search for Social.
- Click Install.
Step 2: Linking the Facebook page to Vtiger CRM
Follow these steps to link your Facebook page to Vtiger CRM:
- Log in to the CRM.
- Click the main Menu.
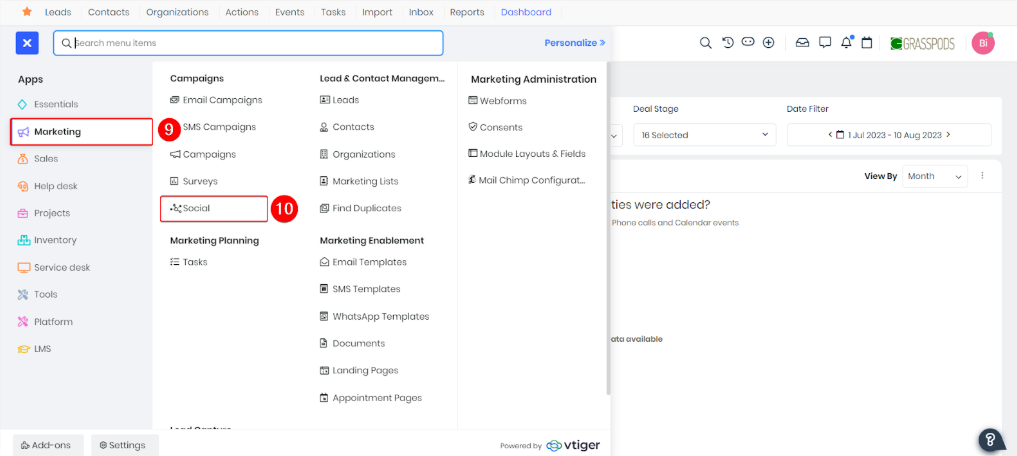
- Select Marketing.
- Click Social.
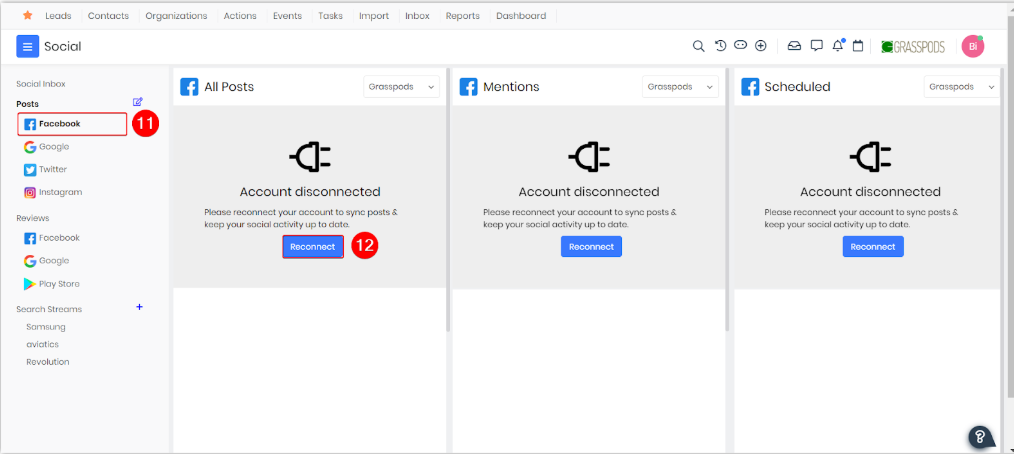
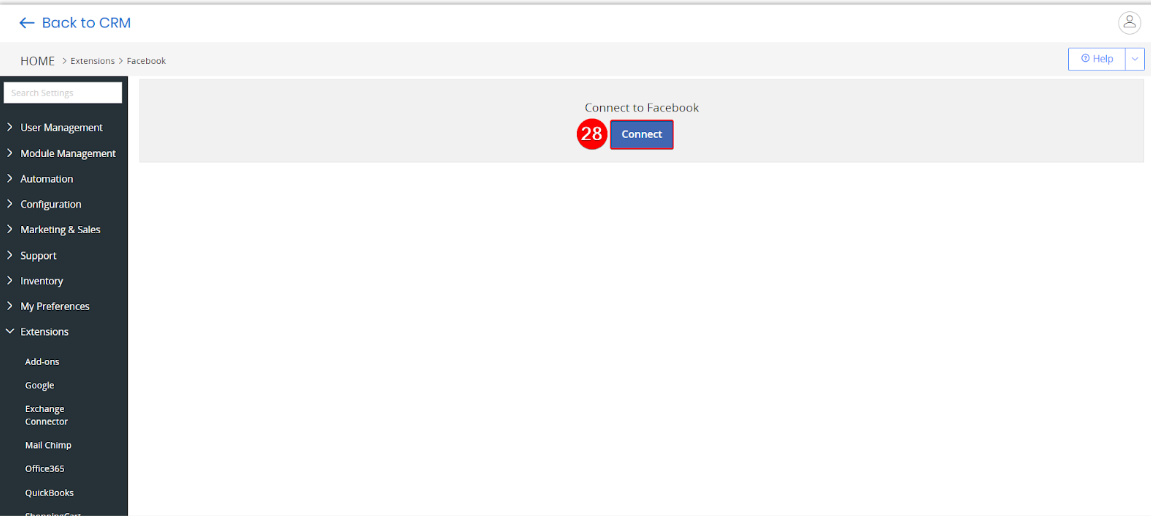
- Click Facebook.
- Click Connect. The Facebook log-in page appears.
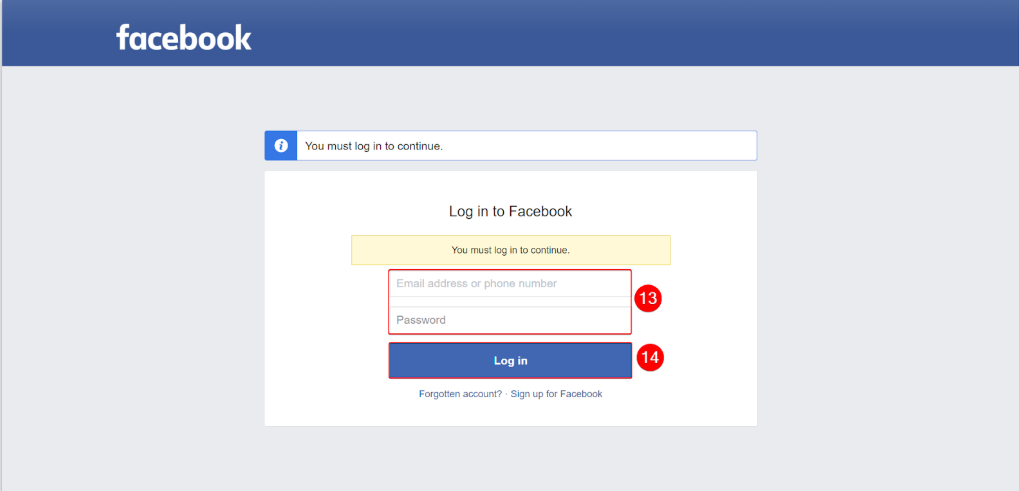
- Enter your Credentials.
- Click the Log In button.
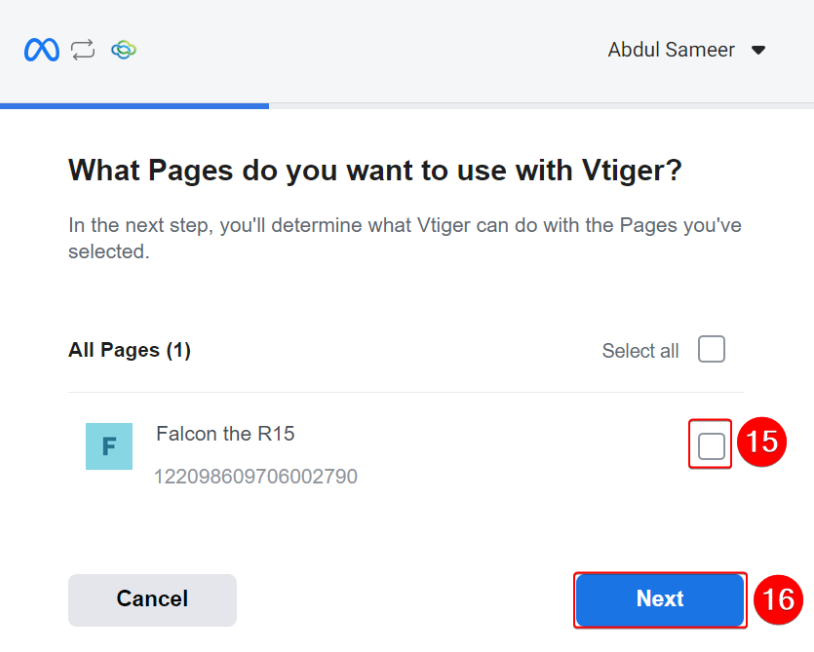
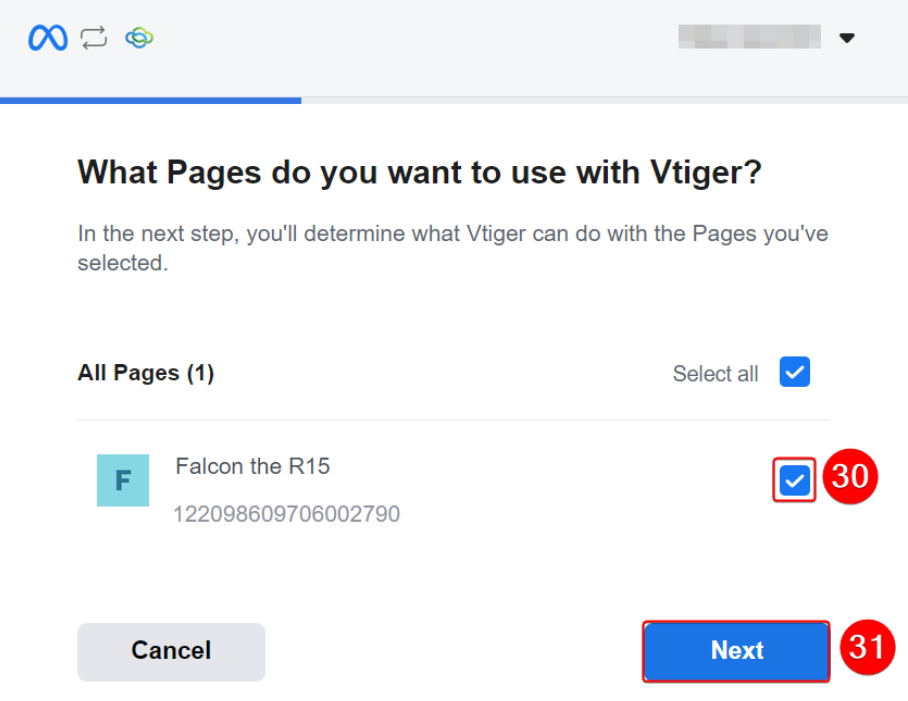
- Select the required Page.
- Click Next.
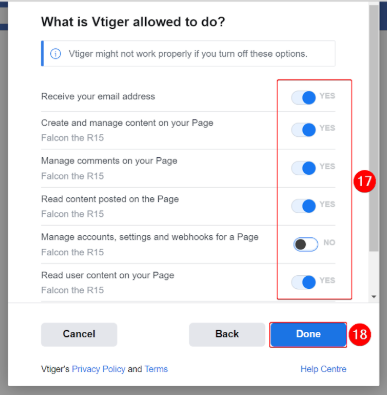
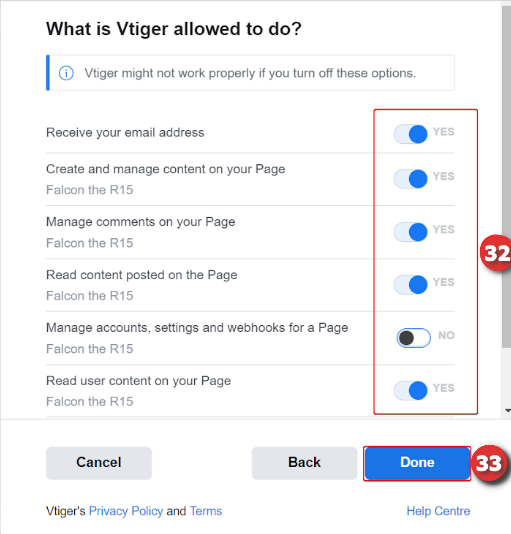
- Provide the required permissions.
- Click Done.
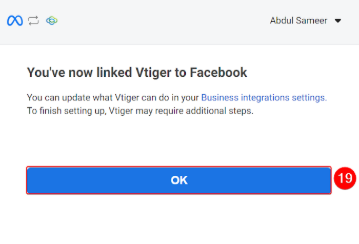
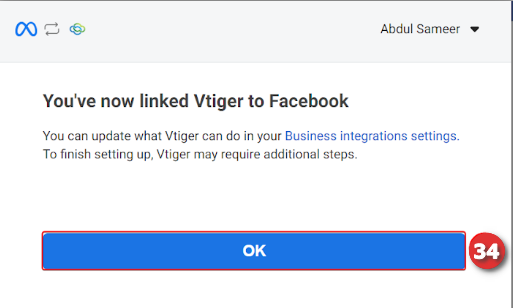
- Click OK.
A success message is displayed once your Facebook account is connected to the CRM.
Step 2: Enabling Facebook in Live Chats
Follow these steps to enable Facebook in live chats:
- Log in to the CRM.
- Click the main Menu.
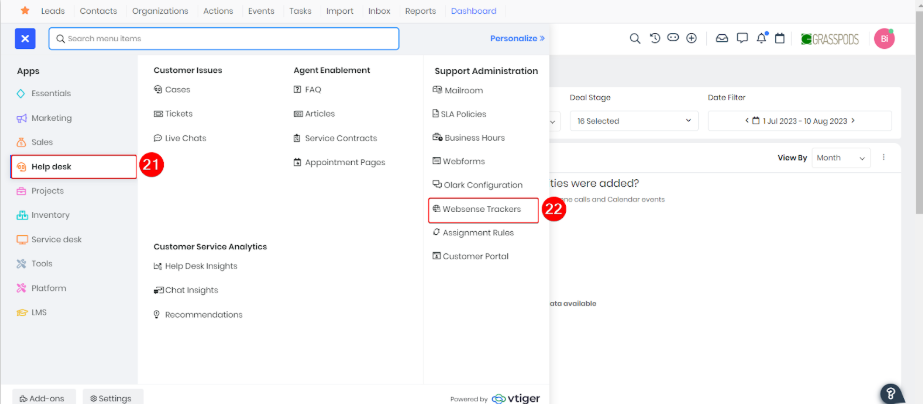
- Click Help Desk.
- Click Websense Tracker.
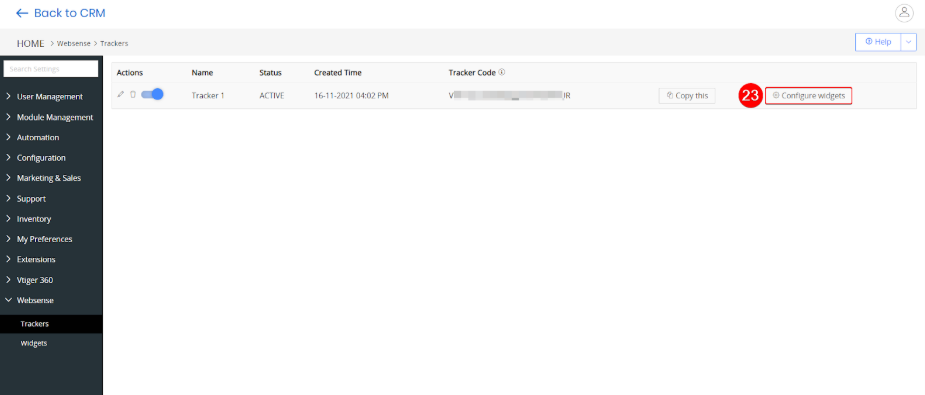
- Hover over the required tracker, and click Configure Widgets.
- Select the tracker in charge of the widget on your website from the Select Tracker drop-down.
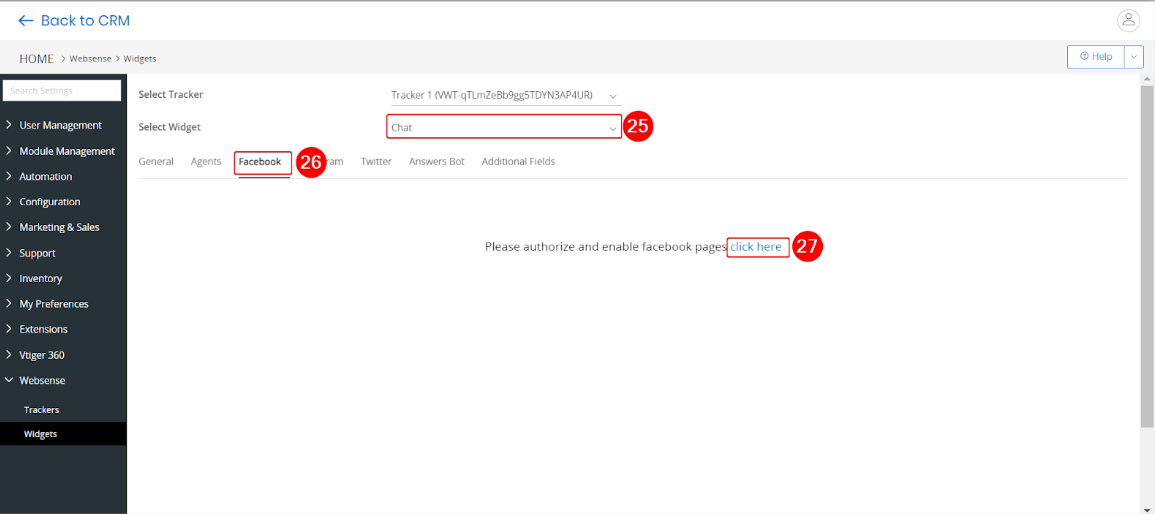
- Select Chat from the Select Widget drop-down.
- Click the Facebook tab.
- Click on Click here to proceed.
- Click Connect. The Facebook authorization page appears.

- Click Continue as Username.
- Select your Facebook Page.
- Click Next.
- Provide the required permissions.
- Click Done.
- Click OK.
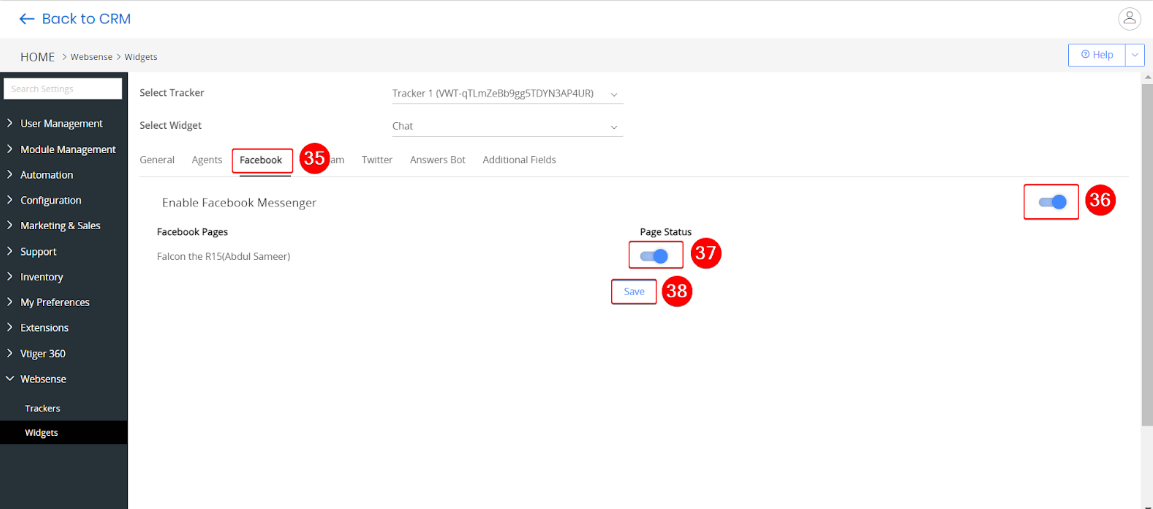
- Come back to the Facebook tab.
- Enable the Facebook Messenger toggle.
- Enable the Facebook Page toggle.
- Click Save
A success message is displayed once Facebook is integrated with Live Chats, and it will be available in the Channel drop-down within the Live Chats console.
Now that you have integrated Facebook with Live Chats, you can answer customer queries that originate from your Facebook Business Page through Live Chats.
For example, if a customer visits your Facebook Business Page and sends you a message, it appears in the Live Chat agent console. You can respond to the customer and continue the conversation from Live Chat to resolve their issue.