Articles in this section
Vtiger Integration with Plivo
Feature Availability
Vtiger Editions: One Pilot | One Growth | One Professional | One Enterprise | One AI
Introduction
The Phone Calls module in Vtiger lets you:
- Integrate with different service providers.
- Make and receive calls from the CRM.
- Track, manage, and log every phone call with your leads, customers, and team members—ensuring no critical conversation slips through the cracks.
- Create records for every phone call made or received.
- Integrate services such as Live Chat, email, call logging, purchase history, feedback surveying, support tickets, and more.
You can also use different telephony gateways! With the Phone Calls module, you can connect to other hosted telephony services such as Twilio, ViciDial, Knowlarity, Exotel, and Asterisk ver. 1.4 and 1.6 (without Vtiger Connector) and Asterisk ver. 1.8 - 11 (with Vtiger Connector).
Plivo Integration with Vtiger
Integrating Plivo with Vtiger's Phone Calls module allows you to make and receive calls seamlessly within the CRM platform. With Vtiger's comprehensive CRM capabilities, you can streamline call management, automate follow-ups, and maintain detailed call logs. This integration:
- Supports simultaneous call routing to multiple agents.
- Lets you use Vtiger CRM’s Phone Call module features such as -
- Incoming calls
- Outgoing calls
- Call notes
- Customer sentiments
- Call recordings
Requirements
To integrate Plivo with Vtiger you need to:
- Have an active Plivo account. If you do not have an account, you must sign up with Plivo and create one.
- Provide your Plivo credentials during the configuration process in Vtiger.
- Install Vtiger’s Phone Calls module.
- Integrate your Plivo phone number with the Phone Calls module in Vtiger.
Before configuring Vtiger you have to explain the IVR flow of your phone system to the Telephony service provider (Plivo) to ensure proper setup.
Other Telephony Gateways in Vtiger CRM
Vtiger’s Phone Calls module integrates with the following telephony gateways:
- Asterisk
- Knowlarity
- Telzio
- Twilio
- ViciDial
- Exotel
Benefits of the Phone Calls feature
- Integrated telephony (web-based) comes at a cheaper cost both in terms of hardware and handling, as calls are routed through your internet.
- Control and coordinate your communication with a single platform. No more worries about trying to work with too many devices and losing out on a contact.
- Call from anywhere and anytime. You or your employees can work from the office or home or even when they are on the road. You can log in at different times and not worry about changes in weather or social conditions.
- Provides more lines of communication and enables handling a large number of calls.
- Switch between multiple applications and devices to see data, which makes a phone call much more efficient.
In this article, you will learn about:
- Installing Phone calls module
- Configuring Plivo
- Phone call status in Plivo
- PHLO support in Plivo
- Troubleshooting common issues in Plivo
Installing Phone Calls
To use the Phone Calls module, you must first install it from the Extension Store. You can access the Extension Store if you are an Admin user.
Follow these steps to install the Phone Calls module:
- Log in to your CRM account.
- Go to the Main Menu.
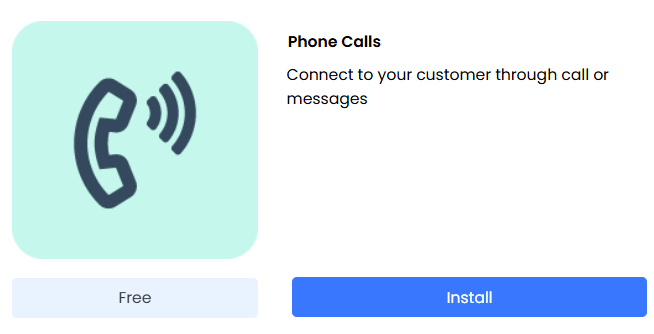
- Click Add-Ons (at the bottom of the page).
- Search for Phone Calls using the search bar.
- Click Install.
After you install the module, you can see it under Main Menu > Essentials > Conversations.
Configuring Plivo
You can set up two types of gateways with Plivo:
- Normal gateway - To set this up, you must configure an extension phone number in the agent’s preferences. When you call a client, it connects to the extension number first. Agents must receive the call on the extension number to connect with the client.
- Client gateway - Outgoing calls directly connect to the clients when you use client gateways. You can set up client gateways only with Twilio and Plivo
.Configuring Plivo requires you to do the following:
- Step 1: Set up Plivo as a normal gateway in Vtiger CRM
- Step 2: Configure the extension number in the CRM
- Step 3: Setting up Plivo as a Client gateway
Note:
- To set up the gateway, log in to your Plivo account and keep both Vtiger and Plivo tabs open.
- Configuration requires you to move back and forth between Vtiger CRM and the Plivo website.
- You can configure Plivo and other gateways only as an Admin user.
Perform these steps in Vtiger CRM.
- Log in to your CRM account.
- Click the Main Menu.
- Click Settings.
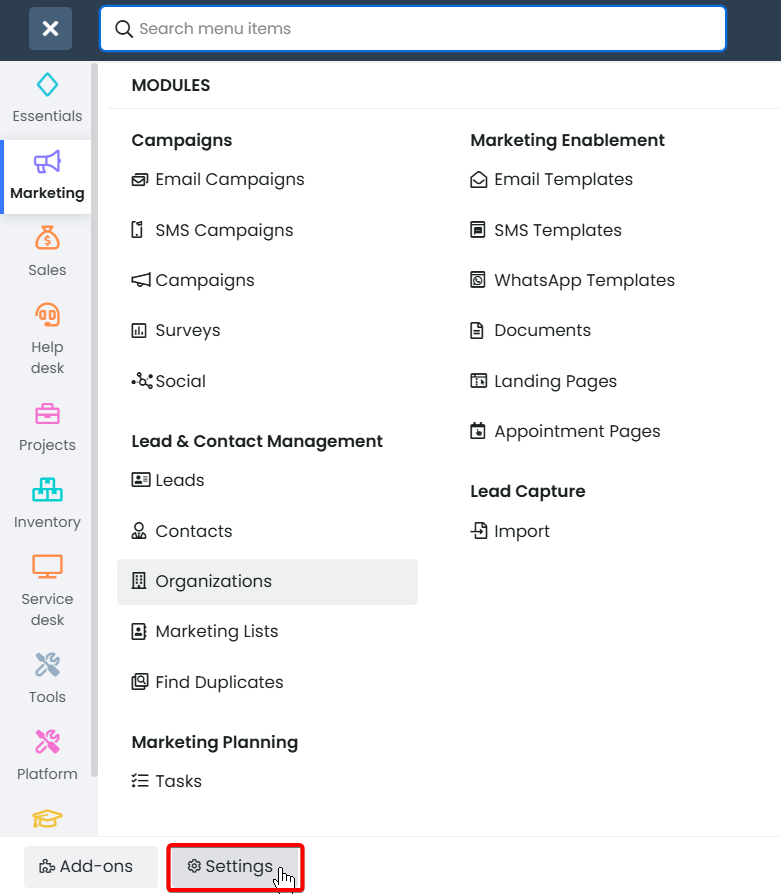
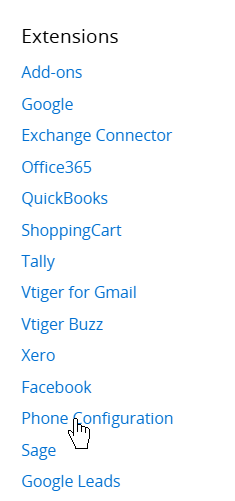
- Look for the Extensions section.
- Select Phone Configuration.
- Click +Add Gateway.
- Select Plivo from the Gateway drop-down.

- Select Active from the Gateway Status drop-down. This activates the gateway for incoming and outgoing calls.
- Set the gateway as default by selecting Yes from the Default Gateway drop-down. This step is optional.
Keep both the Plivo and the CRM tabs open.
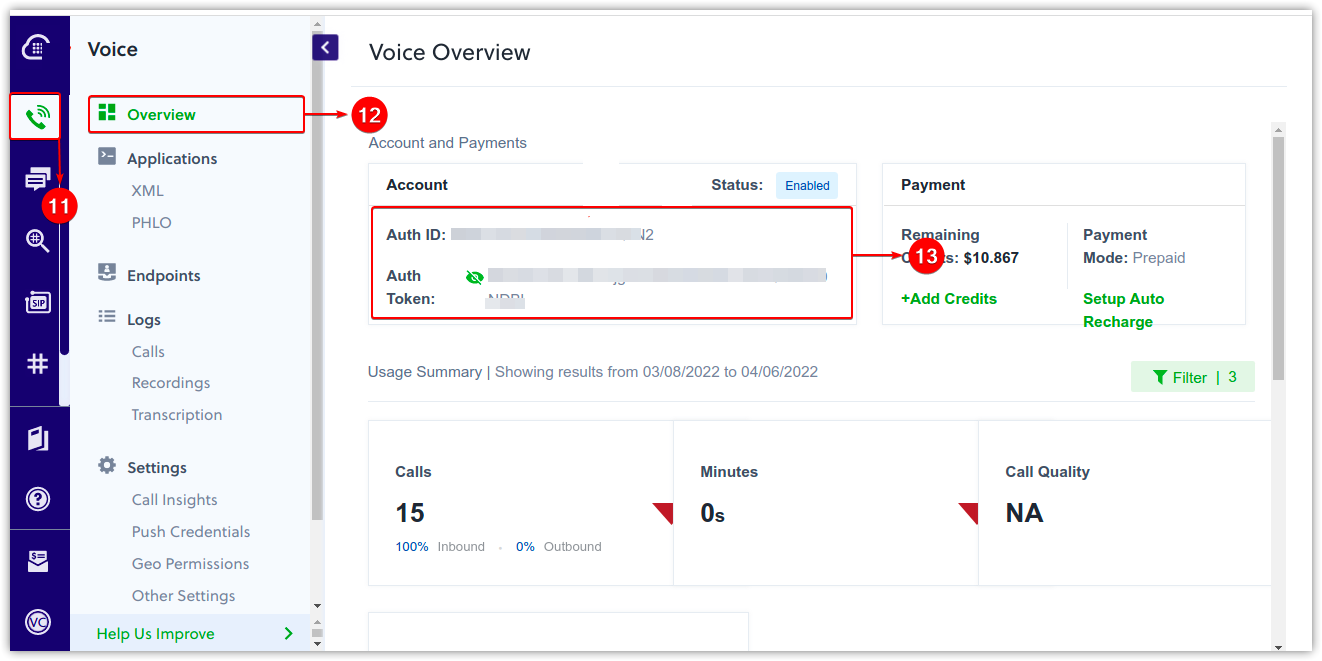
- Log in to your Plivo account.
- Click Voice.
- Click Overview.
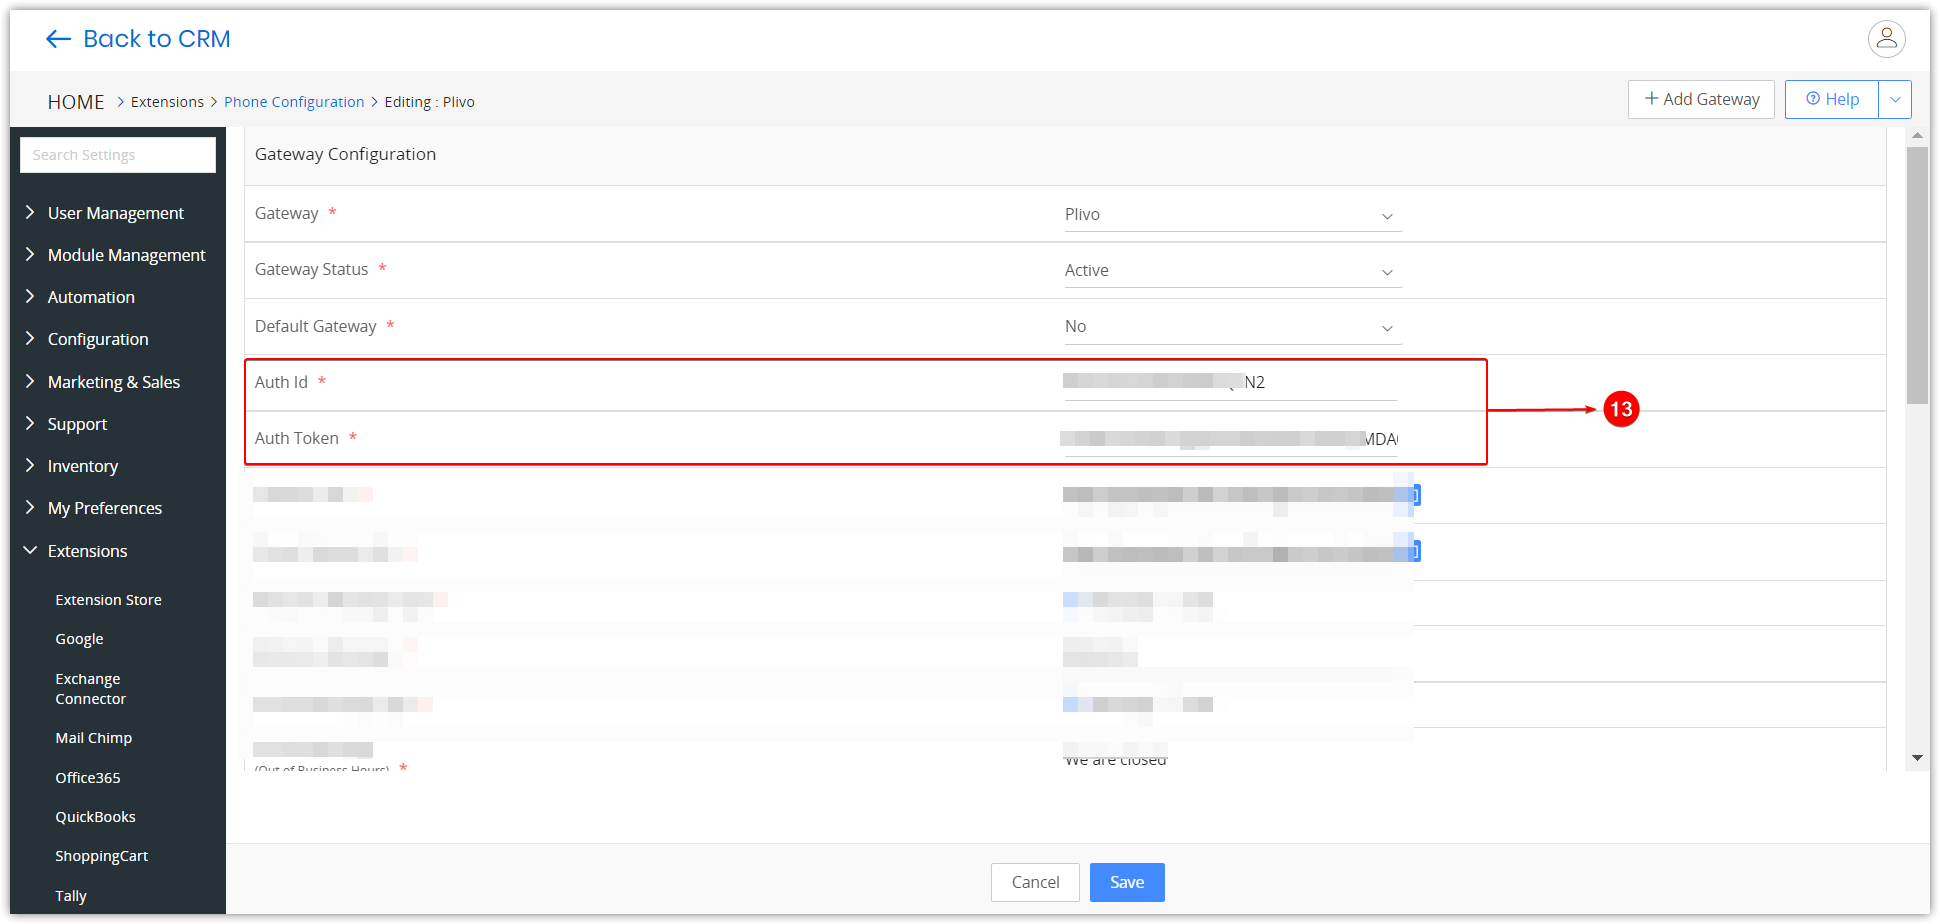
- Copy the Auth ID and Auth Token from the Account and paste it in under Auth ID and Auth Token in the CRM.
- Go to Voice.
- Click Applications.
- Click XML.
- Click Add New Application.
- Enter the application name. For example, Vtiger CRM.
- Copy Callback URL from the CRM.
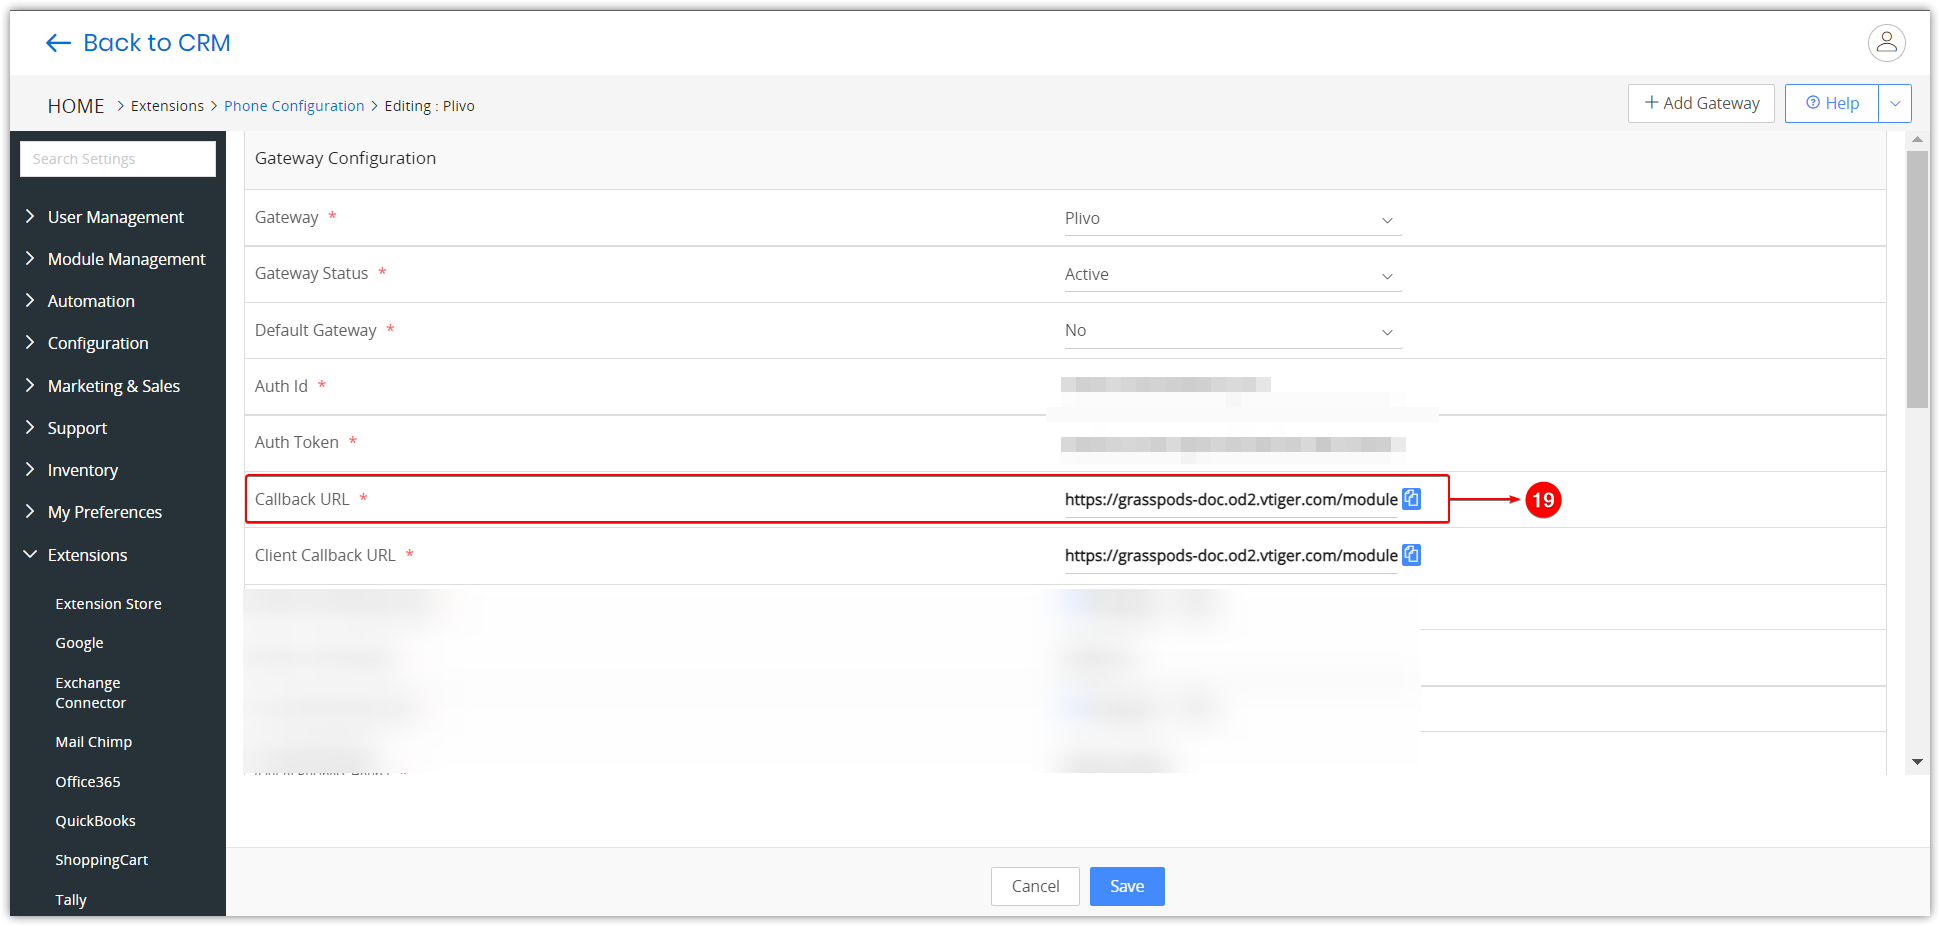
- Paste it under the following in Plivo:
- Primary Answer URL.
- Hangup URL.
- Fallback Answer URL.
- Click Create Application.
- Go to Phone Numbers (# icon) from the Plivo sidebar.
- Click on Your Plivo number.
- Copy your Plivo number and paste it under Your Caller ID in the CRM. Remove all special characters from the number while you paste it.
- Go to Plivo, and select the application you created in Step 18 from the PHLO Name drop-down.
- Click Update Number.
Go back to the CRM tab.
- Choose the following for incoming calls:
- Welcome Message Type - This is an audio message that is played while a client is calling you. You can choose:
- Message - Type the message, which is transcribed into an audio message.
- URL - The audio on the URL is played as the audio message.
- Closed Message Type - This is an audio message that is played when a client calls you during your non-business hours and you are unavailable to receive calls. You can choose
- Message - Type the message, which is transcribed into an audio message.
- URL - The audio on the URL is played as the audio message.
- Busy Message Type - This is an audio message that is played when a client calls you during your business hours, but you cannot receive calls
- Message - Type the message, which is transcribed into an audio message.
- URL - The audio on the URL is played as the audio message.
- No Answer Timeout (sec) - The period after which a client’s incoming call must be disconnected before you receive it. For example, 60 seconds.
- Language for IVR messages - The language in which the Welcome Message must play.
- Business Hour Name - Select the agent’s business hours.
- Voicemail Email ID - When clients leave a voicemail message, it is sent to the email address you specify here.
- Voicemail Transcription - Choose None if you do not want a voicemail transcript. Choose Auto or Hybrid if you need a transcript. To learn about their difference, click here.
- Welcome Message Type - This is an audio message that is played while a client is calling you. You can choose:
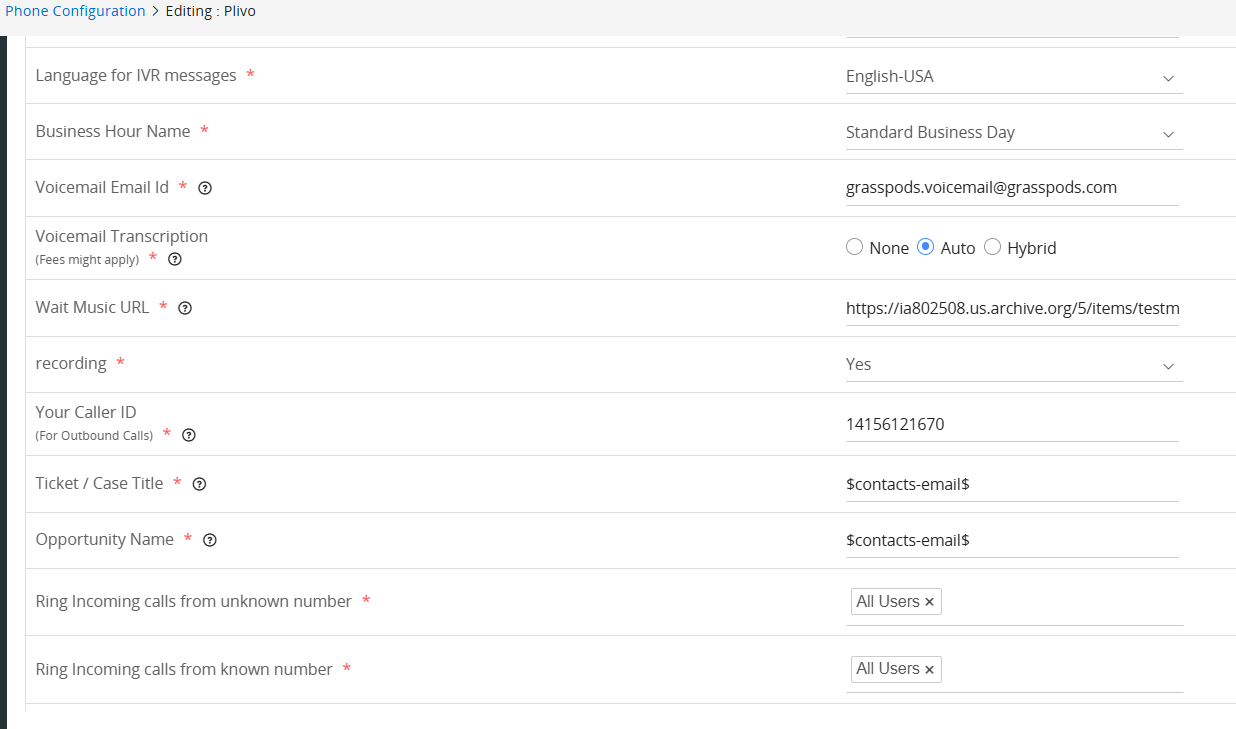
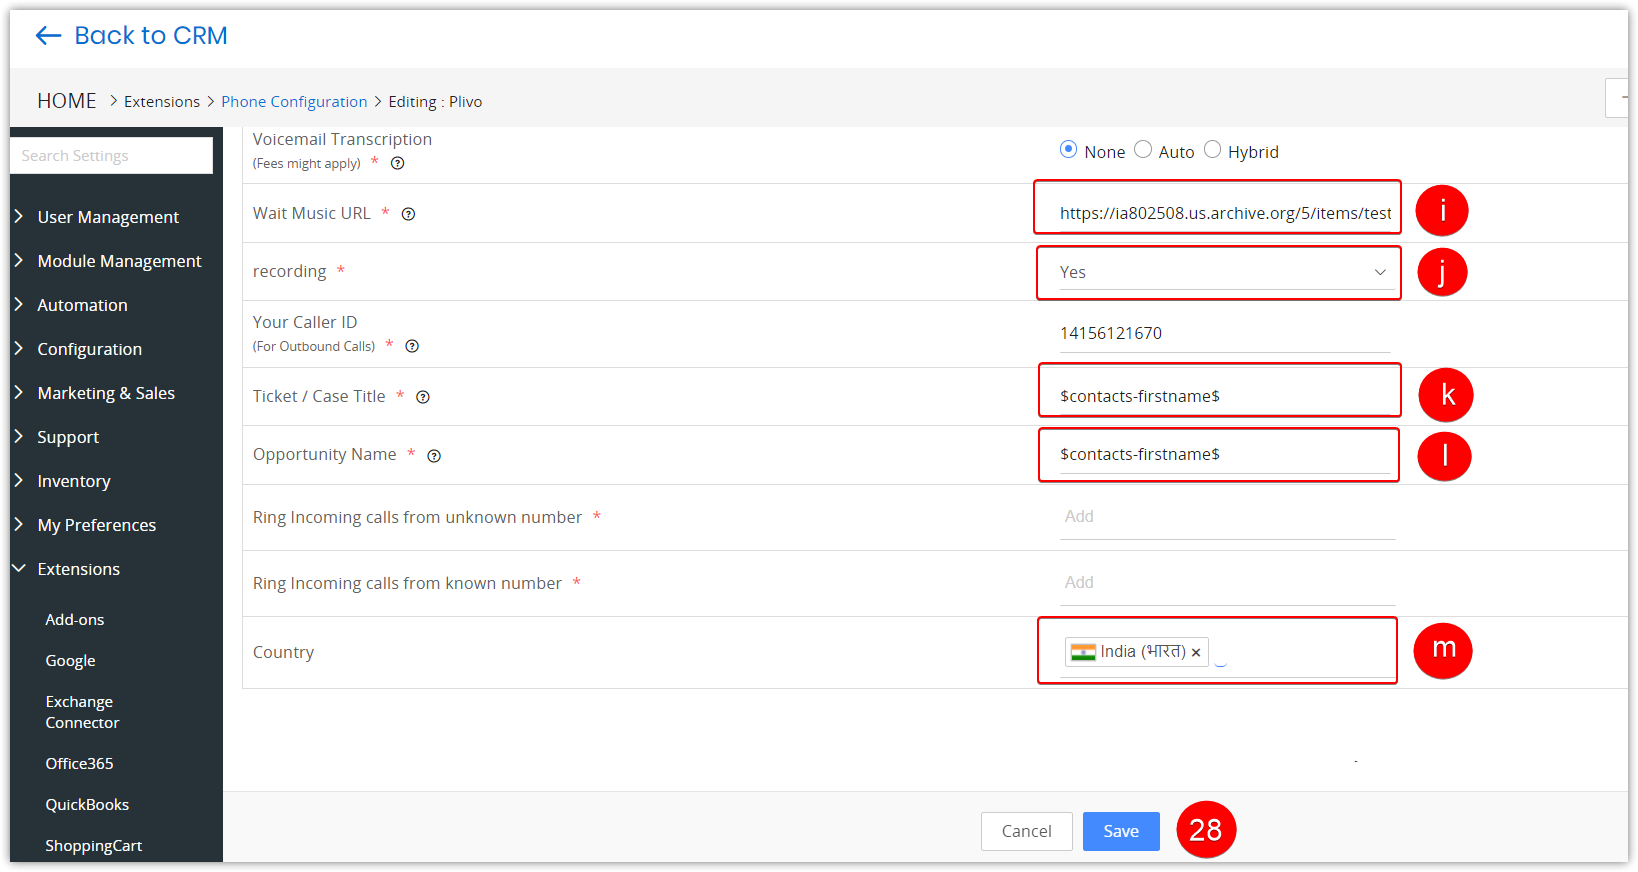
- Wait Music URL - The music that must play when a client’s call is being connected.
- Recording - Choose Yes if you need a recording of the call. Otherwise, choose No.
- Ticket/Case Title - Enter the case title. Vtiger CRM does not consider this value. There are options on the incoming call pop-up to create a case or deal.
- Opportunity - Enter the deal name. Vtiger CRM does not consider this value. There are options on the incoming call pop-up to create a case or deal.
- Ring Incoming calls from an unknown number-
- A mandatory field where you configure users who will be alerted by a ring.
- You can configure all users and groups for an unknown number.
- Ring Incoming calls from a known number-
- You can configure all users, assigned users, and groups for a known number.
- Country- The outgoing call will have the country code of the countries chosen from the drop-down menu.
- When you choose a country, the calls populate that country's phone code. For example, if you select India, +91 is taken to generate the calls.
- If you keep the field blank, calls can be triggered with all other providers, and the codes will auto-populate.
- If you select “ALL”, the CRM allows all types of country codes to do a call.
- If you configure the same country in multiple gateway fields, the CRM displays all the providers configured with the same country code. You can choose any of the gateways to generate a call.
- Click Save.
Configure the extension number in the CRM. Keep both the Plivo and CRM tabs open.
- Click the User Menu on the top right corner of the screen.
- Click My Preferences.
- Click the Edit icon.
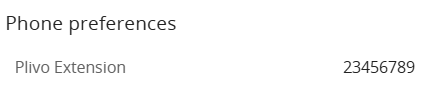
- Scroll down to Phone Preferences.
- Enter the extension number in the Plivo Extension field. Prefix the country code to the number and remove the + sign. For example, 919998877766.
- Click Save.
Client gateway
Follow these steps to set up Plivo as a client gateway:
- Perform Steps 1 to 9 mentioned in the Normal Gateway setup.
- Keep both Plivo and the CRM tabs open.
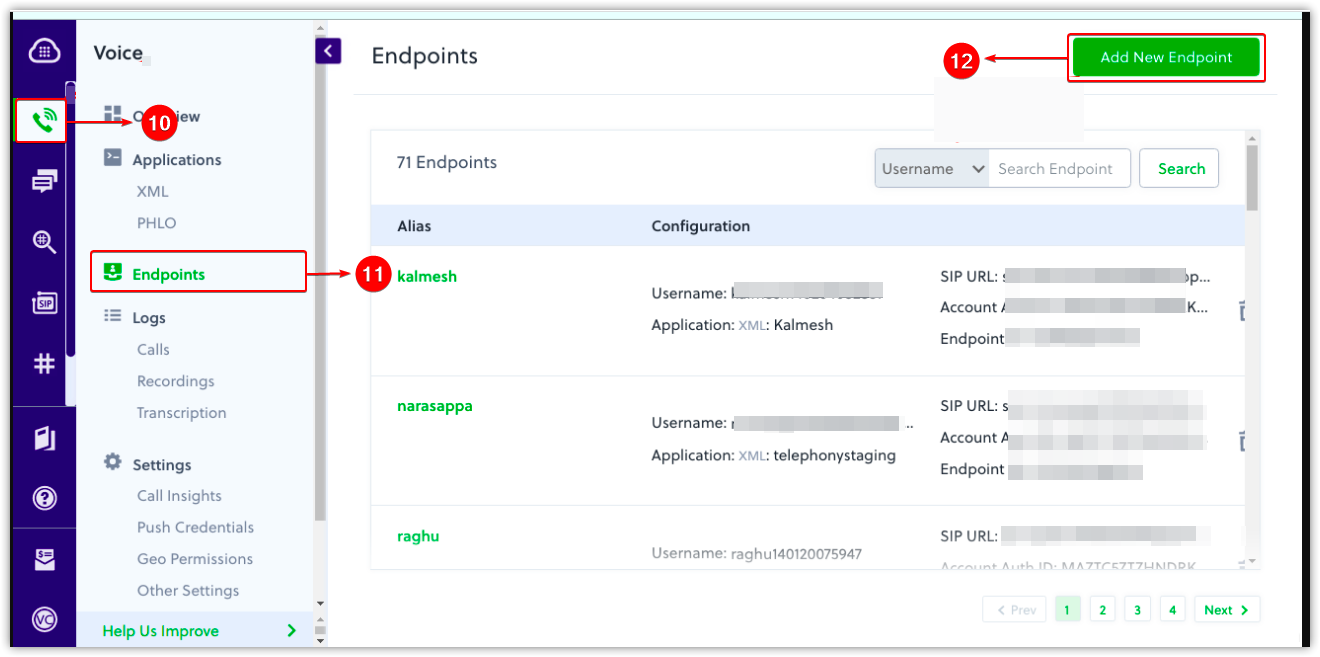
- Click Voice on the sidebar.
- Click Endpoints.
- Click Add New Endpoint.
- Enter a username, password, and alias name.
- Select XML Application from the Application Type drop-down.
- Select the application you created (in Step 18) from the Application drop-down.
- Click Create Endpoint.
- Go to Phone Numbers (# icon) from the Plivo sidebar.
- Click on your Plivo number.
- Copy your Plivo number and paste it under Your Caller ID in the CRM. Remove all special characters from the number while you paste it.
- Go to Plivo, and select the application you created in Step 18 from the Plivo Application drop-down.
- Click Update Number.
- Perform Steps 27 and 28 mentioned in the Normal Gateway setup.
- Configure the Plivo extension in your preferences. Keep both the Plivo and CRM tabs open.
- Click the User Menu on the top right corner of the screen.
- Click My Preferences.
- Click the Edit icon.
- Scroll down to Phone Preferences.
- Go to Plivo and open the endpoint you created in Step 24 in the normal gateway.
- Copy the SIP URL from the endpoint, and paste it into the Plivo Extension field in the CRM preferences.
- Enter the same password you created in Step 21 in the Plivo Auth field in the CRM.
- Click Save.
Phone Calls Features
The Phone Calls module provides the features below.
Incoming Call Pop-up
Vtiger CRM users are notified about incoming calls in the form of pop-up messages.
So how does this feature work? Incoming calls are matched with the lead, contact, or organization records in the CRM by matching caller numbers with numbers in the CRM.
- If a matching number exists, then the lead/contact/organization's name is displayed in the pop-up.
- If a matching number does not exist, you are prompted to enter the caller's email ID in the pop-up to create a new contact record.
And if you have multiple users manning your phone calls, say a customer care team, the incoming call pop-up is shown to all the users who have configured the extension number in their preferences.
When a user answers a call, the pop-up disappears for other users.
So, how is this incoming call pop-up helpful to you? Well, from the pop-up, you can:
- Search/Create a contact if there is no matching contact for an incoming call.
- Create a deal or a case from the incoming call pop-up.
- Transfer calls to other agents or reps.
- Add call notes.
Also, you can view recent call logs in related touchpoints of the contact’s record.
Click-to-Call for Outgoing Calls
This feature is available for all outgoing calls. You can directly call your contacts from the contact or organization record by adding their phone numbers to the record.
Follow these steps to place a call from a record:
- Log in to your CRM account.
- Click the Main Menu
- Go to Essentials.
- Select Contacts.
- Hover on any required contact in the Listview and click on the phone icon on the available options.

- Choose a gateway (if multiple are configured and active).
The call is connected automatically. The outgoing call pop-up has a dialer icon that can be used for IVR messages.
Call Notes
You can add notes while on a call or after the call to follow up with customers. These notes are available in the phone call records. You can also access these notes for reference whenever you call the customer again.
Customer Sentiments
After a call is completed, you can rate the customer’s experience of talking with you using one of the five sentiments: Very Negative, Negative, Neutral, Positive, and Very Positive. Recording sentiments helps you improve customer experiences in the future.
To learn more about customer sentiments, click here.
Call Recording
You can automatically record all incoming calls to ensure you don't miss out on the important points you discussed with your contact. You can listen to these calls later to make notes or to review what you have discussed.
Transfer Calls
Do you have a team of sales reps or customer reps handling calls in your business? Then the Transfer Call feature is perfect for you. If some of your sales reps or customer reps are busy, they can transfer the call to other agents from the incoming call pop-up with just a click. This facility is available for Plivo and Twilio users.
For example, if Chris is busy on a call with a customer and receives another, he can immediately transfer the second call to James, another sales representative.
Follow these steps to transfer a call:
- Log in to your CRM account.
- Receive the call from the incoming call pop-up.
- Click the Transfer icon shown on the top right of the pop-up.
- Select the agent to whom you want to transfer the call.
- Add transfer call notes, if any.
- Click Transfer call.
Setting up Voicemails
Are all your sales reps busy? Don’t miss a customer's call - set up a voicemail!
You can have your customers leave a message if all support representatives are busy or away from work. The voice will be recorded and sent to the owner’s primary email address, which you must specify during the setup.
Also, did you know that you can create a transcript of your voicemail messages?
Simply enable the Transcript field under Phone Calls. You can also send the transcript of the call to your customer. This transcript is emailed to the owner’s primary email address.
Note: Transcripts might not always provide an accurate representation of the audio. Transcription is available only in Plivo and Twilio.
Link Phone Calls to Business Hours
What if a customer calls when you are having an extensively busy day? Or is your business closed for the holidays or if it is your day off? Not to worry, you can now link your phone calls to your business hours by setting up a voicemail. Just record your message, and it will be played out. Customers will have the option of leaving you a message upon the completion of your voicemail.
For example:
- If a customer calls and all the agents are busy, a 'busy' message is played out.
- If a customer calls on non-working hours or a holiday, an 'away' message configured with the phone calls is played out.
Phone Call Logs
The log of the calls (incoming and outgoing) are listed under Main Menu > Essentials > Phone Calls. You can view the following details on this screen:
- Call status, customer number, which agent or rep handled the call (mentioned in Handled By and Assigned To fields), call duration, etc.
- Details for each call can be seen when you open the call record, such as -
- Links to the voice recording
- Call notes
- Call transfer details
- Call directions, etc.
You can create a list of all your phone calls, such as missed calls, completed calls, etc., from the List View.
To learn how to create a list, click here.
Phone Call Status Values
Call status values to define the status of the calls being handled. You can see the following call statuses in the CRM.
- Ringing: For inbound calls, before the call is routed.
- In-progress: For inbound calls, after an agent or a rep picks up the call. For outbound calls, when a rep initiates a call.
- Completed: For inbound and outbound calls, after a call is completed.
- Voicemail: For inbound calls, if a call went to voicemail.
- Hang-up: For inbound calls, if a customer hangs up the call before it is routed to a rep.
- No-answer: For an outbound call, when it is not answered and there is no voicemail.
Making Calls using different Plivo Numbers
- You can use multiple Plivo gateways to handle outbound calls.
- If you have set up different SIP IDs, each linked to a Plivo number, you can call from different numbers based on your setup.
- The call will be made using the extension you've selected in My Preferences.
PHLO Support
In Plivo, the Plivo High-Level Object or PHLO console allows admins to set up IVR call flow. The list of agents is configured in Plivo. Based on the options chosen by the caller, Plivo sends a callback to Vtiger with the details. Vtiger then creates phone call records.
Follow these steps to configure PHLO in Plivo:
- Log in to your Plivo account.
- Go to PHLO from the left menu or go to https://console.plivo.com/phlo/list/.
- Click Create new PHLO to create a PHLO application.
- Select Phone System IVR and click Create Application.
- Design the complete flow with all the messages - Welcome messages, busy messages, etc., in the Plivo console. CRM configuration will not be used in this application.
- Add all the SIP numbers under <> for calling setup.
- Add Custom Headers and Event Callbacks for Answer, Completed, Hangup, and Record under <>.
- Copy the callback URL from Vtiger’s Phone Calls configuration.
- Select the PHLO Name and choose PHLO under Application Type in your Active Numbers.
- Click Update Number.
For more help, reach out to [email protected].