Articles in this section
Integration between Pipedrive and Vtiger CRM
Introduction
Pipedrive CRM is a widely used Customer Relationship Management application that strongly emphasizes growing leads, accelerating sales, and measuring performance.
If you are a Vtiger CRM user who also uses Pipedrive, you can sync data between Vtiger and Pipedrive using an application built through Pipedrive’s developer hub.
Sync Direction
The module and its records can be synced between the CRMs in the following three directions:
- Sync from Vtiger to Pipedrive: Records from Vtiger CRM reflect in Pipedrive CRM.
- Sync from Pipedrive to Vtiger: Records from Pipedrive CRM reflectin Vtiger CRM.
- Sync Both Ways: Records from both the CRMs reflect in each other.
|
|
In real-time, you can sync Pipedrive data into Vtiger CRM or vice-versa and simultaneously work on the same data.
In Vtiger CRM, Pipedrive Sync is available only for the following modules:
- Contacts
- Deals
- Products
- Organizations
Benefits of Syncing Vtiger and Pipedrive CRM
Following are the benefits of syncing data between the CRMs:
- Access your business contacts, leads, and organizations in both Vtiger and Pipedrive CRM.
- Prevent duplication and errors with a single source of data.
- Save time by managing your contacts, leads, and organizations from a single application.
Feature Availability
| Pipedrive Sync | ||||
To know more about feature limits, click here.
In this article, we will learn about the following:
- Building a Pipedrive application
- Installing Pipedrive
- Syncing Pipedrive and Vtiger CRM
- Configuring sync settings
- Field mapping
Key Terminology
|
|
|
|
|
|
|
|
|
|
|
|
|
|
|
|
|
|
Building a Pipedrive Application
You need to first build a Pipedrive API application through the Pipedrive developers Hub to obtain Client Secret IDs that are used to sync data between Vtiger and Pipedrive CRM.
You will have to log in to your Pipedrive account to build an API application.
Follow these steps to build a Pipedrive application:
- Log in to your Pipedrive account (https://www.pipedrive.com/).
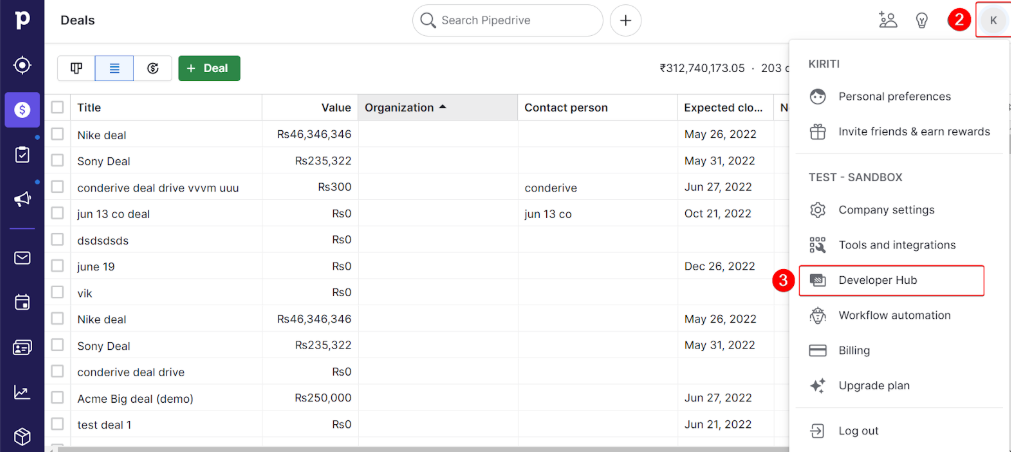
- Click the User Menu in the top-right corner.
- Click Developer Hub.
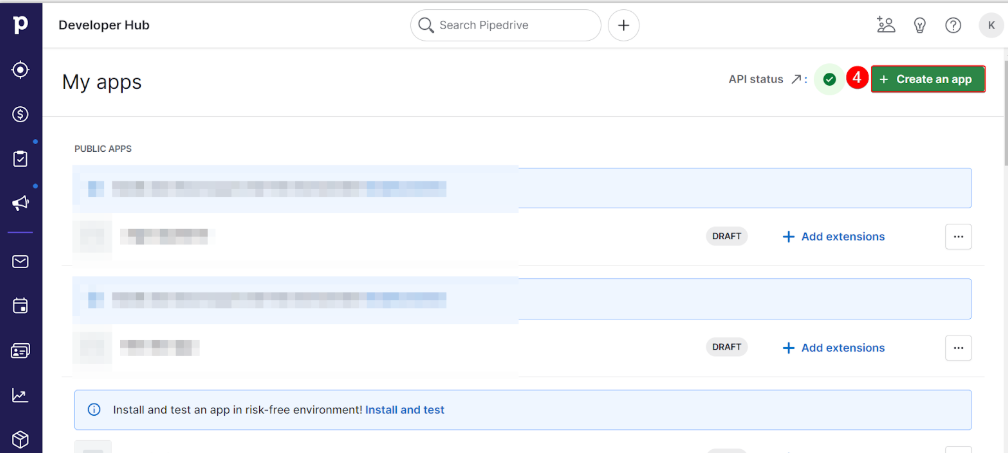
- Click + Create an app.
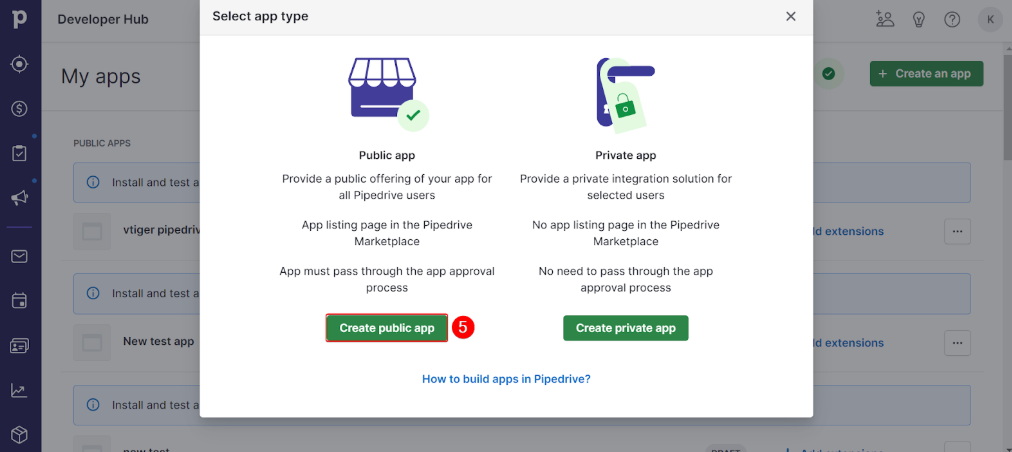
- Select Create public app.

- Enter or select information for the following fields.
- App Name: Enter a name for the app.
- Callback URL: Enter your authorized redirect URL (https://oauthredir.od1.vtiger.com/).
- App type: The App type is set to Public by default.
- Click Save.
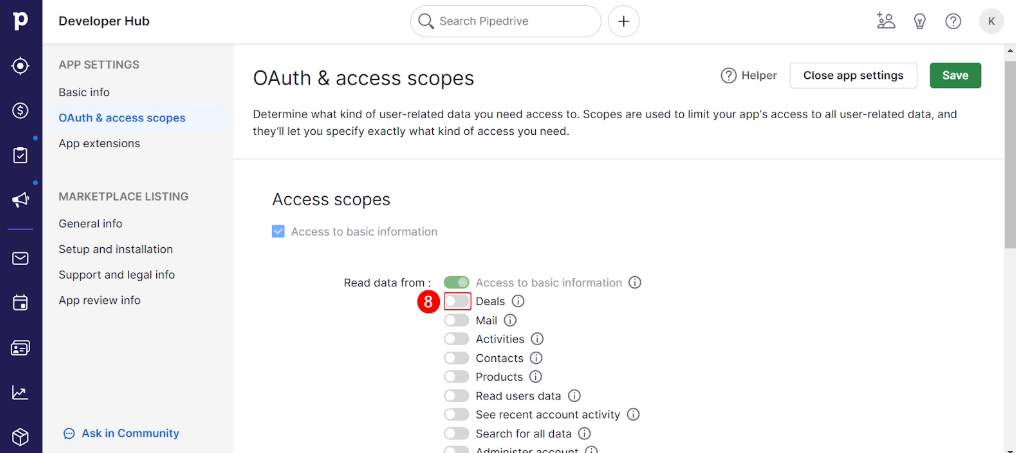
- Enable the required scope access.
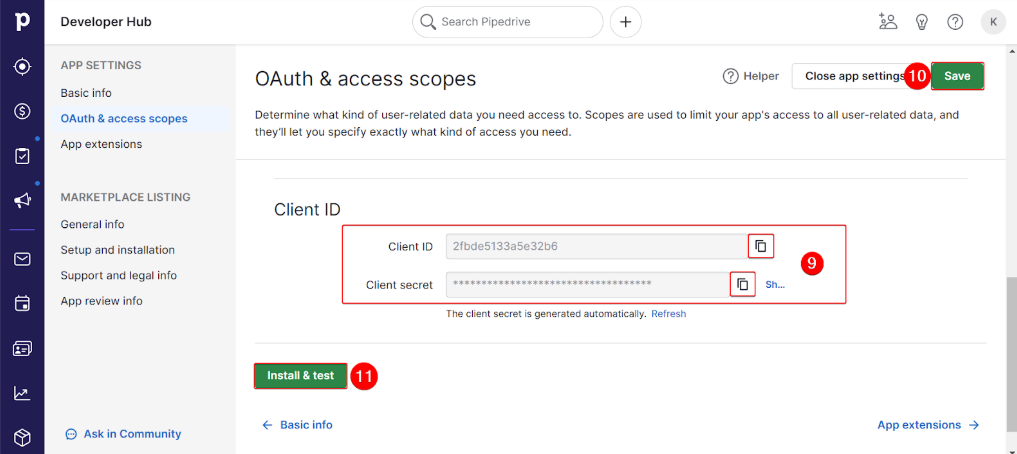
- Scroll down to copy or note the generated Client ID and Client Secret.
- Click Save.
- Click Install & test. An application authorization window pops up.
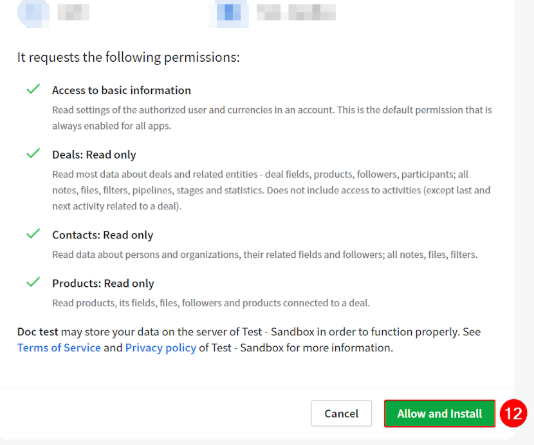
- Click Allow and Install.
The application you built is listed under Developer Hub > My Apps. You can now use the application to integrate Vtiger and Pipedrive CRM.
Now let us install the Pipedrive extension in Vtiger CRM.
Installing Pipedrive
Pipedrive is a third-party app that you must install from Vtiger’s Extension Store. You can install extensions only if you are an Admin user in the CRM.
Follow these steps to install the Pipedrive extension:
- Log in to your CRM account.
- Click the User Menu.
- Click Add-ons.

- Search for Pipedrive.
- Click Install.
The Pipedrive extension is now available as a user-level connecter and can be used to integrate Vtiger CRM and Pipedrive.
Syncing Pipedrive and Vtiger CRM
Once the Pipedrive extension installation is complete, you can sync the data between Pipedrive and Vtiger CRM.
Follow these steps to sync data between Pipedrive and Vtiger CRM:
|
|
- Log in to your CRM account.
- Click the Main Menu.
- Select a module such as Contacts, Deals or Organizations. The List View of the selected module appears.
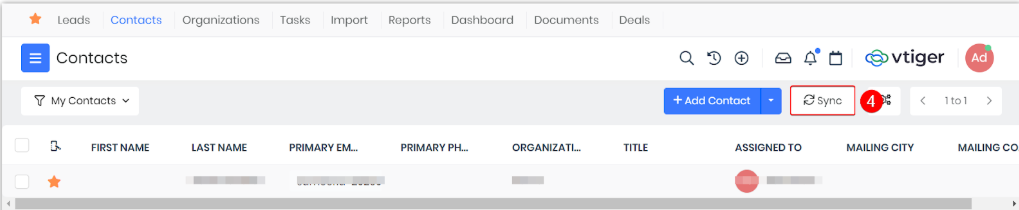
- Click Sync on the top right corner of the screen. The Sync pop-up appears.
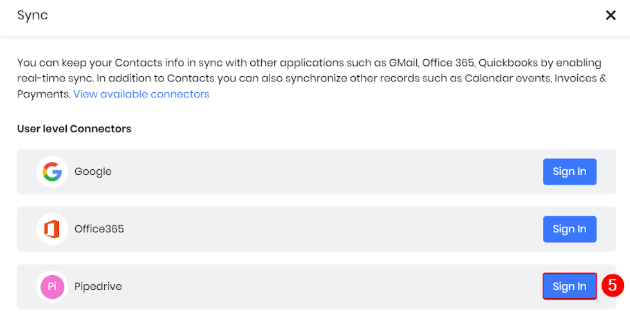
- Click Sign in corresponding to Pipedrive. The Pipedrive sign-in window appears.
- Log in to your Pipedrive account (if requested).
- Click Accept. The OAuth Settings window (Vtiger) opens.
- Note: Open the built Pipedrive application in a different tab and copy the Client ID and Client Secret.
- Enter or select information for the following in the OAuth Settings fields:
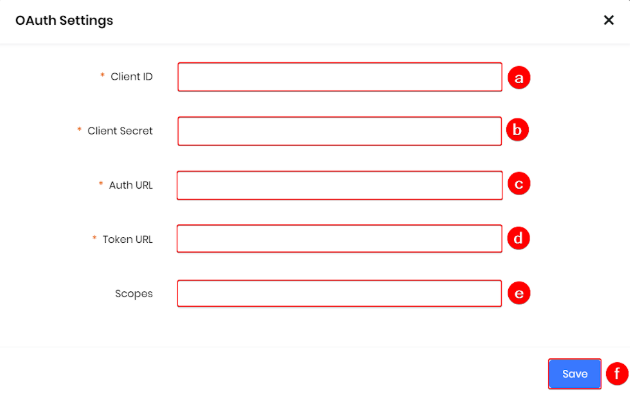
- Client ID: Paste the copied Client ID.
- Client Secret: Paste the copied Client Secret.
- Auth URL: Enter the URL (https://oauth.pipedrive.com/oauth/authorize).
- Token URL: Enter the URL (https://oauth.pipedrive.com/oauth/token).
- Scope: Enter the Scope - base,deals:full,contacts:full,users:read.
- Click Save. A success message will appear.
You must configure the sync settings to sync the data between two CRMs.
Configuring Sync Settings
You can configure the sync settings between the two CRMs and control the sync of individual modules, sync directions, data priority in case of conflicts, etc.
Sync settings allow you to configure the following:
- Pre sync settings
- System Settings
- Settings for individual modules
Follow these steps to configure Sync settings:
- Log in to your CRM account.
- Click the Main Menu.
- Select a module such as Contacts, Deals or Organizations. The List View of the selected module appears.
- Click Sync on the top right corner of the screen. The Sync popup appears.
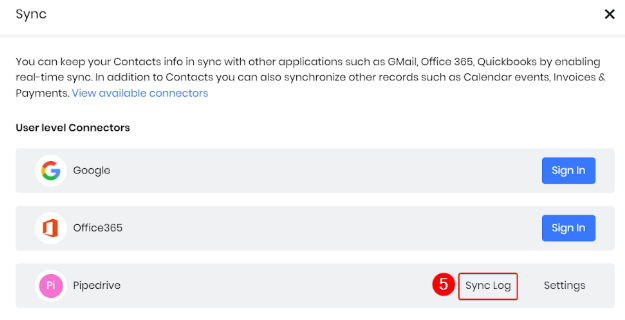
- Click the Sync log button beside the Pipedrive application. The Sync Log window opens.
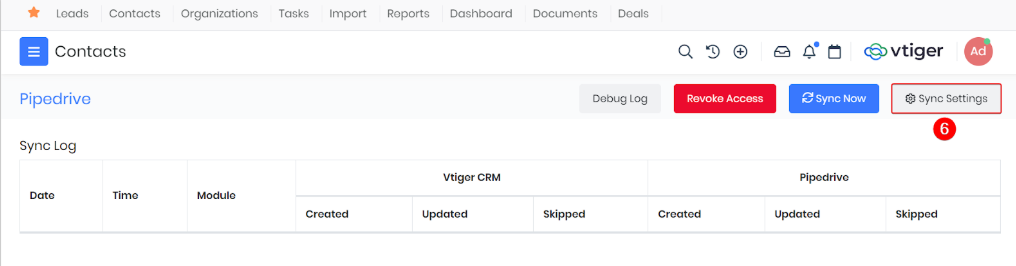
- Click Sync Settings on the top right corner of the screen. The Sync settings window appears.
- Enter or select information for the following fields:
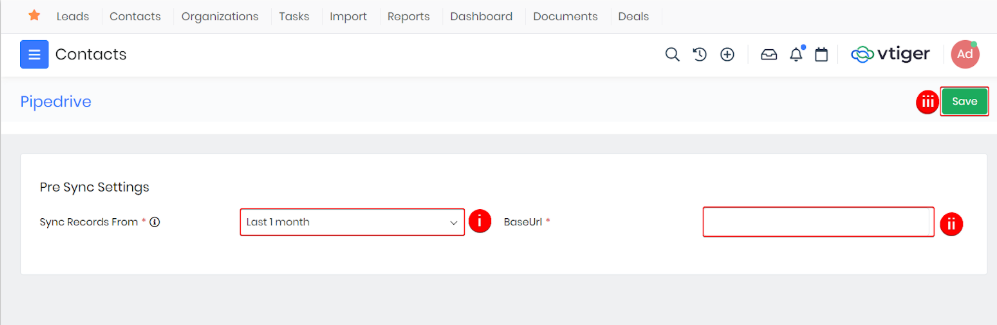
- Pre-Sync Settings.
- Sync Records From: Select a time frame from the drop-down to sync the data.
- Base URL input: Copy and paste the base URL of the built application. For example, (BUILT_APP_NAME.pipedrive.com).
- Click Save. System and individual module settings appear.
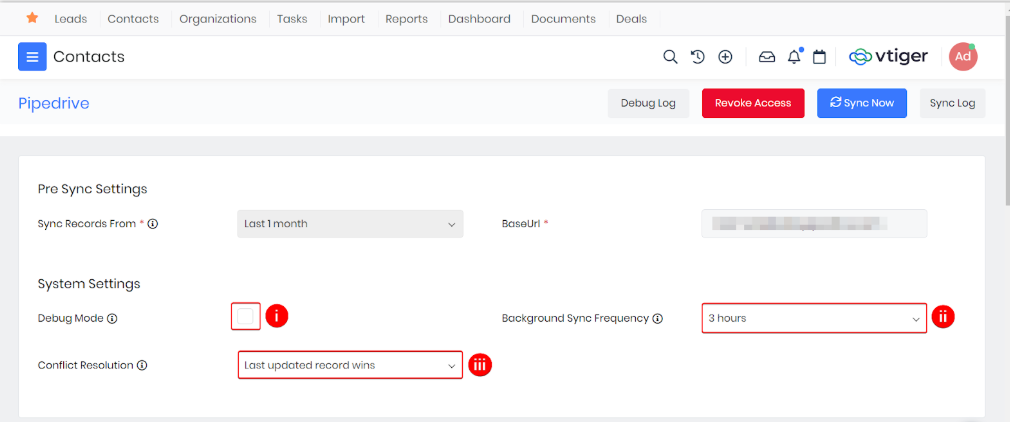
- System Settings.
- Debug Mode: Click the checkbox to enable the Debug mode.
- Background Sync Frequency: Select a time (in hours) from the drop-down for the synchronization to repeat.
- Conflict Resolution: Select a CRM from the drop-down to override data from the other CRM in case of conflicts.
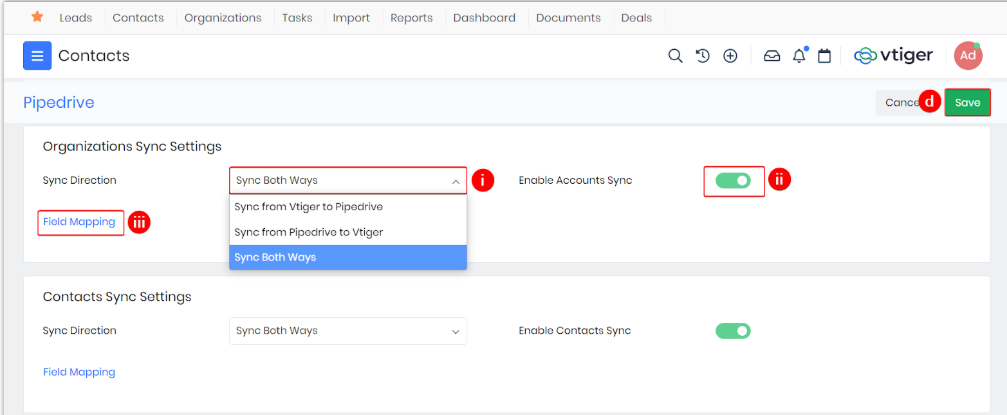
- Settings for individual modules.
- Sync Direction: Select the direction of synchronization from the drop-down.
- Enable Module Sync: Toggle the switch to green to enable synchronization of the respective module.
- Field Mapping: Configure the field mapping as per the requirement. (Check out field mapping in detail in the next section).
- Click Save.
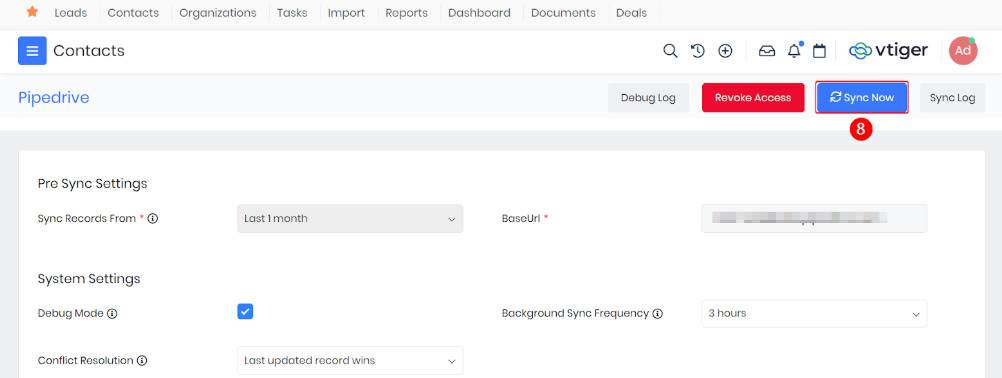
- Click Sync Now on the top right corner of the screen. The sync log appears with all the record information synced between Vtiger and Pipedrive.
Field Mapping
Field Mapping is systematically matching fields between two applications so that data syncs smoothly between the two. Field mapping matches source and target fields and syncs data from one application to another.
Improper or incomplete mapping can prevent the sync process from skipping a few records and failing to update information. For example, a mandatory field in Pipedrive might have data, and the mapped non-mandatory field in Vtiger might be empty. In this case, the sync process is unsuccessful.
|
|
Follow these steps to view the fields mapped between Pipedrive and Vtiger CRM:
- Log in to your CRM account.
- Click the Main Menu.
- Select a module such as Contacts, Deals or Organizations. The List View of the selected module appears.
- Click the Sync button. The Sync window pops up.
- Click the Settings button beside Pipedrive. The Sync Settings open.
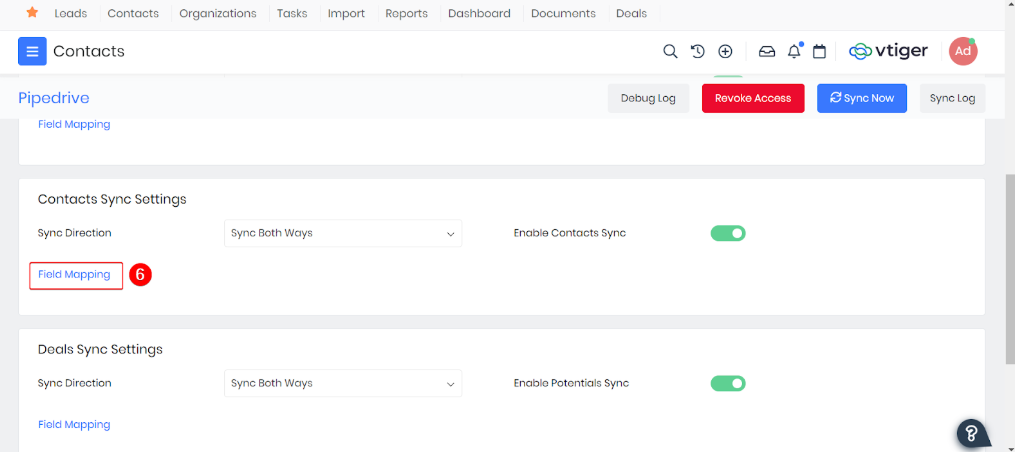
- Click Field Mapping in the sync settings sections of the required module. For example, Contacts Sync Settings.
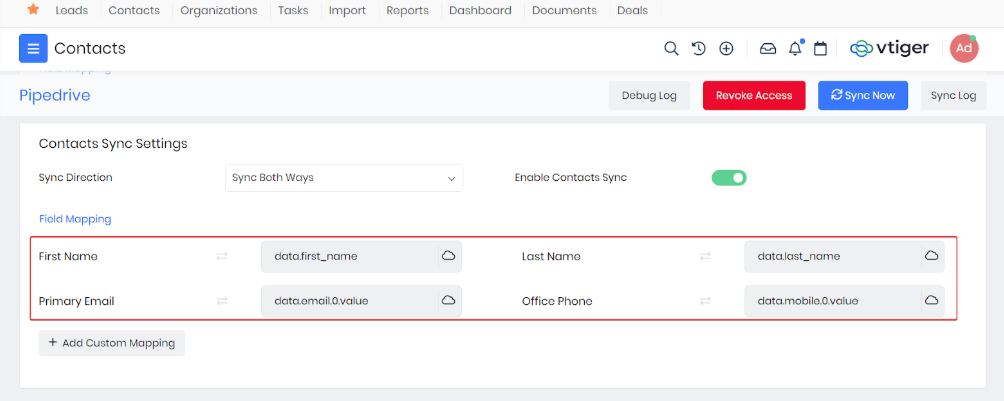
You can see the fields mapped from Pipedrive to the corresponding fields of Vtiger CRM. For more information on field mapping, refer to Pipedrive API documentation.
|
|
Adding a Custom Mapping
You can customize field mapping under the sync settings of the required module.
|
|
Follow these steps to add a custom mapping:
- Log in to your CRM account.
- Click the Main Menu.
- Select a module such as Contacts, Deals or Organizations. The List View of the selected module appears.
- Click the Sync button. The Sync window pops up.
- Click the Settings button beside Pipedrive. The Sync Settings open.
- Click Field Mapping in the sync settings sections of the required module. For example, Contacts Sync Settings.
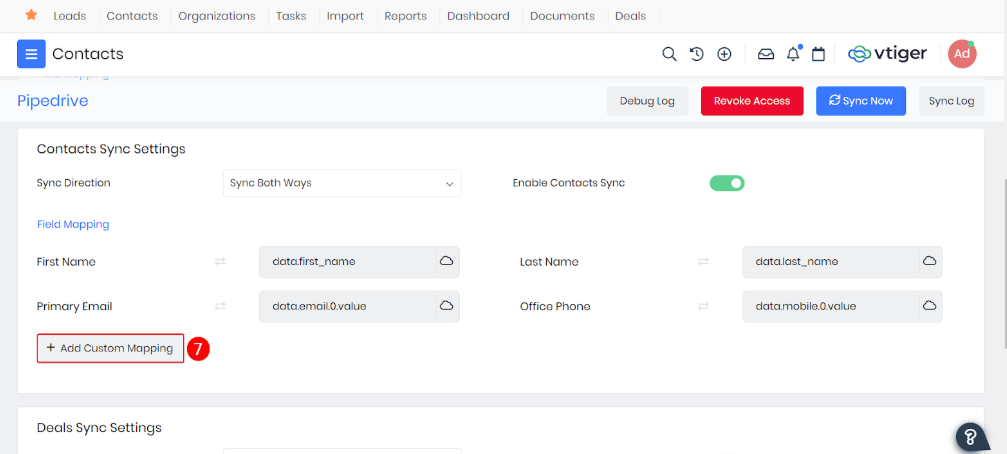
- Click +Add Custom Mapping
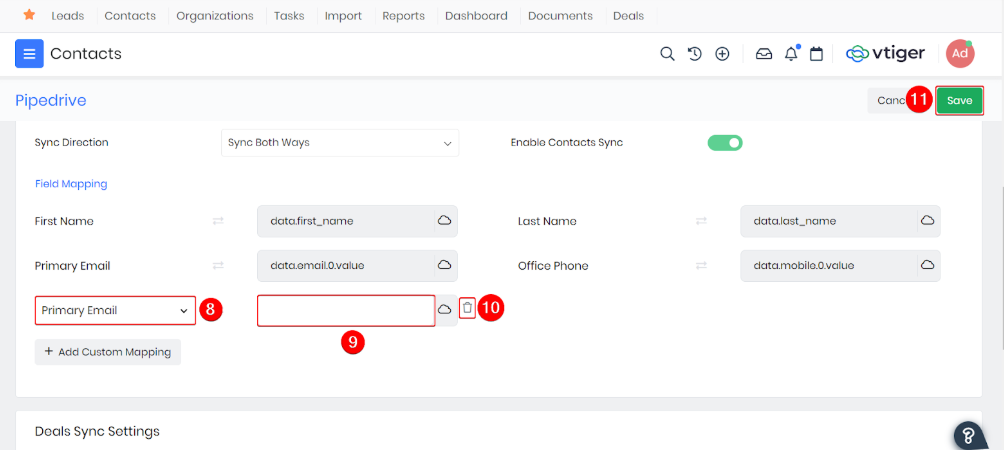
- Select the required Vtiger CRM field from the drop-down.
- Enter the required Pipedrive field name to map. For example, (data.field_name).
- Click the delete icon to remove a custom field.
- Click Save. A success message will appear.
Repeat the steps to add more fields.