Articles in this section
Setting Up a Workflow Action to Send Emails
Feature Availability
Vtiger Editions: One Pilot | One Growth | One Professional | One Enterprise | One AI
Introduction
Workflows allow you to automate the process of sending emails. The Send Mail action lets you specify the sender, receiver, and write the email body. The CRM sends an email to the recipient every time the workflow is triggered.
For example, you can set up a workflow to send a thank-you email whenever a lead is generated through your website. All you need to do is set up the workflow trigger for leads that are generated through the website and set up the email action.
Apart from defining the trigger and action, there are additional components that need to be configured to complete a workflow setup. To learn more about workflows, click here.
In this article, you will learn about:
- Accessing the Workflow Page
- Setting Up a Workflow to Send Email
- Components of the Send Mail Workflow Action
Setting up the Send Mail Action
Using the example stated above, let us learn how to configure the workflow action. Follow these steps to set up the Send Mail action.
Section 1: Accessing the workflow page
- Log in to the CRM.
- Click the User Menu in the top right corner of the screen
- Click the Settings button. The Settings page opens.
- Look for the Automation section.
- Select Workflows.

- Click the +New Workflow button.
- Select the Standard option.
Section 2: Entering the basic information
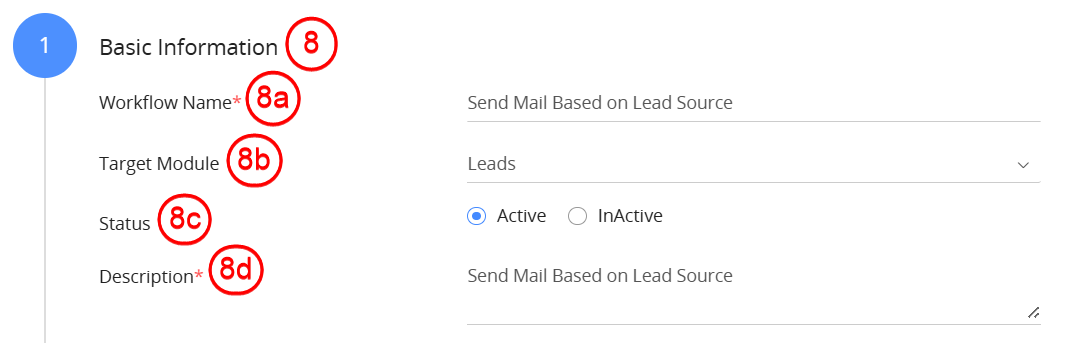
- Enter or select the following details:
- Workflow name: Enter the workflow name as Send Mail Based on Lead Source.
- Target module: Select Leads as the target module.
- Status: Set the status to Active.
- Description: Enter a description that explains the purpose of the workflow action.
Section 3: Select the workflow trigger
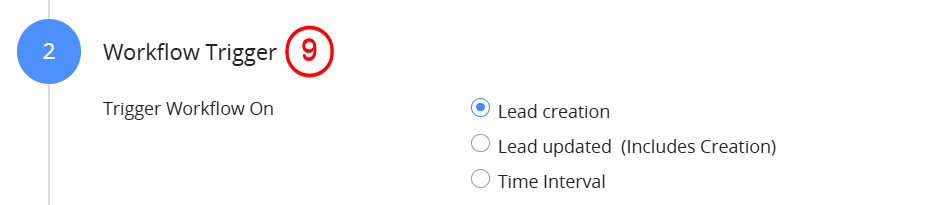
- Select the Workflow Trigger - Lead creation.
Section 4: Set up the workflow entry criteria

- Click the +Add Condition button.

- Follow the steps below to add the condition: Lead Source is Website.
- Select Lead Source from the first drop-down and is from the second.
- Click on the text area on the right.
- Select Raw text from the drop-down.
- Click on Select an option.
- Choose Website.
- Click Save.
Section 5: Set up the Action
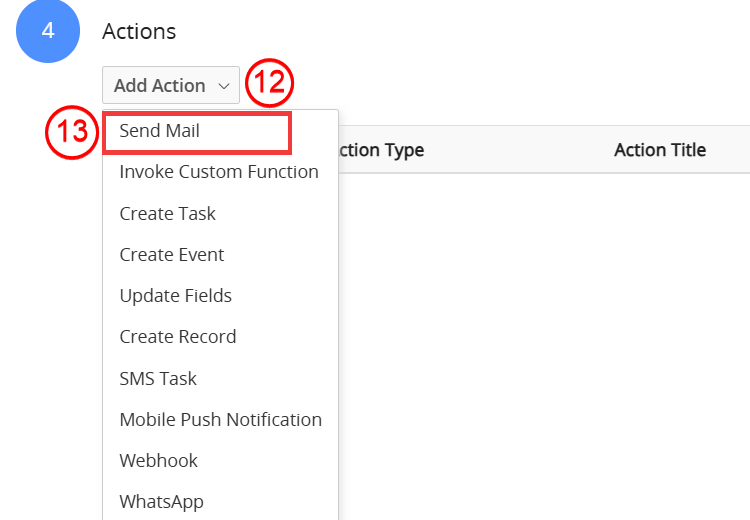
- Click the Add Action drop-down.
- Select Send Mail. This opens a window where you must set up the email.
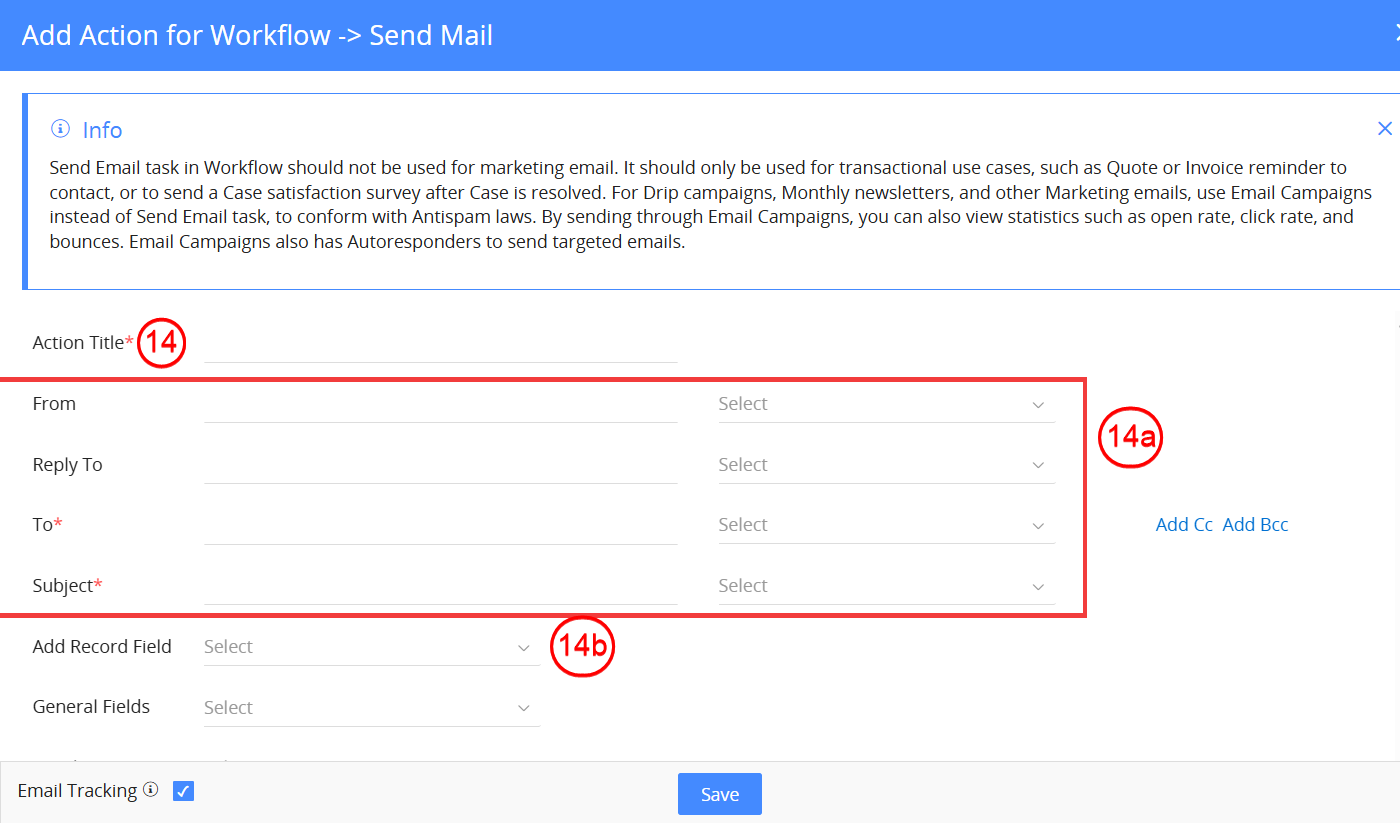
- Enter the Action Title. Enter or select the following details:
- From, Reply To, To address, Subject: Set who the email is from, who will receive replies, the recipient's address, and the subject.
- Record field: Insert values from specific record fields into the email.
- Merge an email template: Use a predefined template with dynamic field mapping.
- Insert documents: Attach related documents from the CRM to the email.
- Insert payment links and signature: Add payment URLs and the sender’s email signature.
- Click Save to save the email action.
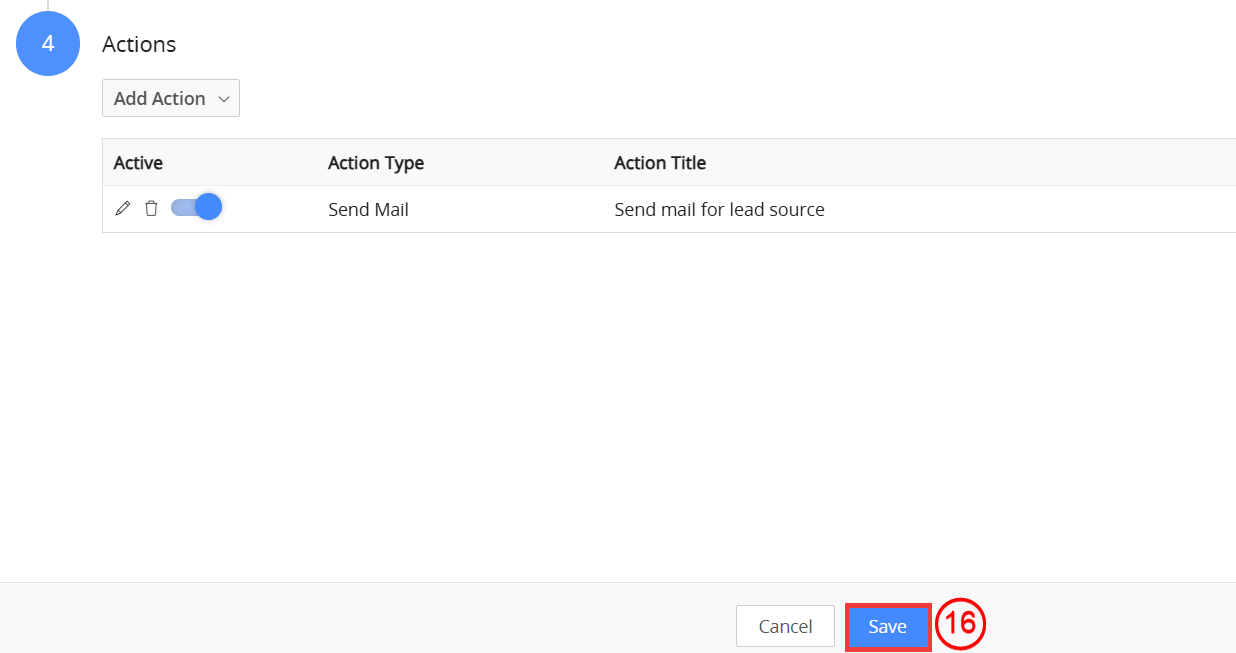
- Click Save to save the workflow.
The workflow is now ready to automatically send emails based on the defined conditions.
Components of the Send Mail Workflow Action
Let us look at each of the action components in detail while setting up the workflow action to send an email.
Section 1: Specifying From, Reply To, To addresses, and Subject
- From: This is the sender’s email address. You have the following options to choose from:
- Enter a From address - This lets you enter an email address manually.
- Helpdesk support email ID - Use the email address set up under Settings > Configuration > Email Settings as Helpdesk Email.
- Assigned To: (Users) Primary Email - Use the email address of the user to whom the lead is assigned.
- Last Modified By: (Users) Primary Email - Use the email address of the user who last modified the lead record (check the Last Modified By field in the lead record).
- Created By: (Users) Primary Email - Use the email address of the user who created the lead record (check the Created By field in the lead record).
- Reply To: This is the email address that can be replied to by the leads. You have the following options to choose from:
- Enter a From address - Lets you enter an email address manually.
- Helpdesk support email ID - Use the email address set up under Settings > Configuration > Email Settings as Helpdesk Email.
- Assigned To: (Users) Primary Email - Use the email address of the user to whom the lead is assigned.
- Last Modified By: (Users) Primary Email - Use the email address of the user who last modified the lead record (check the Last Modified By field in the lead record).
- Assigned To : (Users) Reports To - This is the email address of the user to whom the case assignee reports to.
- To: This must contain the lead’s email address.
- Subject: This is the subject of the email. You can embed fields from the Leads module in the subject by choosing them from the drop-down on the right side.
Section 2: Embedding fields into the email body
- Add Record Field: When you select a field from this drop-down, it gets embedded into the email body. The fields that are shown here are specific to the Leads module, such as Last Name, Primary Email, etc.
- You can choose to make Comments either Public or Private when configuring a Send Email action in a Workflow.
- Go to the Add Record Field section within the action.
- Select the Comments field.
- Choose between:
- Private Comments (from 1 to 5)
- Public Comments
- General Fields: This drop-down contains general fields like Current Date, Time, and Support Email, which help in customizing the email content.
Section 3: Merging an email template with the email body
- Add Merge Template: Enable the checkbox to merge an email template with the email body. You can merge the template in two ways:
- As a link - Inserts the email template link, which in turn displays the template in the sent email.
- As an attachment - Inserts the email template as an attachment in the sent email.
Section 4: Inserting documents into the email body
- Insert Related Matching Documents: Enable the checkbox to add a document to the email. The document that you want to attach must be specified with the help of conditions.
- For example, if you set up the condition - Document title equals Thank you note for leads, then the link of the document that has the specified title gets embedded in the email.
Note: PDF files are added as links in emails, and non-PDF files are added as attachments.
Section 5: Inserting links and signatures into the email body
- You can attach files or insert documents or appointment links into the email body by clicking the Insert Links drop-down. Scroll down to the Rich Text Area to find the drop-down.
- Just above the Rich text Area, in the top right corner, you will find the Insert Signature option. The signature can be set up under My Preferences.
Note: You can attach a maximum of three files. The total file size must not exceed 25 MB.
To learn more about documents, click here. To learn more about appointment pages, click here.
Section 6: Inserting Payment Links into your Email Body
- You can include a payment link in your emails when creating a Workflow.
- For example, you can attach a payment link directly to each invoice email sent to customers, allowing them to associate their payment with the specific invoice. This streamlines the payment process, enabling quick decision-making, reducing confusion, and minimizing follow-up communication.
- Once the Payment Link field is added, the Default Gateway Payment link will automatically appear in the email body when the Workflow is triggered.
- The payment link can be accessed in the email Activity section of the email record and in the recipient’s email.
To learn more about configuring payment gateways in Vtiger, click here.
Reference
- Workflows in Vtiger CRM
- Creating Standard Workflows
- Managing your Documents
- Signature Field in Vtiger CRM
- My Preferences
- Email Templates
- Setting up Autopay and Payment Gateways