Articles in this section
Setting up Autopay & Payment Gateways
Feature Availability
Vtiger Editions: One Professional | One Enterprise | One AI
Introduction
Payments and subscriptions are crucial aspects of any business, and Vtiger CRM provides a seamless way to manage them. The Payments & Subscriptions Settings allow you to integrate various payment gateways to facilitate secure and efficient transactions.
To streamline payments, you must configure payment gateways within the Payments & Subscriptions Settings. Vtiger CRM supports the following gateways:
Benefits of Payment Gateway Integration
Here are the benefits of the payment Gateway integration in Vtiger CRM:
- Seamless Transactions: Accept payments from customers securely and efficiently.
- Multiple Payment Options: Choose from multiple trusted payment gateways, including PayPal, Authorize.Net, Stripe, Razorpay, and Instamojo.
- Automated Subscription Payments: Reduce manual efforts by enabling autopay for recurring transactions.
- Payment Tracking: Keep track of all transactions within the CRM for better financial management.
In this article, you will learn about:
- Adding a Payment Gateway
- Setting up Autopay Configuration
- Managing Payment Gateways
Adding a Payment Gateway
Follow these steps to add a Payment Gateway:
- Log in to your CRM account.
- Click the User Menu icon on the top right corner of the screen.
- Click Settings. The Settings page opens.
- Go to Inventory > Payments & Subscriptions. The Payment Gateway page opens.
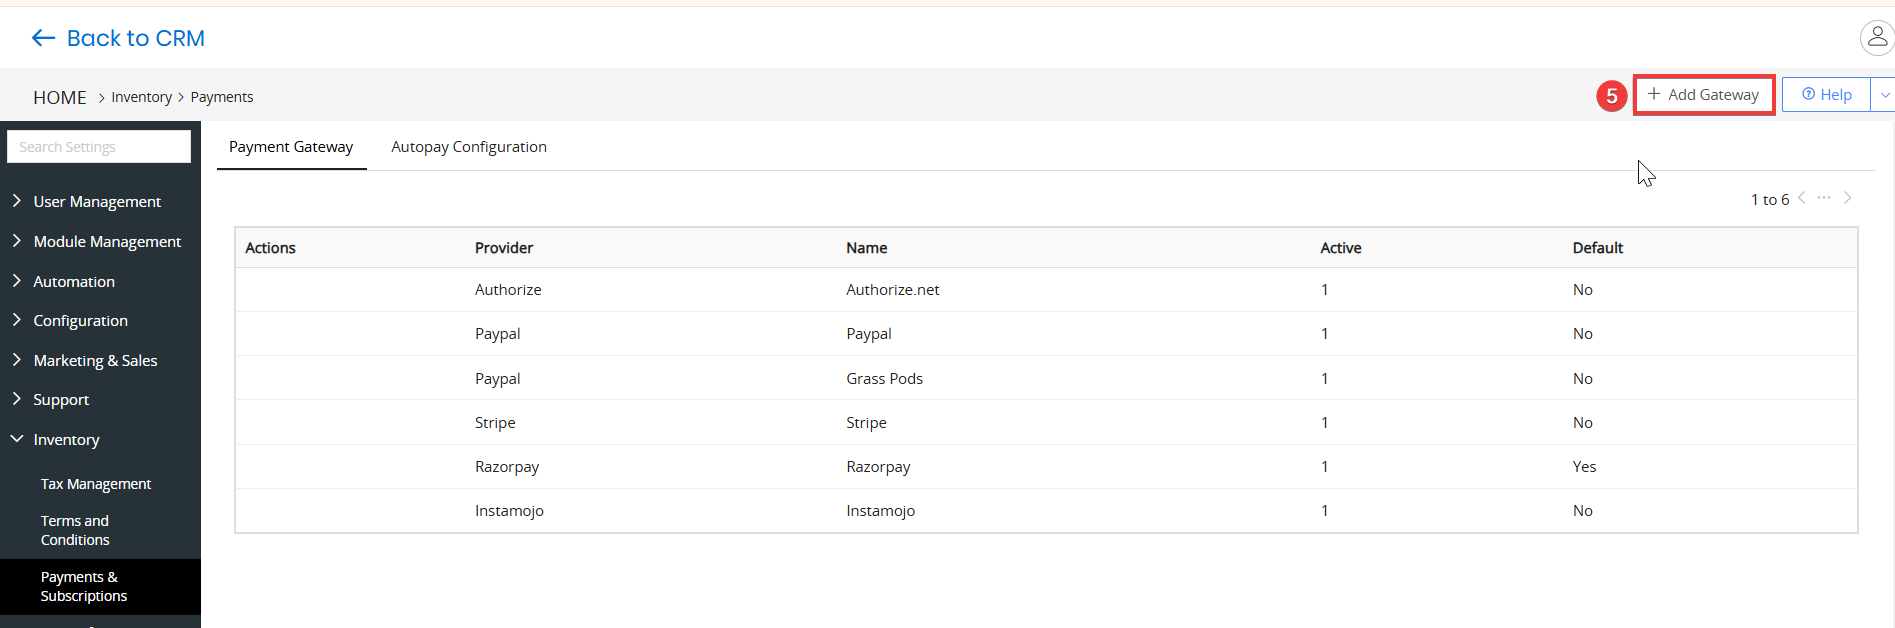
- Click + Add Gateway. The Add Configuration window opens.
- Enter the required details.
- Click Save.
Now, we will learn about each payment gateway.
Configuring PayPal Gateway
Follow these steps to configure the PayPal gateway: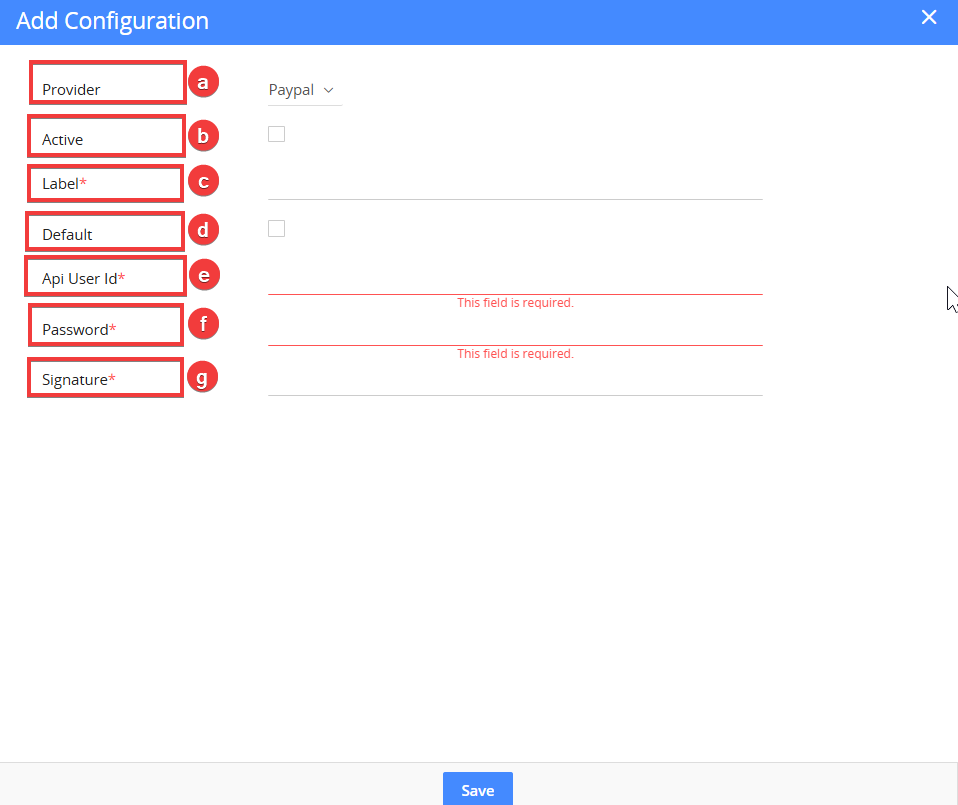
- Provider: Select PayPal as the provider.
- Active: Enable the checkbox to activate the gateway.
- Label: Enter a desired username for identification.
- Default: Set the gateway as the primary payment method for transactions.
- API User ID: Enter the unique PayPal API user ID.
- Password: Enter the PayPal API password.
- Signature: Enter the API signature from your PayPal account.
Note: API credentials can be retrieved from your PayPal Business Account.
To learn more about configuring PayPal Gateway, click here.
Configuring Authorize.Net Gateway
Follow these steps to configure the Authorize.Net gateway: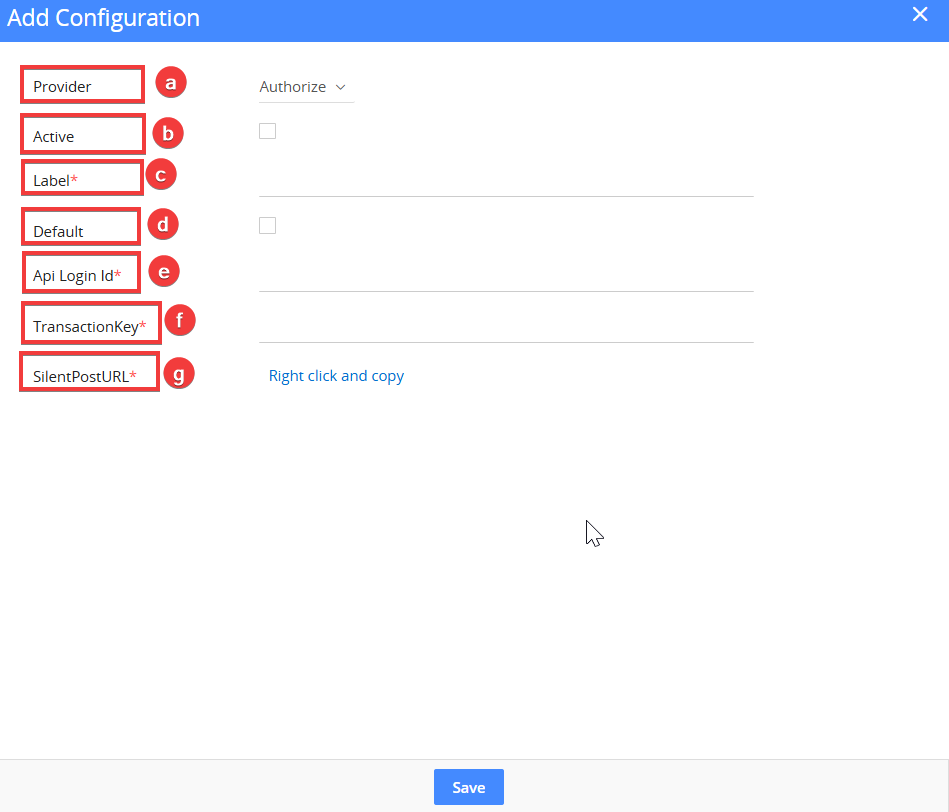
- Provider: Select Authorize as the provider.
- Active: Enable the checkbox to activate the gateway.
- Label: Enter a desired username for identification.
- Default: Set the gateway as the primary payment method for transactions.
- API Login ID: Enter the Authorize API Login ID.
- Transaction Key: Enter the Authorize Transaction Key.
- Silent Post URL: A URL where Authorize sends transaction responses automatically.
Copy the Silent Post URL and paste it into your Authorize account under Account > Silent Post URL.
To learn more about Configuring Authorize Gateway, click here.
Configuring Stripe Gateway
Follow these steps to configure the Stripe gateway:
- Provider: Select Stripe as the provider.
- Active: Enable the checkbox to activate the gateway.
- Label: Enter a desired username for identification.
- Default: Set the gateway as the primary payment method for transactions.
- Publishable Key: A public key from Stripe used for client-side transactions.
- Secret Key: A private key from Stripe used for secure authentication.
To learn more about configuring Stripe Gateway, click here.
Configuring Razorpay Gateway
Follow these steps to configure the Razorpay gateway: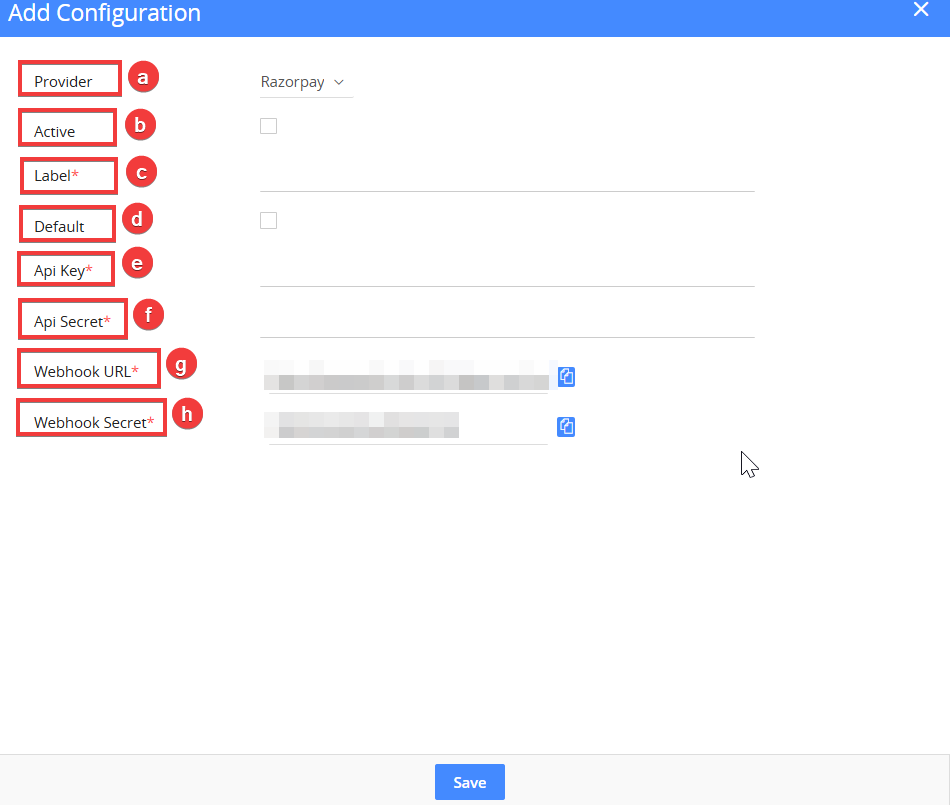
- Provider: Select Razorpay as the provider.
- Active: Enable the checkbox to activate the gateway.
- Label: Enter a desired username for identification.
- Default: Set the gateway as the primary payment method for transactions.
- API Key: Enter the Razorpay API Key ID.
- API Secret: Enter the Razorpay API Key Secret.
- Webhook URL: A URL where Razorpay sends payment event notifications.
- Webhook Secret: A key used to verify Razorpay webhook requests.
To learn more about configuring Razorpay Gateway, click here.
Configuring Instamojo Gateway
Follow these steps to configure the Instamojo gateway: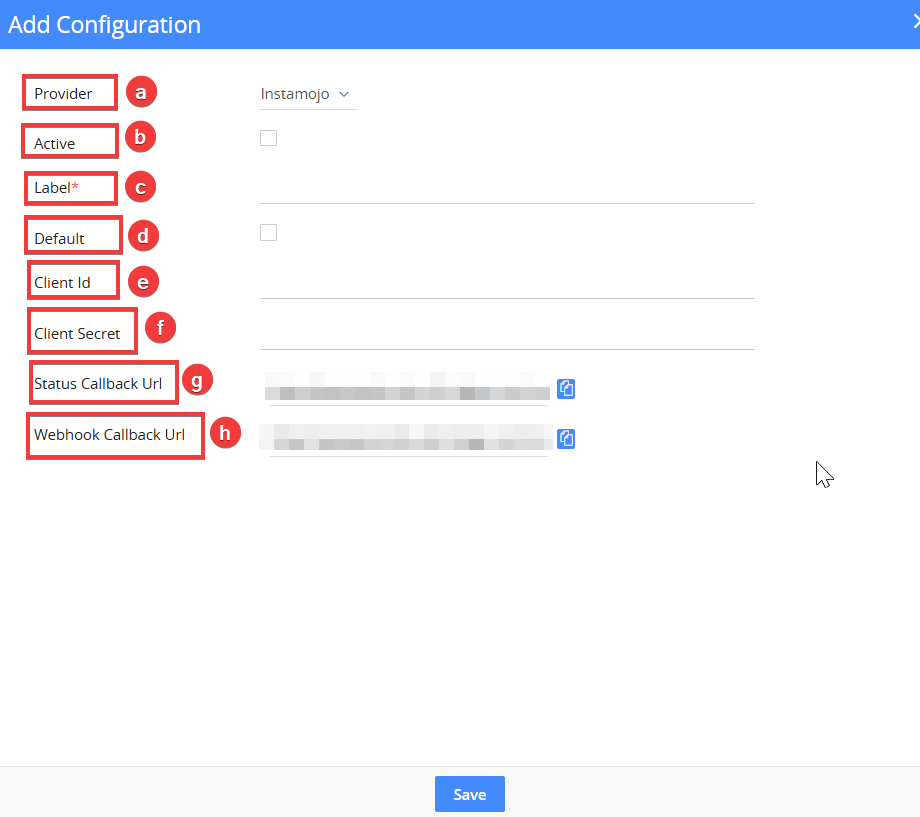
- Provider: Select Instamojo as the provider.
- Active: Enable the checkbox to activate the gateway.
- Label: Enter a desired username for identification.
- Default: Set the gateway as the primary payment method for transactions.
- Client ID: Enter the Instamojo Client ID.
- Client Secret: Enter the Instamojo Client Secret.
- Status Callback URL: A URL where Instamojo updates the payment status.
- Webhook Callback URL: A URL where Instamojo sends transaction notifications.
To learn more about configuring Instamojo Gateway, click here.
Setting Up Autopay Configuration
Autopay Configuration refers to the process of setting up automated recurring payments in the Subscriptions module. It enables businesses to manage scheduled transactions by defining actions for payment success, failure, and retries.
Follow these steps to set up the Autoplay Settings:
- Log in to your CRM account.
- Click the User Menu icon on the top right corner of the screen.
- Click Settings. The Settings page opens.
- Go to Inventory > Payments & Subscriptions. The Payment Gateway page opens.
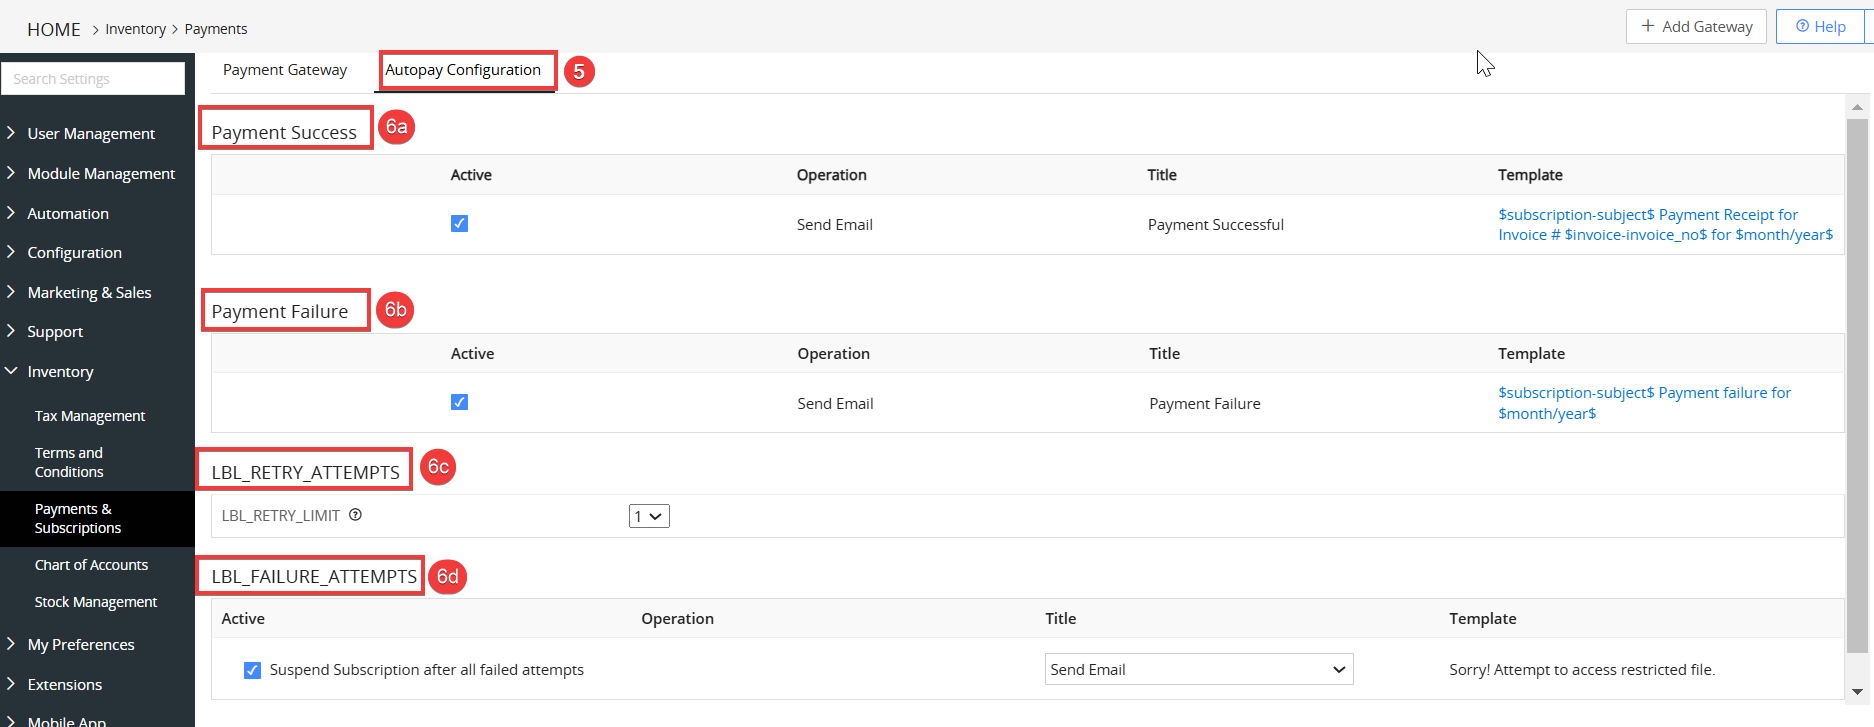
- Click the Autopay Configuration. The Autopay Configuration page opens.
- Enter or select the following information to Configure Autopay settings:
- Payment Success
- Payment Failure
- Payment Retry Attempts
- Failure Attempts
Actions in Autopay
When autopay is enabled, you can define actions for payment success or failure.
- Hover over an action under Payment Success or Payment Failure.
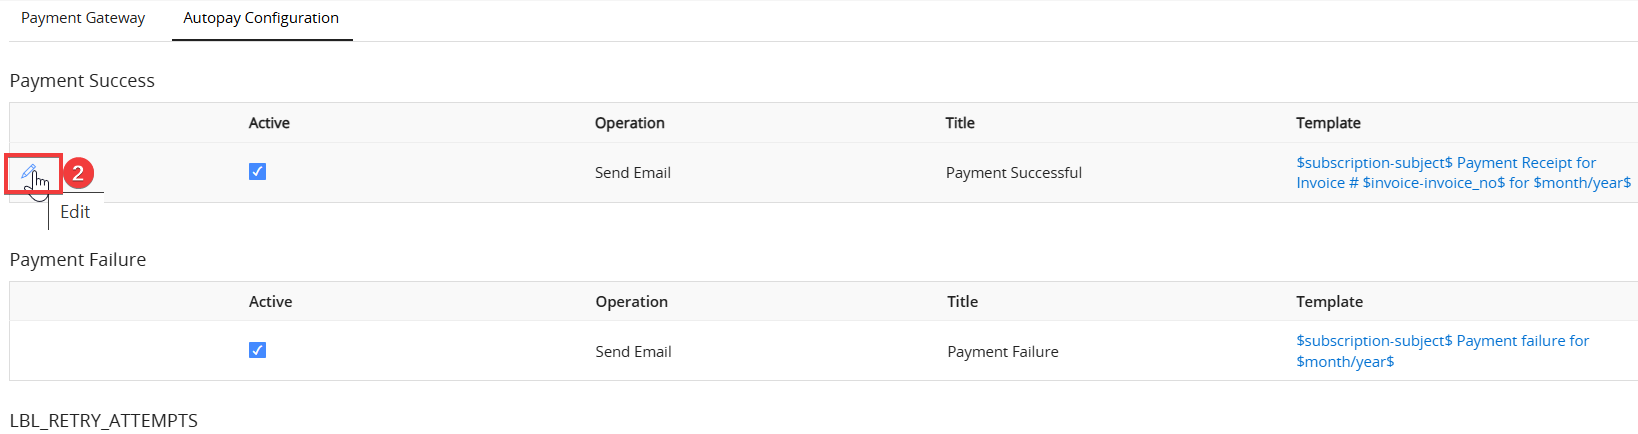
- Click the Edit icon. The Edit Notification page opens.
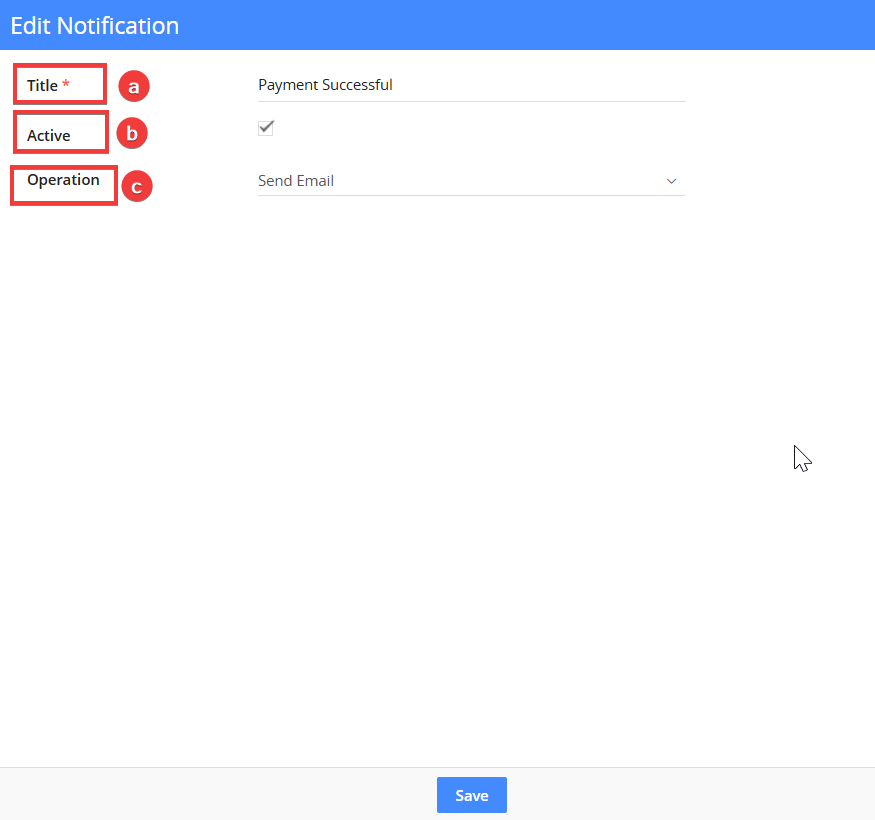
- Enter or select the following information in the Edit Notification page:
- Title: A name or label for the autopay rule.
- Active: Enable or disable the action by clicking the checkbox.
- Operation: Select the operation that has to be done when the action takes place.
- Send Email: Sends an automated email notification to inform the customer about their payment status.
- Do Nothing: No action is triggered when the payment succeeds or fails.
- Click Save.
Retry Rules in Autopay
When a payment fails, retry rules allow the system to automatically attempt the transaction again before suspending the subscription.
Example:
Suppose a customer has subscribed to your service, but their scheduled payment fails due to insufficient funds. Instead of immediately suspending their subscription, Vtiger CRM will retry the payment based on the configured retry rules.
For instance, if the retry limit is set to 3, the system will make three additional attempts to process the payment. If all attempts fail, you can choose to either send a notification email to the customer or take no action. Additionally, if the Suspend Subscription after all failed attempts option is enabled, the subscription will be suspended. The user will then receive a Sorry! Attempt to access restricted file message, depending on the selected Title option (No Action or Send Email).
Follow these steps to Configure Payment Retry Attempts: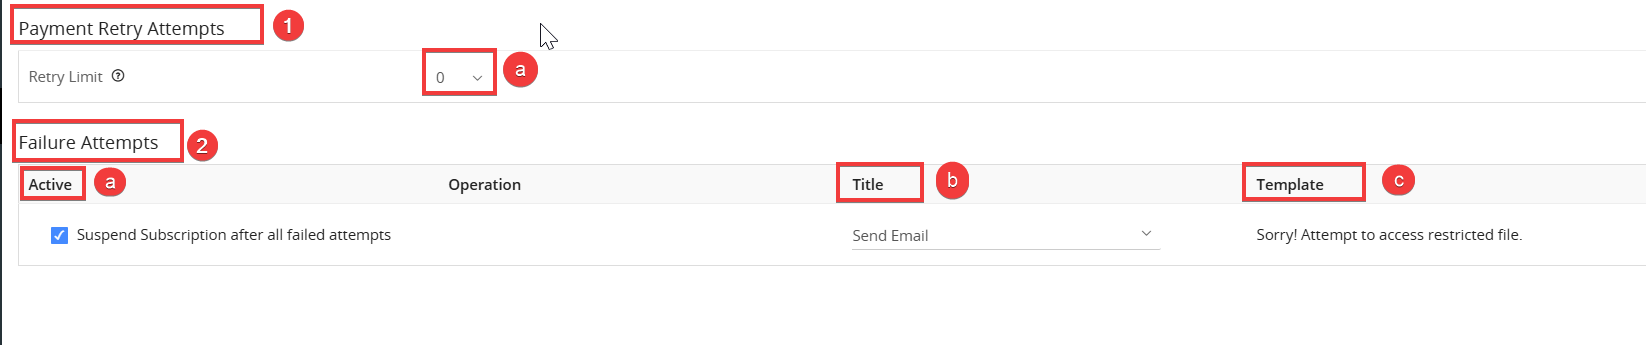
- Payment Retry Attempts:
- Retry Limit: Set the maximum number of retry attempts allowed for a failed payment (ranging from 0 to 3).
- Failure Attempts:
- Active: Enable the Suspend Subscription after all failed attempts checkbox to automatically suspend the subscription if all retry attempts fail.
- Title: Choose whether to send an email notification to the customer or take no action after all retries fail from the drop-down.
- Template: If the retry limit is exceeded, the customer will receive an email with the Sorry! Attempt to access restricted file message via email if Send Email is selected in the Title drop-down.
Managing Payment Gateways
Follow these steps to manage the Payment Gateway:
- Log in to your CRM account.
- Click the User Menu icon on the top right corner of the screen.
- Click Settings. The Settings page opens.
- Go to Inventory > Payments & Subscriptions. The Payment Gateway page opens.
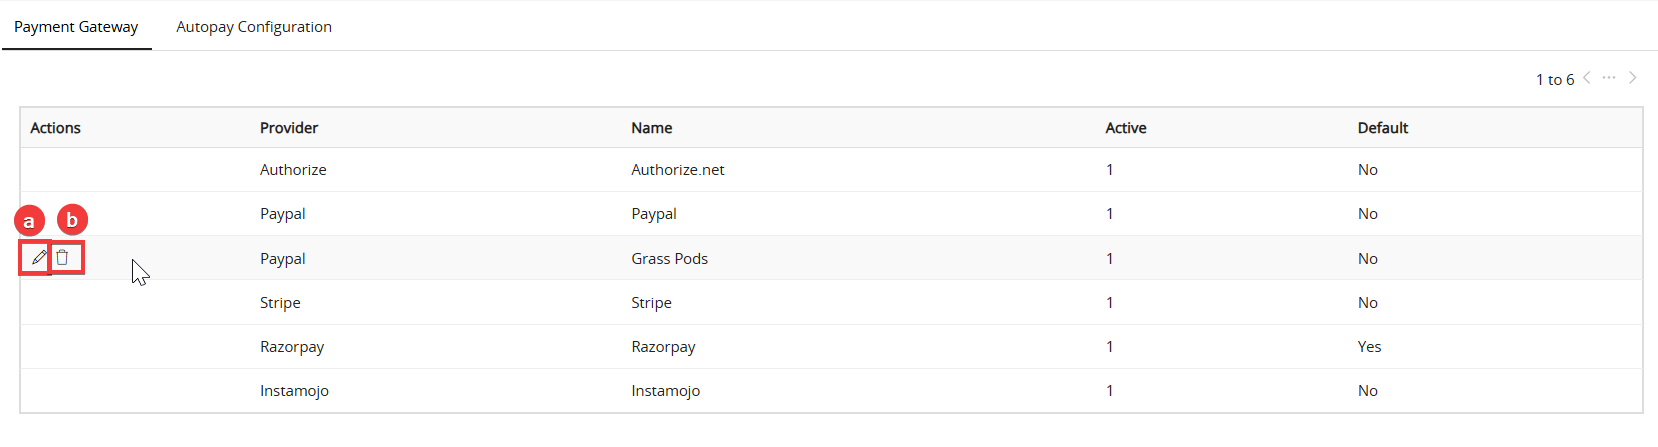
- Hover over the payment gateway record to perform the following actions:
- Edit: Click to edit the Payment Gateway record details.
- Delete: Click to delete the payment Gateway record.