Articles in this section
Configuring a Relationship Between Modules
Feature Availability
Vtiger Editions: One Pliot | One Growth | One Professional | One Enterprise | One AI
Introduction
In Vtiger CRM, records rarely exist in isolation. Contacts connect to deals, deals connect to quotes, and tasks often link to related documents, cases, and projects. These connections are enabled through module relationships.
Creating relationships between modules helps you link relevant records so users can view all associated information directly from a record’s Related tab. For example, linking the Deals and Contacts modules automatically associates a deal with the correct contact.
Key Features
The key features of the Relationships between modules are:
- Four relationship types: One-to-one, one-to-many, many-to-one, and many-to-many.
- Customizable related tabs: Add, rename, reorder, and structure related information for each module.
- Reference fields and related tabs generated automatically: Depending on the relationship type.
- Flexible module linking: Create relationships between any two modules (standard or custom).
- Streamlined navigation: View all related records directly from the parent module.
Benefits
The benefits of creating a relationship between modules are:
- Improved data organization: Easily access all linked records from a single module.
- Enhanced user productivity: Reduce time spent searching for related information.
- Better reporting and insights: Connected data enables more accurate reports and analytics.
- Consistent data relationships: Establish logical connections across CRM modules.
- Higher accuracy: Ensures every record is linked to the appropriate supporting records.
In this article, you will learn about:
- Relationship between the modules.
- Types of relationships.
- Creating and deleting relationships.
Key Terminology
|
|
|
|
|
|
|
|
|
|
|
|
|
|
|
|
|
|
|
|
|
|
|
|
Types of Relationships
Vtiger provides the following types of relationships between the modules:
- One-to-One
- One-to-Many
- Many-to-One
- Many-to-Many
One-to-One Relationship
A one-to-one relationship links a single record in Module 1 to a single record in Module 2. You must specify the reference field names for both modules while setting up a relationship.
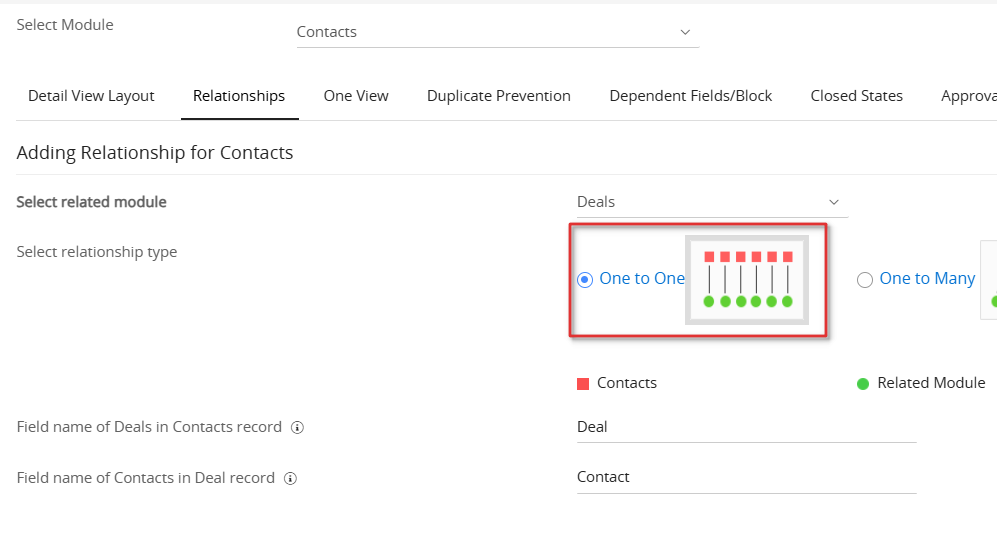
Example: You want only one contact to be linked to a deal. Creating a one-to-one relationship between Contacts and Deals ensures that each contact and deal has a unique related reference field.
One-to-Many Relationship
A one-to-many relationship links one record in Module 1 to several records in Module 2.
Vtiger creates:
- A related tab in Module 1 to display multiple Module 2 records.
- A reference field in Module 2.

Example: A deal in the Value Proposition stage may require multiple quotes if the customer requests revisions. Each new quote is linked back to a single deal, forming a one-to-many relationship.
Many-to-One Relationship
The many-to-one relationship type is the reverse of one-to-many. Multiple records in Module 1 relate to one record in Module 2.
Vtiger creates:
- A reference field in Module 1.
- A related tab in Module 2.
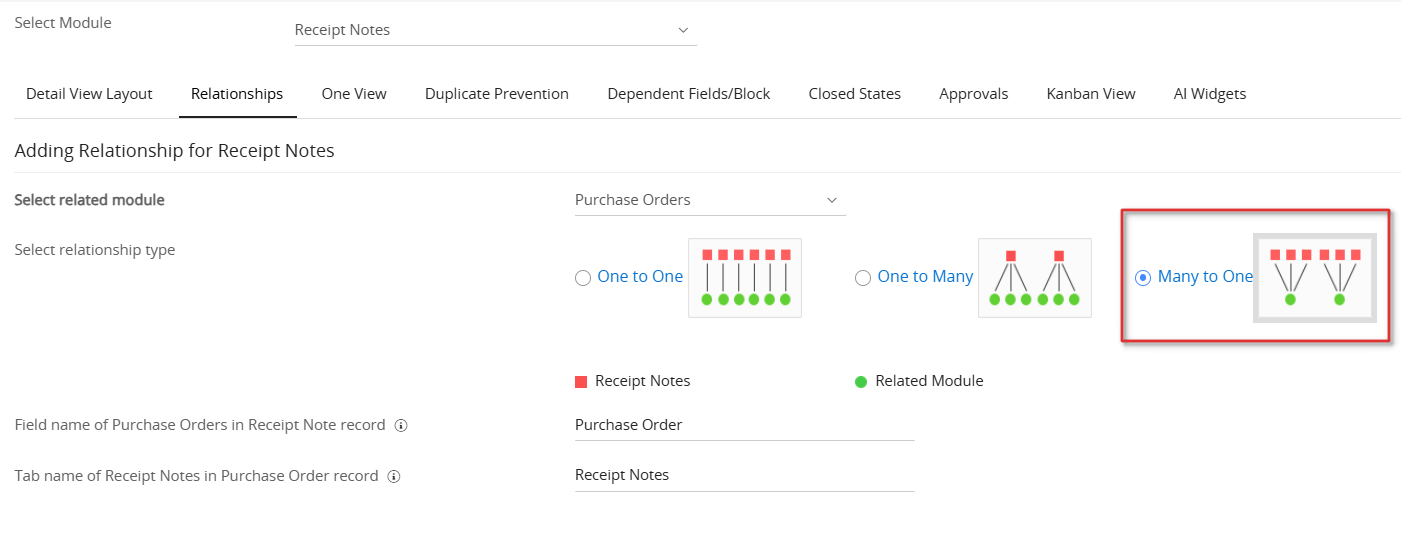
Example: A single purchase order may generate multiple receipt notes for partial deliveries. All receipt notes link back to the same purchase order.
Many-to-Many Relationship
A many-to-many relationship links multiple records in Module 1 to multiple records in Module 2. Vtiger creates a Related tab in both modules.
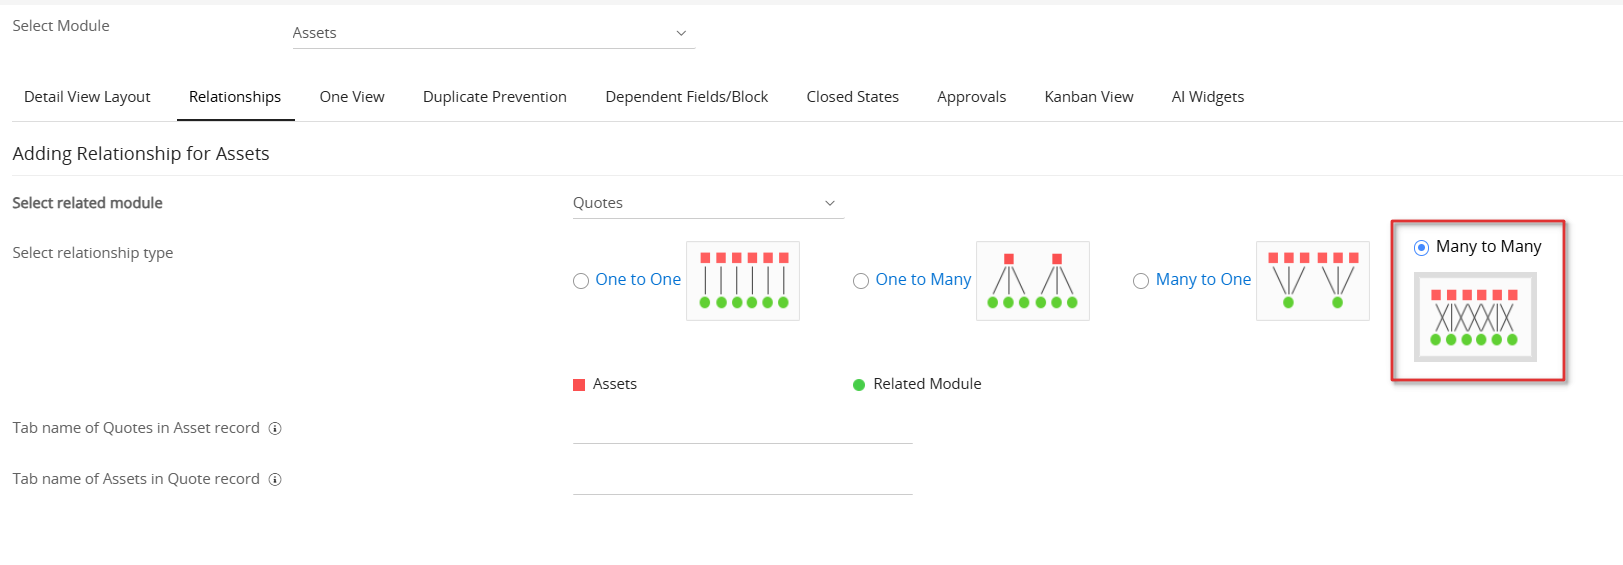
Example:
If Assets and Quotes have a many-to-many relationship:
- One asset can appear in multiple quotes.
- A single quote can contain multiple assets.
Creating a Relationship between Modules
Follow these steps to create a relationship between the modules:
- Log in to the CRM account.
- Go to the Main Menu.
- Click Settings. You will land on the Settings page.
- Click Module Layouts & Fields under the Module Management section.
- Select a desired module from the Select Module drop-down.
- Click the Relationships tab.
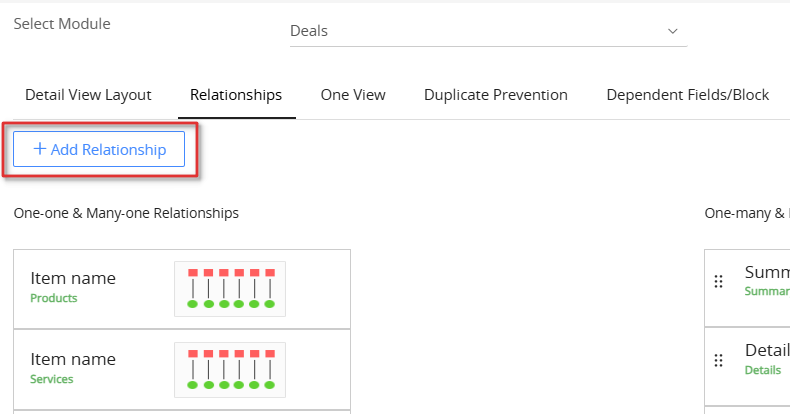
- Click +Add Relationship.
- Select the module you want to link the parent module with in the Select Related Module drop-down menu.
- Pick the relationship that you want to create from the Select relationship type.
- Enter the field/tab name of the related record in module 1.
- Enter the field/tab name of the related record in module 2.
- Click Save.
Note: You can reorder the sequence of tabs in a module with a drag-and-drop action in the Relationships tab. Remember to save the changes.
Mapping Fields in a Relationship
You can map fields between a Parent module and a Child module. When you create a Child record from a Parent record, the system automatically copies the mapped data.
For example:
- A Contact’s mobile number can auto-fill in a Deal or Invoice.
- A date from a Case can auto-fill in an Invoice.
You can set up these mappings for one-to-many and many-to-many relationships in any module.
Follow the steps below to map the fields:
- Log in to the CRM.
- Go to the Main Menu.
- Click Settings. The Settings page opens.
- Click Modules and Layouts under the Module Management section.
- Select the desired module.
- Click the Relationships tab.

- Click the Settings icon beside the relationship you want to map fields for. The Record Template window opens where you can add field mappings.
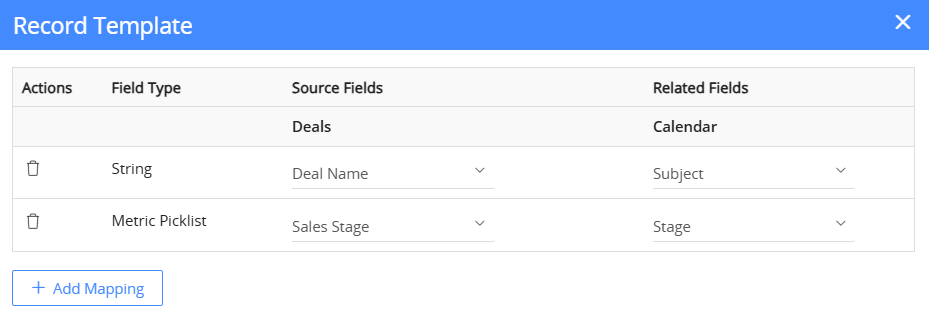
- Click Add Mapping.
- Select the Source Field from the parent module.
- Select the Related Field from the child module
- Click Save.
Deleting a Relationship
By default, you cannot delete relationships in Vtiger CRM. You can delete only the custom relationships that you create.
Follow these steps to delete a relationship:
- Log in to your CRM account.
- Go to the Main Menu.
- Click Settings. You will land on the Settings page.
- Click Module Layouts & Fields under the Module Management section.
- Select a desired module from the Select Module drop-down.
- Click the Relationships tab. It displays all the existing relationships.
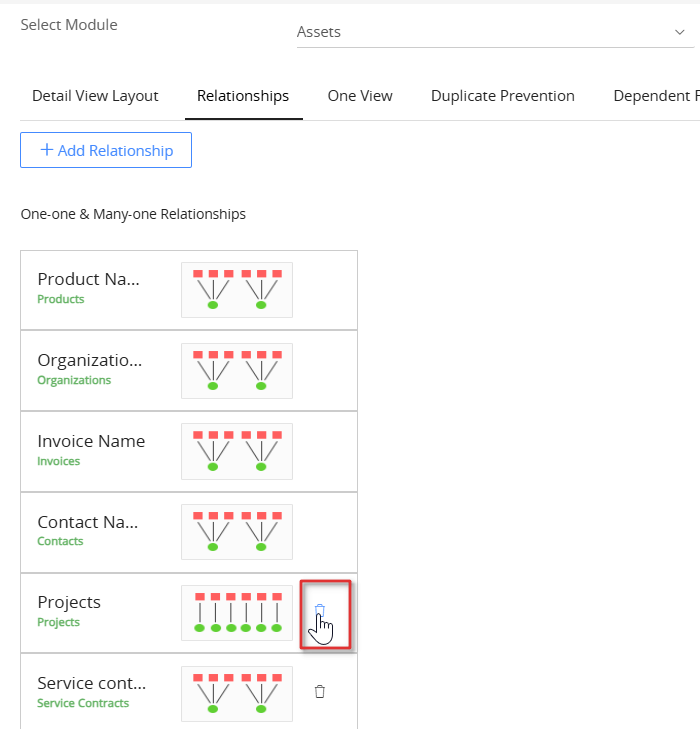
- Click Delete beside a relationship.
- Click Yes to confirm the deletion.