Articles in this section
Set up a Workflow Action to Create Event
Feature Availability
Vtiger Editions: One Growth | One Pilot | One Professional | One Enterprise | One AI
Introduction
Workflows in Vtiger CRM make it easy to automate daily tasks and keep track of follow-ups without manual effort. One useful workflow action is the option to automatically create events.
This allows the system to schedule meetings, calls, or reminders whenever certain conditions are met—for example, creating a follow-up meeting when a new lead is added, or scheduling a product demo when a deal reaches a specific stage.
Consider that the status of a lead changes to Hot. In this case, you might want to immediately set up a meeting to fast-forward the sale. To create an event automatically every time the Lead Status changes to Hot, you can create a workflow.
To learn more about events, click here.
But before you set up the action, you must set up the other workflow components that fall before the Action component. To learn about workflow components, click here.
In this article, you will learn about:
- Setting up the Create Event action
Key Terminology
|
|
|
|
|
|
|
|
|
|
|
|
Setting up the Create Event Action
Now, consider the example stated above to learn how to create events using workflows.
Section 1: Accessing the Workflow page
- Log in to the CRM.
- Click the User Menu on the top right corner of the screen.
- Click the Settings button. The Settings page opens.
- Look for the Automation section.
- Select Workflows
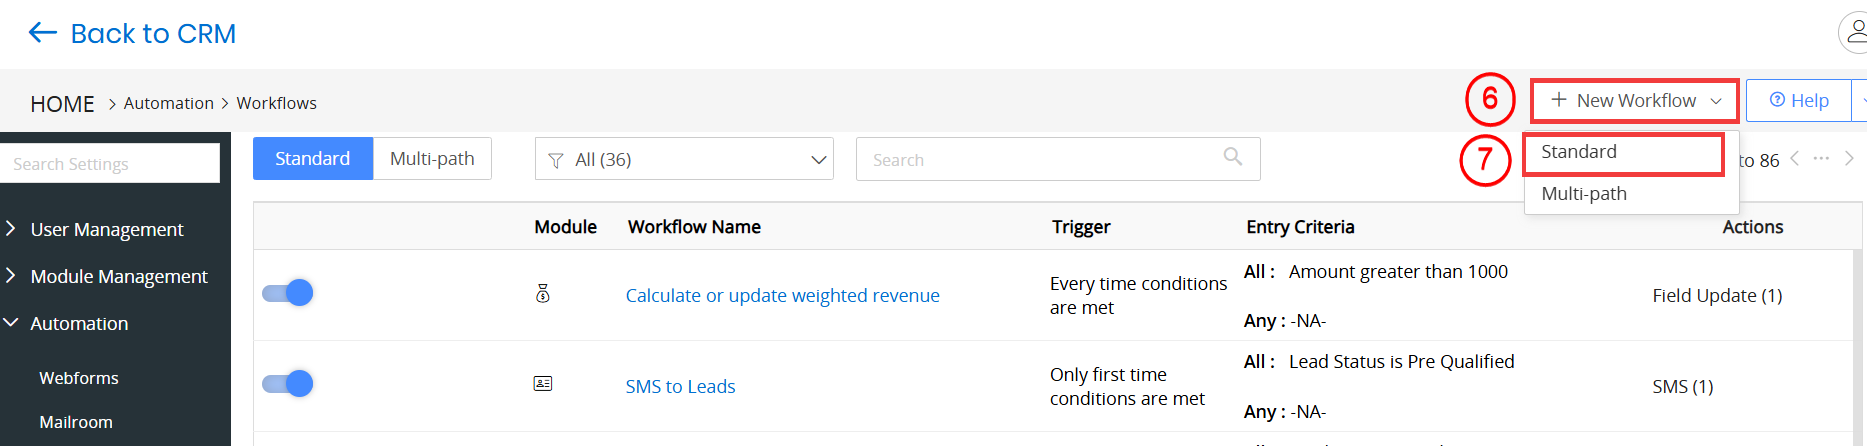
- Click the +New Workflow button.
- Select the Standard option. A New Standard Workflow page opens.
Section 2: Entering the Basic Information
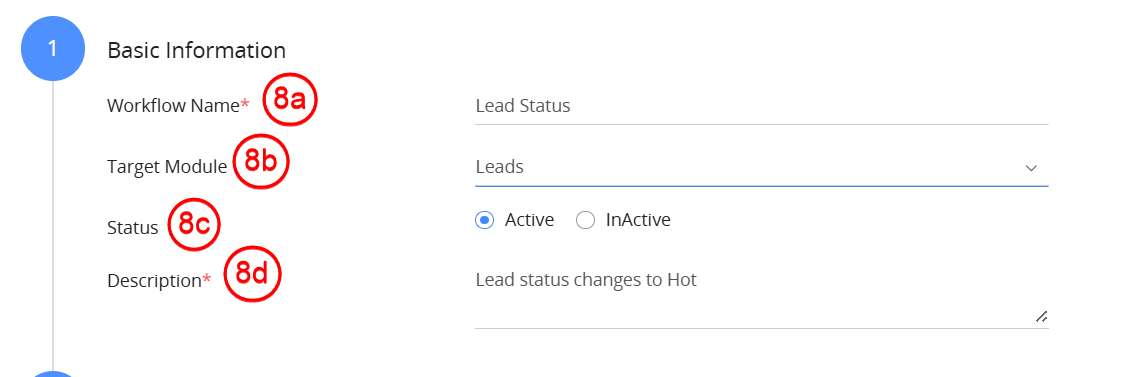
- Enter or select the following details:
- Workflow name: Enter the workflow name as Create a follow-up event.
- Target module: Select the Target Module as Leads.
- Status: Set the status to Active.
- Description: Enter a description that explains the purpose of the workflow.
Section 3: Select the Workflow Trigger
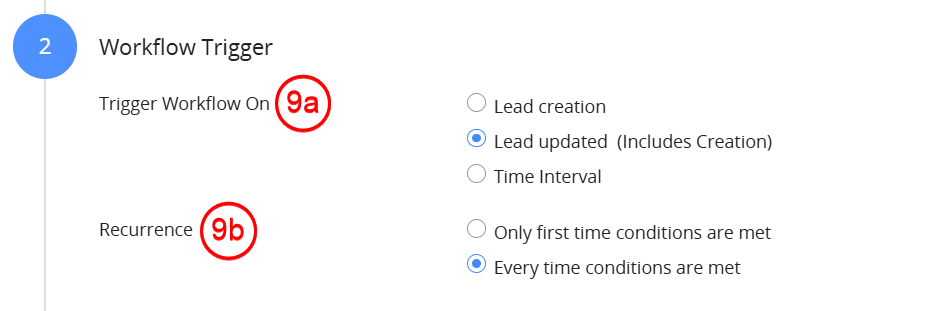
- Enter or select the following details:
- Select Workflow Trigger - Lead updated (Includes Creation).
- Choose Every time conditions are met from Recurrence.
Section 4: Set up the Workflow Entry Criteria

- Click the +Add Condition button under All Conditions (All conditions must be met).
- Enter or select the following details to add the condition - Lead Status is Hot:
- Select Lead Status from the first drop-down and is from the second.
- Click on the text area on the right.
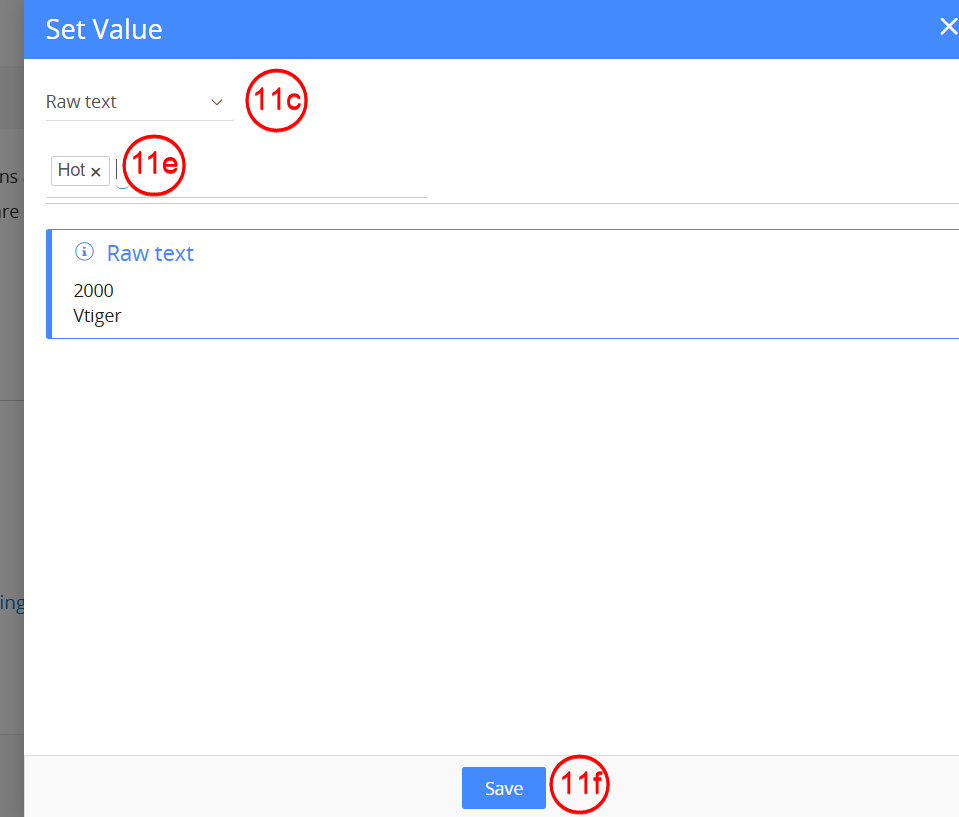
- Select Raw text from the drop-down.
- Click on Select an option.
- Choose Hot.
- Click Save.
Section 5: Set up the Actions
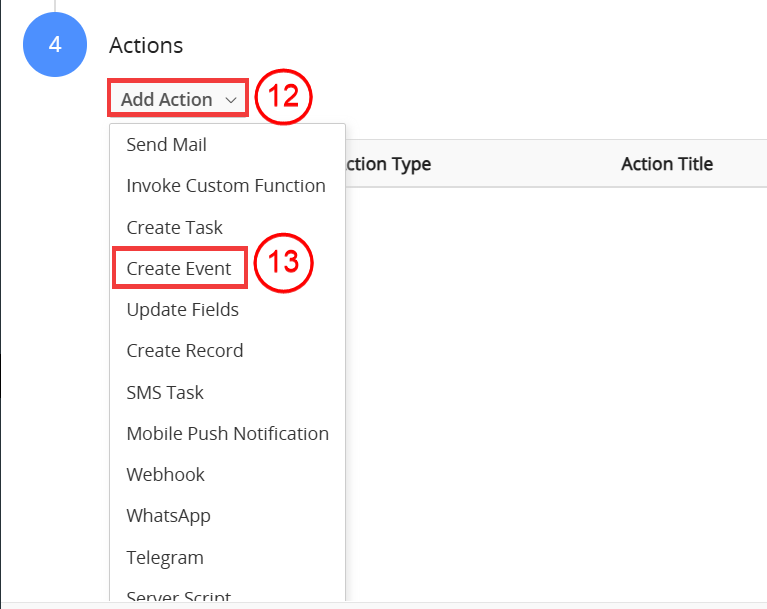
- Click the Add Action drop-down.
- Select Create Event. This opens a window where you must specify the event details.
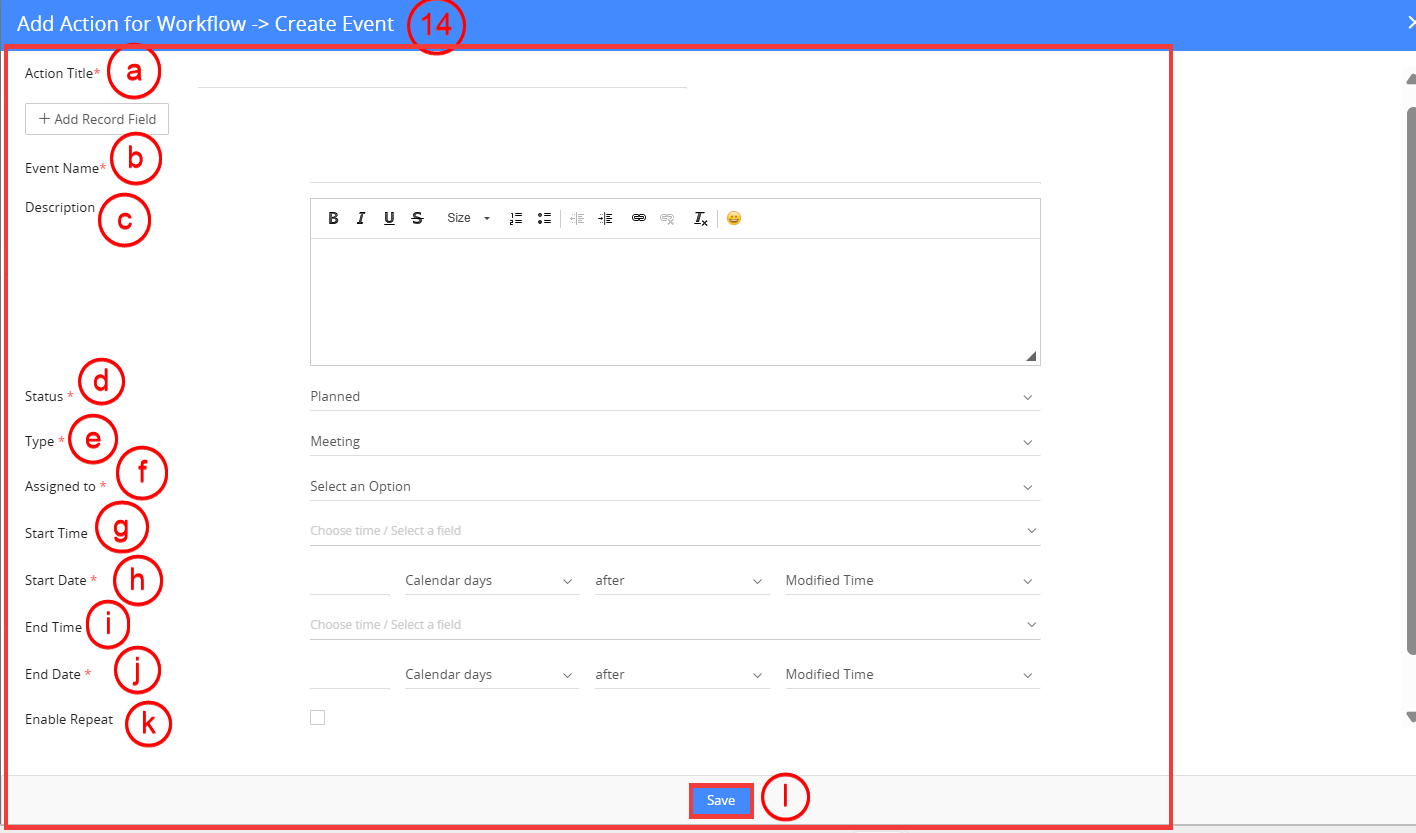
- Enter or select the following event details:
- Action Title: Enter the Action title.
- Event Name: Enter the event title.
- Description: Enter a brief description of the event.
- Status: Select the event status.
- Type: Select the event type (Meeting, Call, etc.).
- Assigned to: Choose the user to whom you want to assign the event.
- Start Time: Choose the time at which the event starts.
- Start Date: Choose the date on which the event will be held.
- End Time: Choose the time at which the event ends.
- End Date: Choose the date on which the event will end. The Start Time and End Time must be specified with regard to one of the following fields:
- Created Time of the lead.
- Modified Time of the lead.
- Last Contacted On -The time at which the lead was last contacted.
- Email Confirmation Last requested - The date and time at which the Double Opt-in confirmation was last sent.
- Consent Last Requested Time - The time at which consent was last requested from the lead.
- The Start Date and End Date can be specified as follows - 5 Calendar/Business Days before/after Created Time. To learn about calendar vs. business days, click here.
- Enable Repeat: This option is for creating recurring events. For example, Once in every 2 weeks Until 01-12-2020 creates two recurring events in a month (one event per 14 days) until 1st December 2020.
- Click Save to save the action. This closes the window opened in Step 14.
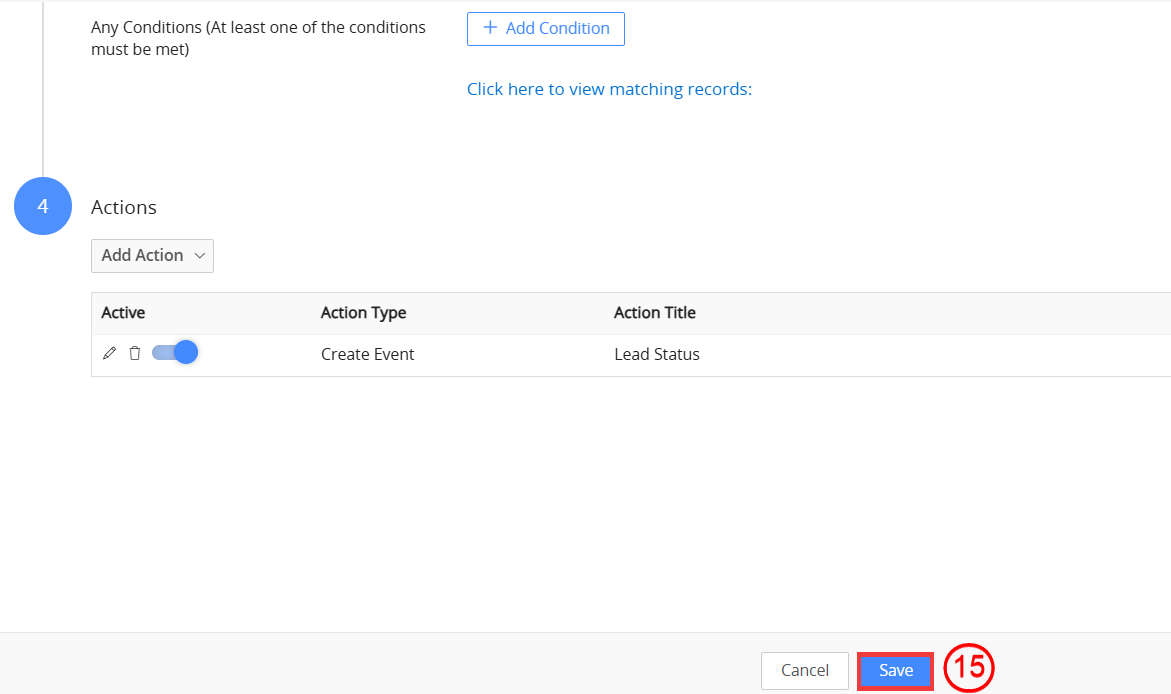
- Click Save to save the workflow.
The workflow will now automatically create an event whenever a lead’s status changes to Hot.
Note: You can add more fields by clicking the Add Record Field button.