Articles in this section
User Management - Settings Log
Introduction
|
|
The Settings Log records all the changes made to CRM settings. When you know what changes were made, it helps you troubleshoot problems better.
|
|
Now that we know what the Settings Log is used for, let us learn in detail about it.
Feature Availability
This feature is available in One Professional, One Enterprise edition of the Vtiger CRM.Benefits
The following are the benefits of Settings Log:User Accountability: Each login is associated with a specific user account, allowing you to track user activities within the CRM.
Personalized Experience: Each user can have their own login credentials, allowing them to customize their CRM experience based on their preferences and requirements.
Access Control: With login settings, you can define user roles and permissions, granting different access levels to individuals or groups.
User Collaboration: You facilitate collaboration among your CRM users by enabling logins.
Multi-Device Access: Users can log in to Vtiger CRM from various devices, including computers, tablets, and smartphones.Key Terminology
| | |
Accessing the Settings Log
|
|
Follow these steps to access the Settings Log:
- Log in to the CRM.
- Click the User Menu on the top right corner of the CRM screen.
- Click Settings.
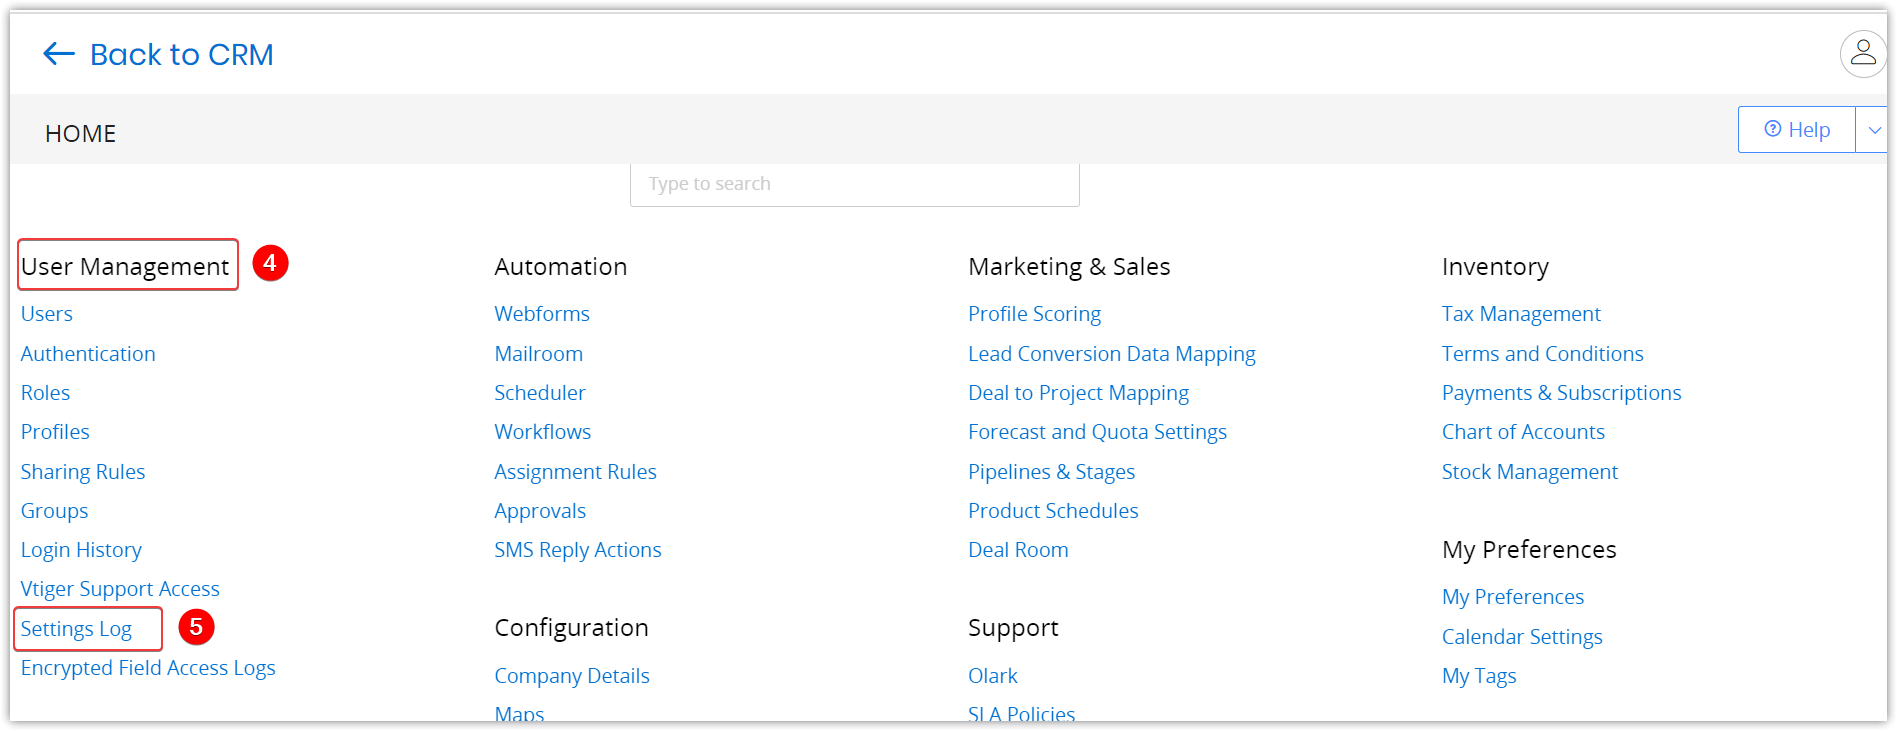
- Look for the User Management section.
- Click Settings Log.
When you land on the Settings Log page, you will see the information listed below.
Applying Filters in the Settings Log
You can filter the Settings Log by user, date, and module. You can filter by all the parameters simultaneously or by a single parameter.
Follow these steps to filter the Settings Log:
- Log in to the CRM.
- Click the User Menu on the top right corner of the CRM screen.
- Click Settings.
- Look for the User Management section.
- Click Settings Log.
- Apply the filters as follows.
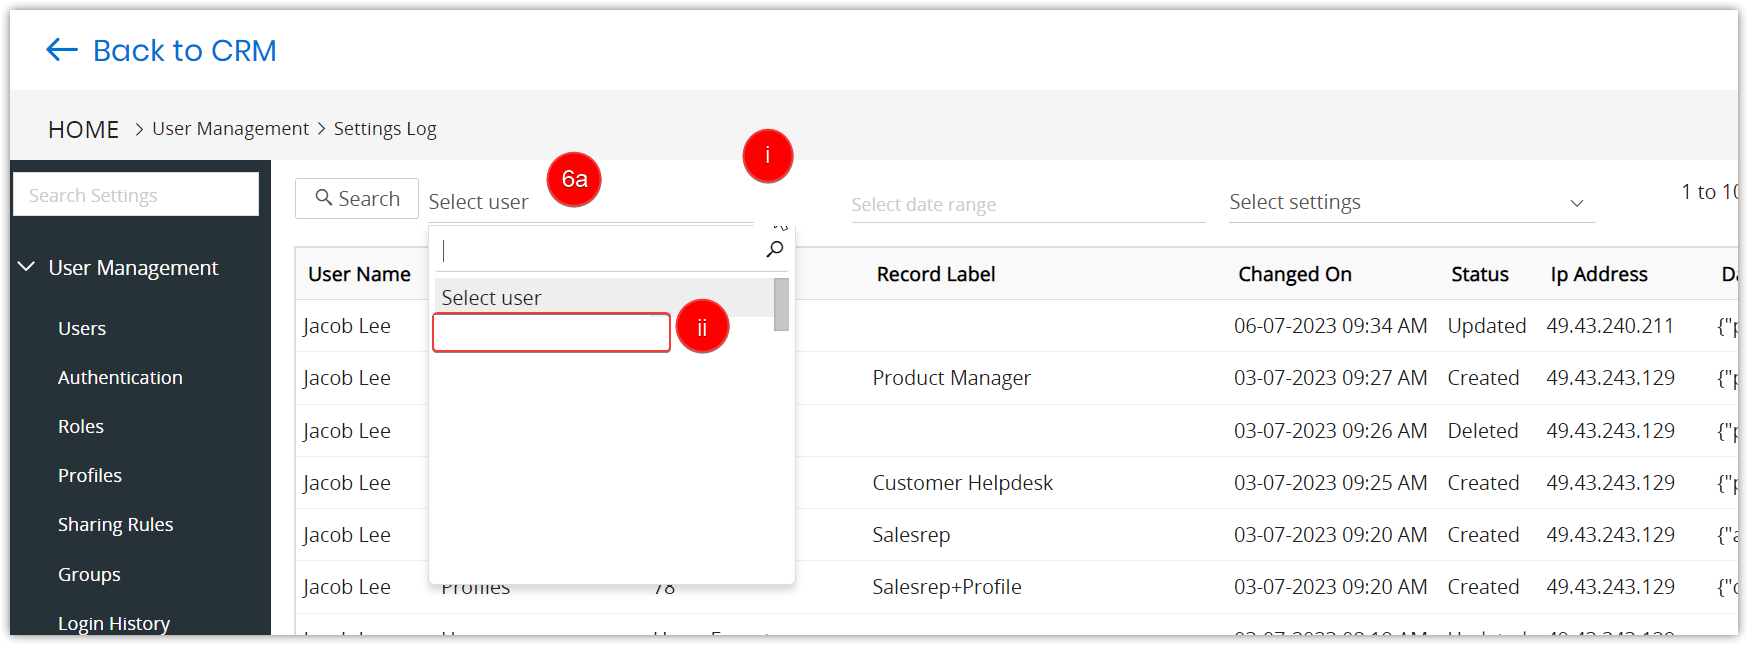
- Filter by user:
- Click the drop-down on the top left side of the column names.
- Select a user.
- Filter by user:
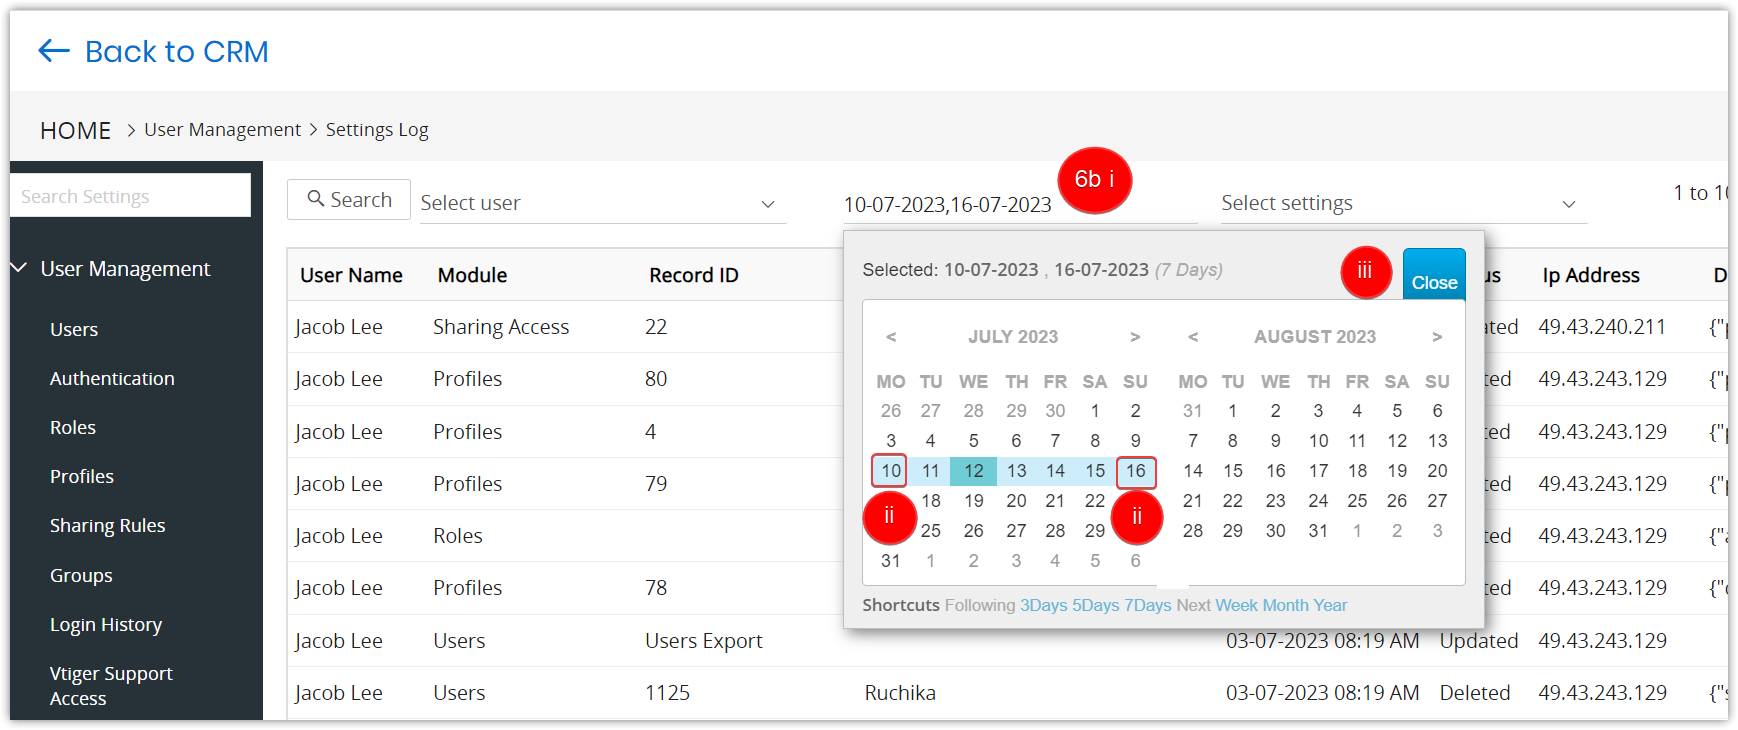
- Filter by date range:
- Click inside the Select date range text area.
- Pick the start date from the left and the end date from the right side.
- Click the Close button.
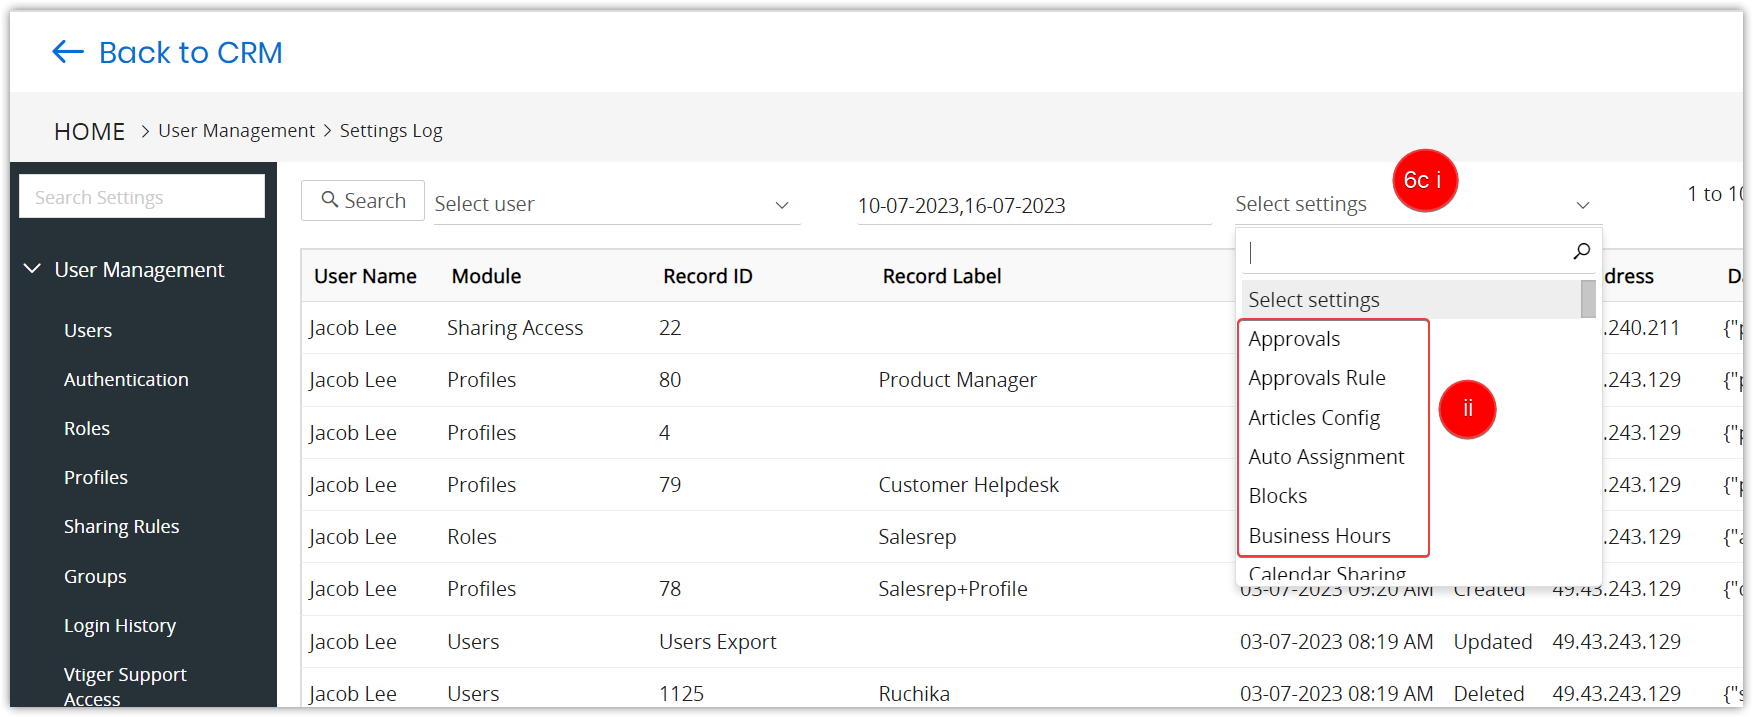
- Filter by module:
- Click the Select Settings drop-down.
- Pick a module.
- Click the Search the located on top of the first column name.
|
|
You will see the log filtered by the options you select in Step 5.
|
|