Articles in this section
Customizing Module Layouts
Feature Availability
Vtiger Editions: One Pilot | One Growth | One Professional | One Enterprise | One AI
Introduction
The Module Layout in Vtiger CRM allows administrators to tailor the appearance and structure of module records. It provides complete control over how information is displayed, helping teams focus on the data that matters most.
By using the Detail View Layout, you can add or modify fields, group them into logical sections (blocks), and customize record views to suit your business processes.
Key Features
- Custom Blocks: Create new blocks in any module to organize related fields and enhance data organization.
- Custom Fields: Add fields of various data types to capture essential information.
- Rearrange Layout: Drag and drop fields or blocks to design a cleaner layout.
- Hide or Show Fields: Control the visibility of specific fields for different users.
- Delete Fields or Blocks: Remove unnecessary or outdated fields and blocks for better data management.
- Field Properties Configuration: Set rules like mandatory entry, quick create, key field, and more.
Benefits
- Enhanced Data Organization: Group related fields into custom blocks for easier access and understanding.
- Improved User Experience: Tailor record layouts to match team workflows and reduce clutter.
- Increased Efficiency: Make important fields easily visible and hide irrelevant ones.
- Better Data Control: Ensure only necessary and secure data fields are available to users.
- Scalability: Easily adapt layouts as your business processes evolve.
Key Terminology
|
|
|
|
|
|
|
|
|
|
|
|
|
|
|
|
|
|
|
|
|
|
|
|
In this article, you will learn about:
- Module Layouts and Fields
- Creating a custom block
- Managing blocks and fields
Creating a Custom Block
In addition to the default blocks in each module, you can create new ones to suit your data organization needs.
Follow these steps to create a block:
- Log in to your CRM account.
- Go to the Main Menu.
- Click Settings. You will land on the Settings page.
- Look for the Module Management section.
- Click Module Layouts & Fields.
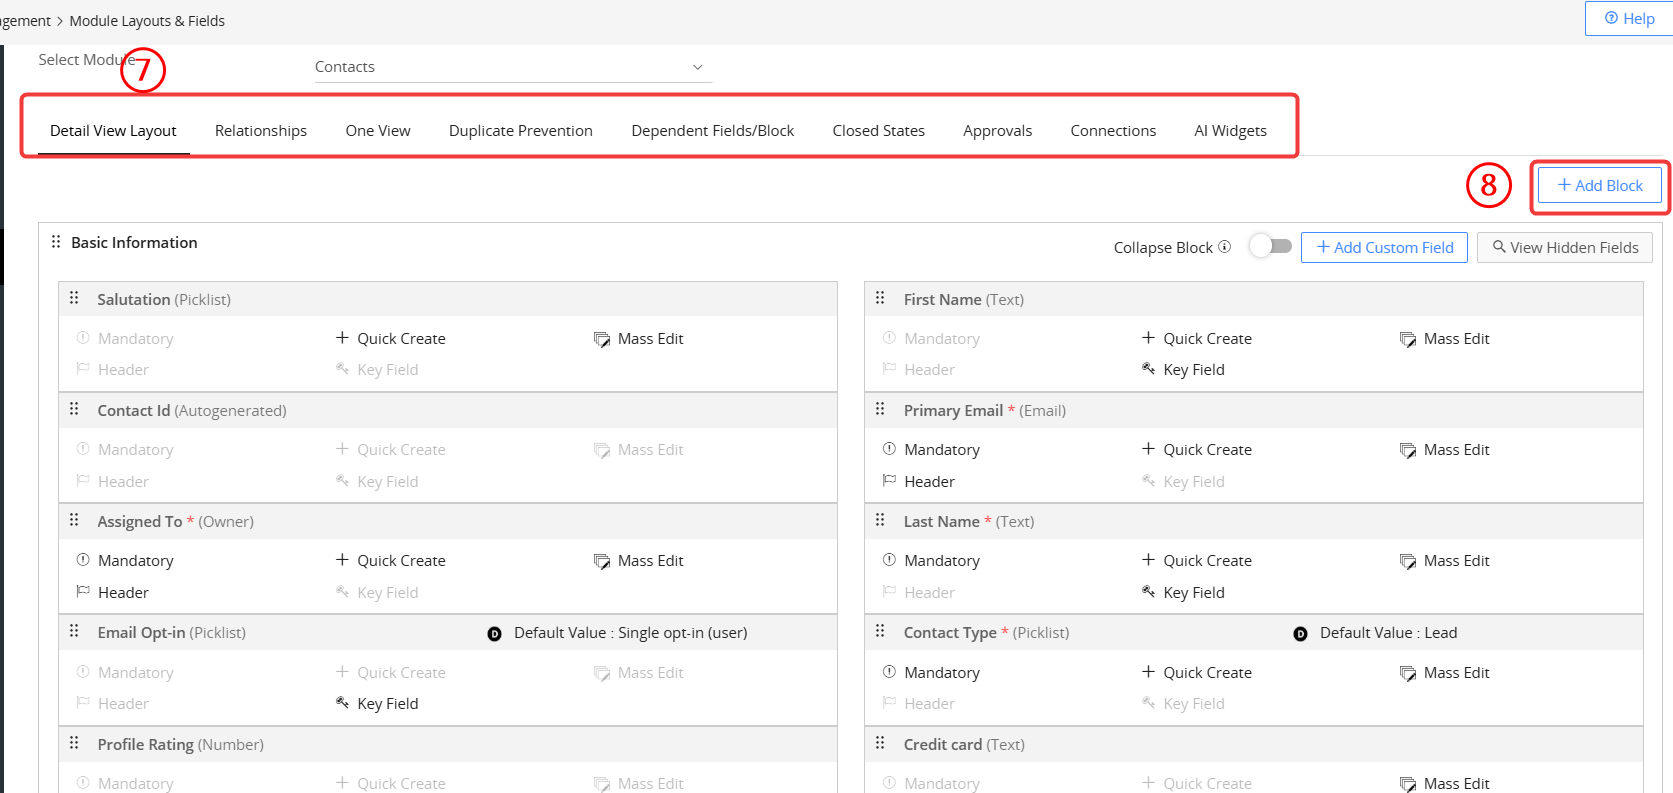
- Select the module.
- You will see the following tabs:
- Detail View Layout
- Relationships
- One View
- Duplicate Prevention
- Dependent Fields/Block
- Closed States
- Approvals
- AI Widgets
- In the Detail View Layout tab, click +Add Block.
- Enter the name of the block.
- Select the block after which you want the new block to appear.
- Click Save.
Creating a Custom Field
You can also create new fields to store desired data.
Follow these steps to create a field:
- Log in to your CRM account.
- Go to the Main Menu.
- Click Settings. You will land on the Settings page.
- Look for the Module Management section.
- Click Module Layouts & Fields.
- Click the Detail View Layout tab.
- Select a module from the Select Module dropdown.
- Click the +Add Custom Field button in the block where you want to create a new field.
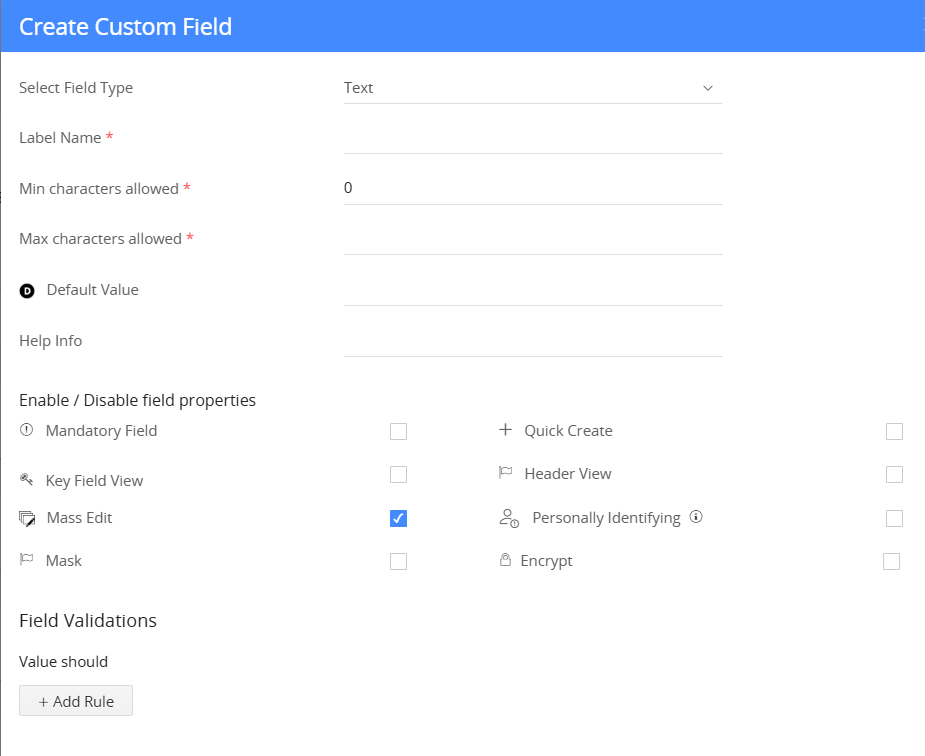
- Select the field type. For example, Phone for phone number, Text for name, etc.
- Enter the field name under Label Name.
- Enter a default value for the field (optional).
- Set the field properties:
- Mandatory Field - Entering a value for this field is now mandatory.
- +Quick Create - The field becomes available under Quick Create.
- Key Field View - The field appears in the Key Fields section of a record’s Summary View.
- Header View - The field appears in the Header section of a contact’s Summary View.
- Mass Edit - You can perform a mass edit action on the field.
- Click Save.
Note:
You can mark a field as Personally Identifiable or Encrypted to store the confidential information of a contact. To learn more, click here.
You can edit an existing field’s properties by hovering over it and clicking the Edit icon.
Rearranging Fields and Blocks
You can rearrange fields and blocks to change the layout of a record.
Follow these steps to rearrange fields or blocks:- Log in to your CRM account.
- Go to the Main Menu.
- Click the Settings button. You will land on the Settings page.
- Look for the Module Management section.
- Click Module Layouts & Fields.
- Click the Detail View Layout tab.
- Select a module from the Select Module dropdown.
- Click the Ellipsis icon (six dots) beside a block or field name.
- Drag and drop the block or field to the position you wish.
- Click Save.
Hiding a Field
In situations where you want to hide a field from the CRM users, you can do it simply with a mouse click.
Follow these steps to hide a field:
- Log in to your CRM account.
- Go to the Main Menu.
- Click the Settings button. You will land on the Settings page.
- Look for the Module Management section.
- Click Module Layouts & Fields.
- Click the Detail View Layout tab.
- Select a module from the Select Module dropdown.
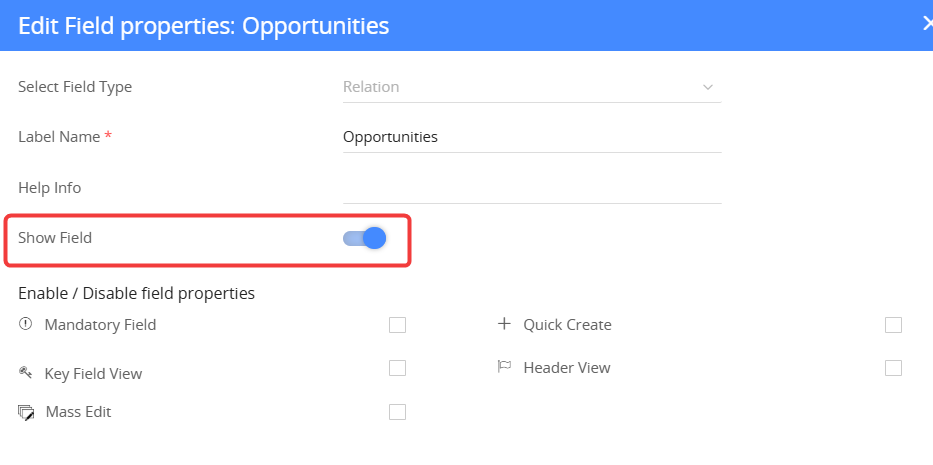
- Hover inside a field and click the Edit icon.
- Disable the Show Field toggle button.
- Read the message in the dialog box and click Yes to confirm.
Tip: Enable the Show Field button to reveal the field.
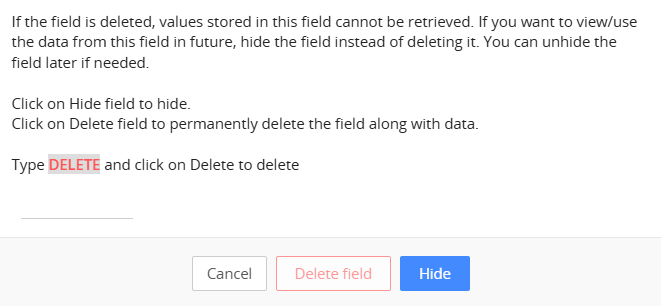
Deleting a Field
Follow these steps to delete a field:
- Log in to your CRM account.
- Go to the Main Menu.
- Click the User Menu on the top right corner of the screen.
- Click the Settings button. You will land on the Settings page.
- Look for the Module Management section.
- Click Module Layouts & Fields.
- Click the Detail View Layout tab.
- Select a module from the Select Module dropdown.
- Hover over the field you want to delete and click the Delete icon.
- Type DELETE in the space provided and click the Delete field.
Deleting a Block
You can only delete custom blocks (blocks that you have created) in a module. Before deleting a block, you must move all its fields into another block or delete them if they’re no longer needed.
Follow these steps to delete a custom block:

- Log in to your CRM account.
- Go to the Main Menu.
- Click the Settings button. You will land on the Settings page.
- Look for the Module Management section.
- Click Module Layouts & Fields.
- Click the Detail View Layout tab.
- Select a module from the Select Module dropdown.
- Go to the block you want to delete and click Delete Custom Block.
- Click Yes to confirm.