Articles in this section
Configuring Modules Using Module Builder
Feature Availability
Vtiger Editions: One Professional | One Enterprise | One AI
Note: It is available as a paid Add-on for the One Growth edition.
Introduction
Every business is unique, and so are its data needs. In Vtiger CRM, you can create custom modules to capture and organize the information that matters most to your business using the Module Builder. Custom Modules enable you to tailor your CRM to match your business model, eliminating the need for predefined templates.
A module in Vtiger is a collection of records that store related information. For example, the Leads module holds details about potential customers, while the Contacts module contains information about existing customers. Similarly, with Custom Modules, you can define and manage your own data structures. Suppose your company is managing a new project that requires a specialized workforce. You can create a Workforce module within the Projects app to track team members, their roles, and assignments.
Key Features
- Flexible Module Builder: Create new modules directly from the CRM's Module Management settings.
- Custom Blocks and Fields: Define the structure of your module by adding new blocks and custom fields.
- Custom Relationships: Establish relationships between your custom module and existing CRM modules.
- Customizable List Views: Choose which fields appear in the module's List View by default.
- Full Admin Control: Only CRM Admin users can create, modify, or delete custom modules.
Benefits
The benefits of Module Builder are:
- Personalized Data Management: Capture and organize data specific to your business processes.
- Improved Productivity: Access all relevant data in one place, reducing time spent switching between tools.
- Enhanced Reporting: Create reports that include custom module data for better visibility and insights.
- Seamless Integration: Link custom modules with standard modules, such as Projects, Contacts, or Deals.
- Scalable Design: Modify or delete modules as your business processes evolve.
Key Terminology
|
|
|
|
|
|
|
|
|
|
|
|
|
|
|
|
|
|
|
|
|
|
|
|
In this article, you will learn about:
- Modules in Vtiger.
- Creating a custom module.
- Defining module properties.
- Managing blocks and fields.
- Setting up a relationship between modules.
- Deleting a module.
Creating a Module
Creating a module involves the steps below:
- Accessing the Module Management settings.
- Creating a custom module.
- Specifying the module properties.
- Creating blocks and fields.
- Choosing columns for your default lists.
- Creating relationships with other modules.
We'll look at all these steps in detail, but before that, let's look at an example of a module.
Consider that your company has acquired a new project and needs to assign a specialized workforce to it. You can create a module called Workforce under the Projects app. The workforce will contain records of all the team members working on the new project.
Note: You can create custom modules only if you are an Admin user.
Follow these steps to create a module:
Step 1: Access the Module Builder
Follow the steps below to access the Module Builder:
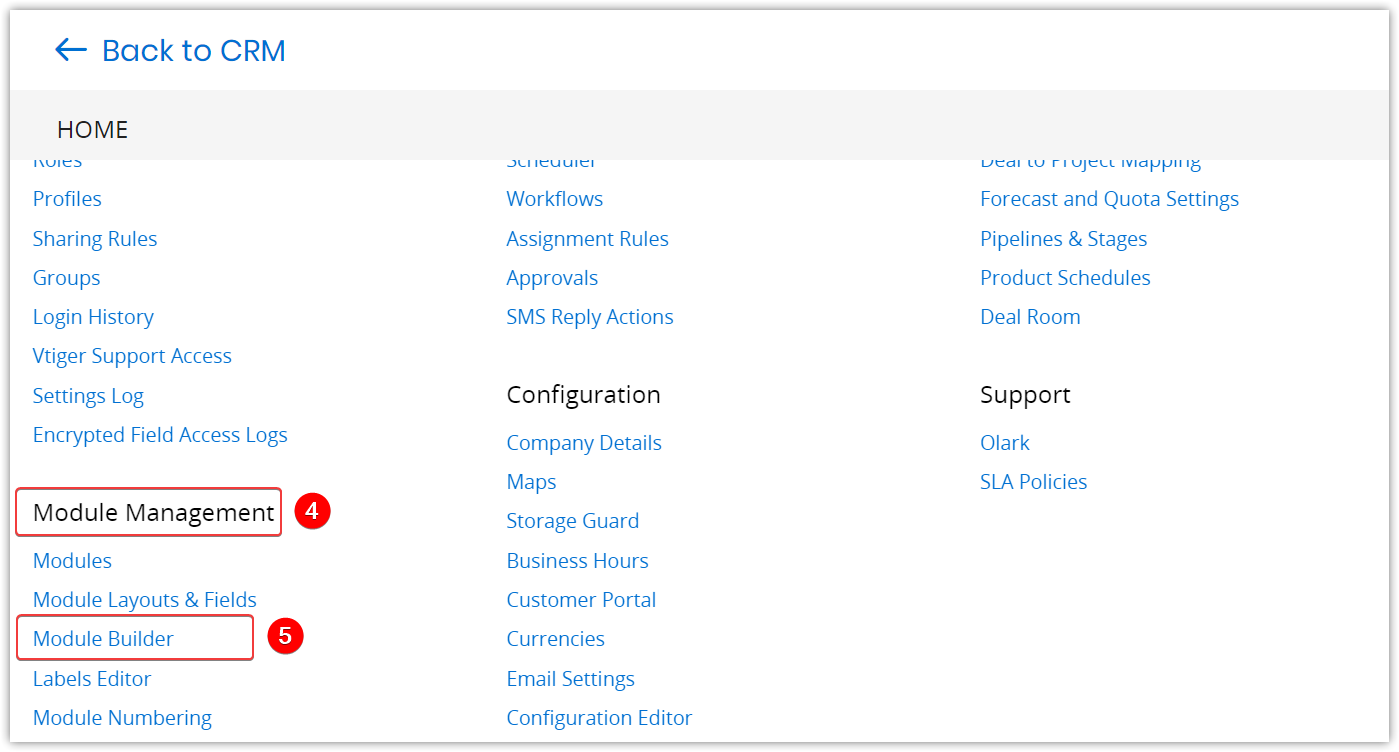
- Log in to the CRM.
- Go to the Main Menu.
- Click Settings.
- Look for the Module Management tab.
- Select Module Builder.
Step 2: Creating a custom module
Follow the steps below to create a custom module:
- Log in to the CRM.
- Go to the Main Menu.
- Click Settings.
- Select Modules under the Module Management tab.
- Click + Create Module.
Step 3: Specify the Module Properties
Once you click Create Module, you must specify its basic details.
Follow the steps below to enter module properties:
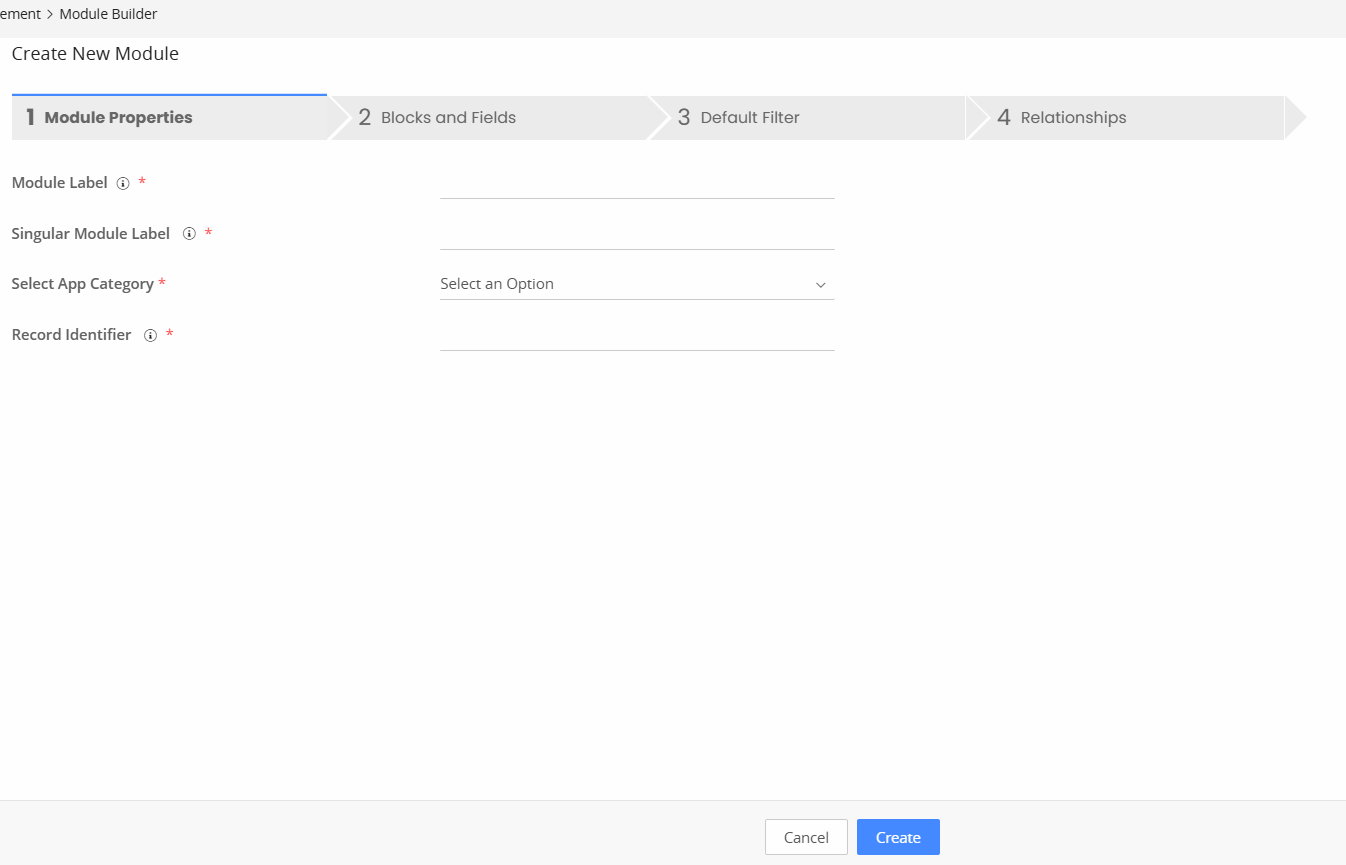
- Enter the following information:
- Module Label: Specify the module name. For example, Workforce.
- Singular Module Label: Specify the module name in the singular form. For example, if the module name is Contacts, then Contact is its singular form. The singular form of Workforce is Workforce.
- Select App Category: Select the app under which you want to create the module. For instance, you will create Workforce under Projects.
- Record Identifier: Specify the label by which you want to identify the module's records. For example, Workforce Records are identified by Workforce Name.
- Click Create.
Step 4: Create Blocks and Fields
Note: Some fields in the Basic Information block are pre-populated by default.
You can also create custom fields and blocks if needed.
Follow the steps below to create a custom block:
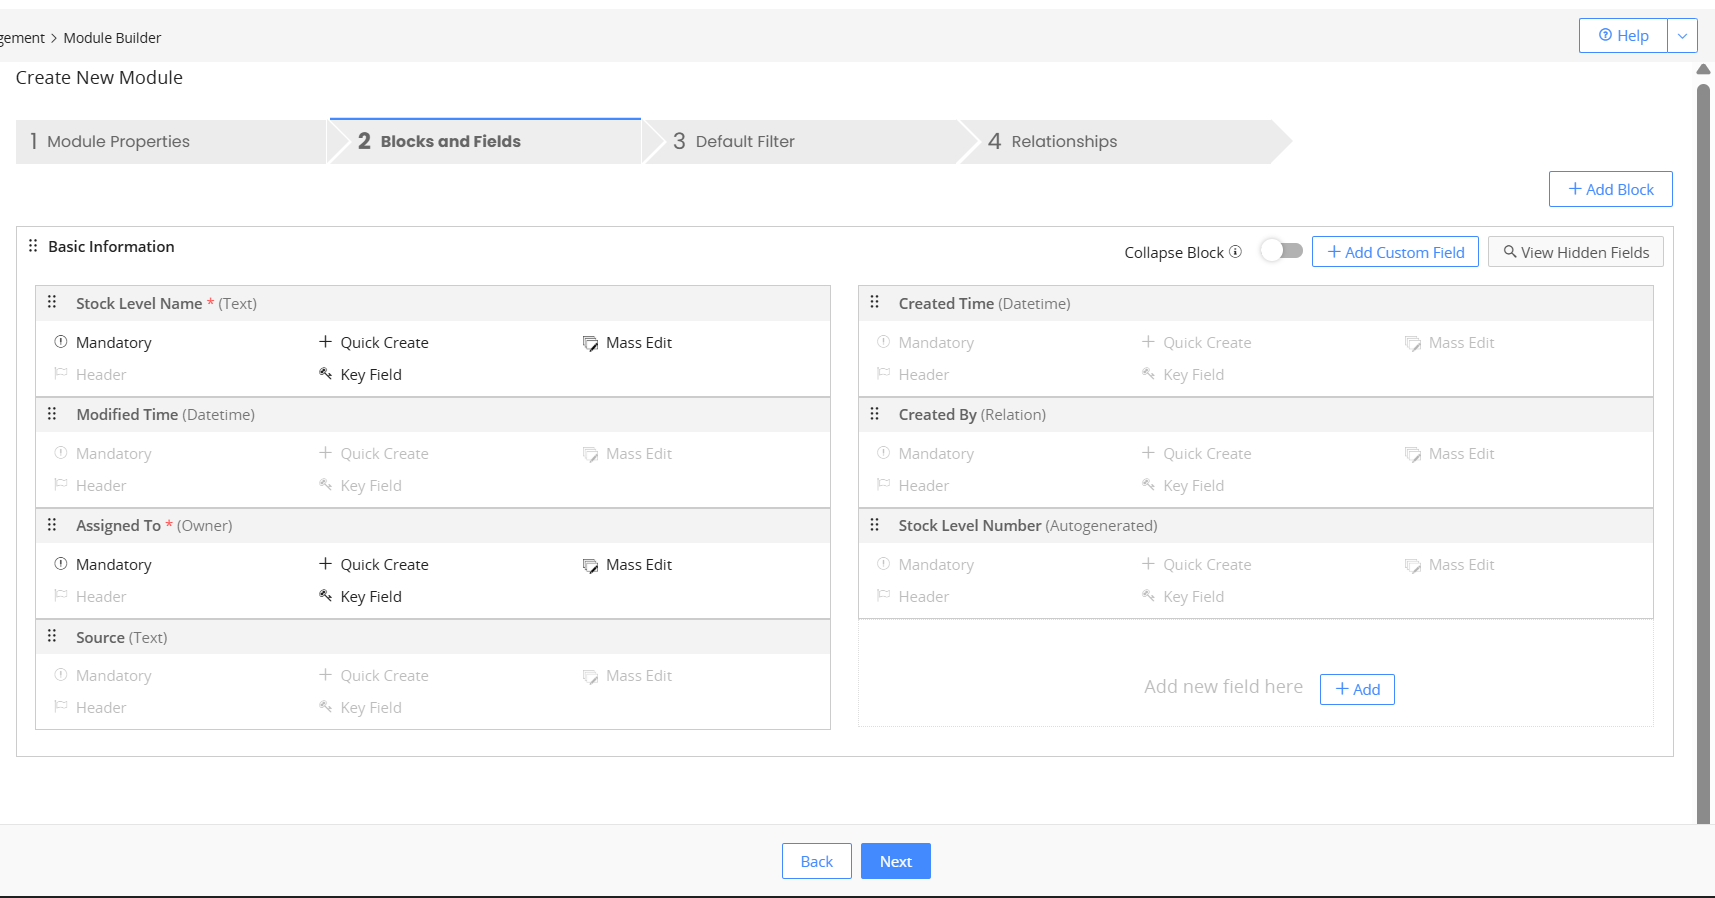
- Click +Add Custom Field under any block you want to create it in. For example, under Basic Information, Address Details, and so on.
- You can also create a new block and a custom field under it:
- Click +Add Block.
- Enter the block name.
- Choose the existing block after which you want to add the new block.
- Click Save.
- Click +Add Custom Field in the newly created block.
- Select the field type. For example, Phone for a phone number, Text for a name, etc.
- Enter the field name under Label Name.
- Enter a default value for the field (optional).
- Set the field properties:
- Mandatory Field: If enabled, entering a value for the field becomes mandatory.
- +Quick Create: If enabled, the field becomes available under Quick Create.
- Key Field View: If enabled, the field appears in the Key Fields section of a contact's Summary View.
- Header View: If enabled, the field appears in the Header section of a contact's Summary View.
- Mass Edit: If enabled, you can perform a mass edit action on the field.
- Click Save.
- Click Next.
Step 5: Choose the Default Filter
In this step, you must choose the columns that will appear by default in the List View of the module.
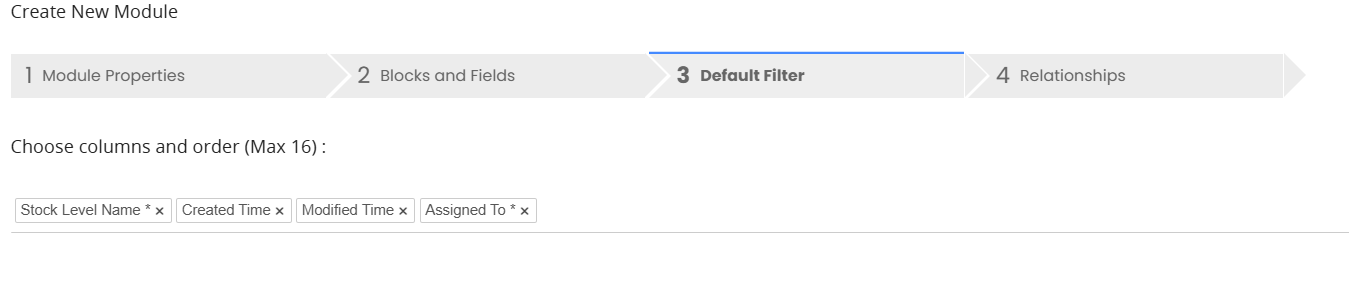
Follow the steps below to choose the default filter:
- Click on the space provided under Choose columns and order (Max 16).
- Select fields from the list to add to the List View.
- Click Next.
Step 6: Build a relationship between the custom module and other modules
To create a link between records in different modules, you need to build a relationship between the modules.
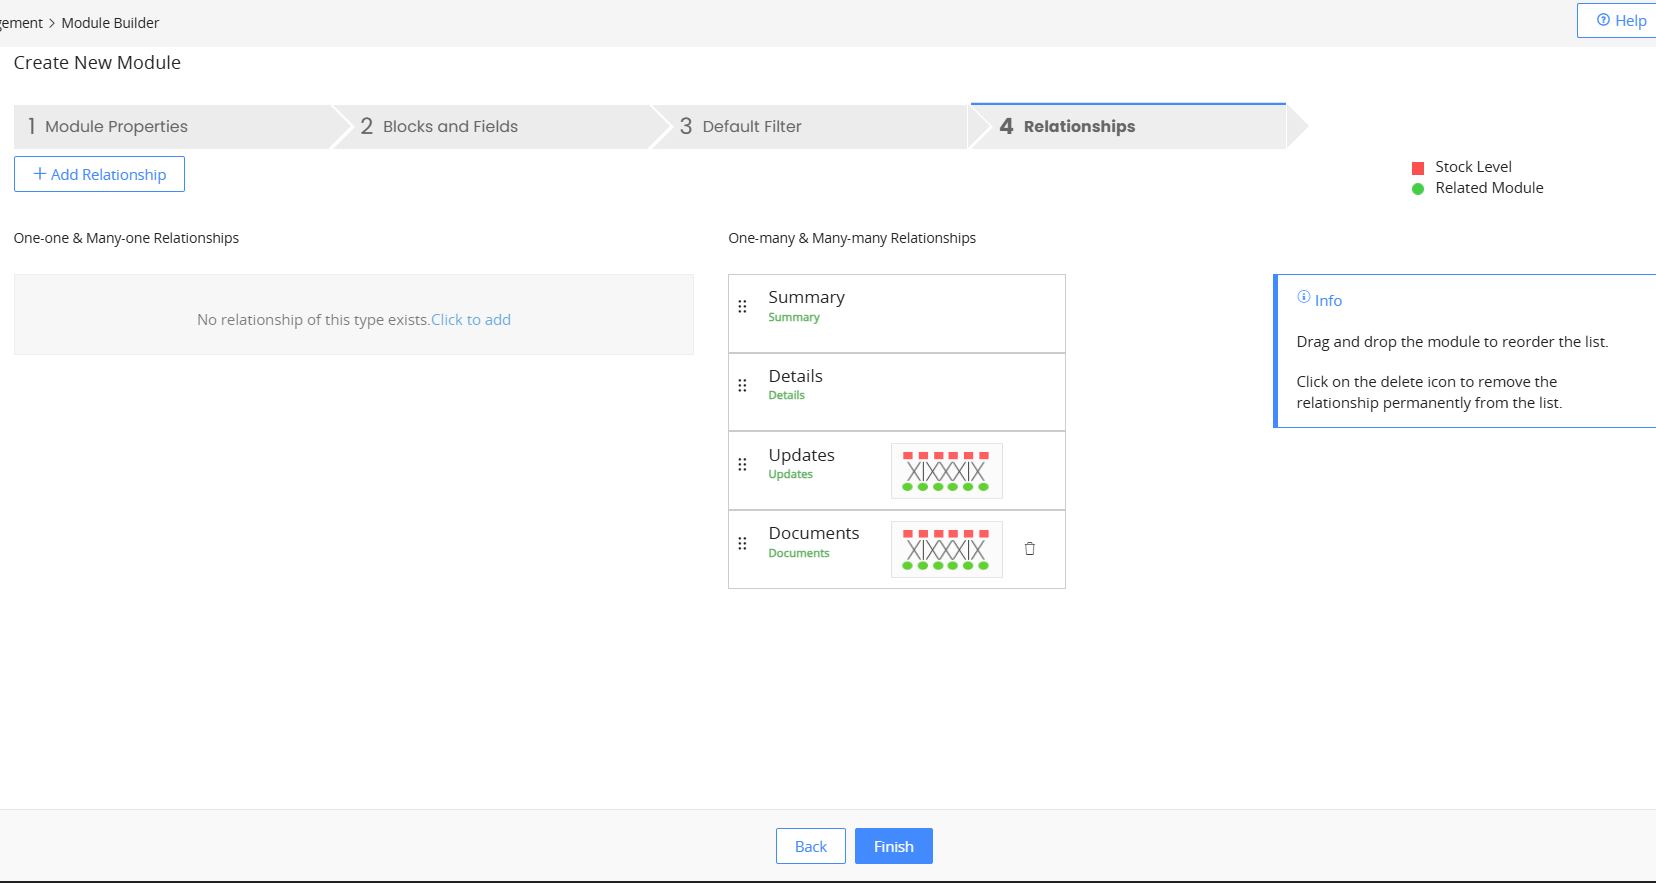
Follow the steps below to set up relationships:
- Click +Add Relationship(on the left, under the tabs).
- Choose the module with which you want to create a relationship from the Select related module drop-down.
- If you consider the example above, you must select 'Projects' from the drop-down. Projects become the related module.
- Pick a relationship type under Select relationship type.
- Specify the names of the related and custom module fields/tabs that must appear in the modules' records. (You will get more clarity on this in the next section.)
- Click Save.
We have detailed information on the need to create relationships between modules, different types of relationships, and the procedure to follow. To learn about it, click here.
Deleting a Module
Follow these steps to delete a custom module:
- Log in to the CRM.
- Go to the Main Menu.
- Click Settings.
- Select Modules under the Module Management tab.
- Look for the desired custom module.
- Hover over the module name and click More.
- Click Delete.
- Click Yes to confirm.

Note:
- You can delete only custom modules. Deleting a custom module does not affect the existing modules.
- You can delete a module only if you are an Admin user.