Articles in this section
Module Management - Module Layouts & Fields
Introduction
Module Layouts & Fields is where you can customize and configure module-related settings. Before diving into the possibilities, let us see how you can access the Module Layouts & Fields page.
Accessing Module Layouts & Fields Settings
Module Layouts & Fields is a part of CRM Settings. You can access the Settings page only if you are an Admin user.
Follow these steps to access Module Layouts & Fields:
- Log in to the CRM.
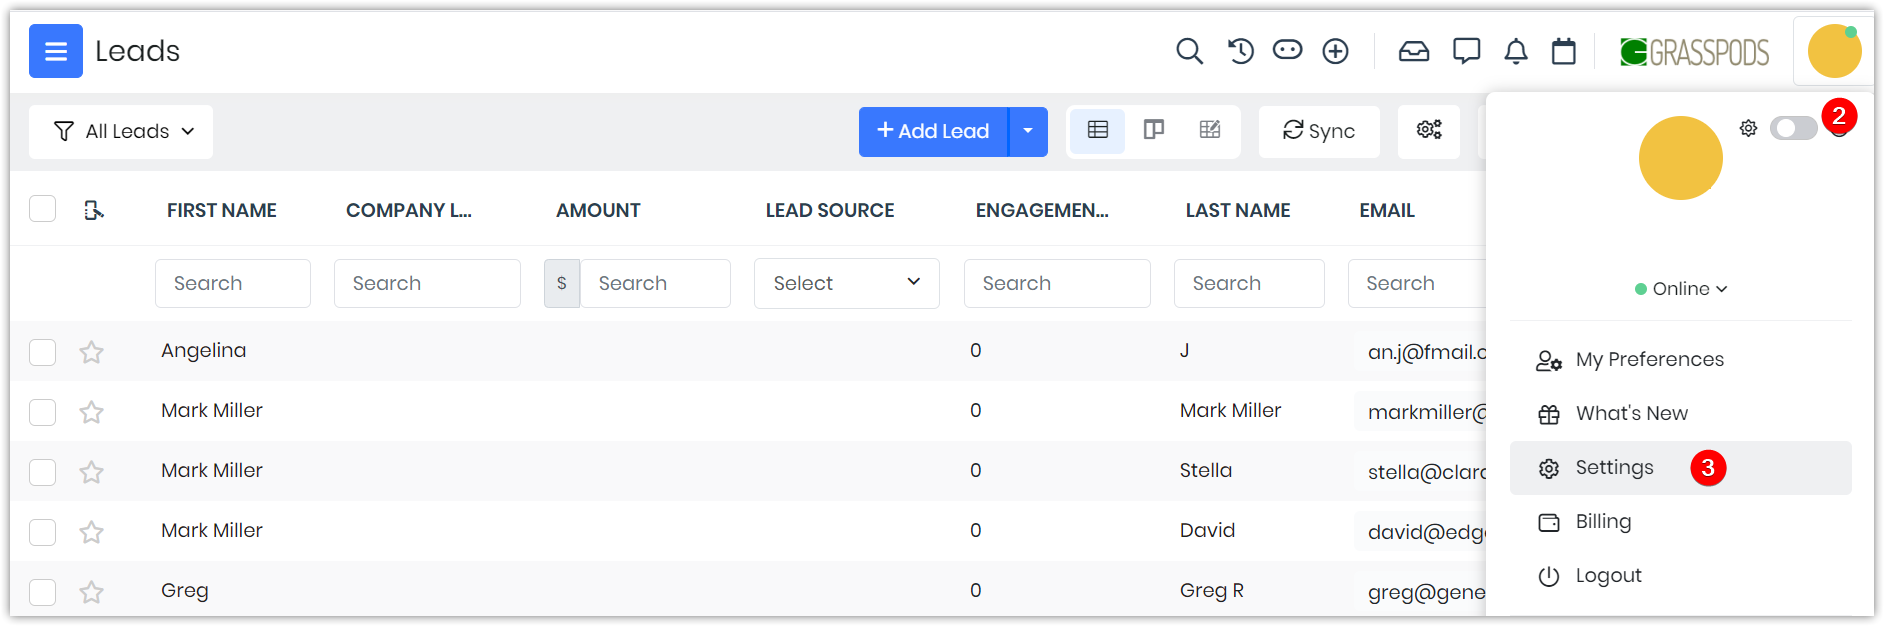
- Click the User Menu on the top right corner of the CRM screen.
- Click Settings. You will land on the Settings page.
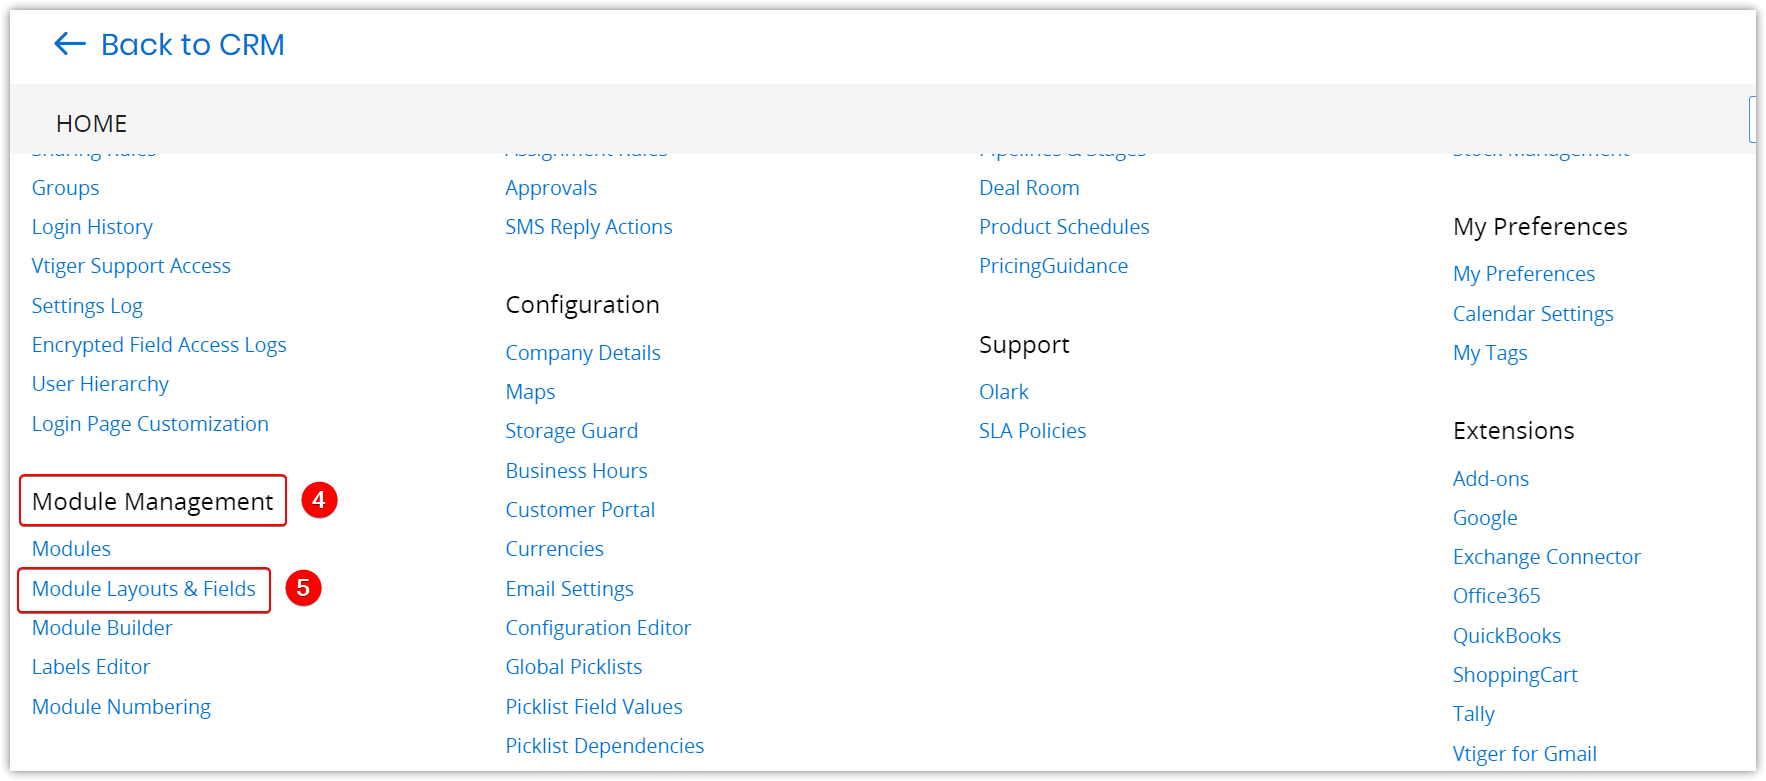
- Go to the Module Management section.
- Click Module Layouts & Fields.
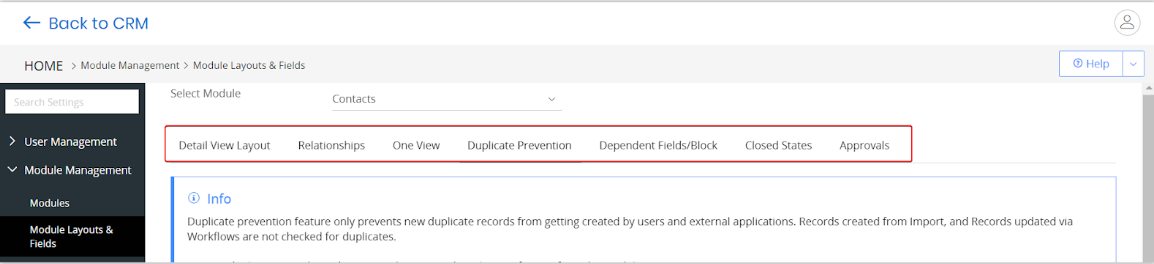
You will see six tabs when you land on the Module Layouts & Fields page. Each tab provides a different type of setup. This article gives you an overview of the setup available under each tab.
Detail View Layout
You can do the following under the Detail View Layout tab:
- Customize the layout of modules by moving around blocks and fields to desired positions
- Create custom (new) fields and blocks
- Configure other field-related settings, such as marking them for Quick Create, Mass Edit, etc.
Relationships
To relate the records of different modules to one another, you must create a relationship between them. Under the Relationships tab, you can choose the modules you want to relate to and how you want to relate to them.
One View
One view provides a 360-degree view of all the information related to a CRM entity.
For instance, you can get a comprehensive view of customer-related deals, cases, campaigns, projects, and other details, all in a single view.
You can perform the following actions on a One View tab in a record:
- Related Records
- You can view the list of related records with the click of a button.
- You can create related records from a record using One View. For example, if you want to link a quote to a deal, you can create one from the deal’s One View tab.
- If you have already created a record in another module, you can link it via One View. For instance, you can link existing documents from the CRM to a record.
- You can connect with a contact via email, SMS, or WhatsApp listed under One View using the options under the More icon.
- Uploading documents: You can also link documents to the CRM to a record.
- Deep dive into records: You can open the Deep Dive View of a related record under the One View tab.
- Print records: You can print related documents under One View by selecting a print template.
Duplicate Prevention
A CRM record is said to be a duplicate when it contains the same information as another record.
With Duplicate Prevention, you can avoid the creation of duplicate records in a module. You must enable the duplicate check and select a field whose value will be used to detect duplicate records.
Dependent Fields/Blocks
Dependent fields are also called dynamic fields. They appear only when needed.
For example, consider you have two products, A and B, and fields related to both. Then, related fields of Product A must not be shown when you update Product B. Similarly, related fields of Product B must not appear when you update Product A. You can set up dependencies between fields and blocks to mimic this behavior.
Closed States
Closed states mark CRM records as closed or inactive. When you no longer use a record but need it for future reference, you can close it. You cannot edit closed records.
Under the Closed States tab, you can choose the module and picklist field to configure a closed state.
Approvals
You will see the following option under the Approvals tab depending on the module you select:

|
|
A record is locked when it is sent for approval. If you want to link other records to the locked record, you must enable the toggle button.
For example, you are a sales rep and send an invoice to your manager for approval. While the invoice is locked, you want to link a document to it. You can do this only if the toggle button under the Approvals tab is enabled for the Invoices module.
AI Widget
AI Widget in Vtiger CRM enhances user productivity by providing real-time insights and recommendations. These widgets can be added to the Summary View or List View of CRM modules, such as Deals, Cases, or Contacts, to offer contextual assistance. Users can leverage AI Widgets for various functionalities, including generating summaries, assisting with responses, analyzing data, and performing quick actions, helping streamline workflows and decision-making
Note: AI Widgets are only available if the user has installed Calculus AI.