Articles in this section
Set up a Workflow Action to Invoke Custom Function
Feature Availability
Vtiger Editions: One Professional | One Enterprise | One Growth
Introduction
The Workflows module in Vtiger CRM offers a straightforward interface to define custom actions that are executed when a record is saved.
To extend this functionality, Vtiger provides a Custom Task feature using entity method tasks. This allows developers to call specific methods on Vtiger entity objects, enabling the execution of custom business logic within a workflow.
Let’s walk through how to create a Custom Task.
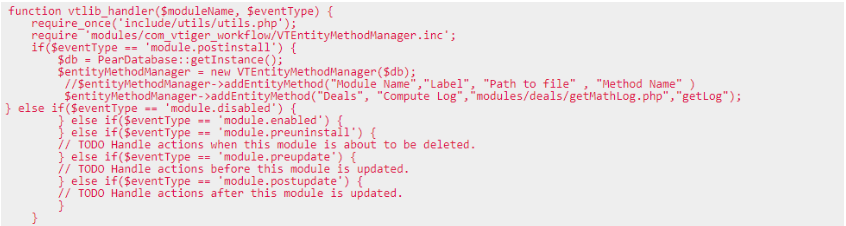
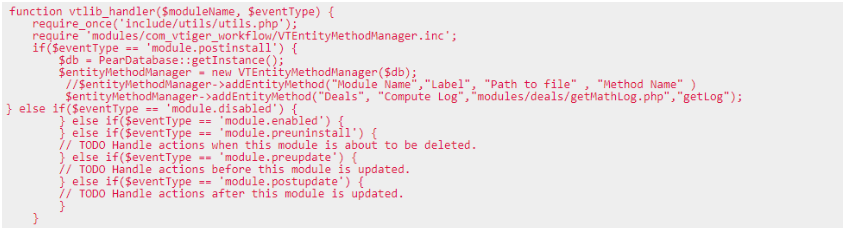
For instance, if you want to calculate a natural logarithm (Math Log) as part of a custom operation, you would first register a method to handle this logic. The registration process includes defining an operation name, specifying the file path (which can be in any module, including a custom one), and setting the function name.
Suppose you have a custom module named Deals. You can register the method within the module’s postinstall event using the vtlib_handler API in the Deals.php file. This event is triggered automatically after the module is installed, allowing your custom method to become available to workflows.
To learn more about this, click here.
In this article, you will learn about:
- Setting up and invoke custom function workflow action
Setting Up an Invoke Custom Function Workflow Action
Note:
- We have taken the example of the Deals module only for better understanding. To learn more about Deals, click here.
- Make sure you have registered the custom function in the module’s vtlib_handler method.
Example:
Follow these steps to set up the workflow with a custom function:
Section 1: Accessing the workflow page
- Click the User Menu on the top right corner of the screen.
- Click the Settings button. The Settings page opens.
- Look for the Automation section.
- Select Workflows.

- Click the +New Workflow button.
- Select Standard. This opens the New Standard Workflow page.
Section 2: Entering the basic information
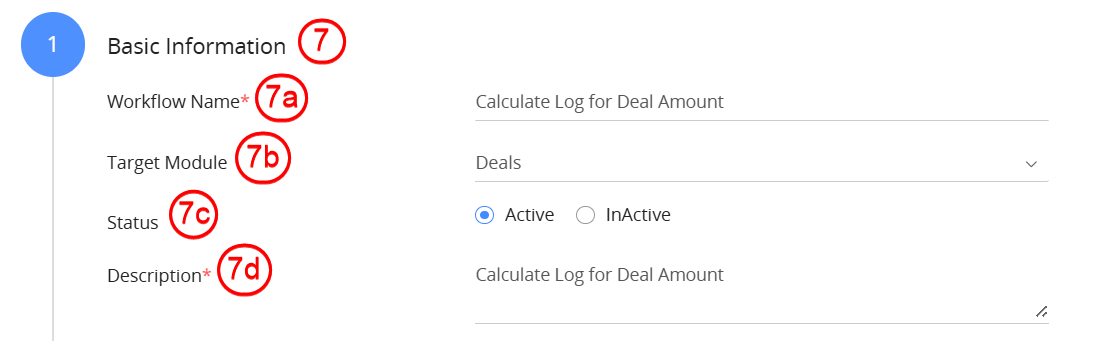
- Enter or select the following details:
- Workflow name: Enter the workflow name as Calculate Log for Deal amount.
- Target module: Select Deals as the target module.
- Status: Set the status to Active.
- Description: Enter a description that explains the purpose of the workflow action.
Section 3: Select the workflow trigger
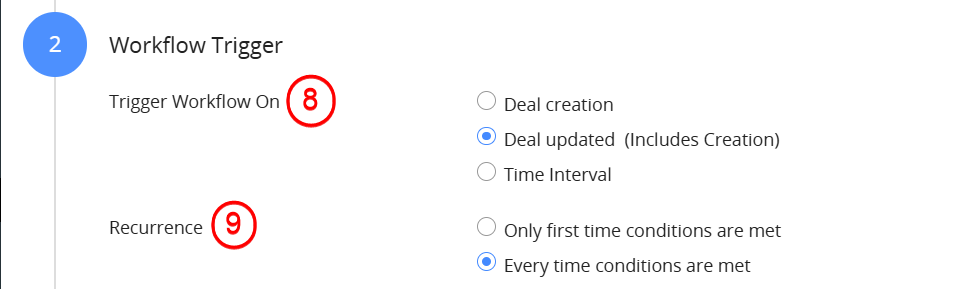
- Select the Workflow Trigger as Deal Updated (Includes Creation).
- Select Every time conditions are met for Recurrence.
Section 4: Set up the workflow entry criteria
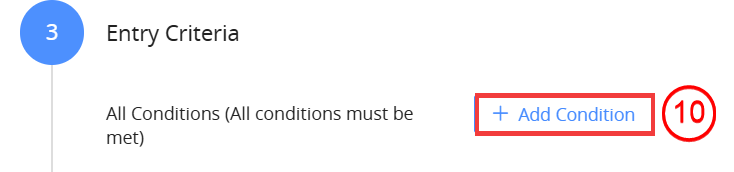
- Click the +Add Condition button.

- Set the entry criteria as: Amount is not empty.
Section 5: Set up the action
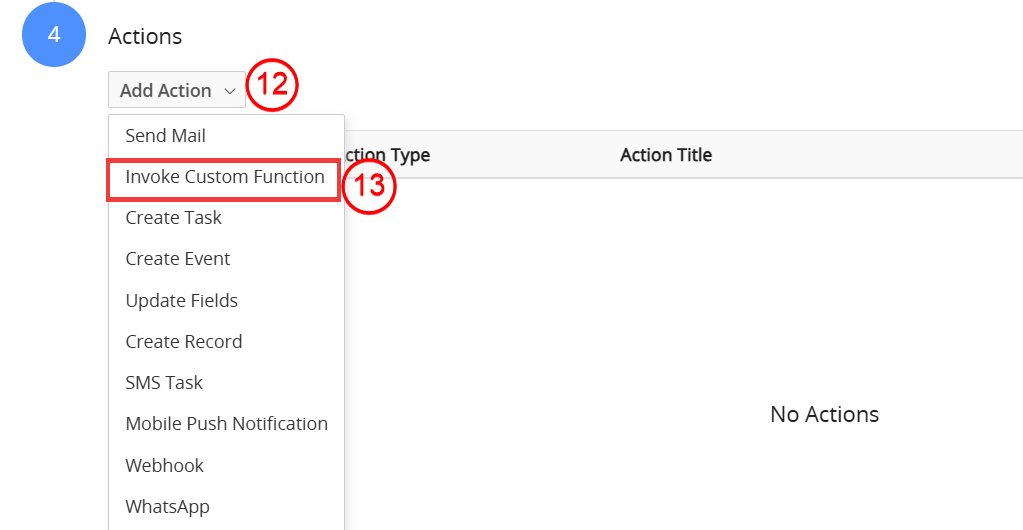
- Click the Add Action drop-down.
- Select Invoke Custom Function. This opens a window where you must enter the Action Title.

- Enter the Action Title as Calculate Log.
- Select the Method Name for the specified action.
- Click Save to save the action.
- Click Save to save the workflow.
Now when a Deal is created or updated with an amount, the workflow will calculate the natural logarithm and store it in the specified field.
Note: If you want to update the Purchase cost of Products based on the List price given for the Product in the latest Purchase Order, do the following:
- The admin has to select the custom function when creating a workflow for PO,
- The custom function will update the Item's Purchase Cost based on the following formula:
- ((Qty*List price)-Item level discount)/ Qty
- This should update the Purchase cost for all the Items selected in the PO/Bill.
- The latest selected price is recorded if the same product is selected in the PO or Bill more than once.
- For example, if the product - Glass is selected in the 3rd and 7th fields with prices of 400 and 600, respectively, then the price of the 7th field, that is 600, is recorded.
- Ensure that the ModTracker entry should be added to the Product and the Product or service workflow should not be triggered.