Articles in this section
Automation - Workflow Scheduler
Introduction
A Scheduler is used to automate operations or jobs at predefined times, based on specific conditions. In Vtiger CRM, the Scheduler works in the background by running a cron script that executes tasks periodically without manual intervention.
This feature helps automate routine activities such as sending reminders, updating records, or performing system checks. You can also enable or disable specific jobs in the execution sequence, depending on your business needs.
For example, you can set up automated email reminders to notify you about upcoming events, ensuring you never miss important tasks.
Jobs in the Scheduler
The jobs in the scheduler are listed based on:- A module’s availability in your Vtiger edition
- Whether the module is enabled or disabled (Settings > Module Management > Modules)
Note:
- If you install modules through extensions and there is an automated operation defined for that module by the CRM, the job will automatically get added to the Scheduler list.
- If you need to automate an operation for a module, contact our Support team ([email protected])
Benefits
The benefits of a workflow scheduler are:
- Automation of routine tasks: Saves time by automatically running processes without manual effort.
- Improved efficiency: Ensures jobs like reminders, updates, or notifications happen on time, every time.
- Consistency: Reduces human error by executing tasks in a standardized, repeatable way.
- Better time management: Frees up users from repetitive tasks so they can focus on more important work.
- Proactive notifications: Keeps teams updated with automated alerts, reminders, and escalations.
In this article, you will learn about:
- Working of a Scheduler
- Accessing the Scheduler
- Changing the sequence in the Scheduler
- Changing the status of the jobs in the Schedule
Key Terminology
|
|
|
|
|
|
|
|
|
|
|
|
|
|
|
Working of a Scheduler
The Scheduler in Vtiger CRM works 24/7. It scans the job list and checks for the following criteria in a job:
- Sequence: The sequence starts with the number 0. So, the job with sequence number 0 gets first priority, the job with sequence number 1 gets second priority, and so on...
- Frequency: The jobs having a frequency of 00:00 (H:M) will execute instantly, and other jobs execute based on the defined frequency.
- Status: Only jobs having an Active status will be considered. Inactive jobs are skipped.
Once the above criteria are met, the Scheduler operates.

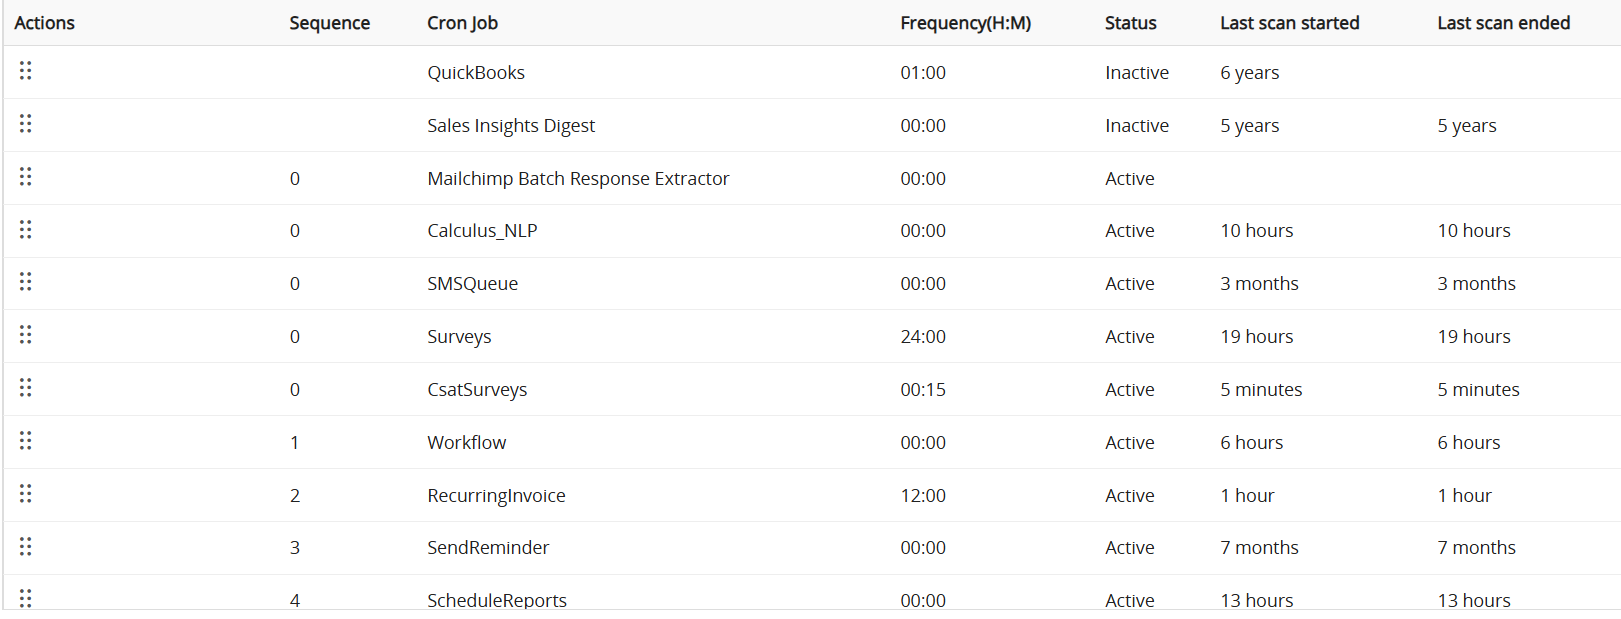
Consider the image above for a clear understanding:
- The Workflow job has sequence number 0, frequency 00:00, and is active. Therefore, it is given first priority and executes instantly.
- The Recurring invoice has sequence number 1, frequency 12:00, and is active. It was last scanned 10 hours ago. The scheduler will wait for 2 more hours before executing at the frequency 12:00.
- The SendReminder has sequence number 2, frequency 00:00, but is inactive. Hence it will be skipped by the Scheduler and moved to the next job.
Note: The Last scan started and the Last scan ended columns show when the job was executed previously.
Here are the samples of jobs that are executed by the Scheduler in Vtiger CRM:
|
|
|
|
|
|
|
|
|
|
|
|
|
|
|
|
|
|
|
|
|
|
|
|
|
|
|
|
|
|
|
|
|
|
|
|
|
|
|
|
|
|
|
|
|
|
|
|
|
|
|
|
|
|
|
|
|
|
|
|
|
|
|
|
|
|
|
|
|
|
|
|
|
|
|
|
|
|
|
|
|
|
|
|
|
|
|
|
|
|
|
|
|
|
|
|
|
|
| |
|
|
|
| |
|
|
| Triggers workflow activation, logs updates, and initiates scheduled imports. | |
|
|
| Handles email scheduling, delivery, tracking, and bounce management. | |
|
|
| | |
|
|
|
| |
|
|
| Imports subscribers, syncs lists/campaigns, processes unsubscribes, and logs sync results. | |
|
|
| Identifies duplicates, updates consent, logs changes, re-evaluates opt-ins, and triggers consent workflows. | |
|
|
|
| |
|
|
| Analyzes chats by tracking message count, response time, missed chats, and ratings. | |
|
|
|
| |
|
|
| Captures visitor activity, initiates chats, logs conversations, and links transcripts to contacts or deals. | |
|
|
| Captures Facebook leads, syncs messages, updates contacts, and converts chats to deals or cases. | |
|
|
|
| |
|
|
| Sends notifications, updates fields, manages ownership, creates follow-ups, and triggers alerts. | |
|
|
| Triggers tasks for composing, posting, replying, scheduling, or deleting social updates. | |
|
|
| Automates fetching, processing, scheduling, and responding to social content via background tasks. | |
|
|
| Triggers product creation, order confirmation, invoice generation, and PO receipt. | |
|
|
|
| |
|
|
| Downloads recordings, extracts transcripts, and logs them under Event records. | |
| 39 |
|
| |
|
|
|
| |
|
|
| Automates emails, field updates, record creation, and notifications on record changes. | |
|
|
|
| Processes and logs chatbot messages flagged as disliked, marking them for review and future improvement. |
|
|
| Logs interactions, tags responses, tracks unanswered queries and updates analytics for bot optimization. | |
|
|
|
|
|
|
|
|
| Collects, cleans, and uploads CRM data to the AI engine to enable or retrain predictive models. |
|
|
|
|
|
|
|
|
| |
|
|
|
| |
| 49 |
|
| |
|
|
|
| |
|
|
|
| |
|
|
|
| |
|
|
| Triggers workflows, escalations, reminders, and portal access. |
Accessing the Scheduler
Follow the below steps to view the Scheduler:
- Log in to the CRM.
- Click the User Menu icon on the top right corner of the screen.
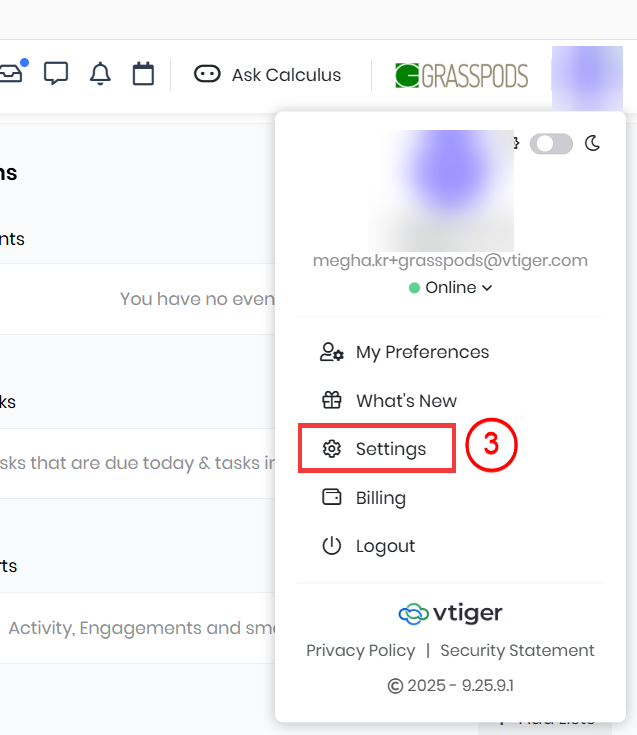
- Click Settings. The Settings page opens.
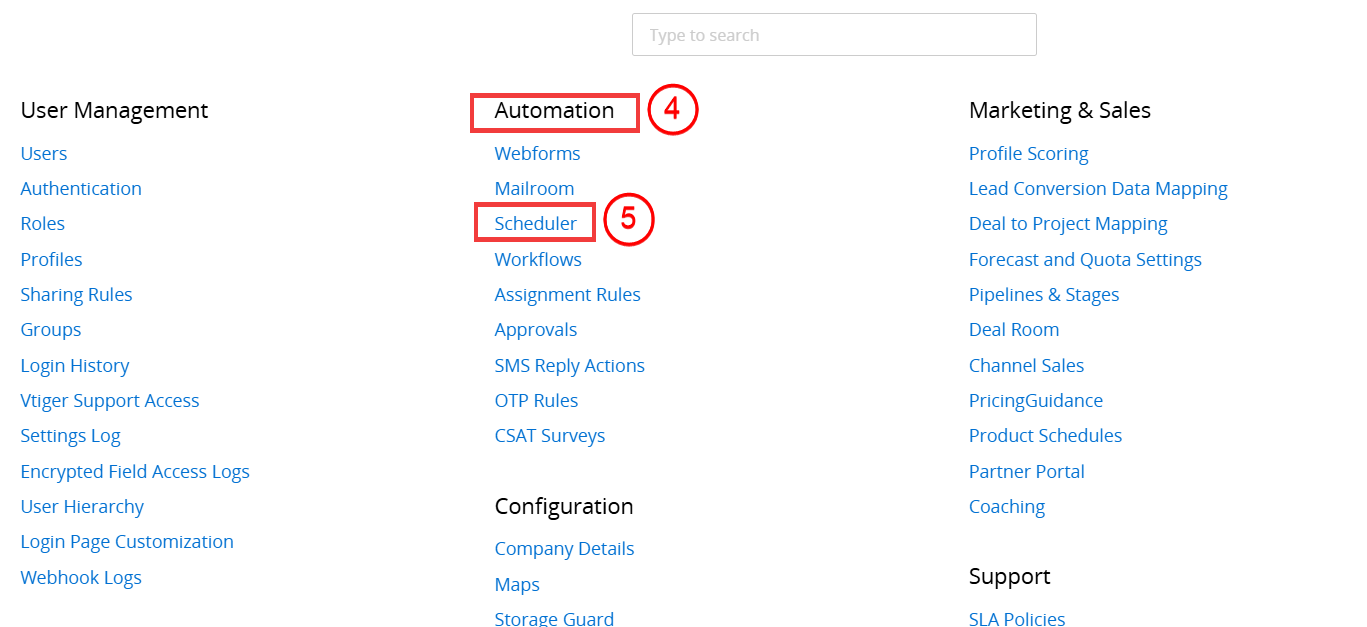
- Go to the Automation section.
- Click Scheduler.
You will see jobs are listed by default based on the modules present in your CRM account currently.
Changing the Sequence in the Scheduler
You can change the sequence in which the jobs are executed by the Scheduler when the cron runs.
Follow these steps to change the sequence of a job:
- Log in to the CRM.
- Click the User Menu icon on the top right corner of the screen.
- Click Settings. The Settings page opens.
- Go to the Automation section.
- Click Scheduler. A list of schedulers opens.

- Click the Drag icon under the Actions column.
- Drag the job and drop it in the desired position.
A success message saying Sequence updated successfully will pop up, and the sequence number of the job will be changed.
Changing the Status of Jobs in the Scheduler
Vtiger CRM provides you the flexibility to enable or disable the jobs that you do not want the scheduler to execute. For instance, if you don’t want a workflow job to be executed, you can disable it by making it inactive.
Follow these steps to change the status of the job:
- Log in to the CRM.
- Click the User Menu icon on the top right corner of the screen.
- Click the Settings button. The Settings page opens.
- Go to the Automation section.
- Click Scheduler. A list of scheduler opens.

- Click the Edit icon next to the corresponding cron job to change the status.
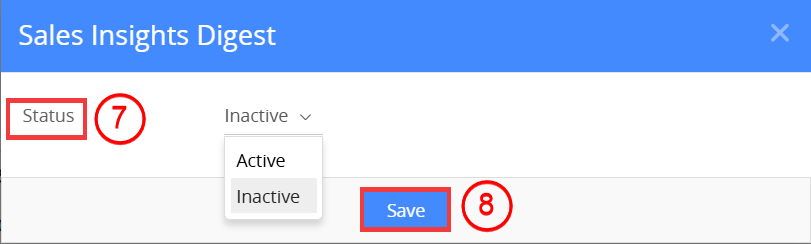
- Select Active or Inactive from the Status dropdown.
- Click Save.
The status of the job will be changed to Inactive, and the Scheduler will skip it.
Note: If the Scheduler is currently executing a job, then the job status is changed to Running. After execution is complete, the status automatically switches back to Active, all within a split second.
References
- Workflows in Vtiger CRM
- Creating a Scheduled Workflow
- Set up a Workflow Action to Send Mails
- Set up a Workflow Action to Create Event
- Set up a Workflow Action to Create Task
- Set up a Workflow Action to Create Records
- Workflow Action to Update Fields
- Set up a Workflow Action-to Invoke Custom Function
- Set up a Workflow Action to Create an SMS Task
- Automation-Webhook Workflow
- Automation-Expressions Workflow